A stove in a person’s life appeared earlier than a hut. At the source of its existence, it looked like a hearth with a bowler hung over it. The constant development and improvement of the hearth turned it into a work of art.
Furnace development over time
 A modern stove has nothing to do with a fireplace. The first stoves, like the ancient huts, were clay. Over time, the brick stove became the most important attribute of each hut. In the five-walled huts, the furnace was built so as to heat both rooms. It was installed in a wall opening, placed so that one side of the stove was pushed towards the bedroom. The main part of it was in the room where the whole family gathered. Now in homes this method of installing a stove is often used. In the highlands of the Carpathians, you can meet at home with a stove that heats 4 rooms.
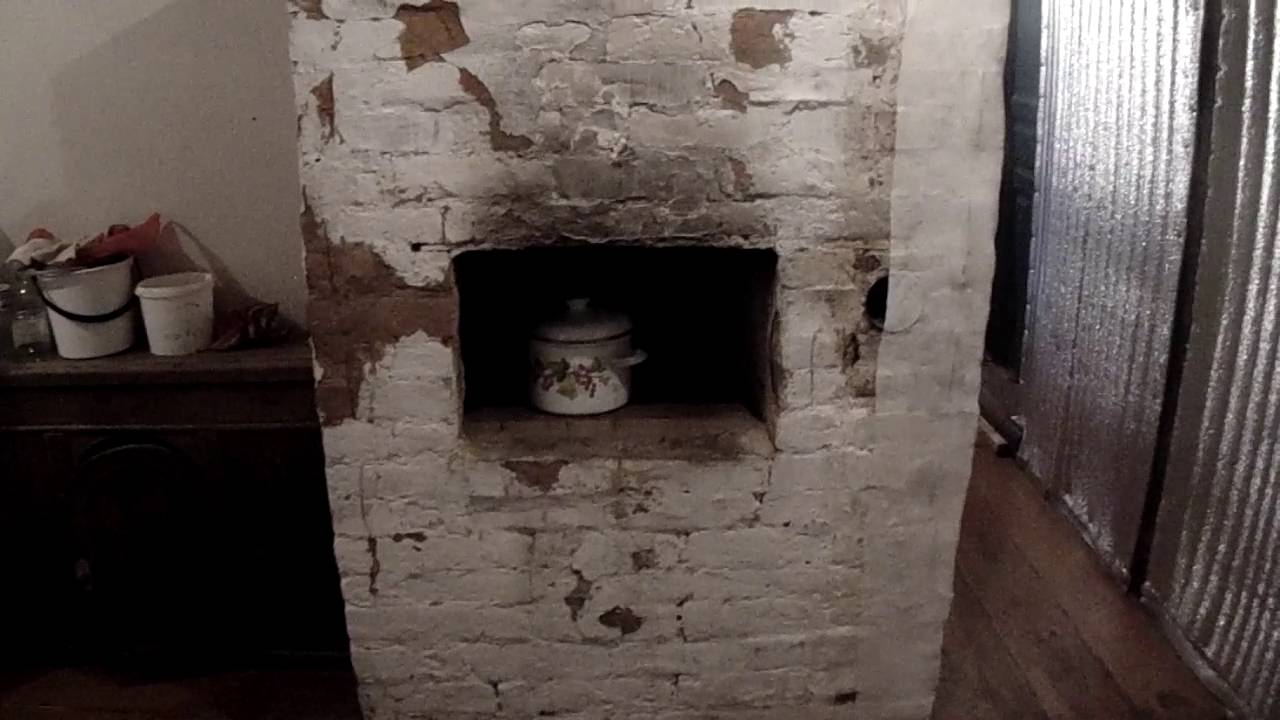
The latest technology allows you to get a brick for stoves with a fairly acceptable appearance. Nevertheless, most housewives want to see their stove plastered. The stove under the plaster looks aesthetic and attractive. In villages, it is manually painted with folk ornaments. In order for the painted stove to please the eye for a long time, it must be properly plastered. Then the surface of the furnace will remain intact for a long time, without cracks, chips or other errors.
How to plaster an oven
 Since ancient times, a natural material called chamotte clay has been used to plaster the furnace. In a simple way - fireclay. Although chamotte initially has special properties, if it is improperly prepared for coating the furnace, the results of the work may not meet expectations. Before preparing the solution, the clay must be soaked for at least 3 days. During clay soaking, it should not be pierced or stirred. Clay flooded with water is left alone until it is completely soaked.
To determine whether the clay is wet, you need to take a pinch of the resulting slurry and rub it between the fingers. If it spreads out under the fingers, the lumps are easy to press, then the clay is ready. It's time to prepare a solution from it.
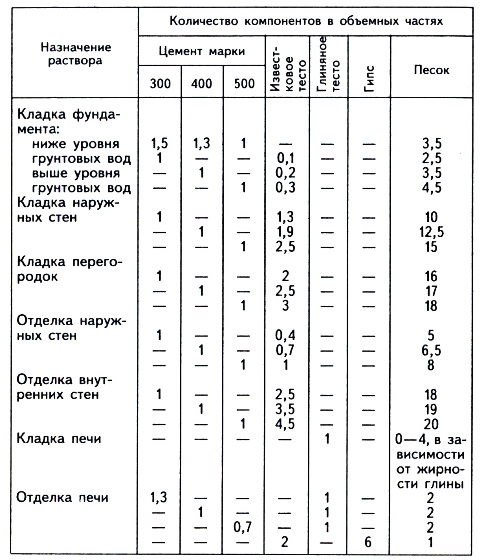
It can be prepared in several ways. The composition of the solution is clay, sand and water. It should be borne in mind that the amount of sand in the solution is directly proportional to the clay content. With greasy clay, three, or even all four, measures of sand are added per measure of chamotte.
Another mixture consists of one measure of clay, the same amount of lime and two measures of sand. It is called a lime mixture. Another composition for plastering the furnace is called cement clay. In it, one measure of clay accounts for the same amount of cement and twice as much sand.
There is another solution in which clay is not present - lime-gypsum. It includes two measures of lime, one measure of gypsum and the same amount of sand.
The table shows the proportions of the ratio of the constituent solutions for the plaster of the furnace.
Furnace preparation and plastering tips
 It must be remembered that before plastering the furnace it should be heated several times. When heating the oven for the first time, do not bring it to a very hot state. The first warm-up should be gentle. The next time you need to warm the stove more, then - even more. This is necessary so that the new furnace shrinks and does not crack on the masonry.
Of course, you can always buy the finished composition in the store, but it will be more expensive than with its independent preparation.
Asbestos fiber binder is added to a solution of soaked clay. Sometimes straw or burlap. In this case, you must ensure that the furnace does not overheat. You can add chopped fiberglass.Sometimes salt is added to the solution as a binder, but this method has not yet been fully studied.
The addition of asbestos to the solution should also be treated carefully. Asbestos, of course, has fireproof properties, but its low thermal conductivity can significantly reduce the efficiency of the furnace and, as a result, lead to excessive fuel consumption.
The lime added to the solution is carefully selected, quenched in the pit for at least a month. Lime is considered the better and more elastic, the longer the process of extinguishing.
When using gypsum, it should be remembered that it quickly hardens. Its setting takes place after 5 minutes – half an hour, which must be taken into account when plastering. You can use white plaster, which remains elastic all the time, while it is in motion. By constantly stirring the solution, it is not allowed to harden. The moment of gypsum solidification moves away, and the need to rush during the execution of work disappears.
Sometimes the oven is reinforced with a mesh. However, this option is doubtful. Since the expansion coefficients when heating the stucco and metal are different, there is a risk that the stucco will peel off from the stove and hang on the reinforcement, forming an air gap that prevents the exchange of heat between the stove and the stucco, and then with the air in the room.
Starting to plastering, prepare all the necessary tools: spatulas, brushes, rules, trowels, graters - all that is more convenient for you to work with. When the plaster dries a little, it should be covered with milk of lime. This will prevent the plaster from drying out quickly, resulting in cracks.
The plastered stove must be left to dry. The room should not have drafts or heaters. Provide your creation with natural conditions for drying and get a positive result.
Let the stove be pleasing to the eye and create coziness and warmth in your home for many years on winter evenings.