In order to save, the gutter system can be made independently from improvised materials. At the same time, they use not only purchased pipes, gutters, other parts made of plastic or galvanized, but also ordinary plastic bottles. With a responsible approach to work, a self-made gutter in a private house will last up to 10 years.
Creation of a drainage complex
The easiest way is to assemble it from plastic pipes. They are inexpensive, easy to process, and the range of suitable parts is wide. It is also realistic to create a galvanized drainage system. If you do not want to spend money, you can take plastic bottles for armament.
Sometimes mounted drainage systems and wood. For these purposes, pine, larch or fir are suitable. It will require carpentry skills and significant material costs, since quality wood is expensive.
Drawing up the scheme and carrying out calculations
When creating a drainage system from any materials, first of all, they make a detailed drawing of the future structure. To do this, measure the roof around the perimeter and take into account the height of the building. When drawing up the scheme, it is taken into account:
- the length of the roof overhang;
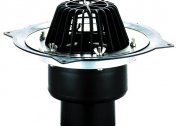
- the total number of funnels and pipes for discharge - they are located in the corners and every 10 meters of the length of the overhang;
- the slope of the gutters (3-5 mm);
- distance between pipe holders - up to 1.5 m;
- the height of the lower drain above the ground is 30 cm.
To equip the drainage system, it is necessary to correctly make all the calculations and plan the acquisition of building materials, which will avoid unnecessary costs. First of all, the roof area is calculated and determined with the dimensions of the details of the drain:
| Roof area (sq. M) | Gutter Width (mm) | Drain pipe section (mm) |
| Up to 50 | 100 | 75 |
| 50 to 100 | 125 | 87 |
| Over 100 | 150 | 100 |
The total number of groove segments is determined depending on the sum of the lengths of the eaves overhangs of all the roof slopes on which the system is installed. Since the standard gutter is 3 or 4 m in length and 2 m from galvanizing, the resulting amount must be divided into 2, 3, 4. The number of pipes is calculated based on the distance from the ground to the roof and the number of mounted drains.
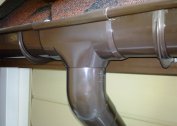
Installation of polymer gutters
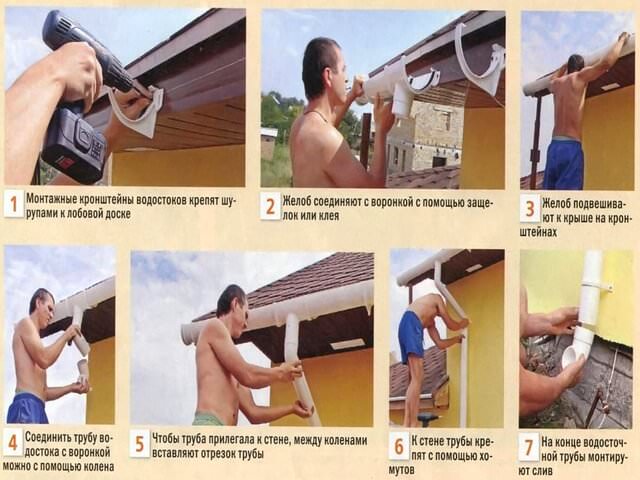 To make a drain from the roof with your own hands, you will need:
- sewer pipes for creating gutters;
- pipe elements for vertical parts of the drainage structure;
- tees and adapters for joining construction details;
- sealing material;
- strips of metal sheets for suspensions.
Of the tools for arranging a drainage system with your own hands, you will need an angle grinder with a disk for cutting metal, an electric jigsaw, a construction cord, a screwdriver, and self-tapping screws.
To make a groove part from a previously purchased sewer pipe, you need to cut it in half with the help of the UGShM. If this is not possible, use a blade hacksaw blade. Also, to create gutters of the same size, you can make patterns of wood.
It is better not to cut sections of the pipe at the points where the risers are connected - this will make the structure stronger. 150-200 mm on each side of the drain pipe is enough. The hole in the groove can be cut with a jigsaw.
The connection of the groove segments is carried out with a special silicone sealant or aluminum clips. Semicircles of sheet plastic are glued as plugs.
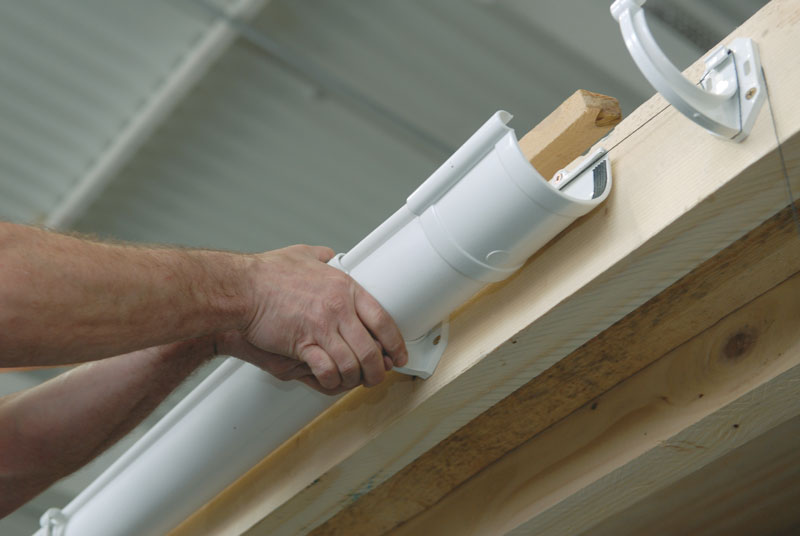
Before you begin assembling the drain, you will need to make brackets. They are made of metal strips, bending in the form of drainage systems.
The entire structure is assembled already after mounting the holders, which are fixed with screws on the cornice board or supporting rafters. To maintain the required slope, use a construction cord. In the places where the drainage pipe is connected to the risers, tees are installed, not forgetting to seal the joints.
Galvanized Steel Systems
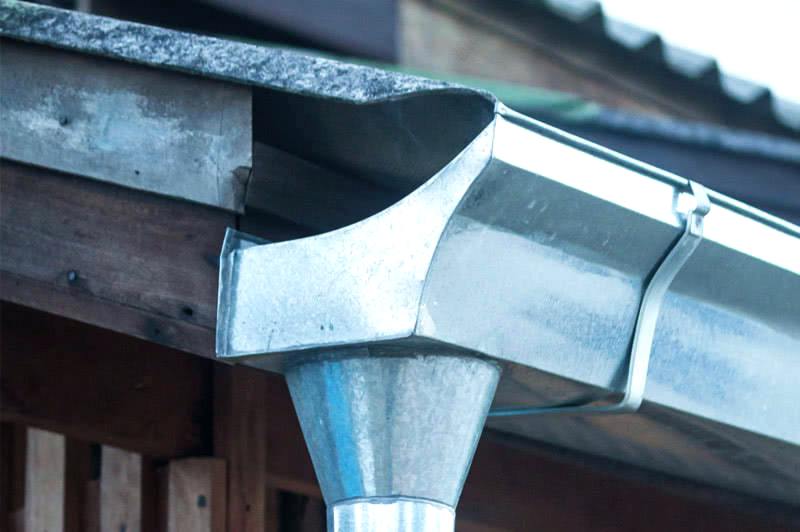
Self-made creation of gutters and pipes from galvanized with your own hands is quite possible. You will need a half-centimeter thick metal sheet, metal scissors, a hammer, pliers and a marking marker.
According to a pre-made project, the galvanized sheet is marked out, after which the drawn elements are cut.
The necessary form of cut strips attached with a mallet and pliers. To facilitate this task, as well as more accurate execution, pre-made patterns of wood or pipe will be required.
Plastic bottle weirs
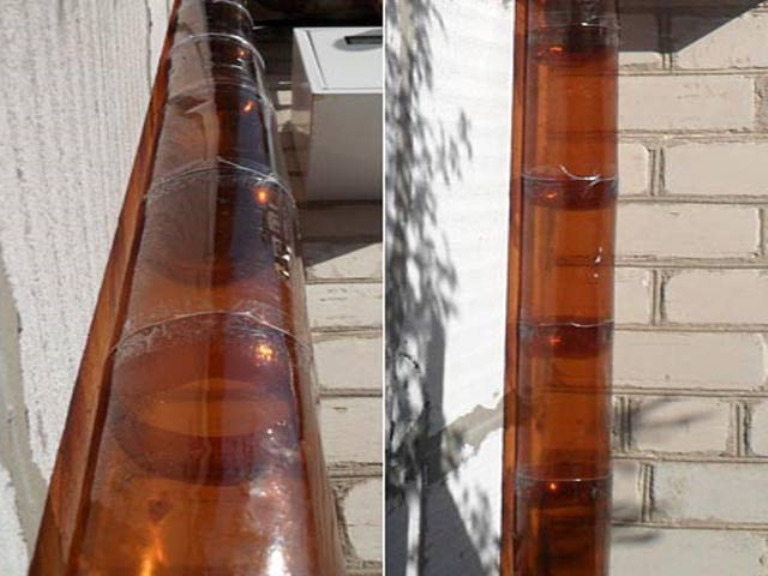
From plastic bottles it is quite possible to make gutters and downspouts. They will last a year or a little longer. But with a minimum of cash investments, such an option will help to cope with excess moisture in the offseason.
To create a drain, you will need:
- plastic bottles;
- scissors;
- electric drill;
- clerical stapler with staples;
- thin wire.
Only necklace-shaped containers in the shape of a cylinder are suitable, since the ribbing will lead to a quick blockage of the system.
To calculate the number of bottles and determine the angle of inclination of the gutter, it is necessary to measure the length of the drainage system along the entire perimeter of the roof. Following actions:
- Remove labels and cut bottoms and neck of bottles.
- Cut the resulting cylindrical elements with scissors along the seam.
- Fix the rectangles with an overlap using a stapler.
On the roof, the gutter structure is fixed with a wire through holes drilled in slate or metal tile.
The installation of the spillway is simple. The neck from one bottle is inserted into the cut of the bottom of the other, after which the edge of the groove segment is installed in it. As a riser, cylinders fastened together by means of a stapler or necks connected by a wire, creating the effect of watering cans, are used.
As a temporary roof drainage system, this is the most profitable option. The material at hand is free, and the time and labor costs are minimal.
Operation and maintenance

The drainage complex requires systematic verification. Regular cleaning of the gutter reveals problems. Inspection of drainage systems must be performed at least once a year. Traditionally, cleaning is done in the spring - this is the time most suitable for removing leaves and debris.
To clean the spillway begin with the gutter elements. Cleaning is done with a soft brush, and then washed with water. Sharp objects are not allowed, as they can damage the protective coating. After this, you can begin checking the patency of the riser risers. Rinsing is carried out with a water stream under pressure (for example, from a hose).
Installation errors can cause problems with the system. Wrong choice of the section of pipe segments and the number of funnels will not allow to cope with a large water flow. If the pipe is located very close to the wall of the house, this leads to wetting of the surface. Horizontal installation of the trough sections causes the accumulation of water and overflow of these elements. This is especially dangerous in winter, when frozen moisture can damage the elements of the system.
If you avoid mistakes and approach the self-assembly of the drainage complex responsibly, it will last almost as much as the purchased one.