A properly constructed gutter complex will reliably protect the facade and the foundation foundation from the destructive action of rain and melt flows. If you correctly draw up a project and comply with all technological rules, it is possible to install a system for removing water from the roof in a low-rise building with your own hands, without hiring a professional team.
Purpose and scope of drainage
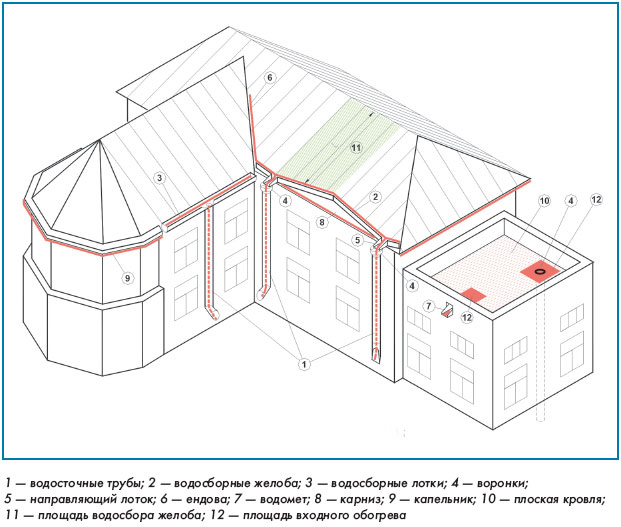
The gutter complex consists of gutter and pipe parts, through which water from the roof is collected in a single stream and discharged from the building.
In the absence of a sewage system, sedimentary and melt water fill the foundation and walls, building materials quickly collapse. Wet walls retain heat worse and look ugly.
A well-equipped roof storm helps to avoid this. Modern designs and materials make it possible to create efficient gutters that harmoniously combine with the design of the building and the surrounding landscape.
Types and arrangement of roof drainage systems
According to the manufacturing method, gutters are divided into self-made and created at specialized enterprises. The first features low cost and original design. You can make drains from various improvised materials, even from plastic bottles. The disadvantage is the difficulty in connecting the nodes. In addition, artisanal drains are usually less durable compared to industrial ones. The latter are made in accordance with GOSTs, manufacturers give a guarantee on the product. Their price is higher, especially considering the professional installation.
The best option is to create an individual scheme of a drainage complex, purchase of finished parts and self-assembly.
The principle of operation of drainage systems also varies. They can work in three ways:
- Unorganized. Water flows naturally from the roof under the influence of gravity.
- Organized internal. The entire network of drainage elements is located inside the building.
- Organized outside. The complex is installed on the outside of the house.
In the first case, in order to somehow protect the walls and the foundation, roof extensions are made large (at least 0.6 m), and streams of rain or melted snow flow down them to the ground. According to SNiP 31-06-2009, a similar scheme is implemented in houses in which there are no more than 5 floors, with a pitched roof. It should be tilted towards the yard. It is allowed to build houses with similar roofs only in areas where the rainfall is minimal (no more than 30 cm per year).
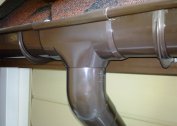
The optimal method of drainage from pitched roofs is external. Drains are organized in a storm sewer. The complex is simple to install and does not require serious investments. In this case, the configuration of the roof must be taken into account:
- The gutter complex on the roof with one slope consists of one pipe and is mounted in the lower part under a slope.
- Drainage systems on gable structures require a separate drain for each side of the roof.
- If the roof is four-pitched - hip, gutter and pipe parts are mounted around the perimeter of the structure.
- For the gable roof, the gutter is installed in separate sections in the gable space.
The internal version is often equipped on flat roofs with a soft coating. If the roof structure has slopes, it is used very rarely, exclusively at industrial facilities. Slate roofs are not adapted to this drainage method, only the external version is suitable for them.
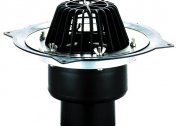
On flat roofs, external drains through the parapet can be used. For this, special parapet funnels are installed.
Production material
A budget option is drainage systems made of polymer materials. The pluses include:
- resistance to fading under sunlight;
- immunity to corrosion;
- strength;
- light weight;
- wide temperature range (from 40 degrees of frost to 70 degrees of heat);
- ease of installation;
- a variety of colors and configurations of system elements.
The disadvantages of PVC parts are high linear expansion coefficient and low impact resistance. The last drawback after a properly installed installation is not so important. However, it is not recommended to install polymer systems on high-rise buildings.
Prices for plastic roof drainage systems are affordable - from 1900 rubles for a minimum set.
Mount complexes with the adhesive method or using rubber seals. The first method is better, since "cold welding" is used and the connection of parts occurs at the molecular level. The second option requires periodic replacement of seals.
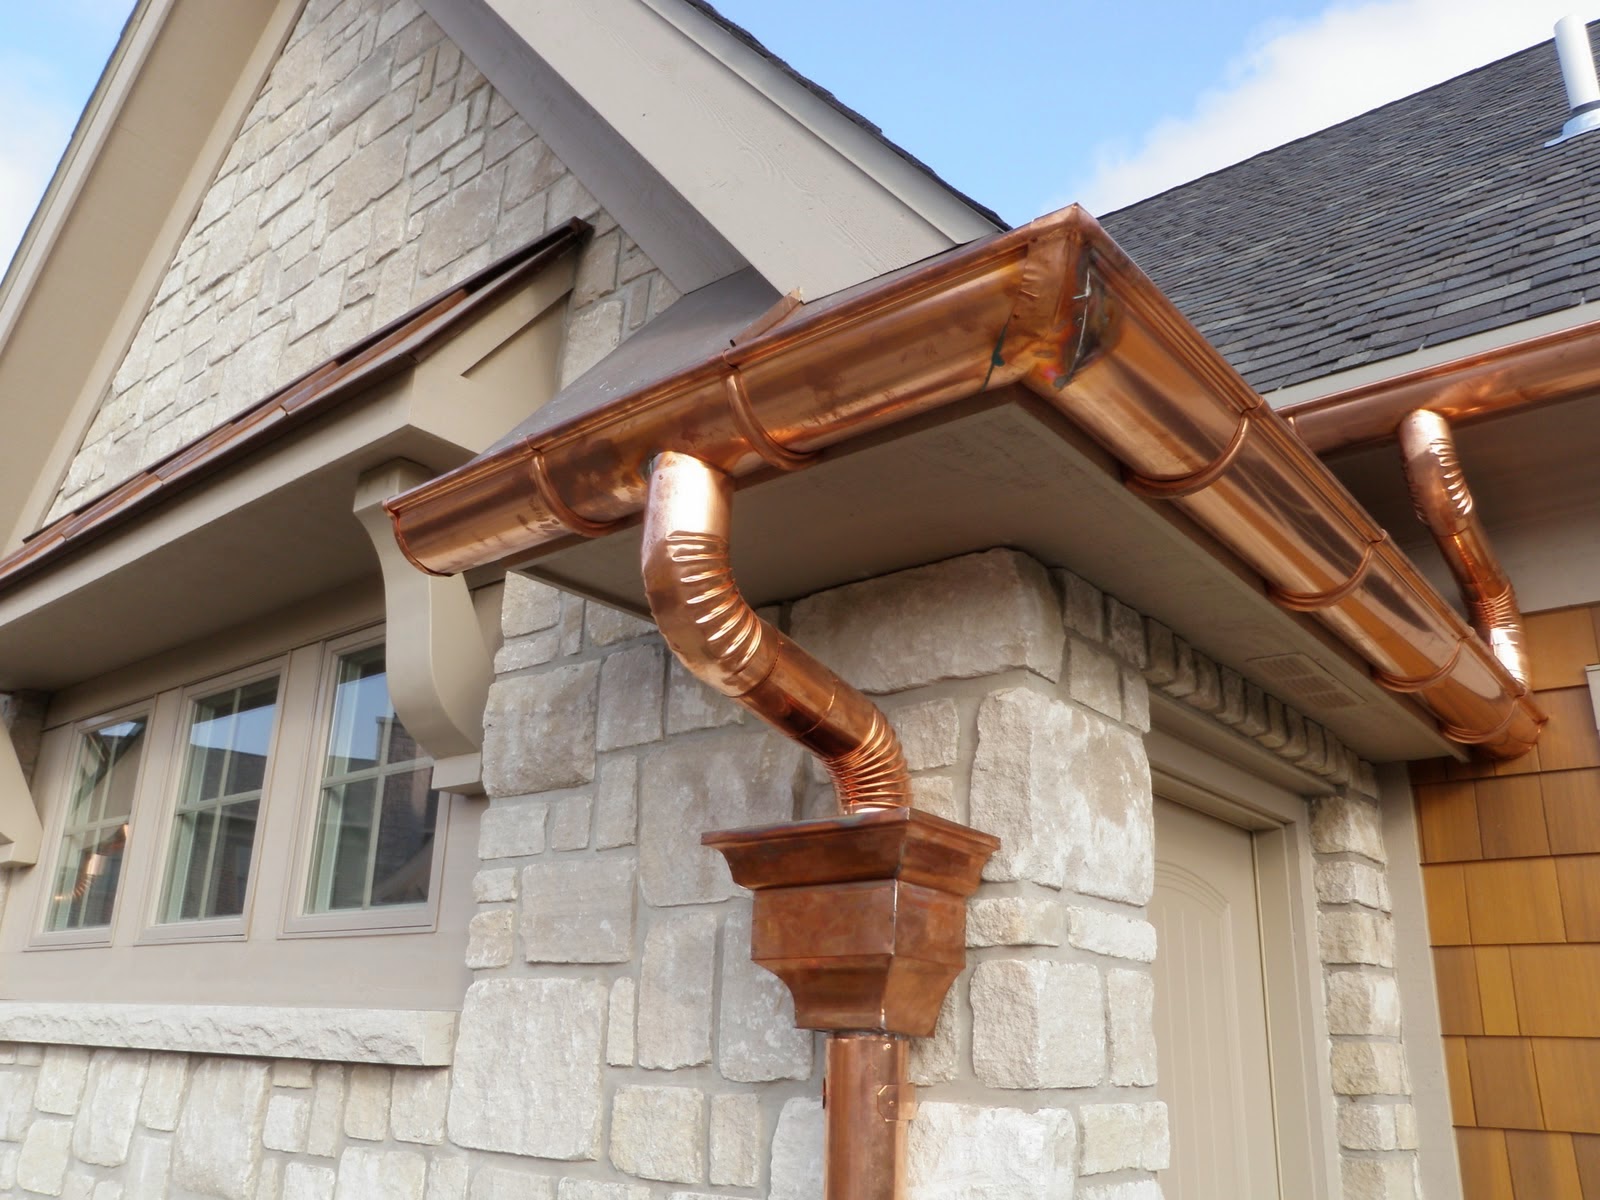
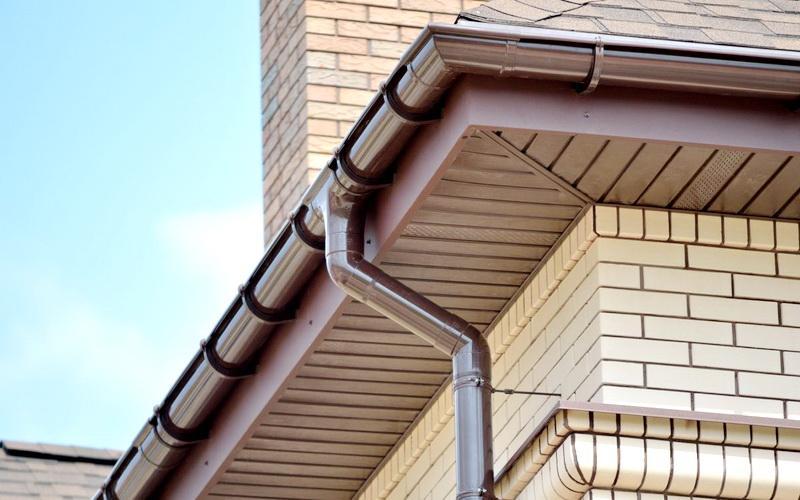
More durable gutters made of metal: copper or steel alloys. The latter is galvanized or coated with a polymer layer. Metal drains are mounted on buildings of any height.
Copper products are more resistant to corrosion, they are flexible, durable, not afraid of heavy loads and aggressive environments. However, the cost of each part is at least 1000 rubles.
Galvanized or polymer-coated complexes are cheaper - from 5000 rubles for a minimum set. But with improper use, there is a risk of moisture penetration under the coating and the formation of rust, which reduces the service life.
Advantages and disadvantages of metal gutters:
| pros | Minuses |
| Impact resistance | Heavy weight |
| Reliability | A small selection of shades |
| Resistance to heavy loads, which is important in regions with heavy rainfall | A small number of elements, which makes it impossible to install on complex roofs |
| Fire resistance | The complexity of installation work |
| Lack of linear expansion | Poor coating of steel parts |
Most brands produce gutters from various materials. For example, at Unikma you can buy all types of drainage systems: from non-ferrous metals, plastic, galvanized steel or polymer coating.
Design and calculations
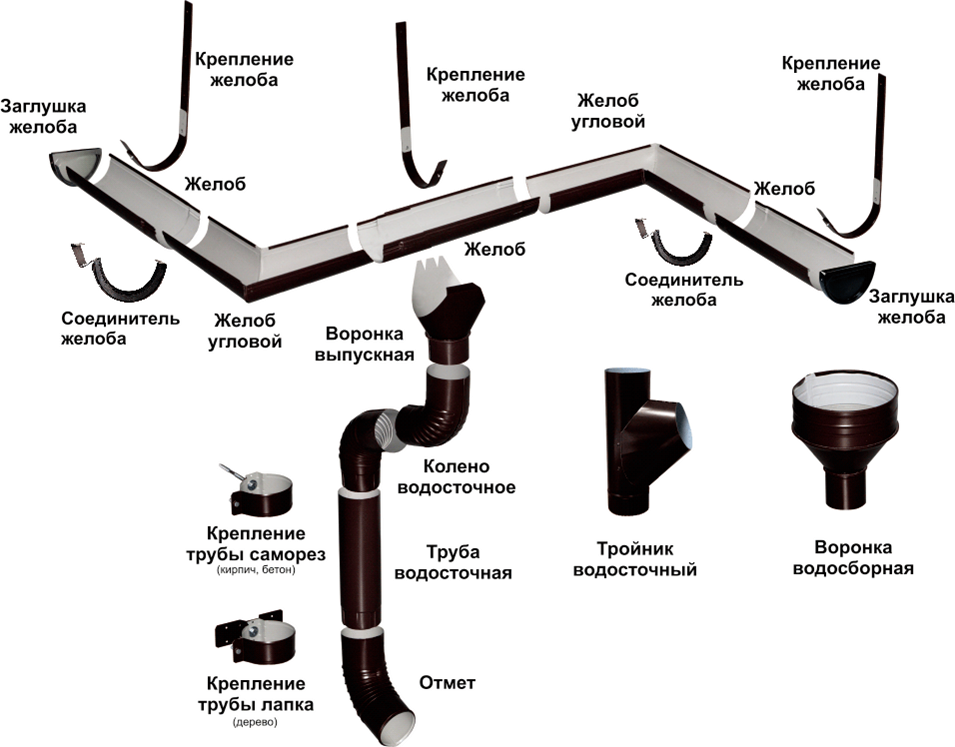
When creating a home-made complex or before installing an external roof drainage system from finished parts, you will need to create a project with a drawing. An accurate calculation is needed of how many and what details will be needed, taking into account all the technical characteristics. It will be required:
- sewage pipes;
- gutters;
- funnels for connecting the first two elements;
- plugs on the ends of the groove parts;
- mounting brackets and clamps to fix structural elements;
- filter grates.
Design work begins with measuring the roof perimeter. The length of the gutter parts must be at least five percent longer than the perimeter of the structure so that a difference can be created for the unimpeded transportation of precipitation. The slope is 0.5–2 cm per meter. When measuring the perimeter, consider the ledges and outstanding architectural details, such as chimneys.
Between the gutter sections, drainage funnels are placed with the subsequent installation of pipe gutters to them. The distance between them should not exceed 24 m, but it is advisable to install them every 10 m. The optimum diameter of the funnels and pipes is 8–12 m so as not to increase the groove slope.
The sizes of the elements of the waste complex at different suppliers may vary slightly, so it is advisable to purchase all the details in one place.
If a gutter made of steel or copper is mounted, the brackets are fixed every 100 cm, if from polymers - every 50 cm. Additionally, a stormwater drainage scheme is created for draining the drains.
The edge of the gutter is positioned at least 3 cm below the roof plane, otherwise there is a risk of damage to the element by sliding snow cover.
Installation of construction
 Before installing the catchment, assemble the necessary tools:
- electric screwdriver;
- hacksaw or grinder;
- scissors for metal or plastic cutter;
- tape measure, construction level.
A portable ladder of the required height and fixing hardware will be required depending on the material of the walls of the building.
The drain complex is carried out from top to bottom. First, drainage channels are fixed, then drainage pipes are mounted. To make it easier to work, mark up where exactly the brackets will be installed.
A step-by-step guide will help to make a drain of water from the roof from finished parts with your own hands:
- Install a funnel on the lower part of the layout, and the bracket on the upper by attaching them to the rafters or the wind board. Pull the cord between the funnel and the bracket, and fix the remaining holders along it. The distance from the extreme ones to the funnel or coupling is not more than 100 mm. The distance between the other holders is approximately 60 cm.
- Fix the grooves on the holders. Joining of two parts is carried out by means of a coupling.
- Fix the corner pieces connecting the gutter lines to the outside and inside corners of the building. At the ends, install the plugs.
- Attach a bend to the drain funnel, which is connected to a similar part using a piece of pipe, but looking in the opposite direction. This will make it possible to approach the drainpipe to the wall of the house to the maximum. Secure the second knee with a hose clamp.
- Fix the clamps for the spillway to the walls at a distance of no more than 170 cm from each other.
- At a distance of 30 cm from the soil surface, install a drain part. Assemble all parts vertically.
When all the weirs are mounted, install intermediate clamps and tighten the fixation elements.
A properly assembled drainage complex will last several decades without complaints.