Often, troubleshooting requires disassembling or removing the light switch. The process is not laborious, with basic knowledge and skills allows you to quickly cope, if you strictly follow the rules. Particular attention when working with electricity should be given to the rules of personal safety - the electrical network in the room must be disconnected.
Tools required for disassembling the circuit breaker

To open the light switch, you need to prepare all the necessary tools and materials for work. To dismantle the circuit breakers, you will need to arm yourself with a few screwdrivers - the most common and often used flat screwdriver.
A Phillips screwdriver will be needed, provided that the circuit breaker has cross-shaped screws.
Features of the disassembly procedure
There are several types of switches, each of them has its own nuances of disassembly. To successfully cope with the task, you need to familiarize yourself with them.
- Triple switches are most often used in rooms with lights on the ceiling, a large number of spotlights and other lighting fixtures. Feature of such designs - thin keys. The dismantling process begins with their alternate removal. Most modern models are equipped with special holes for easy removal of elements.
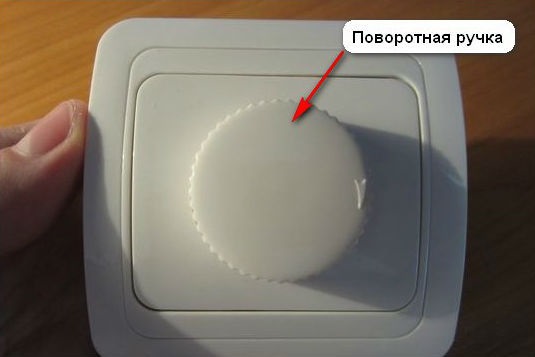
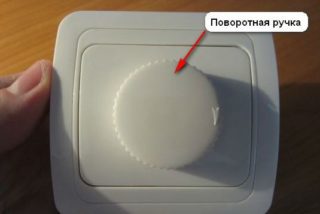 To dismantle the dimmer, you need to remove the rotary knob
 - The process of dismantling a dimmer - a switch equipped with an adjustable rotary knob - does not have any fundamental differences. It is necessary to remove not the key, but the control knob.
- The touch switch is disassembled by removing the outer panel. To do this, you can use an ordinary screwdriver or a special catch, which is often included in the kit. Care must be taken during work, otherwise the likelihood of glass damage increases.
- If the design is double and the socket is paired with a switch, everything will have to be dismantled. Most often, the first outlet is removed, since under it is one of the mounting bolts.
Feed-through switches have a similar design. The only difference is the number of wires, since they are connected simultaneously in several places remote from each other.
Power outage
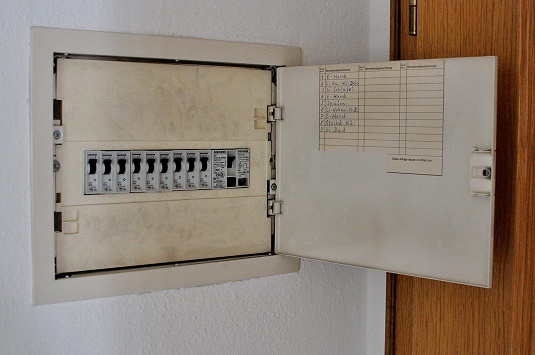
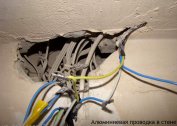
Before dismantling a socket or switch, it is important to turn off the power supply. The room has branched wiring, there are several lines. Each of them is intended for lighting, sockets, switches, etc.
With the help of an automatic machine, the power switch is turned off on the switchboard, the voltage is checked at its output. If difficulties arise in this matter, it is better to completely de-energize the room by turning off the input circuit breaker.
There is a common problem to pay attention to. Inexperienced electricians often connect a neutral wire to the machine instead of a phase wire. Such a scheme will be quite functional, but the wiring of the lighting will always be energized. To fix the problem, you need to make changes to the connection diagram.
Key release
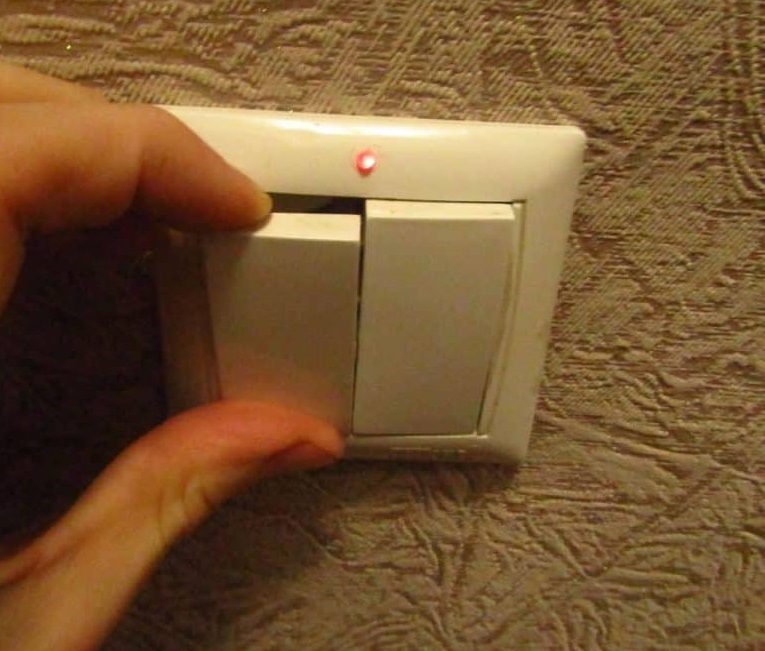
It is necessary to start the analysis of the switch with the keys, since it is not possible to dismantle the structure with them.
The easiest way to implement it is to press the key with your thumb towards the wall, grab the formed ledge with your other fingers and, with little effort, pull the key toward you. If a person is afraid not to calculate the force and break the part, you can use any flat and hard object, for example, a knife, a flat screwdriver. However, it is preferable to do everything manually, since the likelihood of scratching or damaging the part is minimized.
Modern modifications of the switches are equipped with special openings on the sides of the keys. This design is removed without much effort and risk of damage to its integrity.
In the two-key or three-key switch, after removing the first, the rest are removed in the same way.
Frame removal
The next step in disassembling the electrical structure is the removal of the frames. They can be attached to the base in two ways - clamping or screw.
In the latter case, the frames are fixed with miniature screws, which with a Phillips or flat-head screwdriver are untwisted in a matter of seconds. In the first case, the frames are attached by special clamps; for dismantling, it is enough to simply bend them. To speed up the process, first remove one clamp, and then proceed to the second.
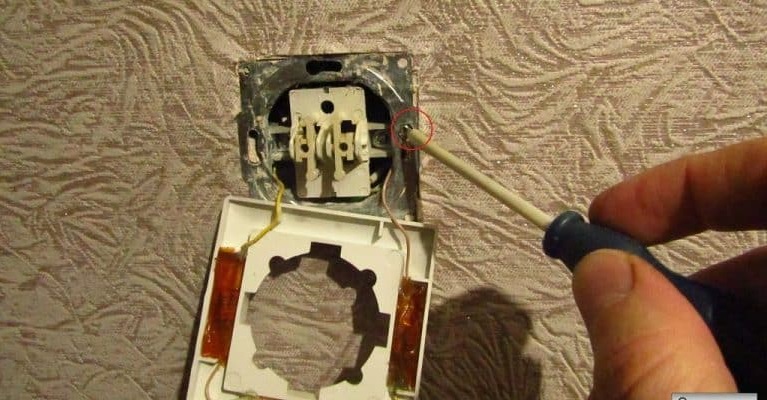
How the switch understands
Before proceeding with the removal of the main mechanism, you need to find the core to which the phase is connected. To do this, voltage is applied to the switch and, using an indicator, its presence on the contacts is checked. Then the key switches to another position and the test is repeated.
If in all cases the indicator shows the presence of voltage, a supply phase conductor is connected to it. The second core should be extending to the lamp. The total number of wires should not worry, since only one voltage is supplied. After checks, the power supply is turned off again.
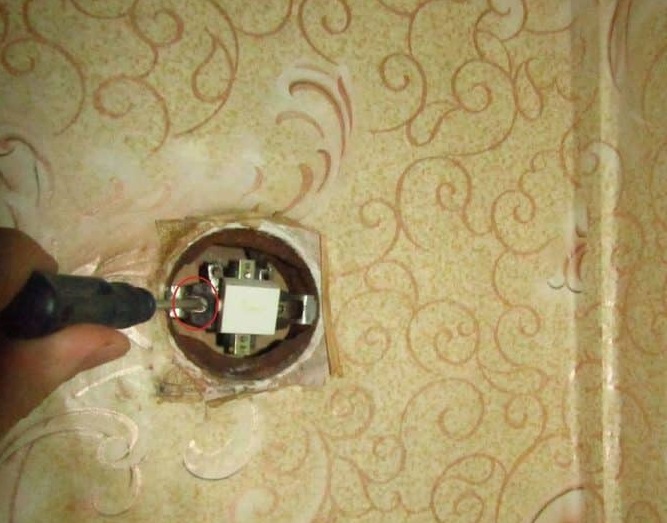
Spacer tabs hold mounting screws that abut against the side walls of the mounting housing. If the screws are loosened, the entire mechanism should freely exit the wall. If it is fixed with screws, they must first be unscrewed.
Next, the fastening screws are unscrewed and removed from the recess in the wall. After that, the voltage is checked on the mechanism using an indicator screwdriver. The lead wires must be fixed with self-clamping terminals. To easily remove the cores from the connector, it is enough to apply force to the locking levers. First disconnect and isolate the phase wire. Then it is again connected to the phase contact of a new or repaired old switch.
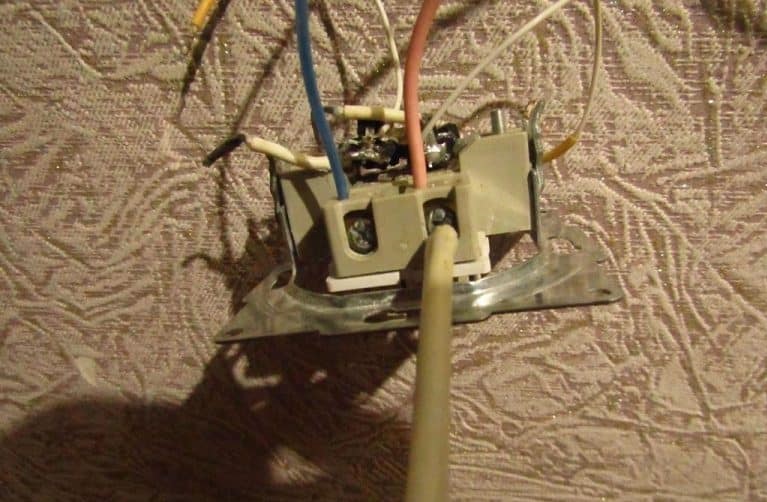
The phase must be connected to the fixed contact, and the discharge ones to the moving contact. If all the above actions were performed correctly, the key remains pressed from above in the “on” position and from below - in the “off” position.
Disconnecting wires
Most switch models are equipped with a special bolted connection to which the wires are attached. When disassembling, as a rule, it is enough just to loosen the bolt and pull it towards you.
If the device to be dismantled must be replaced with a new one, all wires must be insulated and marked with different colors so that they are not mixed up during installation.
Common mistakes in work
The most common mistakes are excessive force when removing keys and frames. This leads to deformation and the appearance of scratches and violation of the integrity of the part. In this case, it is required to purchase new switches, since the separate components are not sold to them.
The most dangerous mistake is neglect of personal safety rules, which poses a direct threat not only to health, but also to human life.Before carrying out work, it is important to turn off the power supply in the room on the shield.