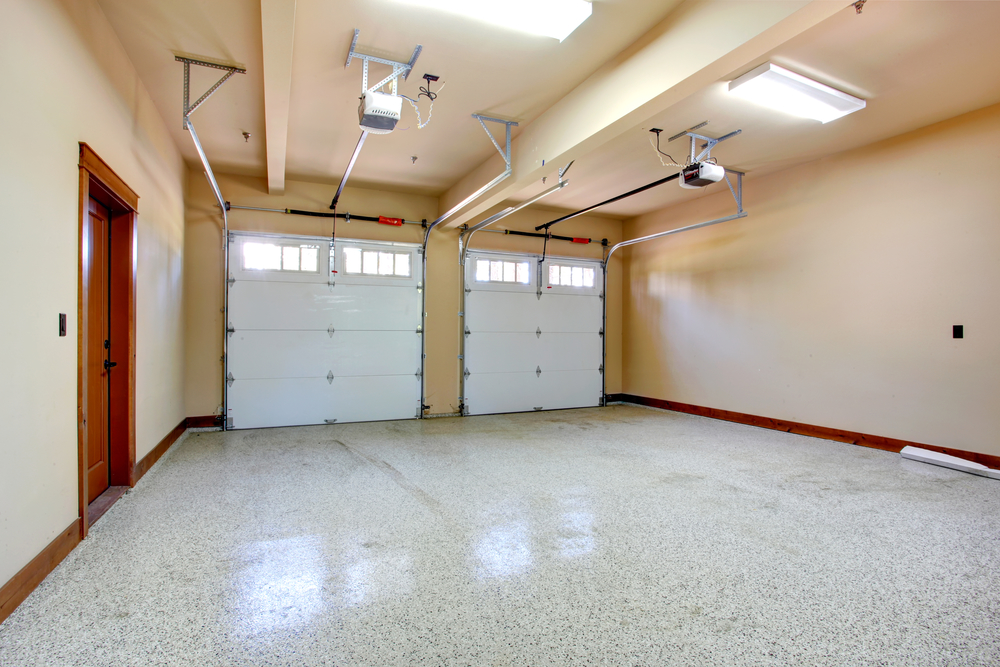
Car owners arrange artificial lighting in the garage for convenient and safe operation. Proper selection and placement of light sources create comfortable conditions for entry into the box and repair the car.
What to consider
You need to determine which lighting option is best for this garage. Draw up a plan, taking into account the characteristics of the room, the characteristics of the used lighting devices, the preferences of the owner.
The final design depends on the following factors:
- boxing area, ceiling height;
- the availability of racks, allocated places for work;
- type of fixtures;
- lamp characteristics;
- material and color of wall coverings.
Do not underestimate the color of the walls of the room. Light shades reflect light, increasing illumination, and dark tones absorb light rays, darkening the space of the garage.
How to make light in the garage with and without electricity
If the garage is connected to the mains, make general and local lighting. They extend electrical wiring lines along the walls, ceiling, and also lead into the inspection ditch. Wiring requires compliance with safety regulations.
Light in a garage without electricity is obtained from alternative sources. Autonomous lighting will help out the owner in the absence of a connection to the city power supply, as well as during temporary blackouts.
The temporary absence of light can be made up for with LED lamps or 12 V tapes that connect to the battery. LEDs with minimum power give a luminous flux that is many times higher than other types of lamps. This allows you to continuously and brightly illuminate the room from the capacity of one battery.
Make stationary or portable lighting. Charge the battery with a charger from the mains, an electric generator or from solar panels. Gasoline generators produce more power, but consume fuel.
Garage Lighting Requirements
The garage serves the owner for household repair needs, so lighting equip, taking into account the rules and regulations for auto repair shops.
Garage Lighting Requirements:
- Uniform illumination of space.
- Separate light sources for work areas and racks.
- Economical power consumption during long-term operation.
- Isolation of lighting fixtures and electrical wiring from moisture and dust.
- Protection of lamps from mechanical stress.
Lighting devices must be safe for humans. It is not allowed to install luminaires with a shade of thin glass, which, when broken, can injure.
Garage Lighting Options
A knowledge of the classification will help determine which lighting organization is best in the garage. Lighting devices differ in the design and type of lamp installed.
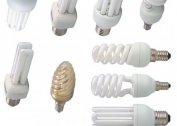
Types of light sources:
- Incandescent lamps have a low price, a small resource, low light efficiency - up to 15 lm / W. Unevenly scatter light, sensitive to voltage surges.
- Halogen lamps heat up during operation, have a light output of up to 22 lm / W and an average service life. They fail due to power surges, liquid and grease falling on a glass flask, therefore they require installation in sealed caps.
- Fluorescent tubes are more economical - light output from 45 lm / W.They are unstable at voltage drops and temperatures below + 5 ℃. They contain mercury, which, when the flask is lost in leakage, enters the environment, which is harmful to human health.
- LED panels, ribbons and lamps give out 120 lumens of light per 1 W of consumed electricity, which characterizes them as the most economical. The resource of work reaches 30 thousand hours.
In garages apply overhead, pendant, recessed lamps, as well as devices on an adjustable bracket. The design of the housing is waterproof, dustproof, shockproof or with a protective grill.
Determination of lighting power
The total required power is calculated based on the required standard illumination of garages - 200 lux. It is equal to illuminating an area of 1 m2 with a luminous flux of 200 lm. The required total luminous flux is determined by multiplying the standard by the garage area. For example, the garage area S = 24 m2, then the required luminous flux:
L = S × 200 = 24 × 200 = 4800 lm.
Dividing the total luminous flux by the light output of the selected type of lamp, the required power of the light sources is calculated. For example, they chose incandescent lamps. Light output Сн = 15 lm / W, then the total required power:
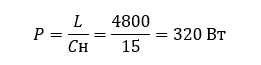
LED lamps have a light output of Cs = 120 lm / W, then:
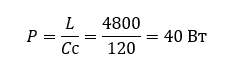
The use of LED lamps repeatedly reduces the total power consumption of lighting at the same level of illumination.
With a garage ceiling height of more than 2.5 m, the actual luminous flux decreases, therefore, the total power is adjusted by multiplying by 1.5.
LED lighting

LEDs compares favorably with alternative light sources with enhanced light output, long life, and economical operation. Manufacturers gradually reduced the price of LED devices, which became available to most consumers. Installing LED lights in the garage will cost more than incandescent lamps, but will pay for itself by saving energy and a long service life.
LED lighting can be mounted in the garage with your own hands. A popular option is to install moisture-proof LED panels with a built-in or external collimator. Such a lamp works from a 220 V network, evenly scatters a light flux of 3000 lm at a power consumption of 30 watts. The uniform distribution of light allows you to install fixtures on the ceiling and walls below eye level.
A common form of light sources is LED lamps with a threaded base. LED lamps for uniform lighting of the garage are installed on the ceiling equidistant from each other.
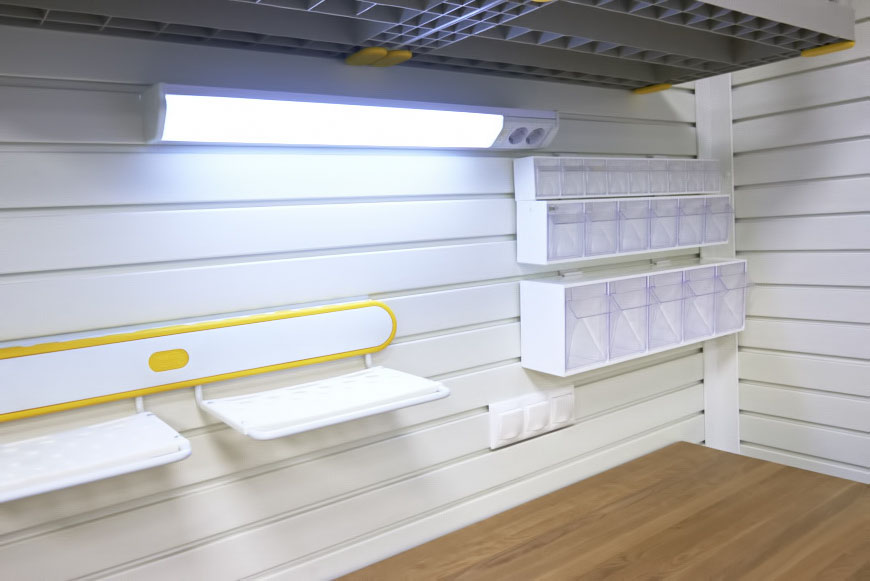
LED strips are mounted on the shelves, and an LED spotlight is mounted on an adjustable bracket above the desktop, which will allow you to redirect the light to the right place.
Instructions for lighting in the garage
Planning and installation of lighting is done in stages. Compliance with the proposed recommendations will prevent errors and the need to redo the layout in the future.
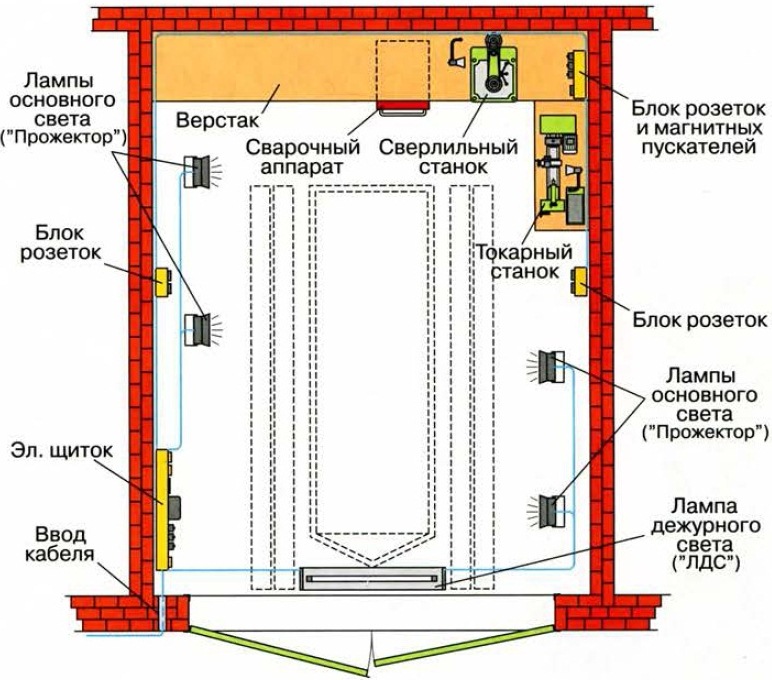
Wiring diagram
Choose the method of laying the cable - open in the corrugation or closed in the gates. Draw a garage plan with electrical wiring, given the type of lighting.
The diagram indicates:
- Lines for laying electrical wires;
- Mounting place for switchboard;
- Mounting points for switches, nodes, sockets;
- Places of binding general, zone lighting, additional equipment.
The drawing includes the planned equipment with the parameters, cable section. According to the exact scheme, it is convenient to purchase the necessary materials.
Choosing the location of light sources
With the small size of the garage, one or two ceiling lights and light sources for workplaces are designed. Racks require the installation of additional lighting.
For a large area, ceiling and side lighting fixtures are mounted. Local light is also needed.This arrangement eliminates shading from machinery and equipment.
A layered layout distributes the light in space most evenly. With this lighting option, the fixtures are placed on the ceiling and walls at a height of 0.4 m, 0.75 m, 1.8 m, respectively.
Low-lying lights are additionally covered with diffusing shades, protected by a grill. The lamps are selected with a small luminous flux to prevent a blinding effect.
Calculation of the number of lighting points
The required number of lamps for the garage n is calculated by dividing the total required power P by the power of one lamp p:

An example of calculating the number of LED elements and incandescent lamps for a garage with an area of S = 24 m2 with previously calculated total power parameters: for LEDs, we take the power of one lamp p = 10 W, and for incandescent lamps p = 60 W.
Determine the required number of incandescent lamps:

We round n = 6.
We calculate the required number of LED lamps:

The 24 m2 garage is equipped with six 60 W incandescent lamps or four 10 W LED lamps. For halogen and luminescent sources, the calculations are similar.
Manufacturers make lamps with various light output parameters. Exact calculations are made based on factory data.
Necessary tools and materials

For marking, you need a measuring and marking tool: tape measure, level, long ruler, pencil. Shtroblenie walls for electrical wiring do shtroborezom, punch or drill. Short grooves in soft material are hollowed out with a chisel and a hammer. Installation is done with screws, anchors, dowels, which are screwed with a screwdriver.
For installation, the estimated number of fixtures, cable, switches, junction boxes, sockets, mounting brackets, corrugations will be required. Switchboard, meter, two residual current circuit breakers.
To work with wires, you need pliers with wire cutters, a knife, a screwdriver, electrical tape. To seal grooves, putty and putty knife are used.
Phased Work Plan
The arrangement of garage lighting consists of preparatory and installation work carried out in stages:
- Preparatory work - drawing schemes from the plan on the walls, ditching grooves for hidden wiring. If you plan to outdoor installation, install cable channels or staples for attaching corrugations.
- Fix the switchboard with automatic machines and a counter.
- Install the cable in the grooves, the channel or lead into the corrugation, which is fixed to the brackets.
- Nodal boxes, switches, sockets are fixed.
- Mount lighting fixtures on the walls, ceiling.
- Connect the wiring to the terminals of the fixtures, junction boxes, sockets, switches.
- Install switch and socket housings, lampshades, junction box covers.
- Check the circuit by connecting electricity. Eliminate flaws.
At the final stage, close the strobes, fix the lining, close the cable channels.
Inspection ditch lighting
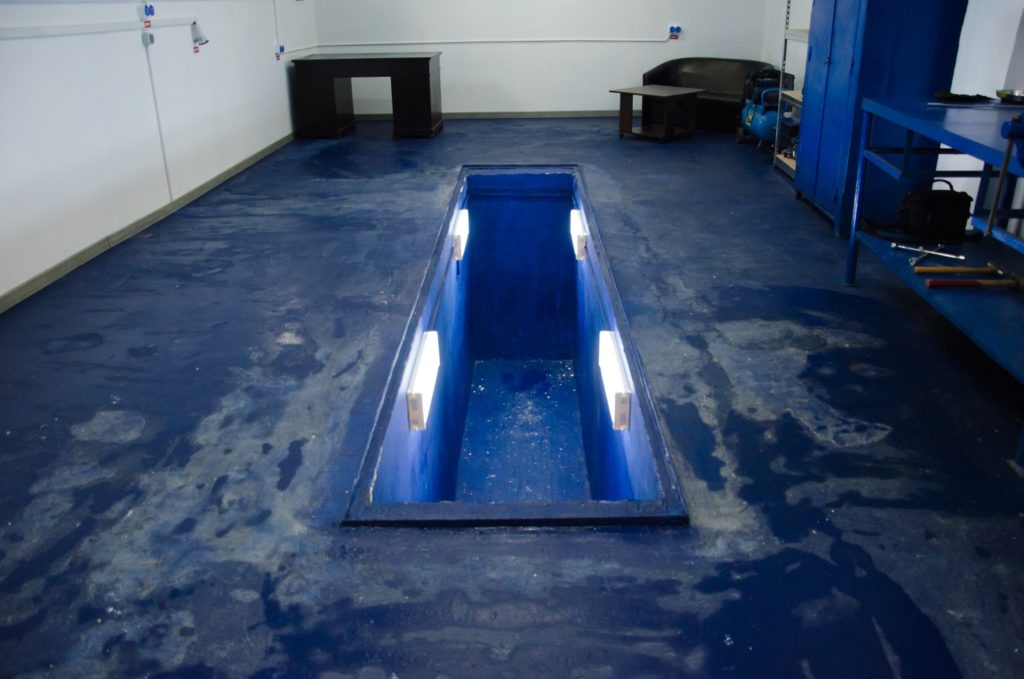
A person works in the immediate vicinity of lighting devices installed in the viewing ditch. The accumulation of dampness leads to the leakage of electric current, which is dangerous for people. This increases the safety requirements for arranging lighting in the inspection ditch.
Stationary and portable lighting of the garage pit is performed by supplying lines with a voltage of 36 V and below. This voltage value is obtained on a step-down transformer.
Airtight, moisture-proof, dust-proof fixtures covered with shockproof shades are installed in the pit. Additionally closed with protective grilles.
To protect the luminaires from damage by falling objects, niches are made in the walls of the viewing ditch and the devices are mounted in them on pull-out brackets.
Useful tips from an electrician
Electricians suggest installing garage lighting, guided by the following recommendations:
- For power cables, use a three-wire ground wire. When equipment is shorted to the case, an RCD will work, preventing a person from electric shock.
- Connect a street lamp for entry light through a motion sensor or photo relay. This will save energy consumption.
- Do not install fluorescent lighting in unheated garages. In cold weather, mercury lamps do not work properly.
- Provide emergency lighting in the event of a power outage. Keep a charged battery and several LED bulbs in the lampholders in the garage. This will allow you to perform urgent work regardless of the grid.
- Use proven devices and materials for installation.
It is not difficult to equip the lighting in the garage, if you choose the right lamps, calculate their number and evenly distribute along the perimeter.