Replacing the wiring in an apartment is a complex and expensive undertaking, which is carried out only in case of emergency. In most cases, it is associated with the overhaul of housing, when people temporarily leave it. The main reason for making such a decision is the mismatch of the capabilities of the line with the requirement or its emergency condition. Before changing the wiring in the apartment, it is recommended to contact the managing organization with a request to increase the allocated power. This will avoid the constant shutdown of automation when the load increases.
Who needs to change wiring
Not only the comfort of living in the house depends on the state of the electric economy. If you replace the wiring in a timely and competent manner, you can forget about the risks of a short circuit, cable overheating and the possibility of fire for several decades.
Replacement of electricians in the apartment is required in the following cases:
- Lack of current in sockets and switches. This is evidence that the line has broken or the contacts in the junction box have broken. If the house is three-room, the cable change can be carried out in whole or in part, in those places where there is damage.
- Regular operation of automatic protective devices. This happens when the laid communications overheat, as they are not designed for modern household appliances with high power.
- Irrational installation scheme during the construction of the building. A two-room mansion could be equipped with branching cables, which leads to overloads and emergency situations.
- Not enough outlets. One-room apartment can be equipped with just one nest, which is located behind a massive wardrobe.
- Exposure to dampness. This often happens when neighbors flood or damage the roof of the building. From contact with moisture, both metal and cable insulation become unusable.
- Full resource consumption. The electric wire is designed for a certain period of operation, at the end of which it loses its physical properties.
Before replacing the electrical wiring in the apartment with your own hands, you should carefully study the safety requirements and refresh your knowledge in this direction.
Replacing wiring after flooding
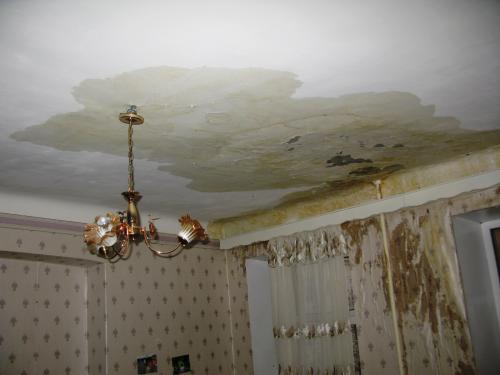
Regardless of the reasons, housing flooding has disastrous consequences for internal communications.
This is manifested in such negative phenomena:
- Violation of the shape of the channels along which the cables are laid. There is a risk of rupture due to overpressure.
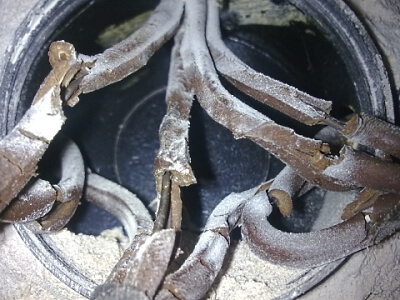
- Passing through the ceilings, the water is saturated with the active reagents that are present in them. The liquid becomes aggressive, corrodes the insulation.
- Contact with water results in oxidation of the metal. As a result, conductivity at the contact points is deteriorated. In some cases, the connection is broken, but more often heating and sparking are observed.
Replacement of wiring in the apartment should be carried out immediately after drying the walls and their disinfection.
After how many years is a replacement necessary
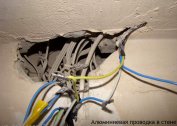
The old panel house, built at the end of the last century, was equipped with cables with aluminum conductors.It was considered economically viable, which was the basis of mass municipal construction. Over time, the engineers realized the mistake.
Aluminum electrical wire has the following disadvantages:
- Brittleness. In the places of the bend, the vein breaks off after 10-15 cycles. Because of this, you have to build up the line and do twists.
- The current passing through the metal changes its structure. The wire becomes porous and brittle.
- Aluminum oxidizes even under the insulation tape. Corrosion first worsens the conductivity of the contacts, and then the compounds disappear completely.
Depending on operating conditions, the replacement of electrical wiring in Soviet-built buildings should be carried out no later than 20 years after their commissioning. If cables with copper conductors were installed in the apartment, their service life is 50 years.
Preparing for electrical work
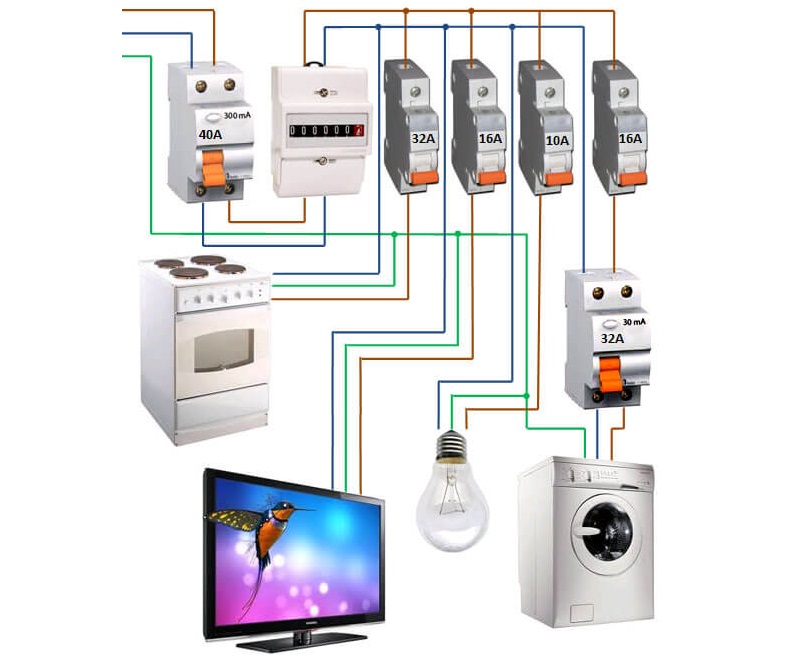
Start work with the preparation of the project. To do this, draw a diagram of each room with the application of all energy consumers with an indication of their power. These data will help determine the type of cable, the number of outlets, their location. It is advisable to make drawings for each room with an indication of the entry point.
The diagram should contain the following data:
- visor
- counter;
- cable laying lines;
- outlet blocks;
- circuit breakers;
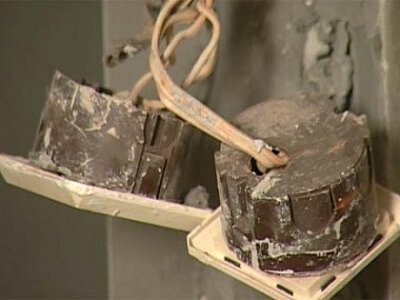
- mounting boxes;
- grounding
- residual current devices;
- circuit breakers (bags).
When drawing up a project, you must adhere to the following rules:
- the power of sockets and wiring is 1.5-2 times higher than the maximum load;
- maintaining minimum distances from sources of threats to energy consumers;
- separation of lines for lighting groups and sockets;
- laying separate lines for powerful household appliances;
- the ability to turn off the current for each room individually.
Since energy is supplied on the basis of an agreement with the management company, a wiring replacement scheme should be agreed with it. Errors can cause an emergency in the porch or throughout the house. Such incidents are fraught with penalties and forced shutdown. Official paper insures a person from such troubles.
Materials and Tools

To replace an electrician, you will need the following tools:
- puncher, grinder, screwdriver;
- level, tape measure, square;
- hammer;
- tester, indicator;
- nippers, pliers;
- Screwdriver Set;
- spatula, paint brush;
- stationery knife;
- soldering iron;
- headlamp.
Calculations of materials and fixtures is done on the basis of the scheme.

To change the internal line in the apartment you should stock up with the following materials:
- cable with copper conductors with a cross section of 1.0-2.5 mm;
- tin or solder;
- rosin;
- insulation tape;
- sockets;
- mounting boxes;
- circuit breakers;
- sachets;
- connecting pads;
- putty;
- primer;
- finish.
For the convenience and safety of working at height you need to purchase a stable stepladder. To protect the skin, organs of vision and breathing, you should work in a construction helmet, protective gloves, goggles and a respirator. You will also need a 1 kW dielectric mat.
Dismantling the old line
Faulty communications can only be replaced in a completely de-energized room. If the accounting equipment, traffic jams or bags inside, there will be no problems. When the appliances are brought into the staircase, precautionary measures must be taken. After switching off the power, the panel door should be closed and a warning sign should be hung on it.
Step-by-step dismantling process:
- Remove paintings, sconces, curtains, shelves, take out furniture that must be disassembled and carried. Cover the rest of the interior with plastic wrap.
- Remove the covers of the mounting boxes, sockets and switches. To take out devices from openings to disconnect them from the line. Check their condition, make a decision: leave the product or purchase new ones.
- Try to pull the old cables through the holes in the wall. If the line succumbs, you should not pull it out. It will come in handy as a long cable when installing new wiring.
- Draw the lines of the old cable. Grinder cut out the strobes, get the wires.
If the new scheme is significantly different from the old, you can not extract the old communications from the walls. It is enough to cut off the protruding wires, and seal the remaining holes with putty.
New wiring
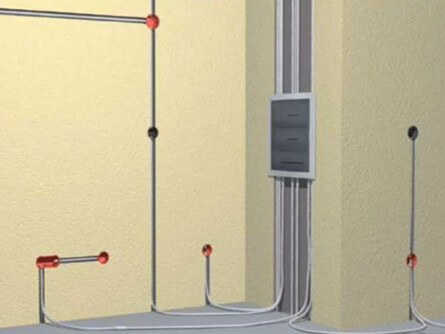
Depending on the design features of the building and living conditions, an open or hidden way of laying is chosen in it.
An open version implies the absence of destructive and wet work. Communications are laid in hollow boxes, skirting boards, platbands and cornices, overhead switches and boxes are installed. The disadvantage of this approach is the weak protection of the line from moisture and mechanical stress.
Hidden laying requires a lot of effort and investment, but more practical and reliable. The cable is hidden under the plaster, the walls are flat, the internal sockets and switches almost do not protrude from them.
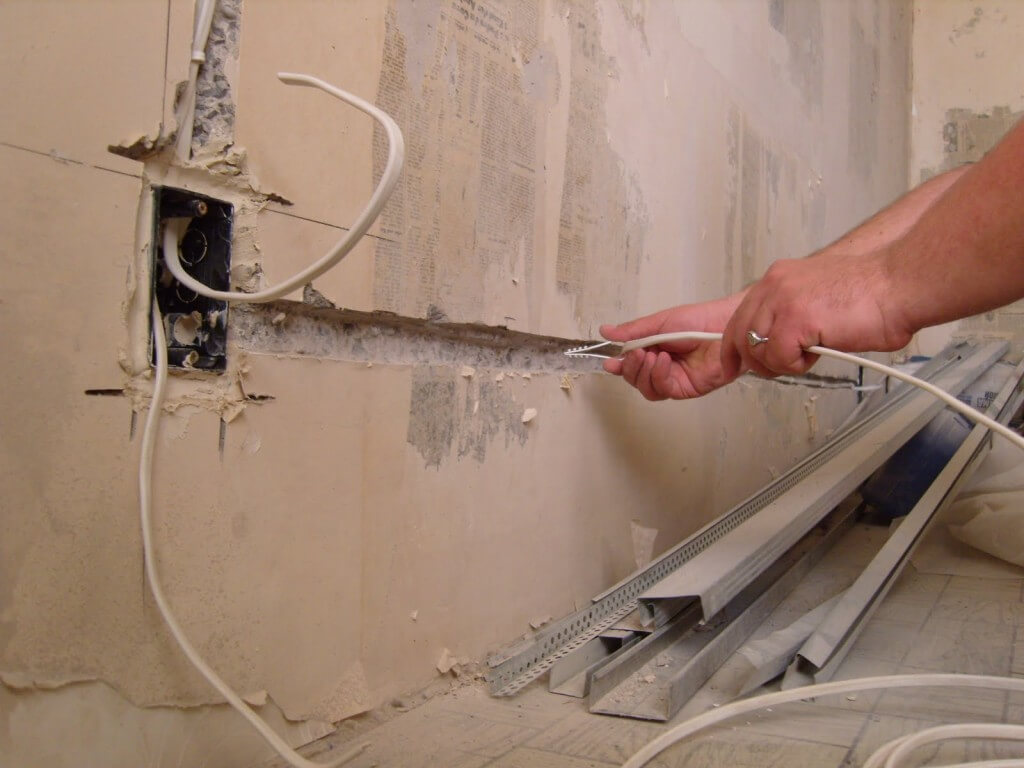
The step-by-step process of performing hidden laying:
- Move the circuit to the walls. Designate places for mounting boxes and socket boxes, connect them in straight lines.
- Drill holes for plastic boxes with a puncher with a crown. For block installation, connect them with jumpers.
- To make strobes. To facilitate the work, you can do them in a triangular section. So the stroba will be sawn in 2 steps without subsequent knocking out of the material between the walls.
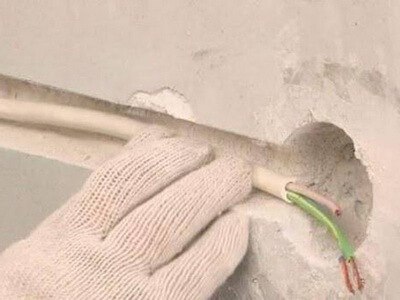
- Cabling. It should be pre-tightened into a plastic corrugated tube, which is then rigidly fixed in the gate.
- Connect the wires in the mounting boxes. Fasten appliances in the holes. Do not install covers on them yet.
- Visually check the correct installation and the fastening of the cores in the terminals.
In conclusion, the lines are tested with a multimeter to determine if there are bad contacts, breaks, or short circuits.
Connection to the shield

Before connecting the line to the shield, it is not practical to close the strobes. If a mistake is made, you will not have to carry out destructive work. When a batch switch is already installed in the panel, the cores are connected to it when the toggle switch is set to the “off” position. For the installation of a new device, you will have to attract a representative of the company who has access to the home panel to disconnect the riser during the installation.
After installing the bag, it is turned on and a functional check of the laid line is carried out. If everything is assembled without errors, the power is turned off, the shutter is closed, the covers are screwed to the boxes, switches and sockets.
Safety rules
When conducting electrical work, the following safety measures must be observed:
- always disconnect the room before starting installation;
- use tools with insulation of at least 1 kW;
- use a dielectric mat and safety glasses;
- lay the cable only vertically and horizontally;
- Do not directly connect aluminum and copper conductors;
- if possible, refuse twists in favor of pads;
- use cables and sockets corresponding to the power of consumers.
These rules are simple, but people's lives and the safety of their property depend on their implementation.