In electrical stores, a device has appeared that looks like a classic switch, but costs more. This is a dimmer - a device that allows not only turning the light on and off, but also adjusting the brightness and intensity of the backlight. Thanks to the use of dimmers, energy can be saved. You can connect the dimmer yourself. To do this, follow the installation instructions and comply with safety requirements.
The principle of operation of the device
The principle of the dimmer is to smoothly adjust the voltage from minimum to maximum value. At a high level, the brightness of the light source will be maximum.
Dimmers are distinguished by the following parameters:
- type of control - rotary, push, touch;
- type of light source - LED, halogen, fluorescent or incandescent;
- additional functionality - timer, remote control;
- design - modules, monoblock switches.
Also, light regulators vary in appearance and manufacturer. The quality and cost of products depend on the fame of the manufacturer.
Application requirements
The most important requirement when choosing a dimmer is to determine in advance which lamp it will be connected to. Products for halogen lamps must not be connected to LEDs.
Also important criteria are:
- minimum power of the light source;
- room temperature - it is not recommended to put a dimmer in the room above 25 degrees;
- the phase conductor must go to break, it is forbidden to connect zero;
- dimmer power must be higher than the total load of all the fixtures to which it is connected;
- Do not connect capacitive and inductive loads at the same time to the regulator.
Failure to comply with the above requirements can lead to negative consequences.
Wiring diagrams
 Before connecting the switch, the master must select the optimal wiring diagram. You can connect with or without a switch. You can also set a combination of several sources at the same time.
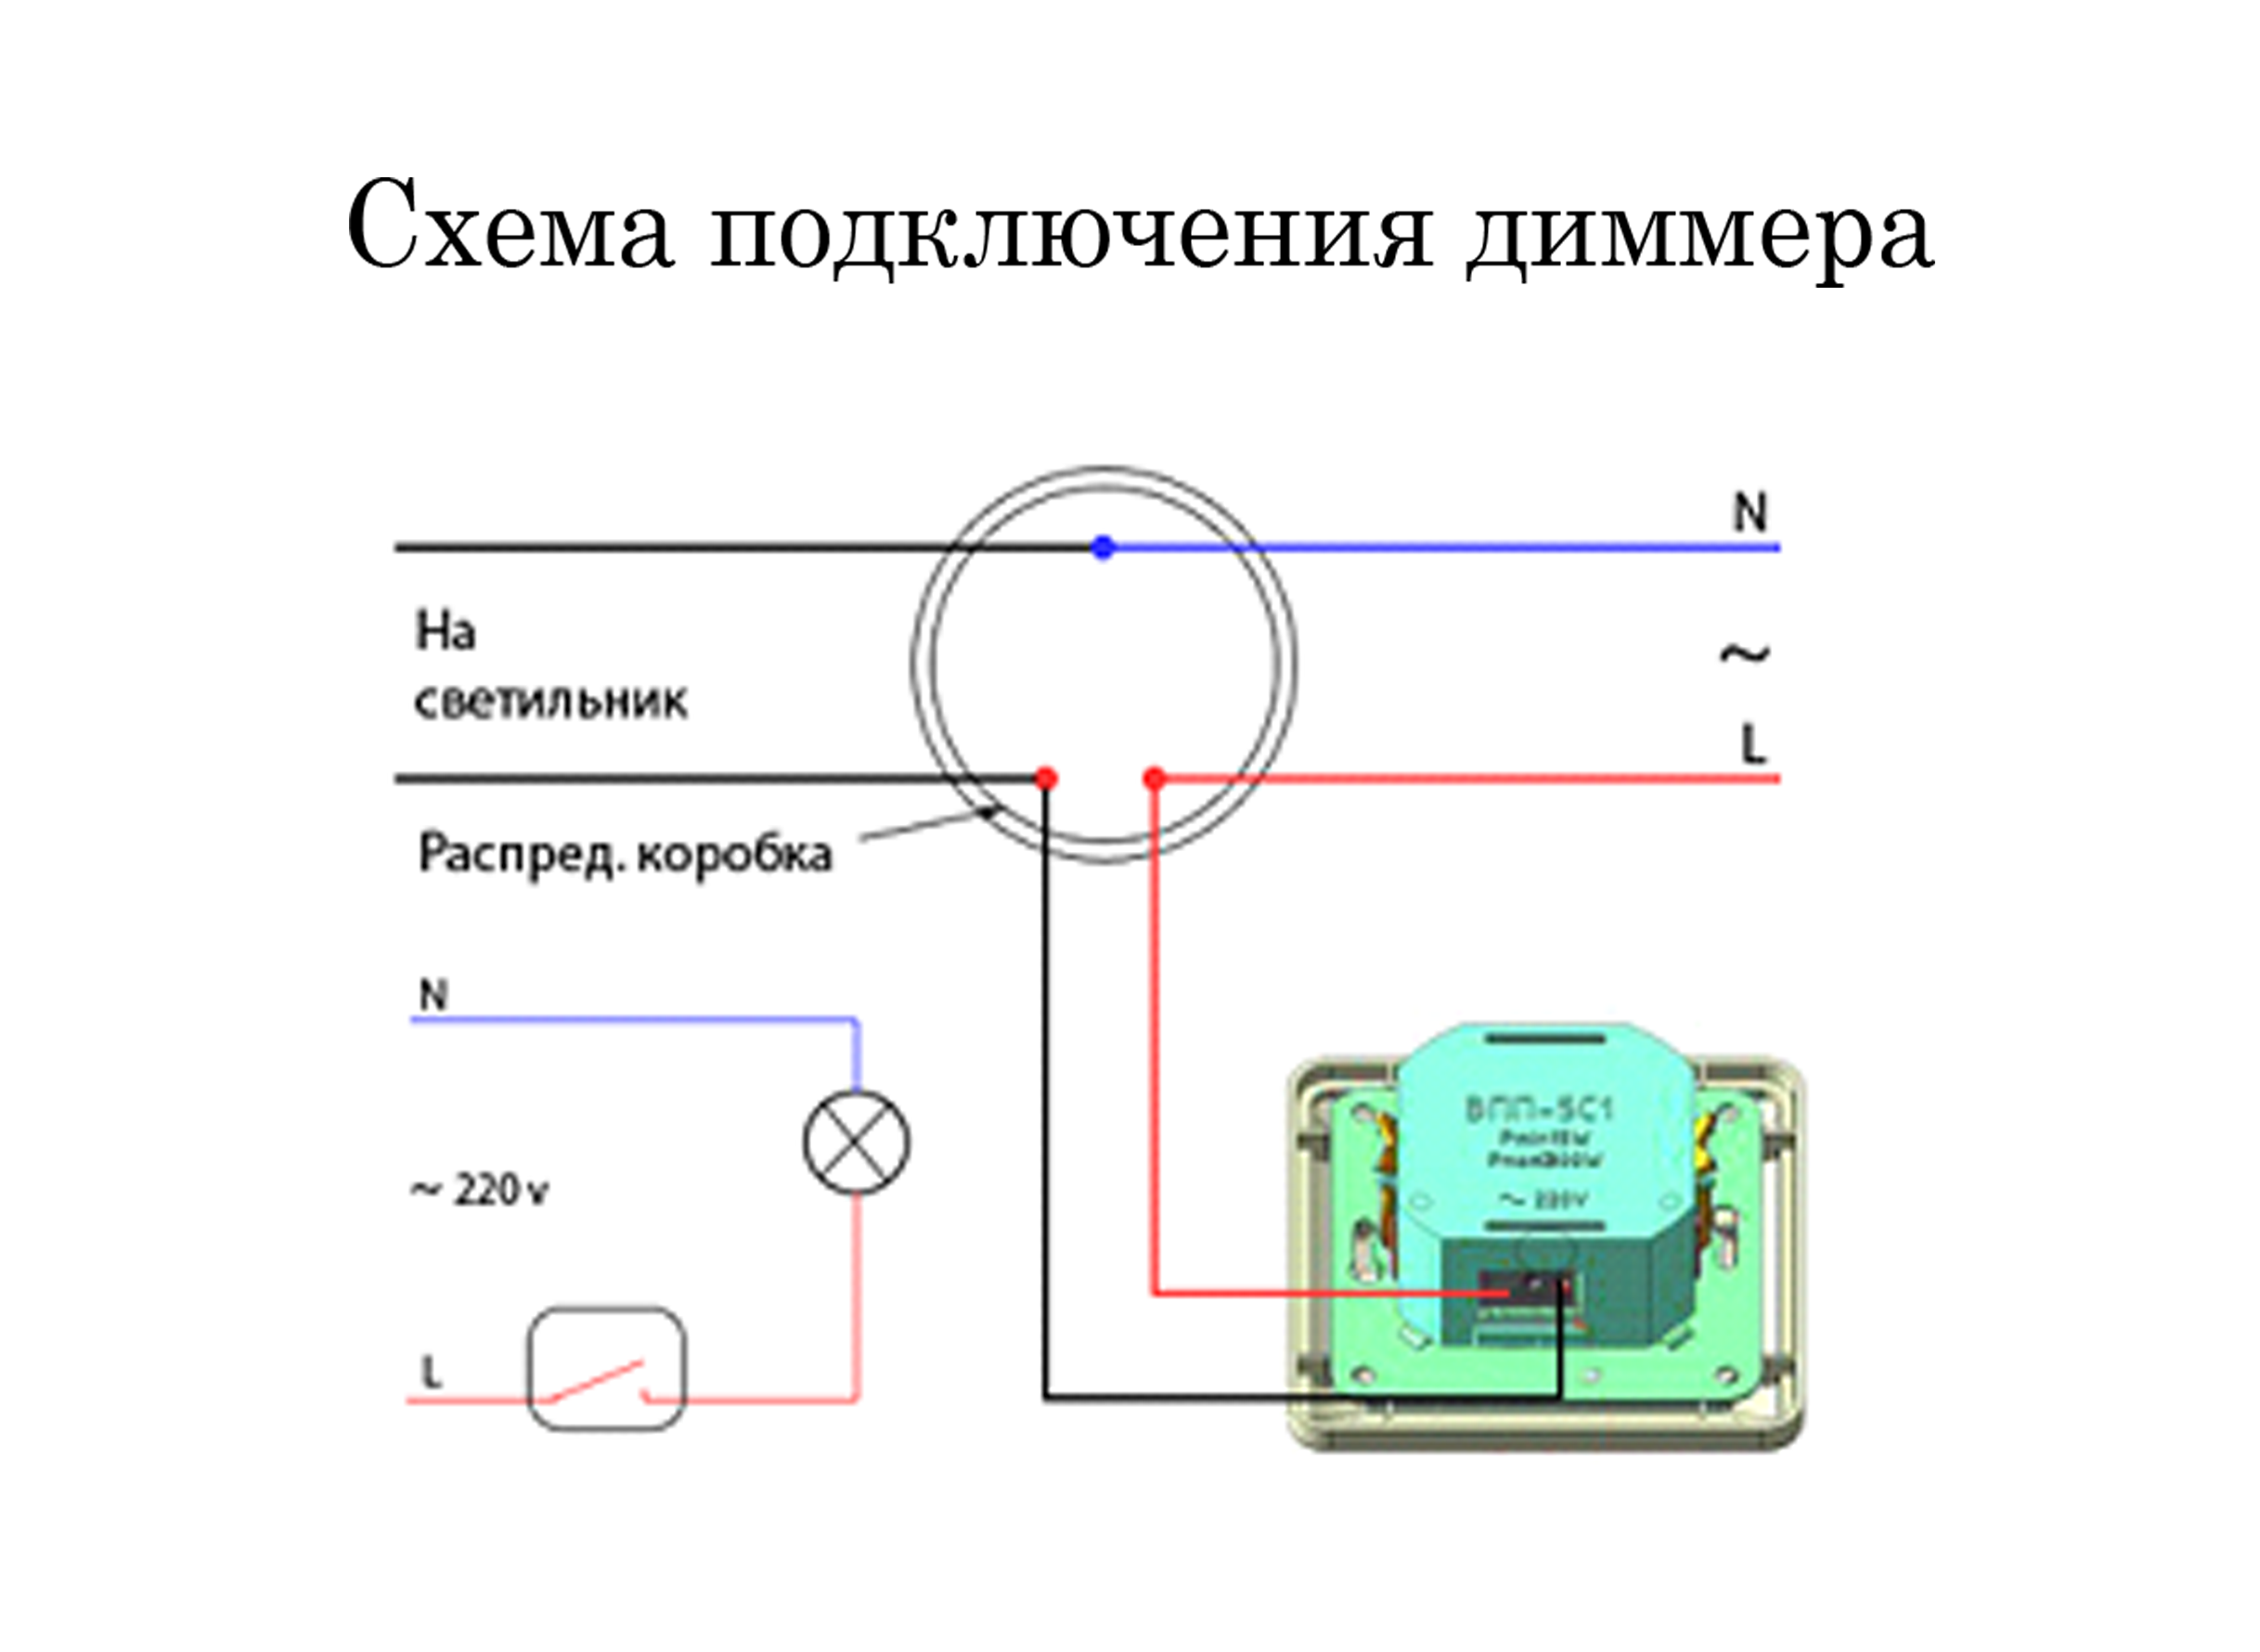
The easiest way to connect is when a dimmer is used instead of a switch. The phase goes to break, and the earth and zero to the lamp.
The switch option is used in bedrooms. With it, you can turn the light on and off, adjust the desired brightness. A switch is placed in phase in front of the dimmer, and wires go to the lamp from the regulator.
For large rooms, you can organize the connection of two dimmers to the chandelier. The installation of two dimmers allows you to control the brightness of lighting from different places. A jumper is placed between the dimmers. This option is convenient to use in long corridors and large rooms. It is possible to assemble a circuit with passage switches.
How to connect a dimmer instead of a 2-wire switch
 Instead of a switch, a standard two-wire circuit is used to connect a monoblock dimmer. To install you need:
- disconnect the voltage in the house on the distribution panel;
- check the absence of a network using the indicator;
- dismantle the switch by removing the protective panel from it and disconnecting the wires;
- find the phase wire using the indicator (it should light up when connected to the phase);
- connect the phase to the dimmer input, connect the load wire for the luminaire to the output terminal.
In regulators, the contacts are marked. L-in - phase-in, L-out - phase-out.
Then you need to turn on the electricity and check the operation of the circuit. With proper assembly, the brightness will smoothly change.
Lighting control from different points of the room
Implementation of light control from different points of the room can be implemented in two ways. You can make a diagram with two dimmers and using separate buttons. The latter method is actively used by eminent manufacturers of electrical products, for example, the French company Legrand.
Installation scheme with two dimmers
To ensure light control from two points of the room, a circuit with two dimmers is used. The first and second terminals of the regulators are interconnected. The phase is connected to the third terminal of one dimmer, from the other the wire is supplied to the load.
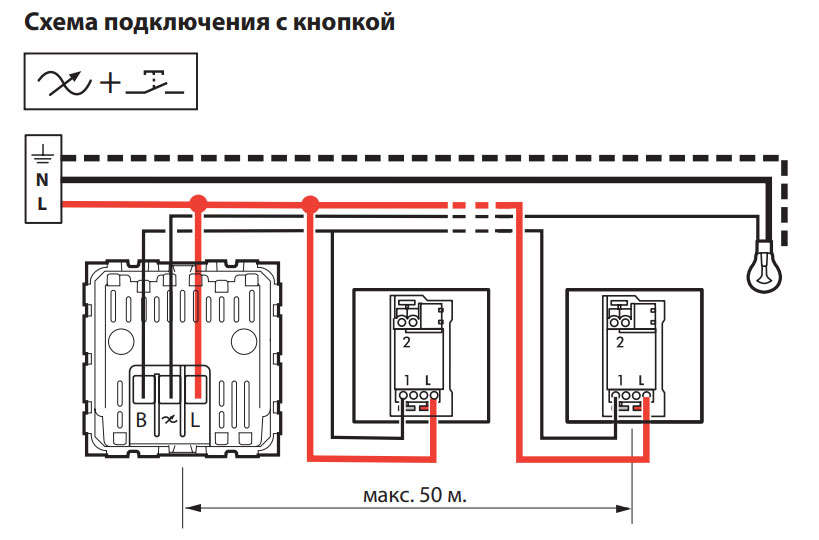
How to connect a high-quality dimmer
High-quality dimmers in a complete set have additional buttons. They allow you to control the light from different points of the room. The maximum distance from the dimmer to the button is 50 meters. Such regulators can be connected with grounding and without it according to a selective or non-selective circuit.
The phase is fed to the first dimmer and button terminals. From the second terminals, the wire must be connected to terminal B of the controller. The load must be connected to terminal 2 of the dimmer and the neutral wire.
Step-by-step replacement instructions
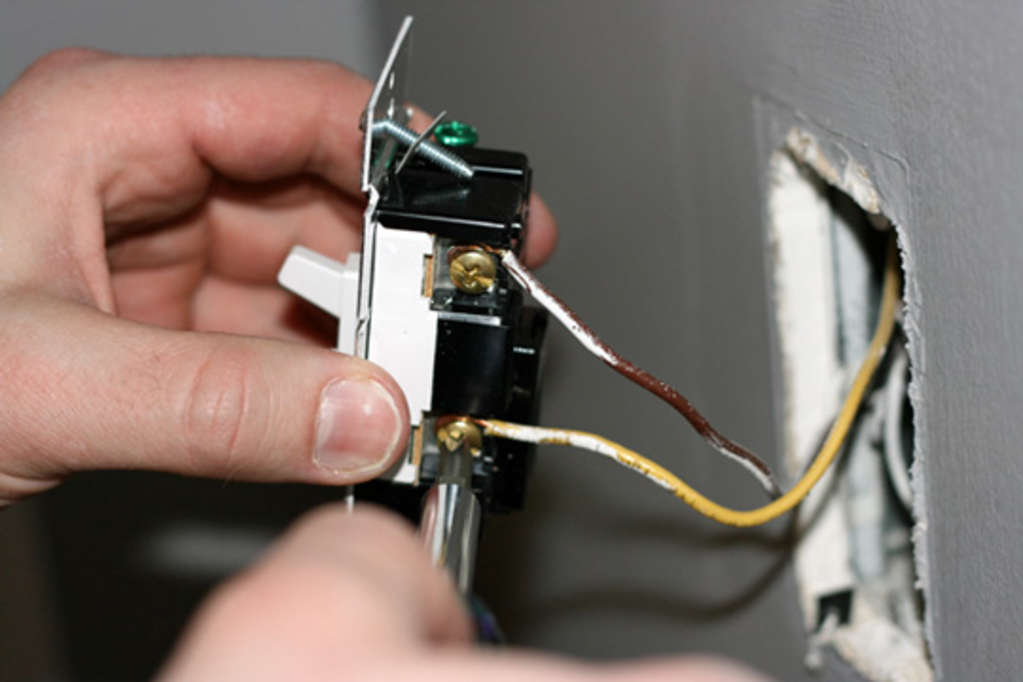
You can replace the switch with a dimmer yourself. Follow the instructions for replacement - turn off the lights, dismantle the switch and install the regulator.
Before performing any electrical work, it is necessary to shut off the voltage supply to the room. To do this, turn off the electricity in the shield on the site or inside the apartment.
First of all, remove the decorative panel from the switch. Then the internal mechanism is pulled out, connected to the wires. The last step is to disconnect the conductors. The cores must be carefully removed from the terminals, keeping them intact.
If the wires are in good condition, preparatory procedures are not necessary. You should study the instructions for connecting the dimmer, which spells out the basic requirements and the wiring diagram. Then you need to apply power and check the operation of the regulator. When connected correctly, the brightness will gradually increase and decrease.
Dimmer is a convenient device for adjusting the brightness of lighting. It can be used both instead of the classic light switch, and together with it. Having the basic skills of electrical engineering, you can independently connect the light control to the light bulb. To do this, observe the correct wiring and safety precautions.