In the modern world, an increasing number of people give their preference to showers. There may be several reasons. Water saving - even with a very high sump, the cab does not require a lot of water. Lack of space - in many new buildings, architects prefer to increase the size of rooms by reducing the area of the bathroom. This leads to the fact that to increase the area in small bathrooms, people dismantle the bathroom, preferring the shower. Convenience - based on your own comfort and much more.
Hazards and installation errors
 It is recommended to pay special attention to the installation of a shower cabin. Before you start assembling a booth yourself, you should carefully study the theoretical part. You should be free to navigate the tools and materials with which you will work. It’s better to read the instructions again than to pay a lot of money to fix an incorrectly installed pan or laid pipes and hoses.
Immediately after buying your favorite shower model, be sure to check the equipment. The number of elements in the list of the passport must exactly match the number in the box. Carefully inspect all components - doors for scratches, rubber products for defects, count the number of fasteners. If suddenly you find uneven edges, cracks, scratches at something, or you don’t get anything, you should arrange for the return of the goods with all the documents.
Identifying the absence of any parts already during the installation process can lead to their forced replacement with those that are at hand, which means that they can significantly affect the quality of how you assemble the booth.
You need to be aware of the consequences that the installation of an improperly assembled shower can lead to:
- the appearance of mold at the seams;
- depressurization;
- leaks;
- flooding of their own and neighboring apartments;
- poor drainage due to the lack of sufficient space between the siphon and the drain pipe.
The design of modern models is most often developed taking into account the fact that a person who does not have a special education in the plumbing sphere can take up the assembly.
The installation process may resemble a complex constructor, but thanks to the illustrated instructions, specialized articles and videos on the Internet, anyone is able to collect a shower cabin without the help of a wizard.
Tools, materials and consumables for installation
 For all modern models of shower cabins, detailed instructions are included, so that installing the structure yourself does not become a big problem for a person with “straight arms”.
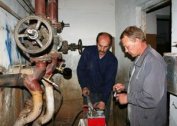
Before starting work, it is necessary to prepare, namely, to purchase all the tools and materials that do not go into the design. Most often, a siphon for connecting the cab to sewer pipes is included with most models.
When connecting the sewer you need to have:
- screwdriver;
- cross bits for a screwdriver;
- cross and slot screwdrivers;
- adjustable wrench or gas wrench.
In case you have purchased a shower cabin with additional functions, it is important to know that they will work efficiently at a certain pressure. If the water pressure in your house does not correspond to this mark, you will need to purchase and install a water pressure reducer. Also, if the quality of the water leaves much to be desired, it is worth considering installing filters for the mechanical treatment of water.
Materials required for installing a shower cabin:
- HosesA standard shower enclosure requires approximately two hoses approximately 1.5 meters long.
- Compression fittings are special elements for connecting and wiring some sections of pipes and hoses.
- Level - for fixing the pallet. Sanitary transparent sealant, namely antibacterial colorless silicone of a thick consistency. It will be needed to lubricate the seams and joints of the cab. Sealant is used to create waterproofing seams and joints.
Installation and installation by points
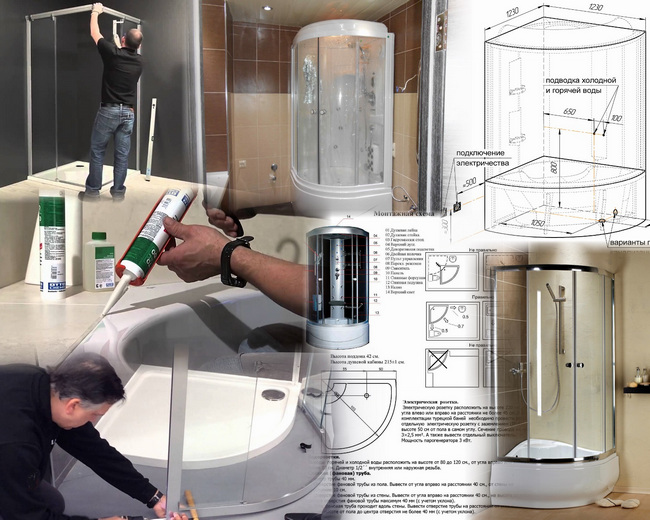 Before you start the installation yourself, you need to remember that this requires a certain amount of time and energy. Before the work itself, we advise you to make a preliminary assembly, which will allow you to assess the scale and dimensions of the shower.
The following steps should be followed:
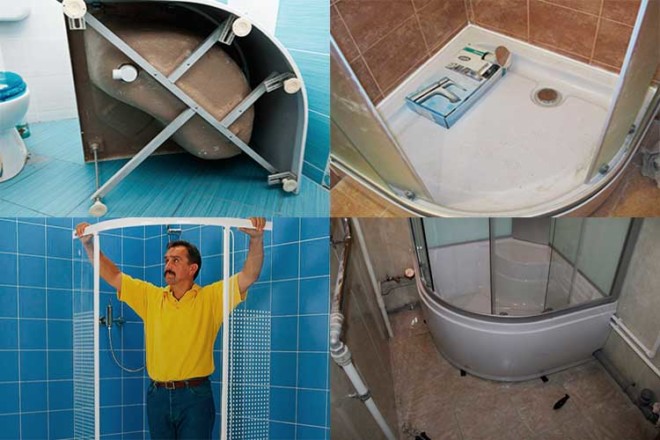
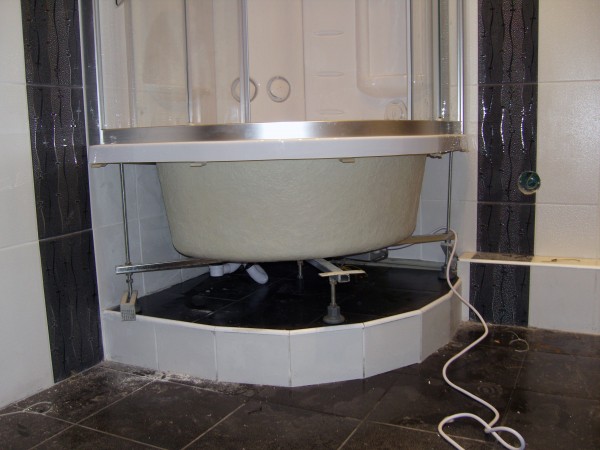
- Install the pan. The first thing to remember when installing the pallet is that you need a margin of the height of the entire pallet of at least 15 centimeters. In order for the used water to flow into the drain without problems, it is necessary to install a drain pipe in the following sequence: it is necessary to remove the elements of the apron; raise the back of the pallet; lay a hose on the knee of the drain; fasten the second part of the hose to the drain hole. Remember that the higher the drain pan is, the faster the water will flow into the pipes. For quick drainage, the pipe should be installed with a slight slope. Using a long level, you need to put the bottom of the pallet horizontally. Choose a convenient location by adjusting the special supports, which should then be locked with locknuts. Then, using the clamping nuts, the drain is mounted, connecting the siphon and the tray. Be sure to ensure that there is a gap between the cabin and the floor. The larger it is, the faster the water will go.
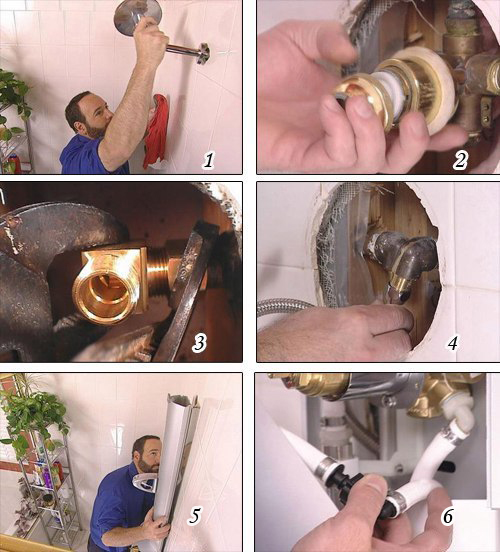
- Then you should connect the cab tray to the water supply. To do this, put compression fittings on the pipes or use a special connecting adapter, which requires pipes with different diameters. All joints must be sealed. Hoses connected to the piping should be connected to the inlets and to the rear wall. It is necessary to check the water supply and check all connections to make sure they are tight.
- Make installation of the central and rear panels of the shower. Before starting installation, all internal components must be mounted. Fix the mixer, control panels for the tap and shower. After assembly, the panel is inserted and screwed to the frame previously attached to the pallet. Brackets secure the back wall. And at the end of the assembly, insert the doors by screwing special rollers that are located on the sides into the canvases. The process is completed. Remember that before you start using the shower, you need to inspect all the connections again.
Assembly and Operational Tips
 Before starting the installation of the cabin already in the bathroom, it is advisable to assemble it completely without the use of fasteners. This should be done to understand what should happen at the end of the assembly.
Before using the shower cubicle for its intended purpose, wait until the silicone completely dries between the seams. The use of any devices, including plumbing in nature, provides for periodic inspections to monitor the quality of shower cabins. And warnings of any possible malfunctions (for example, loosening of door fasteners).
If you did the assembly yourself, disassembling the cab will not be a problem. Just follow the reverse order of installation of the shower.
Conclusion
In conclusion, it is worth saying that self-assembly of a shower cabin is a process that requires attention and knowledge, so do not be lazy to get acquainted with all kinds of information on this topic before starting installation. And remember that self-assembly of a shower cabin can significantly save your money and increase confidence in your abilities.