The climate of the central regions of Russia is characterized by cold winters and the heat in the summer. Household appliances can cope with the problems of maintaining an optimal microclimate in the premises, but electricity bills will be just space. Warming of a country house for year-round use is an event that you can do it yourself without too much difficulty, saving almost half of the construction budget. To make the right decision, you need to familiarize yourself with the materials and technologies used on the market.
The difference between insulation inside and out
Warming of a summer residence can be carried out combined - from within and without, or to stop on one of the ways. The choice is determined by the peculiarity of the structure, the material from which it is built and the landscape of the garden plot. Each option has its pros and cons, which should be considered separately.
If you decide to warm the cottage outside with your own hands, this will give the following advantages:
- The dew point is distant from the supporting structures, moisture is formed on the finish lining, which is waterproof. The walls remain always dry, in stable condition.
- External thermal insulation neutralizes high and low street temperatures. Due to this, there are no freezing and thawing processes, the cyclicality of which is limited for each building material.
- There is no limit on the thickness of the insulator. You can insulate the building, not counting centimeters, as it happens inside. This factor allows you to make such a powerful barrier to the cold that it will protect the house even in the most severe winter cold.
- Convenience of work. There is no need to carry out preparatory steps for the removal and covering of things, there is no chance of damaging any valuable thing or surface.
The external version also has its drawbacks:
- The building can be arranged in dry and calm weather, and wet work at a positive air temperature.
- The appearance of the facade changes, which is undesirable if the house is laid out with a beautiful beam or brick.
- It is necessary to buy or rent scaffolding, which affects the repair budget.
The internal method of warming the cottage has the following advantages:
- The work is carried out in comfortable conditions, regardless of the vagaries of the weather.
- Safety is ensured, since there is practically no risk of falling from a height.
- A wide selection of finishes. There is no need to look for a coating that is resistant to moisture and temperature changes.
Cons of this option:
- It is necessary to take things out of the premises, put them somewhere and look for a place for temporary residence.
- The useful area of the rooms is reduced, it is likely that the old furniture in it will not fit after the repair.
- The dew point is shifted to the inner surface of the wall, which leads to the formation of dampness, the development of mold and fungus.
- Supporting structures are exposed to the damaging effects of the environment - ultraviolet radiation, precipitation, freezing and thawing.
Many property owners are inclined specifically to the internal option of thermal insulation. In most cases, this is done because of the image, when it is necessary to preserve the representative appearance of the walls, which emphasize the consistency and taste of the owner.
Features of insulation and suitable materials
When choosing methods and materials for wall insulation, one should not forget about other structures through which cold air can enter the room. Start with windows and doors. It is necessary to close all the cracks and install high-quality seals on the sash. If finances allow, it is better to install energy-saving products.
According to the law of physics, heated air rises upward, accumulating at the ceiling. If its surface is not insulated, the air will quickly cool and dropping down to cool the room. The ceiling must be reliably insulated from the attic using the highest quality materials.
No less attention should be paid to floor insulation. The microclimate in the house and the comfort of living in it depend on the temperature of its surface. Cold floors can adversely affect people's health. If it is not possible to install a heating system, you need to create an effective thermal insulation layer under the finish coating.
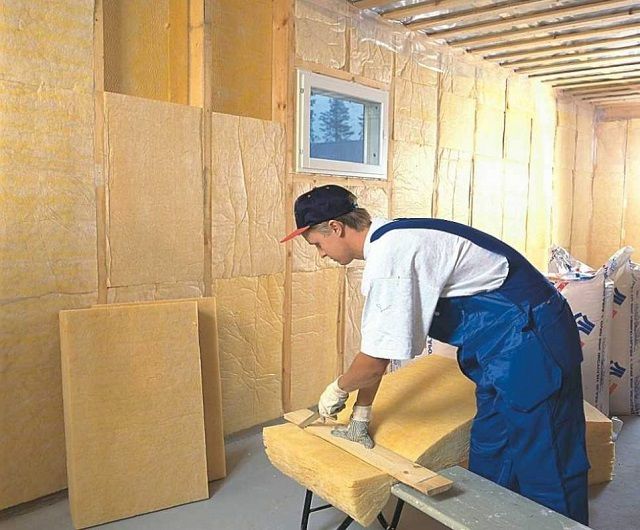
Before you make a choice in favor of a particular method of arranging your home, it is recommended that you familiarize yourself with the types of insulation for the walls inside the house in the country.
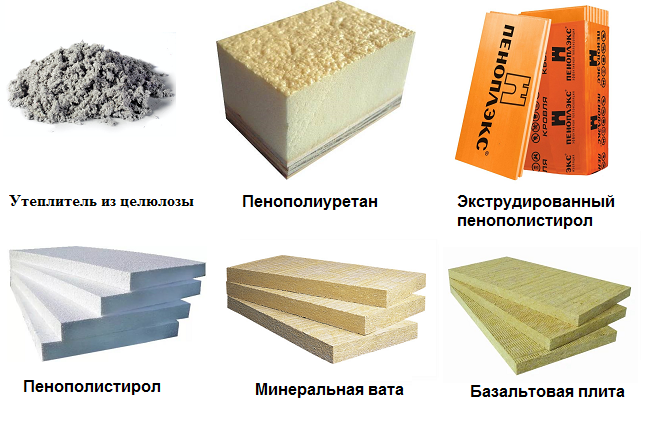
Mineral wool
 The material is a densely compressed fiber, with air enclosed between them. On sale are models made of dolomite, glass and steel industry waste (slag). Products are manufactured in the form of rolls and plates of rectangular and square shapes. The most popular is basalt wool, characterized by excellent performance.
The thermal insulator has the following advantages:
- low thermal conductivity;
- good acoustic qualities;
- resistance to damp, fungus and mold;
- biological inertness - rodents and insects do not settle in cotton wool;
- environmental Safety;
- long term of operation;
- resilience and flexibility;
- fire resistance, ability to block the spread of fire;
- ease of installation;
- vapor permeability.
Since the material absorbs moisture well, it requires reliable sealing or closure with vapor-diaphragm membranes. You have to pay for good quality - mineral wool has a high cost.
Expanded polystyrene
Polyfoam and its modifications are made in the form of plates having a size of 1x1 m, with a thickness of 2, 5, 10 and 20 cm. It consists of many pressed balls having a porous structure.
Advantages:
- low specific gravity;
- water tightness;
- ease of installation;
- low thermal conductivity;
- durability;
- affordable cost;
- resistance to pathological microorganisms.
Styrofoam also has disadvantages. Rodents and insects can start in the coating. The plates are brittle, crumble even under weak mechanical stresses. The material absorbs moisture, which leads to its destruction. The foam also decomposes from ultraviolet radiation, its surface must be closed from direct sunlight.
Polyurethane foam
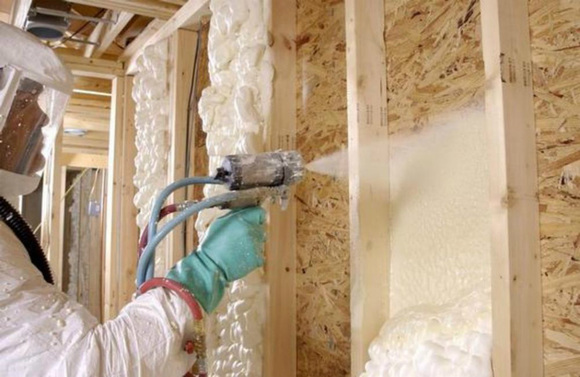
PPU belongs to the category of sprayed heaters. After application to the surface, the liquid increases in volume, solidifies and forms a dense porous substance with open cells. For the processing of large objects, special equipment is needed. Today, this material is considered the best in almost all respects.
Advantages of polyurethane foam:
- high speed application;
- the lowest thermal conductivity among analogues;
- excellent adhesion to any surface;
- filling all cavities, voids and slots;
- creation of a continuous monolithic coating devoid of cold bridges;
- long service life;
- resistance to temperature extremes;
- water tightness;
- fire resistance in some models.
The disadvantages are the high cost of technology and damage to the coating from exposure to ultraviolet radiation.After hardening, the foam should be closed as soon as possible from solar radiation with siding, corrugated board or other dense material.
Examples of roll insulation for walls
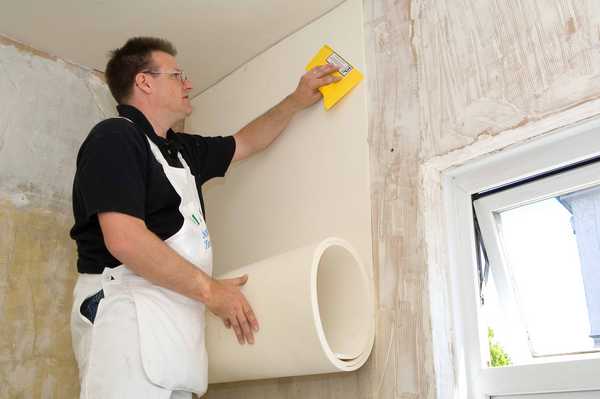
At arrangement of smooth, curvilinear and difficult surfaces indoors, rolled heaters are in demand.
The following materials are most popular:
- soundproof foil backing made of polyurethane.
- natural linen mats 5 cm thick;
- foamed polyethylene;
- foam rubber;
- compacted fiberglass;
- felt tapes.
It is recommended to pay attention to liquid heaters for summer cottages. These include facade plaster and ceramic paint. These materials are well suited for the construction of buildings made of concrete, gas silicate blocks and bricks.
Bulk materials such as expanded clay and sawdust can be used to insulate the floor in the ID. Before use, they need to be shut off so that the composition is heterogeneous and does not give strong shrinkage.
Insulation technology

To carry out the installation of insulation for walls inside the house in the country, you can use one of the technologies developed to date. The choice depends on the architectural features and size of the premises. Following the step-by-step instructions will allow you to achieve high-quality results without much effort.
The step-by-step procedure of internal thermal insulation begins with the design and preparation of the surface. The following actions must be performed:
- remove from the premises all things that will interfere with the work or may suffer during its implementation;
- remove sockets and switches, insulate wires;
- remove all objects protruding from the walls;
- clean off the old finish;
- level the bearing surface with mortar;
- conduct a sequential treatment of the walls with an antiseptic, flame retardant and hydrophobic agent.
After that, you can begin the main stage of work.
Plastering
This method involves minimal costs, but requires the necessary skills.
Work sequence:
- The mixture is prepared in accordance with the manufacturer's instructions. If necessary, pigment or foam balls are added to it.
- The solution is applied with a wide spatula with sweeping movements in the direction from the bottom up. Depending on the brand of the mixture, the thickness of the finished layer is 2-5 cm.
- After complete drying, the surface is ground first with a grater and then with sandpaper.
- The wall is subsequently primed, painted or wallpapered.
If desired, you can get a textured surface in the form of masonry or wood bark. For this, special tools and solid additives are used.
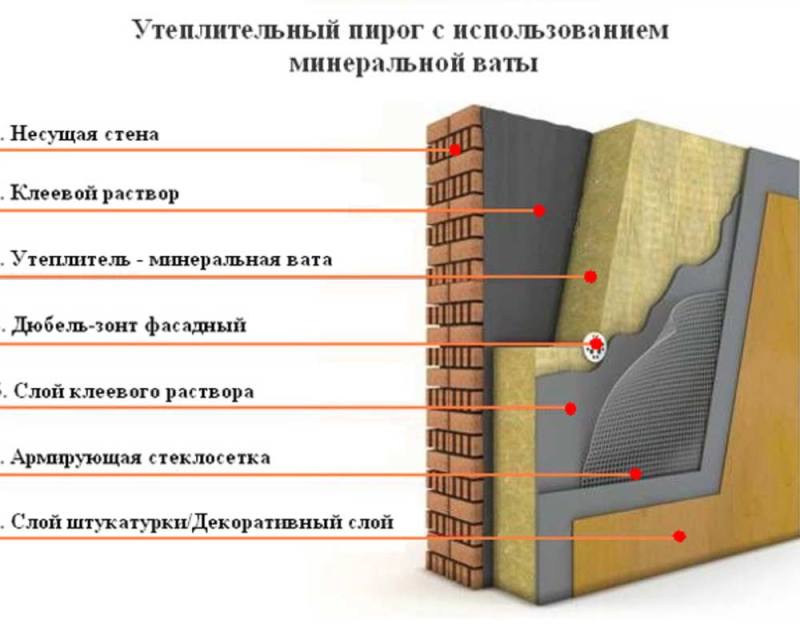
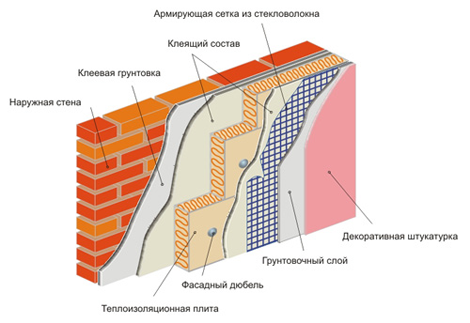
Wet facade
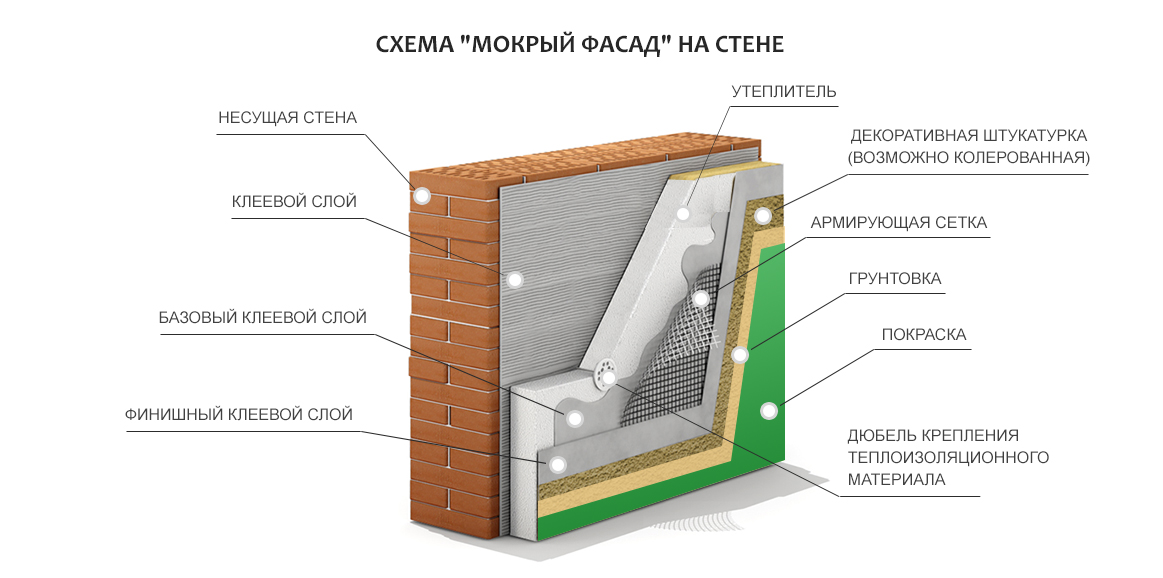 This technology is equally suitable for interior and exterior decoration. The difference can only be in the water resistance and vapor permeability of the materials used. For tight concrete walls, it is better to use standard PPT-25 polystyrene. It is advisable to insulate wooden, foam concrete and panel buildings with extruded polystyrene foam.
Work Stages:
- Markup. Lines are drawn on which the boards will be glued.
- Damping tape is glued to the floor and ceiling. It will eliminate the stress of the material that occurs when the building shrinks.
- The glue is mixed. A mixture based on gypsum or cement is taken.
- Starting from the corner of the room, the bottom row of plates is laid. Glue is applied by points or completely, evenly distributed on the surface with a notched trowel.
- To close the masonry, the last fragment is cut to size.
- All subsequent rows are applied with an offset of half a square. The top of the masonry is brought under the ceiling.
- Slots are being sealed. Use glue, pieces of slabs or foam.
- The surface is reinforced with mounting plastic mesh.
- A thin layer of plaster is applied, after drying, it is treated with a primer.
The final stage is the finish of the insulated wall. Cork, fabric, wallpaper, paint or ceramic tiles may be used.
Wireframe method
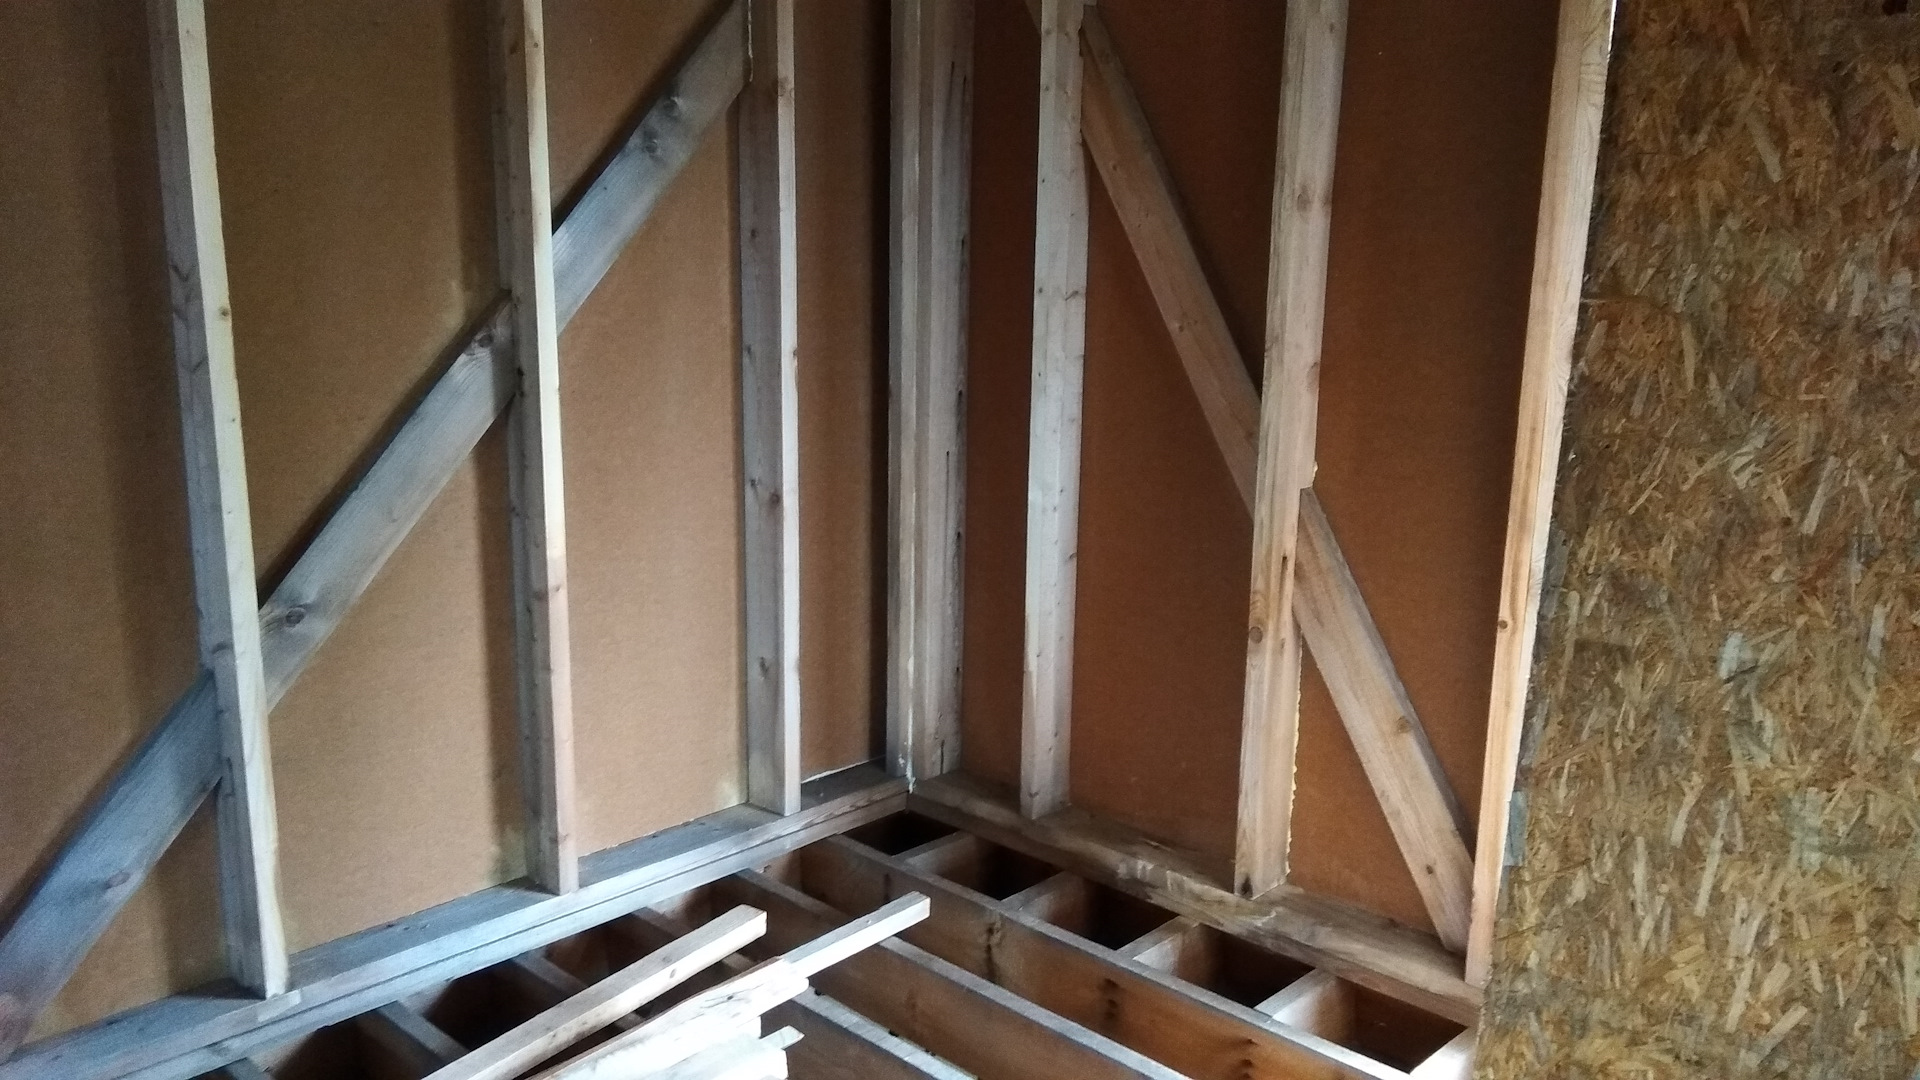
This technology is used when mineral wool or polyurethane foam is used for insulation. It should be borne in mind that with this method, the useful area of the room is reduced by 8-10 cm on each side. Choosing a wireframe method is advisable for large rooms.
Arrangement sequence:
- Fastening to the wall of the first layer of membrane tissue.
- Vertical mounting of pre-treated boards. The distance between them is adjusted to the width of the mineral wool.
- Plates are inserted between the boards or foam is applied.
- The second layer of the membrane is nailed to the frame with a stapler.
- The lath is sheathed with plywood, drywall, slats or lining.
The final step is the finish. As in previous cases, the most suitable material for the interior is selected.
Materials and Tools
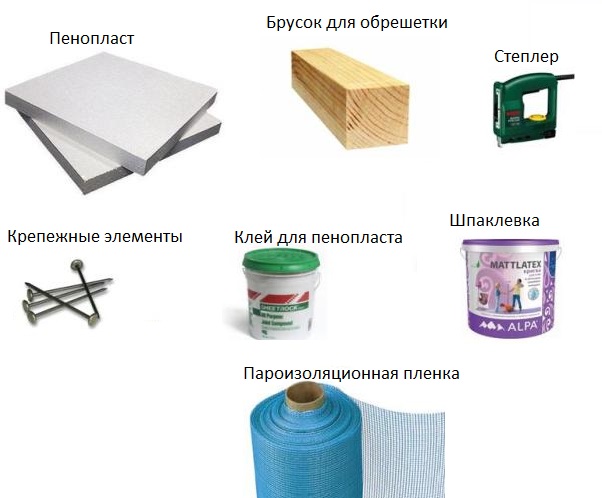
To warm the cottage, it is necessary to prepare such tools and materials:
- level, tape measure;
- electric drill;
- hacksaw, hammer, scissors;
- ladder;
- marker, stationery knife;
- smooth and serrated spatulas, paint brush;
- screwdrivers, pliers, household stapler;
- self-tapping screws, nails;
- primer, antiseptic, flame retardant;
- membrane tissue;
- safety glasses and gloves, respirator.
Depending on the technology selected, the list may be expanded or shortened.