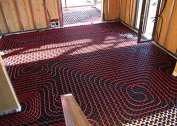
Studies of heat engineering indicators and practical measurements show that up to 25% of the heat in a private house is spent on heating the soil. It is uncomfortable to be in rooms with a cold coating. The problem is solved by mounting a warm floor on the ground floor. The arrangement is within the power of home masters, but there are nuances that are studied before work begins.
Purpose and features
The composition and characteristics of the soil, hydrological and meteorological conditions in different climatic zones, requirements for the design of the premises make homeowners think about arranging concrete floors on the ground floor of the house.
Building structure:
- prevents heat loss, saving money on energy bills;
- prevents the penetration of moisture and groundwater into the house, prevents the development of mold and fungus;
- serves as the basis for the topcoat;
- helps to quickly and evenly warm the entire volume of the room;
- isolates the building from extraneous noise in the low range emitted by passing vehicles.
The construction of floors on the ground with insulation should be taken responsibly - if there is a malfunction in the heating system, you will have to dismantle the concrete screed, which is an expensive and time-consuming procedure.
In an area with a high level of groundwater, improper technology will not protect the building from flooding the first floor.
For a warm floor, you need a margin of height in the room - the thickness of the floor cake on the ground with insulation reaches 35-50 cm.
Having decided to make a warm floor, proceed to calculations, procurement of materials and tools.
Materials and Tools
To equip the rough and finish screeds, heat and waterproofing, you will need:
- quarry or washed river sand;
- crushed stone or gravel with a fraction size of 20–40 mm;
- heat insulator - extruded or foamed polystyrene foam;
- material for steam and waterproofing;
- reinforcing mesh for finishing screed;
- brand cement from M-300;
- damping tape.
For the heating circuit, pipes made of metal-plastic, copper or cross-linked polypropylene are purchased. You will need a cabinet where you install distribution and control valves (manifold, cranes). Special fastening devices for laying pipes accelerate work.
Before starting work, prepare the tool:
- a concrete mixer or metal sheet for mixing the mortar manually;
- shovels, buckets, grouts;
- tape measure, bubble or laser level;
- drill or perforator;
- guides for leveling the floor - permanent or removable.
For compaction of soil, special devices are made or made of wood. Mechanical rammers with gasoline or electric engines can be rented.
Prepare a supply of water if the site does not have a centralized water supply.
The calculation of the necessary materials is carried out based on the geometric dimensions of the building and the thickness of the layers of the “pie”.
Layered underfloor heating
The requirements for durability impose special conditions on the arrangement of the foundation.
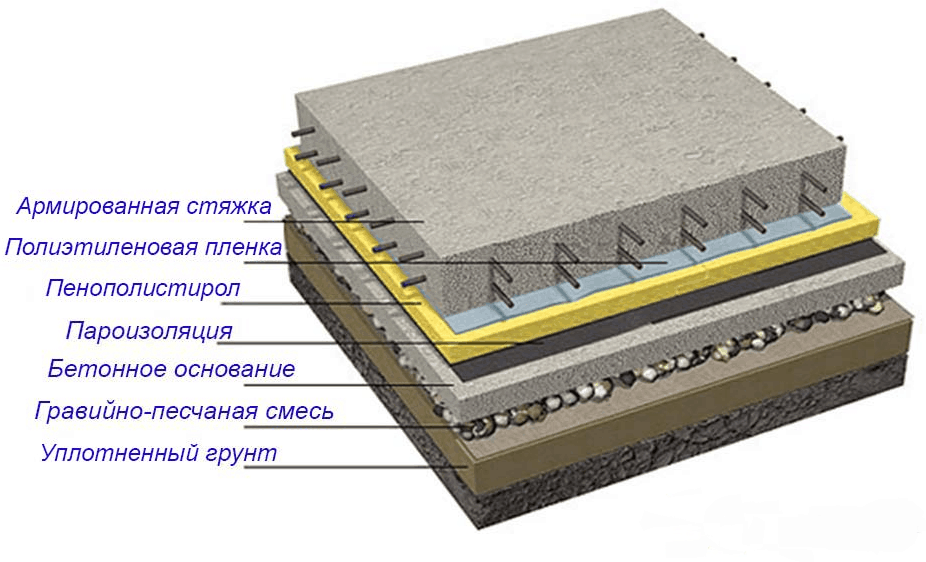
The ground floor cake includes the following layers:
- prepared soil base;
- sand;
- crushed stone or gravel;
- rough screed;
- waterproofing;
- insulation;
- reinforced finishing screed with pipes embedded in it;
- topcoat.
It is important to follow the installation procedure and technology.
Step-by-step instruction
The work of laying a warm water floor consists of the steps of preparing a soil surface, installing the base under a layer with heating pipes, laying and pouring heating elements and finishing the surface.
Ground preparation
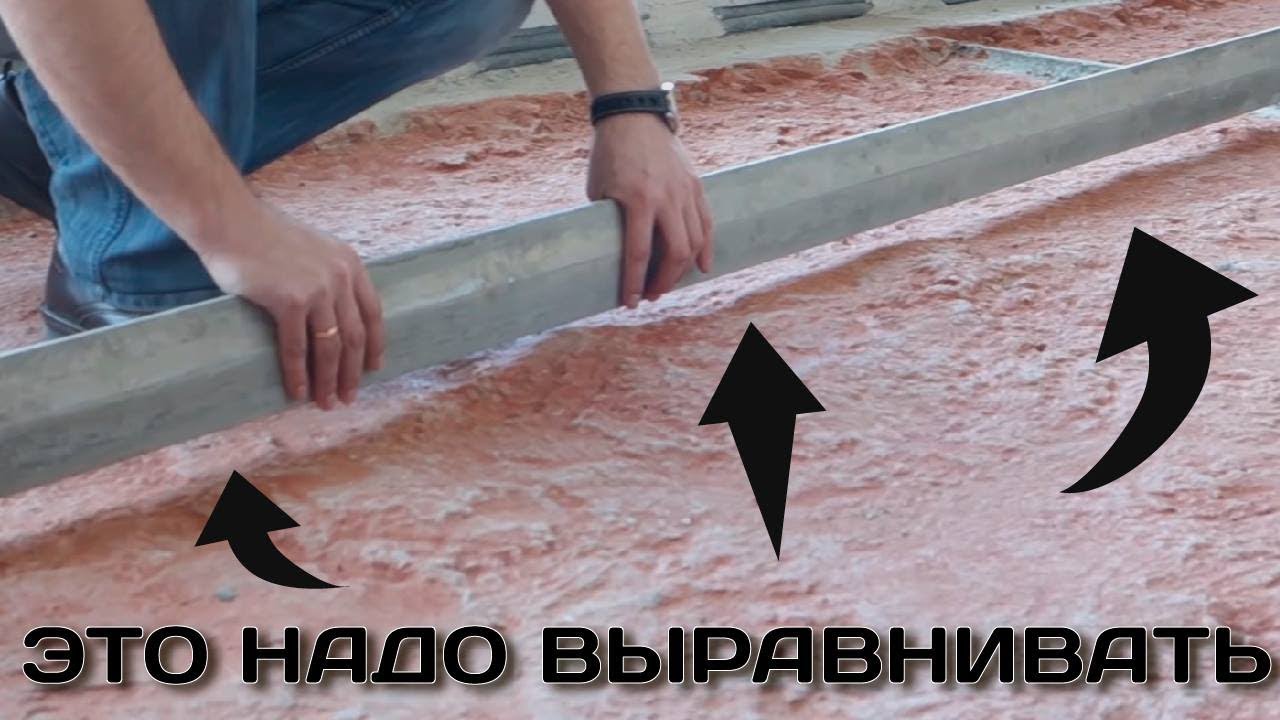 The first stage is the determination of the level of the future floor in all rooms with the application of marking lines or the installation of beacons. If it is planned to equip the underfloor heating in one separate room, the height of the finish must match the surface of the remaining rooms.
Partitioning starts from the front door. Using a level, draw horizontal lines on the walls - it will be convenient to measure the desired surface height from them when installing the cake. The horizontal surface is checked after laying each layer.
Alignment is carried out over the entire area, removing soil. The depth of the resulting “pit” should be 30–35 mm.
A layer of earth with organic matter is completely removed - in the process of decaying the remains of the vegetation, the floor sags and screed destruction can occur.
If you had to dig too deep, compensate for the lack of soil with sand.
When the groundwater is located close to the surface, a clay castle is made. To do this, greasy clay is soaked for 2-3 days in water. In the process, check the readiness of the material. Compressed in a fist mass should not fall apart. Clay is well kneaded and laid in a layer of 5-10 cm. The layer is rammed. After drying, they begin to arrange a rough screed under the warm floor on the ground.
An effective solution for areas with high groundwater may be the installation of a drainage system.
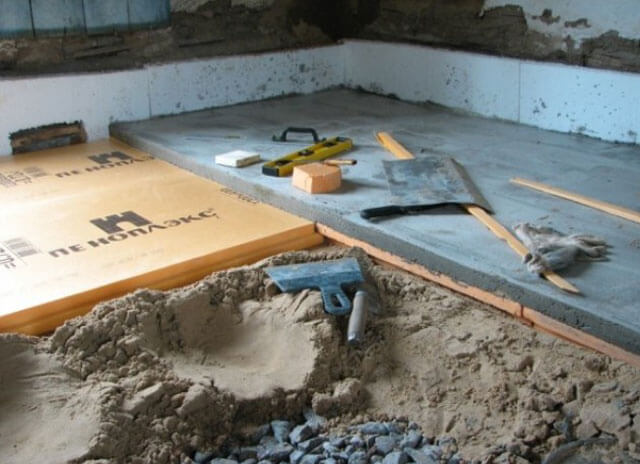
Installation of rough screed
A layer of sand 5–7 cm thick is poured onto the prepared base. The surface is shed with water and tamped. Use a tool from a block of wood with handles or a mechanized tool.
The next layer 30–50 mm thick is made of gravel. The material is compacted and compacted in the same way as sand.
If expanded clay is cheaper than crushed stone in the construction region, it is better to choose this material for backfilling - it will provide additional thermal insulation.
For rough screed use a cement-sand mixture of class B7.5 – B10. These indicators approximately correspond to concrete brands M100 – M150. To obtain a mixture with the indicated strength indicators, cement and sand are mixed. The proportions are shown in the table.
| Grade of solution | Cement grade | Proportion of cement: sand |
| M100 | 300 | 1:3,4 |
| 400 | 1:4,3 | |
| 500 | 1:5,3 | |
| M150 | 300 | 1:2,6 |
| 400 | 1:3,25 | |
| 500 | 1:3,9 |
To maintain the level, beacons are installed over the rubble. Depending on the experience with concrete and the speed with which the solution is prepared? the distance between the beacons is selected from 100 to 200 mm. The filling is carried out in stripes.
The subfloor should not have strong contact with the walls. Before pouring, a damping belt is mounted around the entire perimeter of the room. If the gap is not left, under temperature fluctuations, the screed may break from expansion.
Ready rough floor for 2 days periodically watered with water. Humidification intervals depend on temperature and humidity - it is important not to let the mixture dry completely. Should the surface be left without moisture? cracks will appear in the concrete, reducing the structural strength. In addition, the waterproofing ability of the screed will be lost.
Concrete gains full strength within 28 days, but work on the further construction of a warm floor can begin in 7-10 days, when the surface dries.
Waterproofing and insulation
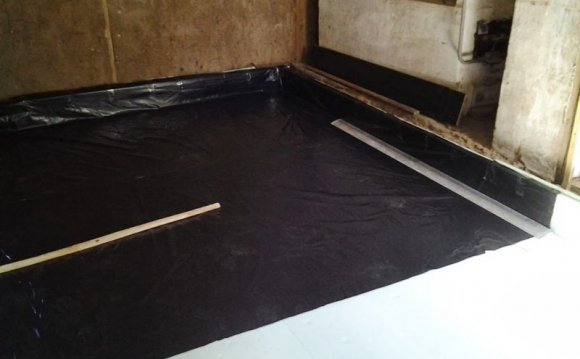
Waterproofing is laid over the rough screed. As a material, a thick polyethylene film, geotextile or roofing material is suitable. The layer is placed with the approach to the walls to a height of 10-15 cm. After completion of all work, the excess is cut with a knife. The purpose of waterproofing is to prevent the entry of groundwater into the room through the floor.Modern materials allow waterproofing. by coating or gluing roll materials.
Insulate the floor with expanded polystyrene. Extruded polystyrene is sold in the form of plates with curly ends. This allows you to lay the insulation tightly, without gaps. Polyfoam, or expanded polystyrene foam, is produced in the form of plates with smooth edges. Joints and seals are sealed with foam. The characteristics of the materials are very similar, but at the price of extruded polystyrene is one and a half times more expensive. To warm the floors, choose a foam with a density of at least 25 kg / m3 - this characteristic will allow you to walk carefully on the surface without damaging the coating. Styrofoam grades with a density below that are intended for wall insulation, it is easily destroyed by the load when walking or under the weight of the screed. The thickness of the insulation is 50–100 mm, depending on the climatic zone.
It is advisable to lay foil material on top of the insulation layer before installing the pipes - this will reduce the outflow of heat from the inside of the room into the ground.
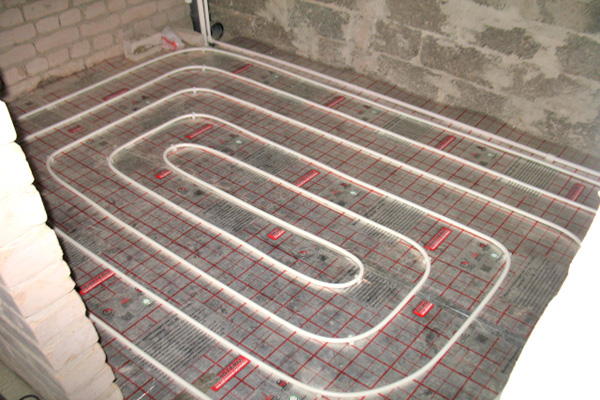
Pipe laying
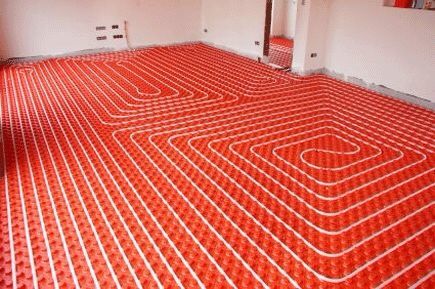
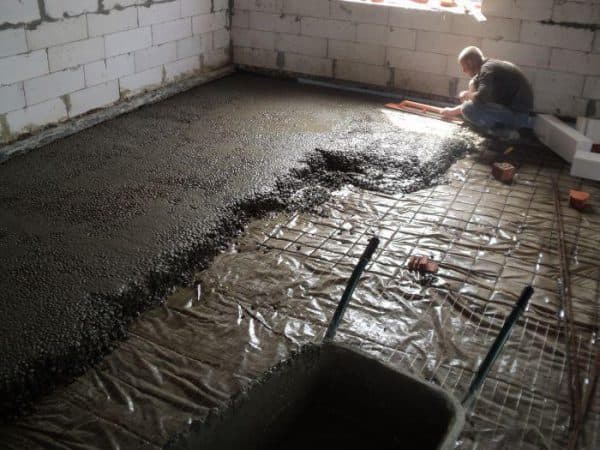
Reinforcing steel mesh is placed on top of the insulation. For laying use gaskets that will leave a gap between the insulation and the grid. Wire thickness from 3 mm, mesh size 50x50 mm.
Pipes are attached to the mesh cells or mounted in a rough screed with special anchors guides.
When laying out, they are guided by the general rules:
- along the walls the distance between the pipes is less than in the center of the room;
- the maximum contour length for pipes with a diameter of 16 mm is 100 m, for a diameter of 20 mm - 120 m.
- all sections should be intact, without joints;
- the ends of the pipes are displayed in the control cabinet;
- the collector should be located at the upper point of the contours;
After installation, a test run of the heating system and pressure testing are carried out. Identified leaks eliminate, if necessary, replace the circuit. Pouring the final screed is carried out after the coolant is completely cooled.
Use the brand of concrete M150. To simplify the work, plasticizing additives are added to the composition, which improve the adhesion of the solution to the grid and the pipe surface and simplify the leveling of the mixture. Be sure to install a damper gasket around the perimeter of the room. At the places where the pipes exit into the control cabinet, they are pasted over with the same damping material.
In rooms where a high quality surface preparation is required, a "self-leveling floor" is used. The finished mixture is diluted with water according to the instructions and poured over the final screed. In this way, a perfectly flat horizontal surface is achieved.
A full-fledged start of the heating system is carried out after 28 days if the final screed was made on the basis of cement mixtures. The same period is maintained after laying ceramic tiles on the floor.
Finish Options
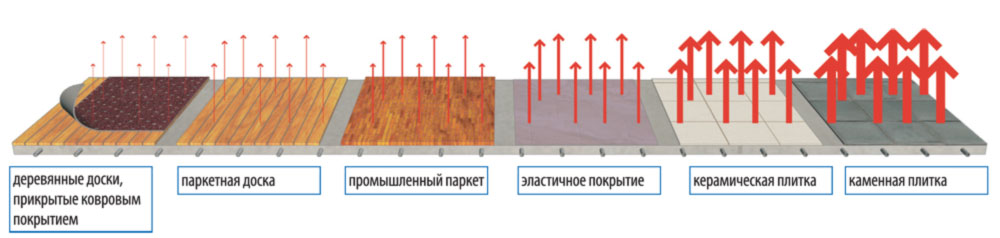
As a final finish, it is allowed to use floor coverings:
- laminate;
- linoleum;
- parquet board;
- porcelain tile or tile.
It should be noted that each of the materials has individual thermal conductivity. Most quickly, after starting the boiler, the tiled floor warms up, and the laminate is the worst to let heat pass through.
Do not use linoleum on pile lining for underfloor heating - the room will warm up for a long time, and heat will not penetrate the room through insulation easily.
Ground floor equipment on the ground is a labor-intensive process that can be performed independently, having the skills of general construction work. If necessary, and insecurity in their own strengths turn to specialized organizations. Spent effort, time and money pays off by saving on energy costs and comfortable conditions in the house.