The correct operation of the fireplace depends on the design of the furnace and the correct installation of the chimney. It is important to consider everything from calculating the cross section of a pipe to the nuances of thermal insulation. Only a well-made chimney will allow a good heating of the room.
The principles of the chimney
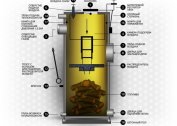
The chimney for the fireplace is a sealed shaft of a vertical, horizontal or inclined shape. It should be closely adjacent to the combustion chamber of the fireplace, stove or boiler.
The section of the chimney is:
- round;
- oval;
- rectangular;
- polygonal.
Each wiring diagram should be selected depending on the structure of the building and the type of fireplace.
The principle of operation of the chimney:
- the ignition of the fuel placed in the furnace starts the process of generating heat and smoke;
- the temperature of the combustion products is 500 degrees Celsius, they lose weight and rush towards the mine;
- cold air causes a convection process, increases traction, whereby the combustion products are discharged outward;
- oxygenated air supports fuel combustion.
The quality of home heating and the safety of residents depend on the correct construction of the chimney system.
Placement Methods
There are two methods for placing a fireplace chimney. Each of them has its own characteristics, advantages and disadvantages. The choice of method depends on the location of the fireplace, the free space in the house and the type of chimney itself.
Internal
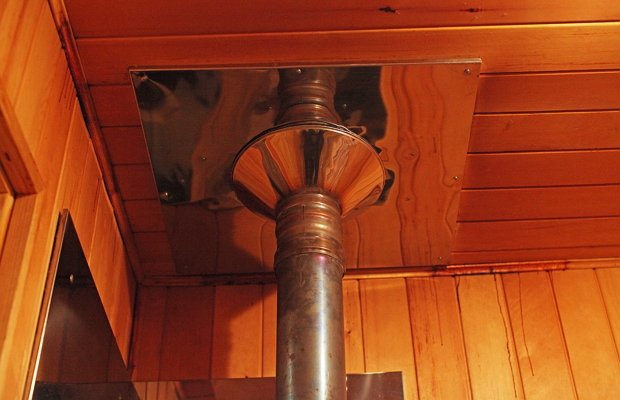
If the place for the chimney pipe is prepared on the roof, it is better to use the internal method of arranging the chimney. The mine will have a vertical shape, rising to the roof above the heater. A smoke exhaust system made of a material with good thermal conductivity will reduce heat loss in the room and reduce fuel consumption to maintain the required temperature.
The complexity of this method consists in the laborious process of tapping into the interfloor surface and the roof during the procedure for laying the chimney mine. Also, this method is considered quite fire hazardous.
It is recommended to place pipes near the partitions and internal walls, carry out sealing with roof cutting.
A significant plus of the internal location is the protection of the entire structure from temperature extremes in the winter season. The main disadvantage is the loss of area inside the house.
External
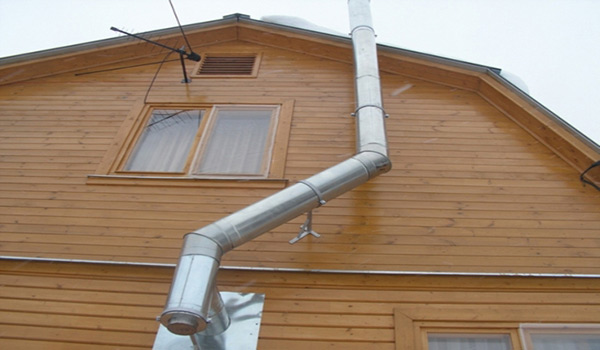
The method is not popular in Russia and is used only if it is necessary to install a heating unit in a private house that was not taken into account in the design.
The installation of the chimney by this method consists in removing the chimney through the wall that is adjacent to the fireplace, to the street. From the place where the conclusion was, the pipe rises to the height of the ridge and above. This provides better traction.
The outside of the pipe must be placed 0.5 m from the edge of the roof to reduce the risk of fire. It is also required to insulate the outer pipe, this will eliminate the accumulation of moisture from combustion products. Mounting to the wall is carried out by brackets.
Fireplaces in a house with an external installation of the chimney into the wall save space in the room by moving part of the chimney system outside the house. In addition, this method of placement is more rational in terms of fire safety.However, there is a minus: if you do not insulate the pipe, condensation will form, which will lead to a malfunction of the chimney system.
Types of chimneys for a fireplace
The construction of the chimney may differ in the material of manufacture, which to a greater extent is a decisive factor. Only after reviewing all types of material can you decide which chimney is best for the fireplace.
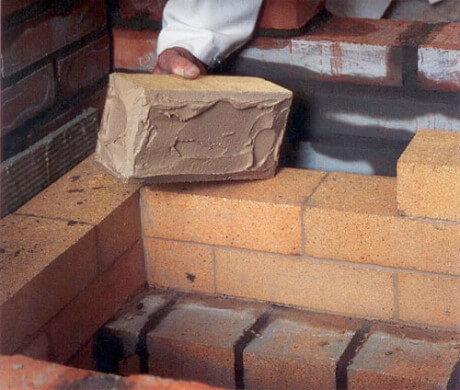
Brick
For the construction of the chimney system, chamotte solid brick is used, since it is more accessible and is a traditional material. It is fireproof and is capable of serving for many years with proper care.
Special requirements are imposed on the cement composition with which the brick is laid. The solution should include sand, cement and lime in a ratio of 5: 2: 1. Only such a solution can fully provide a compound that is sufficiently dense and resistant to heat. A support may be a supporting wall or plate.
Another important parameter is the smoothness of the inner pipe - the solution should not protrude from the seams inward.
The shape of the brick pipe under the fireplace should be square or rectangular. To strengthen it, it is better to use anchors, install them at a depth of at least 20 cm. To ensure that the pipe does not collapse, it is necessary to carry out the procedure for reinforcing its walls. Through every third row, the masonry is reinforced with reinforcement.
Steel

The chimney for the fireplace stove can be made of steel. The combustion temperature should not exceed 400 degrees. Such a system will be cheaper, it is much lighter than a brick chimney, so there is no need to make a foundation platform. The chimney made of steel will last from 15 to 20 years.
Steel chimneys are divided into two groups:
- sandwich pipes with insulating layer;
- simple pipe without thermal insulation.
The air duct is made in the form of a cylinder, which increases the draft of the fireplace. Soot and ash hardly settle on the pipe walls, which is also an advantage.
Ceramic
The material is able to withstand up to 1000 degrees, is not subject to the influence of chemical elements. The advantage of such a fireplace is its slow cooling, which will save fuel when heating the room. Smooth internal walls will not allow combustion residues to accumulate inside the chimney. The service life of the fireplace is from 30 years.
During installation, you will need a special mounting glue that seals the elements better, and a heat-insulating circuit made of heat-resistant material. A block of aerated concrete of a lightweight type, which is treated with a heat-insulating layer, can become such a contour.
The main disadvantage is the large weight, which requires the installation of a separate foundation.
Glass
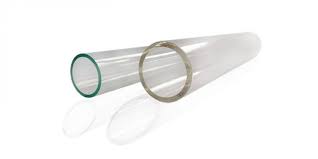
When installing a fireplace and installing a chimney, tempered glass can be used. Such a fireplace is absolutely not susceptible to chemicals and has smooth walls, so the combustion products do not clog the mine. However, it is better to regularly wash visible areas so that the glass does not lose its attractiveness.
The most difficult part when installing a glass chimney is to ensure the tightness of the joints. Glass also collects condensate, therefore, work is needed to insulate the circuit. Such a fireplace is more expensive than others.
Selection requirements
The rules for installing fireplaces and its components are regulated by standards:
- SNiP II 35 / 2.04.05-91 / 2.01.01-82;
- DBN V.2.5-20-2001 and NPB 252-98;
- GOST 9817-95, etc.
In them you can see the main nuances and features of the installation of heating equipment.
Chimney size calculation

To calculate you need to know:
- fuel characteristics;
- boiler characteristics;
- gas lifting speed;
- amount of fuel burned;
- the shape of the chimney.
Calculated by the formula V = (B * V * (1 + t / 273)) / 3600 m³ / swhere V - the amount of air required for combustion of 1 kg of fuel, B - mass of firewood burning in an hour, t - temperature of the outgoing gases. The result is rounded up.
Assembly and installation of the chimney
When assembling a chimney pipe, you must adhere to the following instructions:
- you need to start from the bottom up after fixing the firebox;
- seams should be tightly sealed;
- pipe elements are connected to each other;
- the pipe is mounted on the pipe and fixed with a clamp;
- in the lower part, an element is mounted that holds the pipe when the temperature changes;
- in the roofing part, the pipe is crimped with a clamp and reinforced with rivets;
- a metal corner is placed in the overlap hole, a pipe is placed in it.
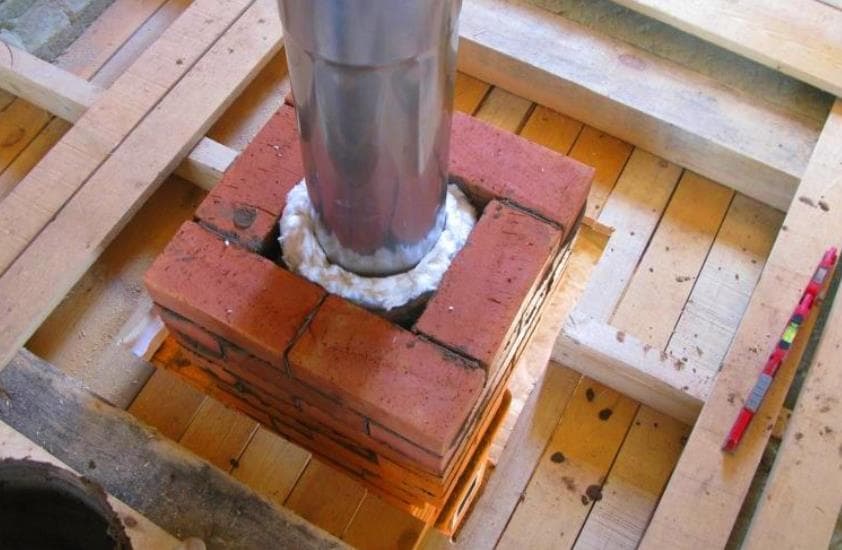
After installation, you can make a brick cladding and insulate the pipe. A visor can be installed on the upper part, this will protect the chimney from moisture and clogging.
DIY chimney construction
You can build a chimney system yourself. In this case, two types of material are used - brick and steel.
Stainless steel
When installing a stainless steel chimney pipe, it is recommended to follow the following instructions.
- The steel pipe is put on a branch pipe. It needs to go in the direction of the smoke.
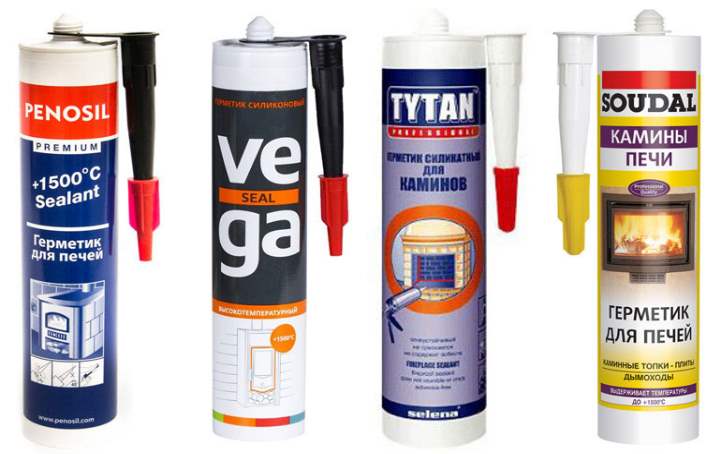
- The gate covering the channel is installed. Joints need to be greased with sealant.
- A chimney of a sandwich type is put on the design. Other metal rolling products are installed on it.
- All pipe elements are assembled, and metal-rolling material is clasped by clamps.
- The pipe is passed through the roof. Thus it is necessary to use overlays - an apron and a conical crisis. The final part is equipped with a cone.
After this, the process is considered completed, you can load fuel into the heater.
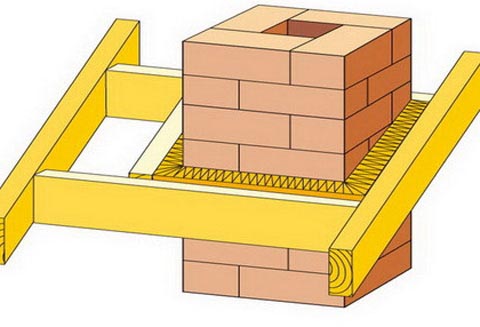
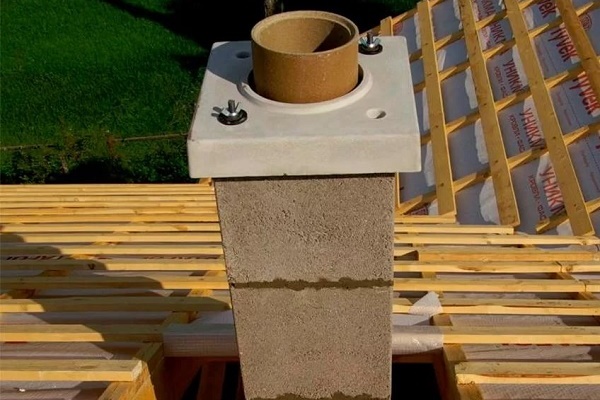
Made of bricks
Building a chimney system of brick:
- Masonry starts from the bottom, from the stove. Each row is checked by level.
- The installation location of the gate is secured by a frame.
- Masonry continues until the beginning of the construction of plowing. Plowing should fit well to the beams of the ceiling.
- After plowing, you need to go to the size of the chimney, pulling it to the roof.
- An otter is laid out on the bottom of the roof. For stability, steel plates can be embedded in it.
- The head is laid. The outer perimeter of the pipe increases by a quarter of the brick. A protective cap is put on top.
It takes 2-3 days to dry, after which you can melt the oven.