Most apartment buildings of the Soviet period have a network capacity not designed for modern electrical appliances. Old wiring in apartments wears out, causing short circuits and fires. Often, replacing the wiring with your own hands in Khrushchev coincides with a major overhaul. Before starting work, it is worth considering replacement options, technical requirements, choosing the installation method and calculating the network capacity.
Full and partial replacement
According to standards, until 1991, the flap of the apartment was supposed to have a power of 3.5 kW. In modern conditions, various electrical appliances are used, so the power is no longer enough. There are two ways to change the electrical network.
Features and cons of partial replacement
A complete replacement of hidden electrical wiring in an apartment in Khrushchev is accompanied by noise, which can interfere with the calmness of neighbors. The complexity of the work of removing the cable from all the walls is within the power of a few owners. If the Soviet aluminum wire is in good condition, you can partially replace the communications. In the process, it is important to consider such points:
- a new 7 kW input circuit breaker is installed to protect against short circuits and power failure;
- sockets designed for a load of 10-15 A must be grounded;
- For laying, an insulated copper wire is used with a current exposure of 2 to 5 A per mm2.
 Copper and aluminum are not galvanically compatible
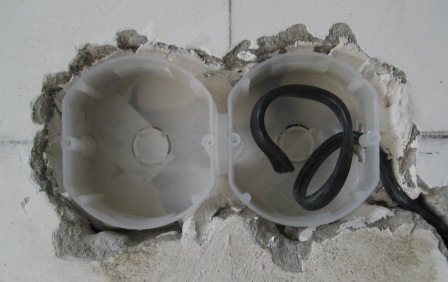
The disadvantages of a partial replacement include the electrochemical incompatibility of copper and aluminum wires, the mismatch of the power cable cross-section of modern household appliances. Often there is not enough space in the little old boxes, and reconnecting brittle aluminum cables requires certain skills.
Partially, it is worth replacing only open lines.
When a complete replacement is required
Overhaul with the dismantling of the floor covering, a radical alteration of the walls provides for a complete replacement of communications. It is completely necessary to change the wiring in the following cases:
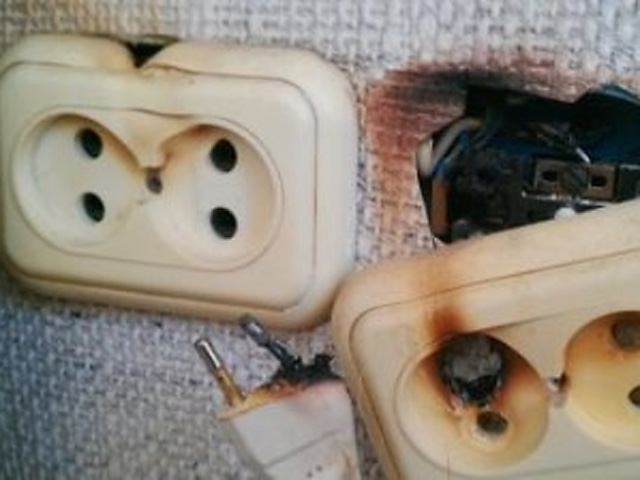
- when the household appliances are turned on at once, the smell of burning appears;
- sockets spark when appliances turn on;
- some outlets lack power;
- leakage of current through the wall;
- wires break, become less flexible.
Complete replacement of wiring is carried out 1 time in 20-25 years.
Problems with old houses
The construction of the Khrushchev was in 1958-1985. as part of urbanization. Power lines in them differ depending on the series of buildings:
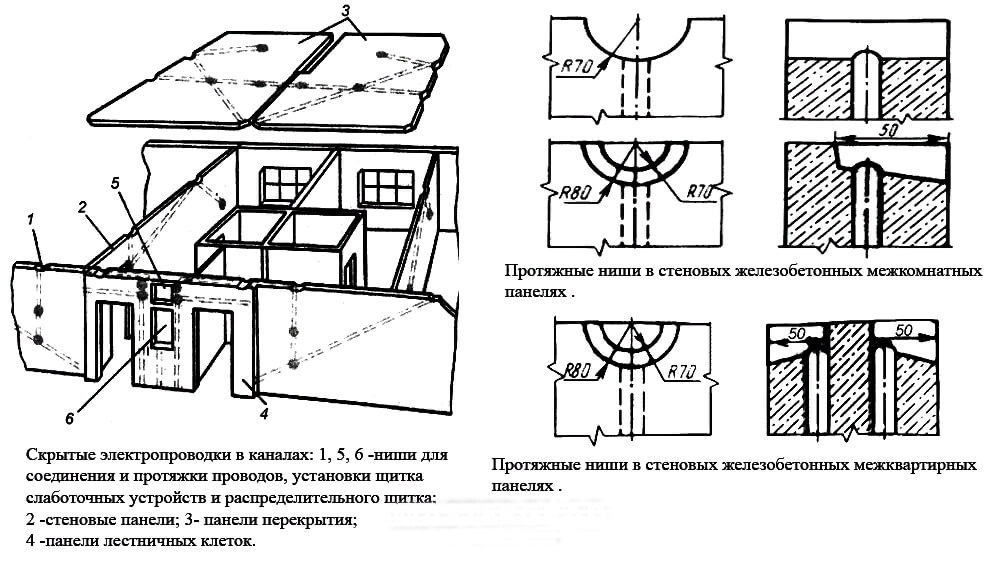
- Buildings from the period of 1963 - places for the junction box, gating, connection of wires remained at the discretion of the electrician;
- Panel houses of 1965 - wire routing and hidden laying were carried out in the channels of panel slabs;
- High-rise buildings of 1974 - relate to standard construction according to the requirements of the Unified catalog of building parts. For reasons of poor quality, the wiring in the slabs was laid in niches under the floor of the upper floors, leading the cables through the through-wall ceiling slab.
In the 60s - 70s. they did not expect such a number of electrical appliances, so the network withstood a maximum load of 3.5 kW. The total power of a modern kettle and iron is 4 kW.
The wiring diagram in Khrushchev’s two-room standard layout included several lamps, an iron, and a radio receiver. The aluminum cable, popular during the time of Khrushchev, also had disadvantages:
- over time, it cracked with slight bends;
- demanded a complete replacement 1 time in 20 years;
- subjected to electrocorrosion under stress, which became the cause of fires.
In 1960-1980 It was customary to ground the power line according to the scheme with a dullly grounded neutral. At the end of the twentieth century, the Russian Federation adopted the TN-C-S scheme, which Khrushchev did not correspond to.
Twisted wires and uninsulated sections due to the use of the branching method provide for the complete replacement of an aluminum cable with a copper one.
Where to start wiring replacement
At the preparatory stage, a plan is drawn up for a new wiring in a two-room apartment. It is agreed in BTI and Energosbyt. Preparation also includes:
- Visual inspection of the line for visible damage.
- Drawing up a drawing with the electrical systems of the whole house.
- Purchase of consumables - sockets, cables, switches, boxes.
- Search for the necessary tools - punch, grinder, indicator, side cutters, level, flashlight, mounting knife, pliers, soldering iron, fabric tape.
Buy wire with allowances after measuring the length of the track.
Power calculation

It is necessary to replace the electrician so that in the future there are no failures and overvoltages of the network. The power of the line is selected taking into account all the electrical equipment and depends on the cable cross-section. It will take a few calculations:
- Summarize the capacities of all equipment connected to the mains.
- Add +100 watts to each fixture.
- Divide the total by 220.
If the result is 12-15, it is allowed to use a cable with a cross section of 1.5 mm2. For a standard layout apartment, this is enough.
When there is a large load on the line, it is allowed to increase the cable cross-section, to arrange communications in a two-wire or three-wire circuit.
There are risks of malfunctioning when using thick wire.
Apartment power plan
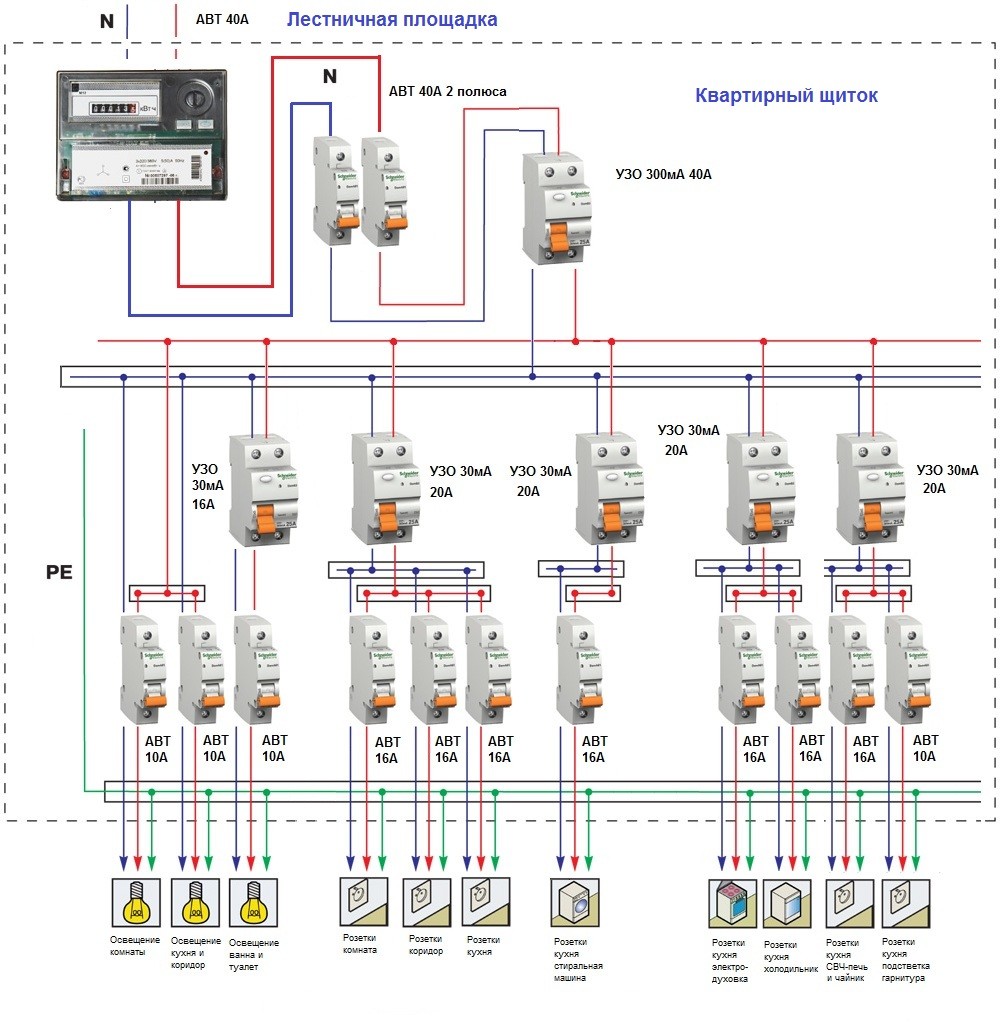
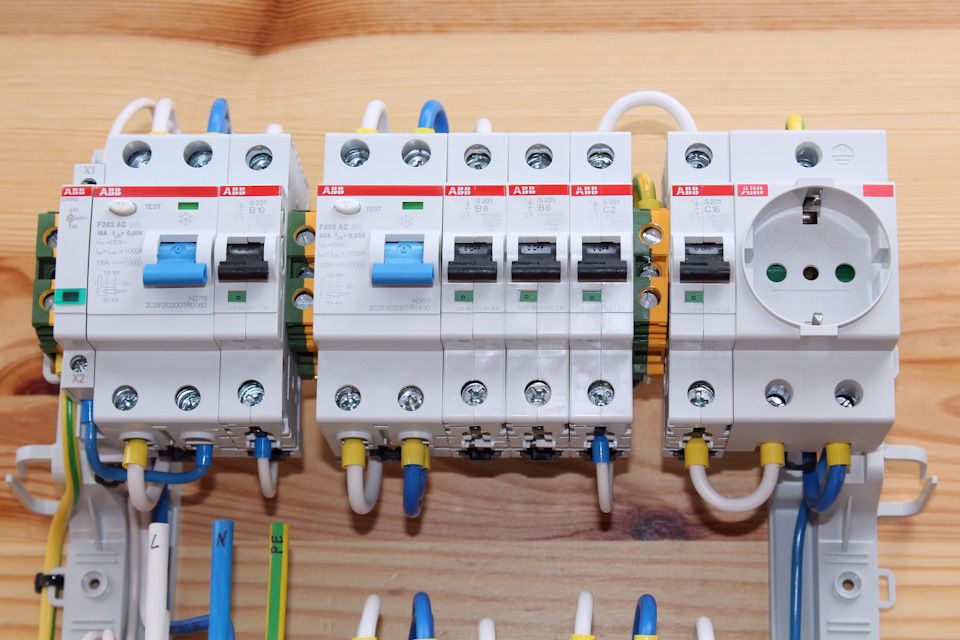
In old houses on each floor there is an electric switchboard, where there is a meter, a packet switch, circuit breakers. Therefore, when the wiring diagram is designed in a two-room apartment, it is worth making an independent power and lighting circuit, planning the main and additional branches. In Khrushchev, the following connection options are allowed:
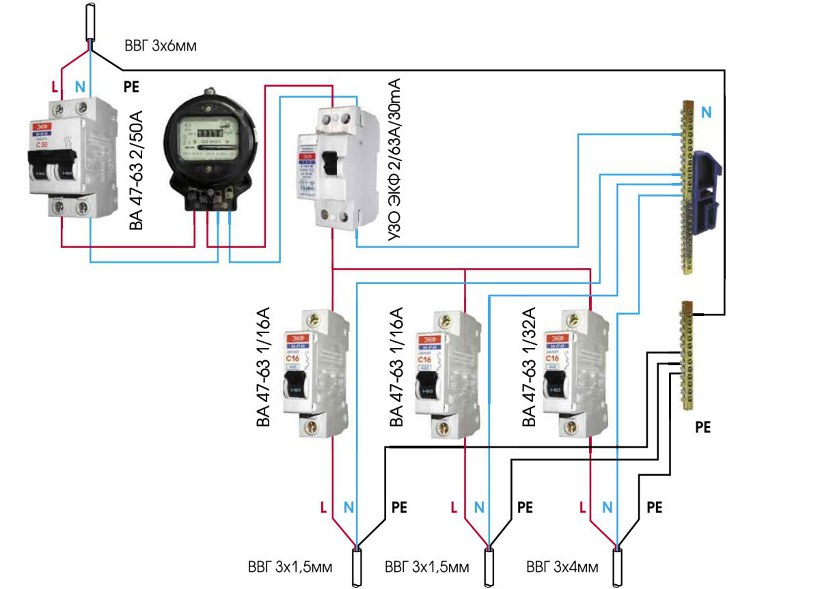
- Parallel - energy is supplied to the consumer from a power source through its own line. A three-core cable is brought to a single-phase device, a five-core cable with wires of phases A, B, C, zero and earth is connected to a three-phase device. A similar scheme provides for the organization of an individual line for each consumer and the installation of an individual RCD.
- Serial - a cable is drawn from one power source, and the consumer is connected to it at a certain distance. To implement the scheme, you will need a wire with a large cross section and gates in the walls. The energy source will be a generator issuing a nominal value of 220 V. To save money, you can stretch the electric cable from the shield to a specific consumer.
- Series-parallel - the scheme is used in most apartments. The distribution box is designed for consumers grouped by type (boiler, sockets, lights) or location (kitchen, bedroom, bathroom).
Serial-parallel connection is the best option for a budget complete replacement of the power grid.
Features of installation in Khrushchev
The selected wiring diagram for laying in Khrushchev’s standard two-room layout is based on consumer groups. These include lighting devices, household and power outlets, a bathroom and a corridor. The arrangement is carried out using two technologies.
Hidden way
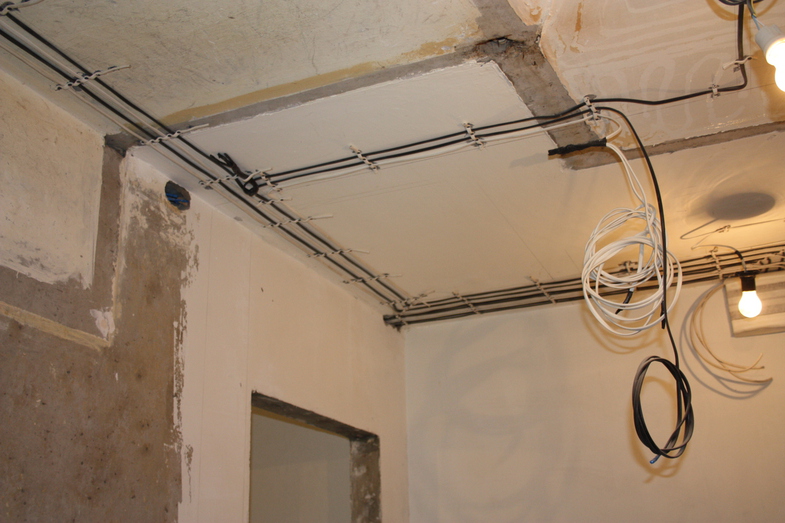
In brick or panel houses, it is allowed to lay wires in three ways:
- Inside the ceiling - the path from the switchboard goes vertically, runs through the gates or in the corrugation. Indoor ceiling slabs already have channels from where you can extend the power cables to the lamps, switches, sockets. The wiring is perpendicular, not falling horizontally below 15 cm. Each distribution box has its own automatic machine.
- Under the plaster - the wires are led into the holes drilled in advance, fixed, displayed to the consumers. The lines are masked by a layer of plaster, which prevents their damage from voltage fluctuations.
- Under the floor - the highway is held under the floor surface. Pipe channels are laid, which are then poured with mortar. The lines for outlets and lighting are masked by a mounting box or pipe.
When combined, the pipes and cables are distributed at an acute angle. The routes are connected by means of a distribution box to the input shield.
Open way

An open version is used when it is impossible to organize the power grid in another way. There are several methods:
- On brackets - for sockets, copper wires with a cross section of 2.5 mm2 are needed, for lighting - 1.5 mm2. Metal strips are used as staples, fixing them so that the non-combustible part extends beyond the trunk by 1 cm.
- In pipes - corrugated flexible products exclude surface leveling. The diameter of the pipe is equal to the total thickness of the conductors, multiplied by 2. Fastening is done on screws, clips, dowels and nails. Each element is removed from each other by 20-40 cm.
- In the boxes - a metal or plastic cable channel and the baseboard is equipped with a removable lid on the latch. The main difficulty of the work is the correct fastening to screws, dowels or staples. Sockets can be mounted directly on the box.
If the apartment has a retro interior, the wires can not be masked.
What tools will be needed
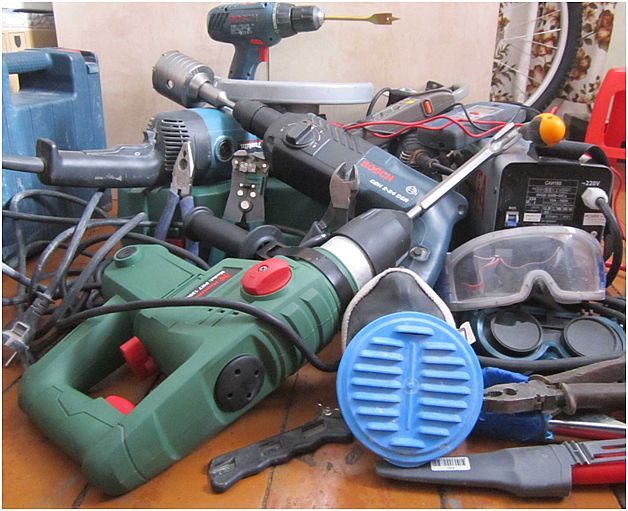
Self-replacement of wiring is carried out using the following tools:
- hammer drill;
- a drill bit for concrete, a drill bit for concrete (16-20 mm), a core drill (90-100 mm);
- bit 25-30 mm;
- 40 W soldering iron;
- grinder with a disk for a stone;
- screwdrivers;
- pliers;
- side cutters;
- phase indicator;
- tester;
- cord and level;
- Lantern;
- stationery knife;
- putty knife.
Before work, it is important to calculate the number of wires - measure the length from the shield to the connection point, taking into account the protrusions, niches and angles.
Wiring Replacement Instructions
At the preparatory stage, a visual inspection and a connection quality check are required. Further operations are performed according to an algorithm developed by professional electricians.
Blackout
To gain access to the system and not get shocked, you will need:
- Turn off the main machine, from which the cables go to the apartment.
- Check for voltage.
- Disconnect each wire by first checking with a phase indicator.
- Test voltage switches and sockets.
Old wiring without damage can be left in place.
Removing old wires
Wiring is dismantled after a complete shutdown of electricity. This can be clarified with a multimeter.
First, local dismantling is carried out from the distribution box under the ceiling. It is opened, the input cable is found and removed. If the wire does not stretch, it is cut away, and then insulated. Further work is done in a similar way.
Surface preparation
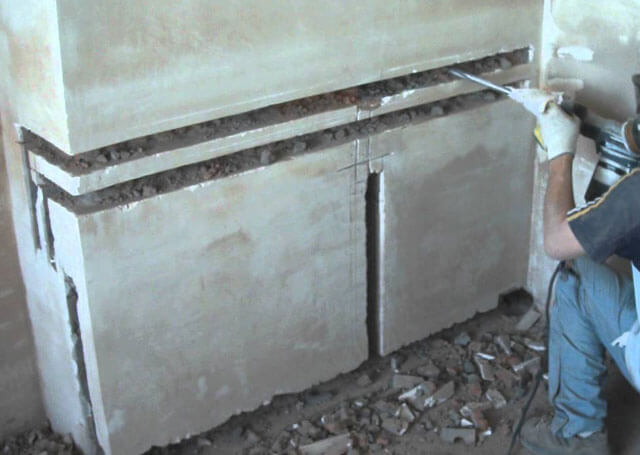
Wall chasing is possible horizontally or vertically.
- Marking the location of the sockets according to the drawings.
- Marking places for sockets with the ability to mask the cord.
- Accurate determination of the boundaries of the channels with a puncher.
- Manual alignment of holes with a chisel.
- Making an oblique cut with a grinder for an even arrangement of wires.
- Making holes in a brick wall with a crown worn on a perforator.
Curved grooves often cause kinks and cable fires.
Earthing line
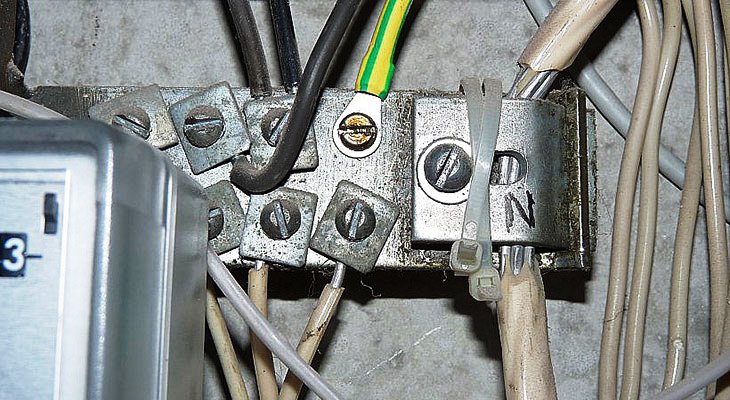
The device of the protective line in the buildings of the period of 1960-1980. was not provided. To solve the problem of where to get grounding in Khrushchev, you will need to do the grounding:
- Connect the ground contact in the socket to zero.
- Bring the structure to the shield from the outside.
A connection in which the input circuit breaker turns on “zero” at the time of operation of the current protection is prohibited by the regulations.
Installation
Installation of a new power line is carried out in stages:
- Installation of podrozetniki on alabaster in the hole.
- Cutting the cable and corrugated pipe to the desired length.
- Pulling the wire inside the corrugation on a flat surface.
- Laying the corrugations in the gate with the factory ends of the cable in the socket.
- Alignment of the hole along the line of the wall.
- Putty strobes in small pieces, every 50 cm.
- Plant the second end of the corrugation onto the input shield.
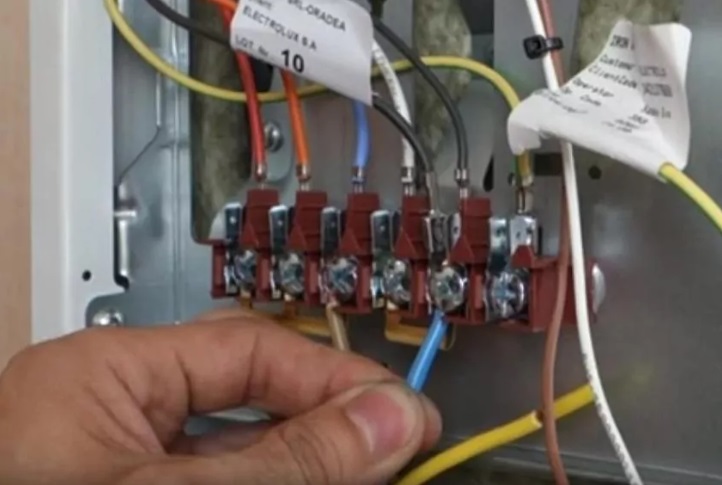
- Processing the ends of the wires with paste, fastening with a clamp and fixing it to the shield terminal.
Housing wiring in the shield on the weight.
Checking and plastering
Testing the finished system is as follows:
- Electricity is turned off, current is supplied.
- Each branch of the cable is checked by a tester for a short circuit. For this, the indicator is zero and phase.
- Conclusion of wires to the corresponding terminals.
- Retest for short circuit.
- Turning on the main machine, supplying electricity.
Be sure to look at how lamps, switches, sockets work.
At the last stage, a primer is applied to the surface of the wall, then a layer of plaster and finish.
The independent replacement of the electric line in Khrushchev is complicated by old wires, an incomprehensible wiring diagram, and the absence of grounding. For this reason, you should adhere to the exact sequence of work, draw up detailed drawings and consult with specialists.