LED lamps are very popular among individuals and in organizations of all forms of ownership. The products are distinguished by good brightness, a range of luminosity pleasant to the eyes, and resistance to dampness and drops. Mass production led to lower prices and product quality. Burnout of diodes happens much more often than we would like. At the same time, the cost of production is tangible enough to cause annoyance when the product breaks down. There is a way out of the situation, since LED bulbs can be repaired with your own hands, with minimal knowledge and skills in this area.
LED lamp device
LED lamp is a prefabricated device consisting of electronic and mechanical parts, components and mechanisms. The principle of operation is designed to change the parameters of materials under the influence of electric current.
The LED lamp consists of the following fragments:
- Base - for connecting to a 220 V household network. Cylinders of size E 14 and E 27 are used.
- Body. Made of heat-resistant plastic. Serves for placing an electrical circuit.
- Dielectric layer between the base and the housing.
- Driver. An electronic unit designed to stabilize the input signal to operating parameters at which crystals can function.
- Crystals. They emit a glow when an electric current passes through them.
- Radiator. Designed for receiving and removing excess heat from the heating parts located on the board.
- Cap. Serves for uniform dispersion of the light flux that the diodes emit.
 The principle of operation is that the voltage through the base is supplied to the driver, which converts alternating current into direct current. Depending on the set parameters, the frequency can increase to 100 Hz (the chandelier will light up brightly and evenly) or decrease (the lamp will blink).
The termination of the glow indicates a breakdown of one of the elements of the circuit. To fix the LED bulb, you need to unscrew it from the cartridge, open, diagnose and replace the defective element.
Driver schemes and their principle of operation
 The crystals located in the flask are powered by low voltage direct current. Diodes can operate in a certain range, which creates an integrated converter.
The device performs the following tasks:
- rectification of electricity;
- lowering it to a given value;
- voltage stabilization;
- protection against electromagnetic radiation;
- pulse smoothing.
Depending on the design, the drivers are divided into the following categories:
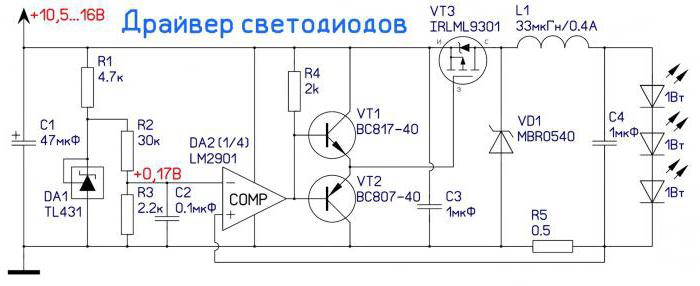
- With current stabilization. The device operates on the principle of pulse-width modulation, creating a smooth and uniform signal that provides high-quality and long-lasting crystal service. Products are characterized by high efficiency, the ability to convert current of any voltage, and a wide temperature range of operation. The basis of the device is a chip that connects directly to the network. It has found application in lamps that are used for street lighting and in fire alarm systems.
- With voltage stabilization. The basis of the block is an electronic chip, which is responsible for the exact boundaries of the output signal. Due to this, the risk of lamp burning due to peak loads is eliminated and an even glow is achieved. The downside is the high cost of the product.
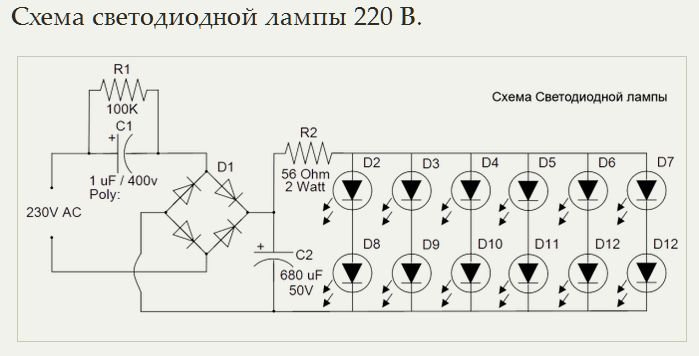
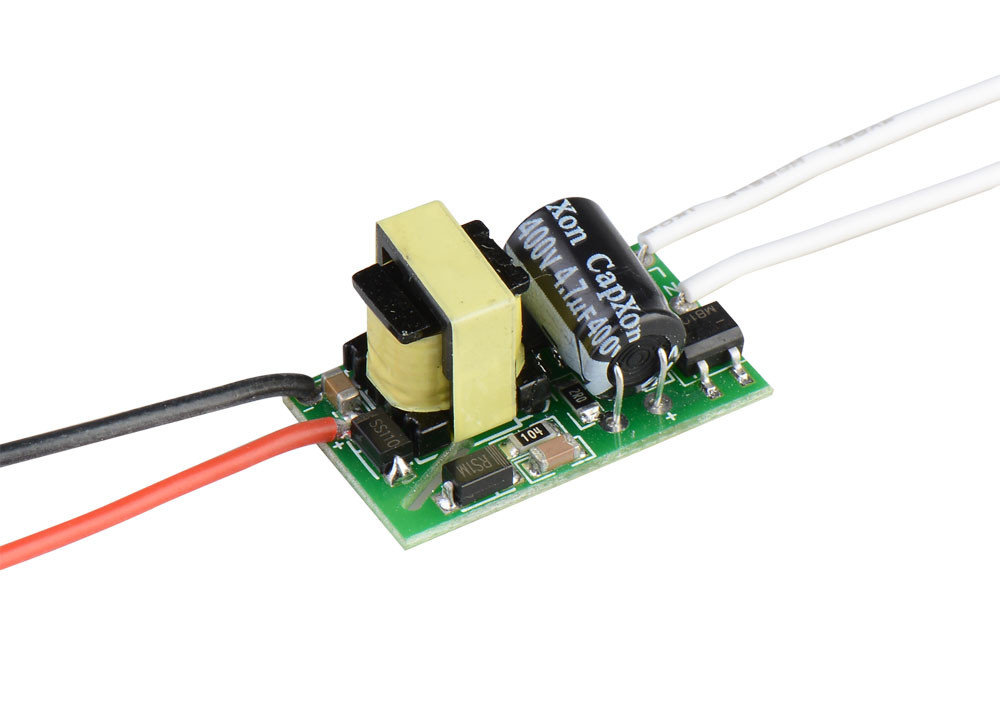
- Without stabilization.The node is mounted on the board and has a fairly simple device, which affects the final price of the goods. The converter, resistor and capacitors protect the crystals from network interference, short circuit, smooth the ripple and rectify the current. The advantage is the ease of repair of LED lamps and the variability of the output signal. The disadvantage is that the device converts the input signal without stabilizing it, which leads to the combustion of diodes. Such models are used in the production of low-power lamps, used to illuminate surfaces and objects.
When buying, you need to check with the seller about the ability to disassemble the LED bulb for its repair or modernization.
Reasons for lamp failure

Evidence of product failure is the emitted dim light or its complete absence. Manufacturers guarantee up to 8 years of lamp operation, subject to the operating conditions that are prescribed in the instructions. Some products can withstand this period of time, but about half of each batch breaks during the first year.
The reasons for this are:
- Critically high incoming voltage. Even high-quality protection, if it does not burn out, will produce a distorted signal, as it is designed for a certain current range. With frequent power surges, equipment wear is much faster.
- Incorrectly selected ceiling chandelier. Despite the fact that the LEDs for the 220 V lamp emit little heat, in small indoor shades they overheat and quickly fail. The same can be said about condensers drying out from high temperature.
- Use in the manufacture of substandard components. In order to reduce the competitiveness of their products, most manufacturers use low-quality parts with a limited resource.
- Violation of the rules of transportation and storage. From shock, the technical properties of the products change. A cracked flask can cause moisture to enter the enclosure and cause a short circuit. From severe overheating and cooling, the operating parameters of capacitors and microcircuits are violated. Long exposure to the sun leads to cracks in the plastic.
- Non-compliance with design rules. If the wiring is made with thin wires, they will warm on the contacts. Excess heat will be transferred to parts that may burn out within a few days.
To extend the life of the LEDs, you should change the wiring, check the parameters of the incoming current and take measures to stabilize it. The best solution is to install a dimmer switch. This device regulates the lamp power, preventing it from oscillating to dangerous limits. In addition, it is not recommended to buy cheap goods that break quickly even in ideal conditions.
LED bulb repair example
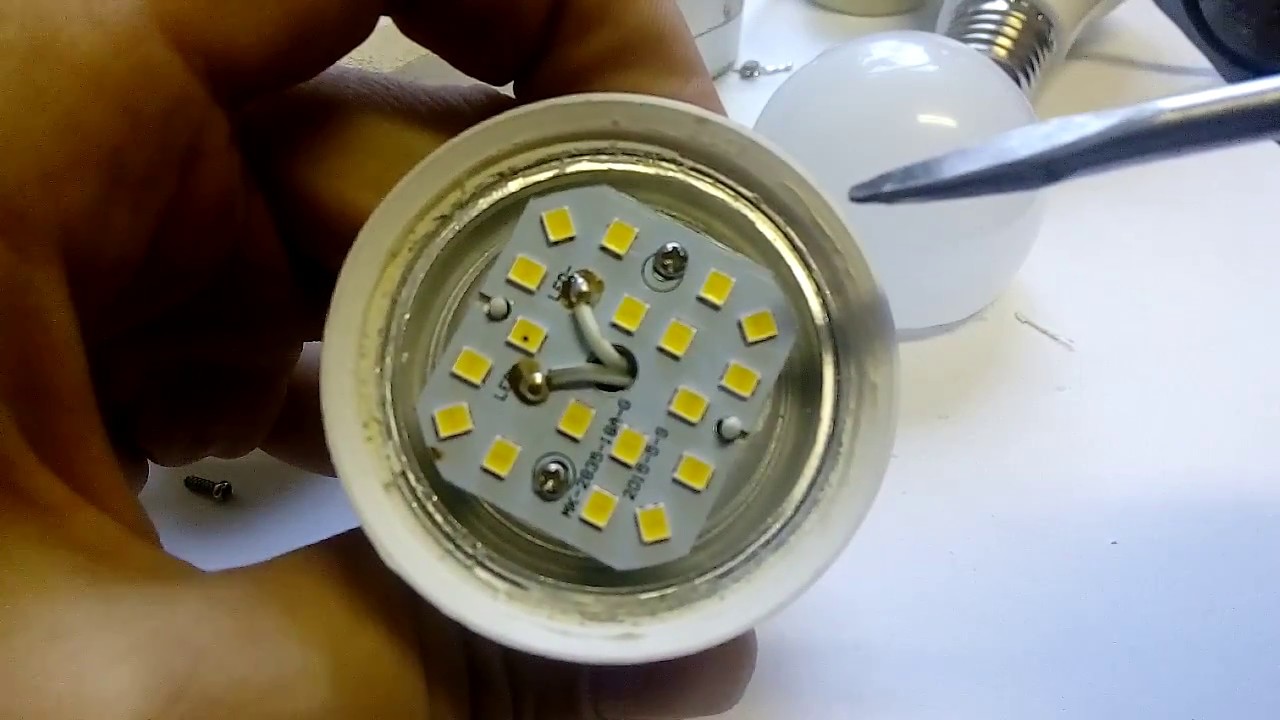
Most products use 6-8 crystals installed in series or in parallel. You can find out which LEDs are used in 220 V lamps in specialized stores. The cost of one crystal is several times less, so it makes sense to spend time and restore the efficiency of the whole product. Another option for the purchase of consumables is the use of another previously burned out lamp. In it, only 1 diode failed, and the rest can be used to restore the functionality of other devices.
To repair an LED lamp, you will need such tools and materials:
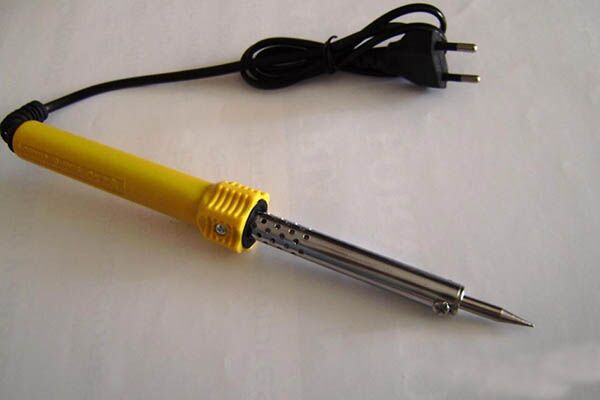
- a soldering iron with a thin sting;
- tin or solder;
- rosin;
- soldering acid;
- tweezers;
- surgical clamp;
- holder for fixing the board;
- portable gas burner or lighter with turbo mode.
Repair a damaged bulb in safety glasses and gloves.In order not to spoil the countertop, it is recommended to put a piece of plywood on it.
To gain access to the inside of the device, you need to disconnect the diffusion cap from the housing. Its fastening in different models is carried out on thread, glue or silicone. If in the first case, disassembly is simple - just turn the cap counterclockwise and remove it from the thread, then you will have to work with glue. To open the device, you need to pour a small amount of acetone into the gap between the flask and the body. If the composition does not immediately dissolve, attempts are repeated until the desired result is achieved. To melt the silicone at the junction, you can use heat. To do this, use a regular household hair dryer. It must be ensured that the plastic does not melt.
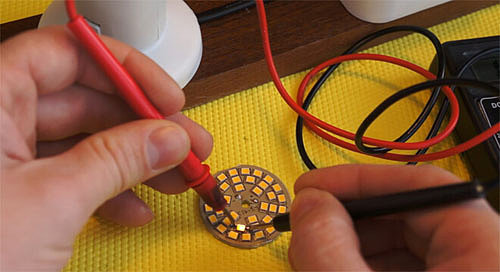
Do-it-yourself LED lamp repair for 220 V begins with a troubleshooting. First, a visual inspection of the boards on which the crystals and driver parts are mounted is carried out. Blackening at the point of contact may indicate damage. If these symptoms are absent, you should use a tester and ring all the connections. Lack of circuit will indicate a faulty element. After that, you can begin to fix the problem.
Driver Repair
If the converter breaks down, it must first be removed from the housing and secured in the holder. The wires are disconnected with a soldering iron, they must first be marked or photographed so as not to be confused during assembly. After that, the operability of all parts that are placed on the board is checked.
If a microcircuit burns out, it detaches completely. The product is captured by tweezers, the soldering spot is heated on the back of the board. When the tin melts, the terminals of the chip easily exit the holes. Replace in the reverse order. If the solder is not enough, it is added with a soldering iron. This must be done carefully so as not to catch neighboring jumpers. To prevent this, the surface of the board near the solder is coated with heat-resistant varnish.
When the driver consists of a chain of resistors, capacitors and rectifiers, you must first conduct an external inspection of the board. Failure is indicated by blackening on the parts or their swelling. If there are no such signs, you will have to unsolder and check each element. You need to do this one at a time, so as not to break the chain by mistake. It is better immediately after the diagnosis to insert the serviceable element back and solder.
The defective part is replaced by an analog. You can save time and money by using a working resistor or capacitor from the donor lamp in which the crystal flew.
Another solution to the problem is the purchase of several drivers whose characteristics correspond to the diode bridge. To replace them, you need to re-solder 4 connecting wiring, and then put the cap in place.
LED Replacement
If the cause of the lamp failure is a burned-out diode, it is replaced with a working part. This procedure should be performed in the following sequence:
- Turn on the soldering iron after laying it on a non-combustible stand.
- Mark where the plus and minus wires are. Disconnect the crystal strip from the housing. This is done using a soldering iron by melting the contacts.
- Clamp the board in the holder. Grab the defective crystal with tweezers or a surgical clamp.
- Bring the soldering iron to the contacts on the back of the part. At the same time, pull the diode away from the base.
- Separate the burnt part. In the same way, remove the working crystal from the donor board.
- Clean the scale from the place on the radiator where the burned diode was located.
- Prepare a working part for installation. To do this, its contacts are adjusted in width to the holes on the board, after which they are processed with rosin and tin.
- Insert a new element with the contacts into the holes.Care must be taken to observe polarity.
- Bring a soldering iron with a drop of solder to each wire and fix them on the base.
- Treat the soldering area with varnish to protect against corrosion.
- Restore a layer of heat-conducting paste. Install the board on the radiator.
- Solder the wires to the contacts.
- Check the performance of the product by attaching it to a carry or a table lamp with a switch. If you encounter problems, carry out further work by replacing diodes or driver parts.
- Glue the cap to the base. To do this, it is better to use silicone glue. You can use the repaired product in a couple of hours.
In the absence of a soldering station and a hairdryer, you can use a lighter with a turbo mode. To perform fine work, its flame is set to a minimum in order to limit the thermal effect to one contact.
Safety precautions for the repair of 220 V LED bulbs
When repairing an LED lamp, the following safety measures must be observed:
- conduct measurements and soldering on de-energized circuit boards;
- Do not leave the included soldering iron unattended;
- work in safety glasses, as there is a possibility of a capacitor explosion;
- remove the cap in the mounting gloves so as not to cut yourself with sharp edges or splinters.
Work should be carried out in a ventilated area, rosin fumes are harmful to health.