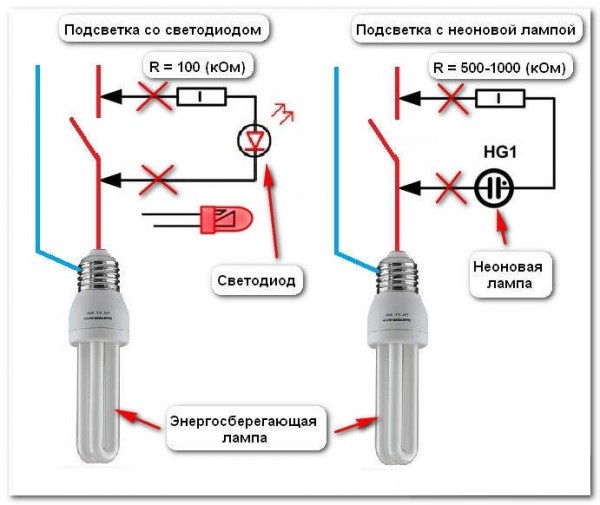
LED light sources are characterized by minimal power consumption and brightness. But with the instability of the power supply under the influence of external factors, an unpleasant flicker is observed. If the LED lamp blinks when the switch is off, the problem can be solved independently, but only after checking the ripple.
Why are cheap bulbs flashing
 In budget models, a power supply with a ballast or quenching capacitor is installed. They are not suitable for LEDs, because when the voltage rating increases, the elements burn out. The first sign of malfunction is blinking, irritating to the organs of vision.
Devices are more expensive equipped with pulse lowering drivers. Due to the feedback chain, the elements are able to stabilize the voltage, so the lamps practically do not blink.
Flashing when the circuit breaker is open

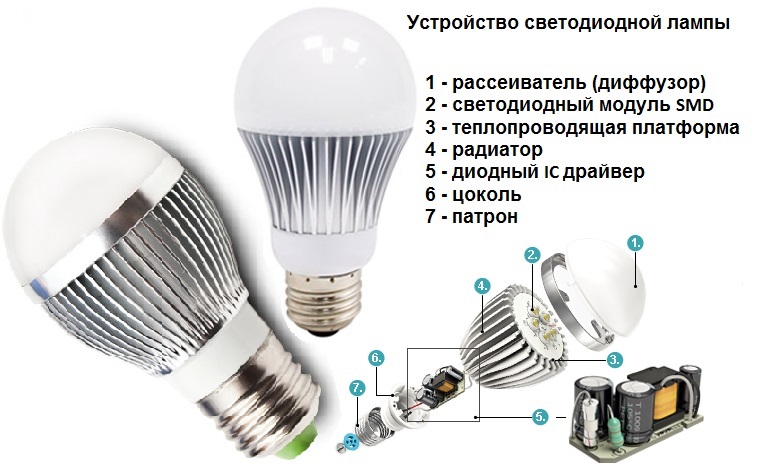
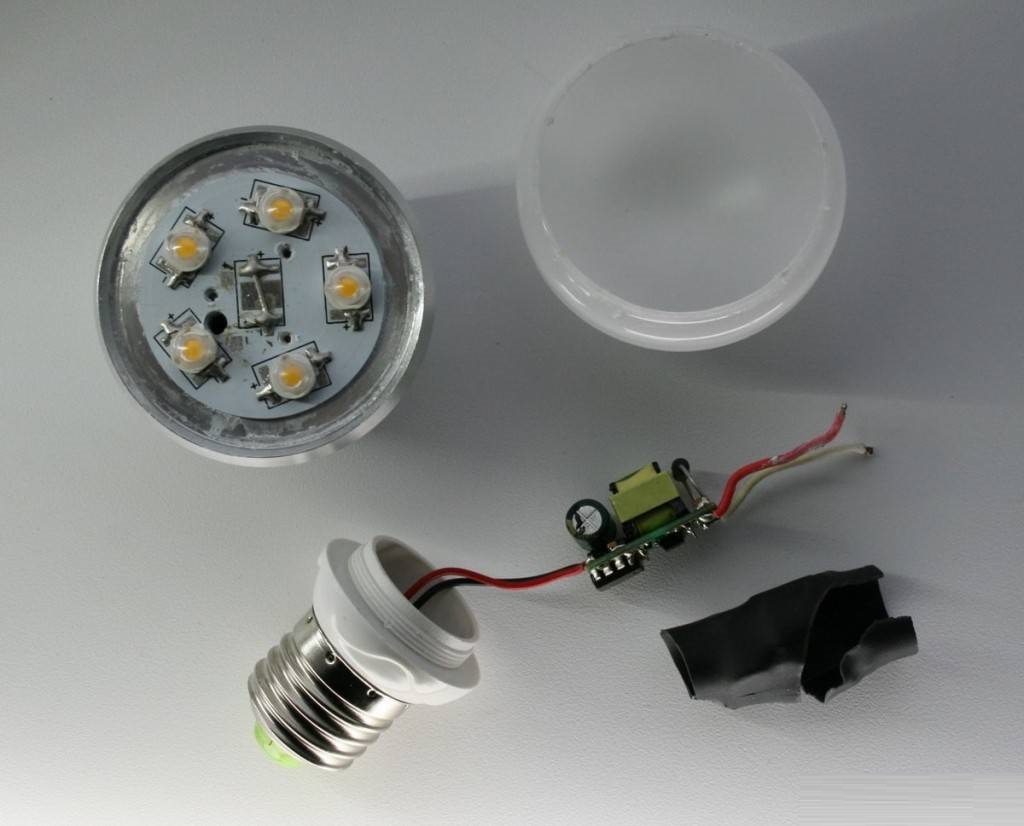
The LED lamp is equipped with electronic converters and diodes connected to its outputs. When voltage is applied to the circuit, it is converted to the desired value with further supply to the LEDs.
If a transformer-free power supply unit is not provided in the electrical circuit, pulse interference is not eliminated, and there is no galvanic connection from the lines. Without an electrolytic capacitor, it is also impossible to smooth out the ripple.
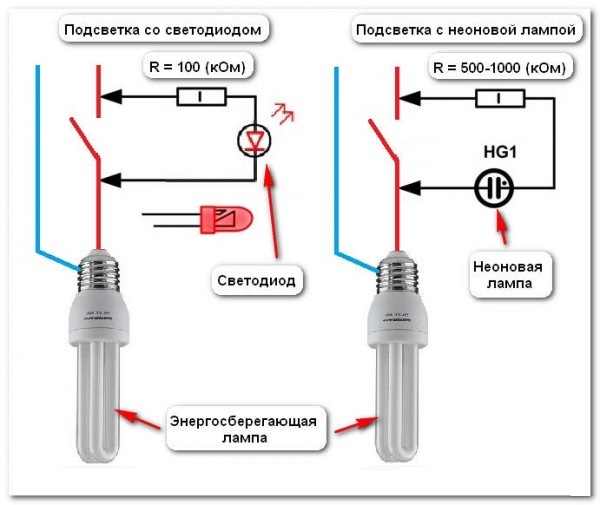
Additional circuits are connected to the sensor contacts - backlight, current limitation. When the position of the contact group of the switch or relay changes, the lamp is constantly energized. The normally closed state of the contacts facilitates the supply of a voltage of 220 V to the light source. In the normally open position, the backlight current or spark-ignition circuit is supplied to it. They become the cause of the blinking effect.
Main reasons for abnormal operation
To power the household network, AC is used. In this case, the LED equipped with a rectifier with a filter will remain operational. When voltage builds up, blinking is observed.
The phenomenon may have another reason:
- Incorrect wiring diagram. Zero goes to the switch, phase goes to the lamp, zero is grounded.
- The presence of the backlight mode at the switch.
- The proximity of equipment with a strong magnetic field - radio stations, large TVs, cell towers.
- Laying wiring inside a damp wall.
- The presence of several cables in the gate.
These factors create spurious currents that disrupt the operation of lamps on LEDs.
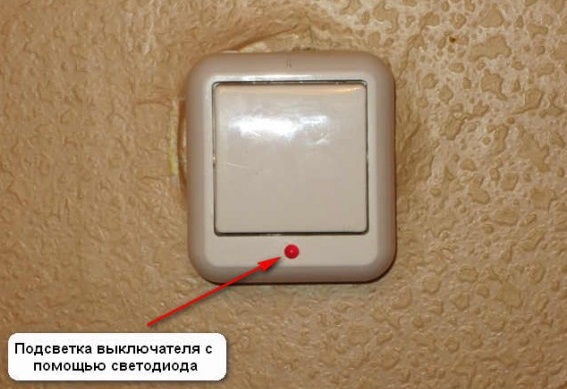
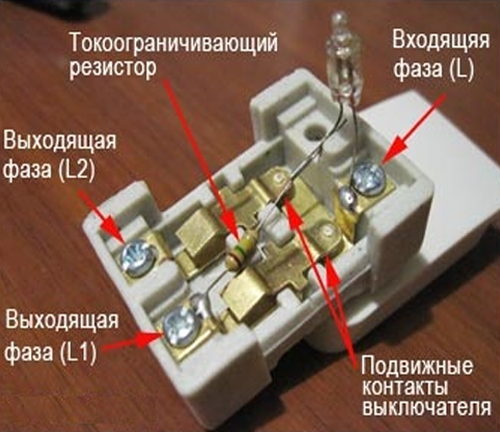
Flicker due to switch backlight
The illumination of a ceiling lamp combined with a brightness indicator provokes a flash of diode power. To understand the reason, you need to understand the design of the device.
The backlight has resistors and diodes, so when turned off there is no open contact. The resistor passes a small current, accumulates it in the capacitor. After overfilling, the residual currents enter the lighting device. The amount of current is not enough to turn on, so the lamp blinks periodically.
Blinking due to mains voltage
A common cause of failure is low voltage parameters. A voltage of 220 V is not enough for a high-quality glow of a source with a built-in driver. The phenomenon is characteristic of lamps connected via a dimmer.Without the support of this parameter, the dimmer will not work at full power, a flicker will appear. The problem can be solved by adjusting the rating or mounting the stabilizer.
Without blinking, only lamps designed for a nominal value of 180-250 V. will work.
Current leakage
The rectifier at the driver input is implemented as a diode bridge with a filtering capacitor. In the process of working, it remains current for charging. After the accumulation of a sufficient amount, an excess begins to spread, causing outbreaks. Leakage occurs through poor-quality insulation of conductors directed to the switch. The flow of small current leads to flicker, flashing of the wiring, emergency situations.
Bulbs with large capacitance of the input capacitor practically do not blink.
Wiring problem
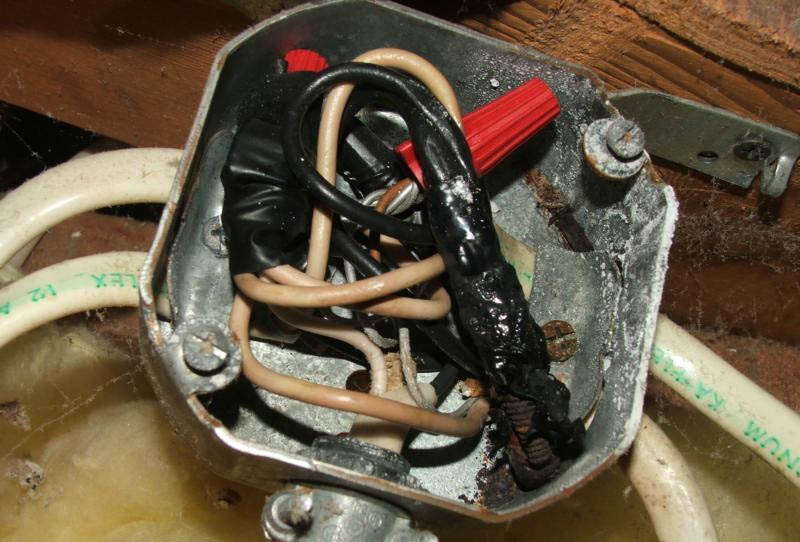
When the LED lamp blinks in the off state, the problem may consist in the wiring diagram. When arranging the lighting line, the phase from the box is fed to the switch, zero to the lamp. In the confused position, the capacitor is continuously charged and the LED turned off blinking.
If the circuit is observed, a flashing lamp signals the induced voltage. Other cables may be included with the wires of the light. To get rid of the phenomenon, you need to completely change the wiring.
If the house is located in a damp area, an RCD is installed to protect against flickering.
How to detect a malfunction
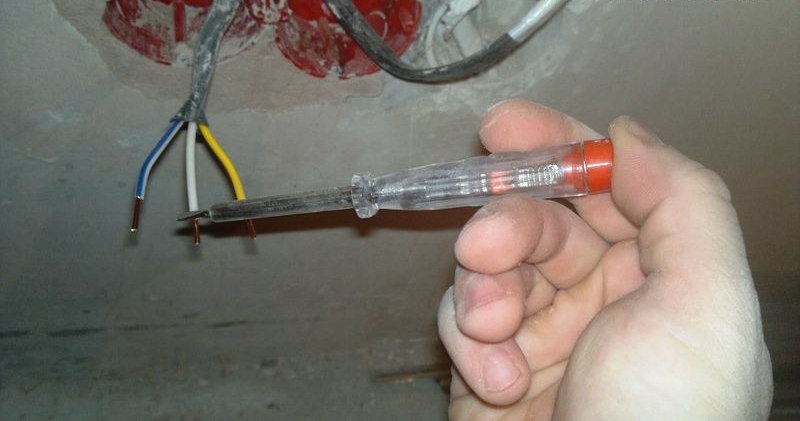
To detect a problem, you need to look at the frequency of the flashes and search for the phase and neutral conductor using an indicator screwdriver. The phase tossed on the switch contact indicates the serviceability of the network. The current supply to the lamp provokes a blinking.
If the breakdown remains, you will need:
- change the switch;
- inspect the wiring for a break in the insulation or oxidation of the contacts;
- Check voltage stability by turning on the breaker.
With normal inspection parameters and re-detection of the problem, it is worth putting a new light bulb.
Methods for eliminating the flickering of a budget light bulb
The easiest way to solve the problem of a blinking lamp is to dismantle the backlight. For modern switches, this option is not suitable. If the light source is inexpensive, you can apply one of the technologies described below.
Capacitor increase
As a resistor, it is allowed to use a paper or ceramic capacitor with a capacity of 0.01-1 μF with a voltage of 630 V. The element is characterized by minimal energy consumption and heating.
On one switch, you need to solder two resistors.
Limiting the flow of current through the LEDs using a quenching resistor
A low-power 1-2 W resistor can be included in the circuit of the LED light source. The product will receive leakage currents that charge the capacitor.
The resistor is installed in the distribution box, because when it is turned on, it will heat up. For additional protection it is allowed to use a tube with heat shrink. With proper installation, the diodes will stop flickering.
Using Homemade Filters

When the LED lamp blinks when the light is off, it is worth making a home-made filter. You will need an incandescent lamp screwed into the second socket, as close as possible to the voltage point at the input. The product will be a kind of pulse receiver.
The lack of technology is the presence of one socket in the chandelier. If you put an incandescent lamp with high power, electricity will not be saved. The situation can be easily corrected by installing an LED source in one horn, and a low-power one at 25-40 watts in the second.
Finalization of wiring
The change of phase and zero places leads to the breakage of the latter on the switch with the further supply of phase to the light source. Even a capacitor with an increased capacity will blink. The solution to the problem is to replace the phase:
- changing the location of the neutral and the phase in the distribution box for the whole house or apartment;
- similar work in the distribution box of the room.
Use a multimeter or indicator screwdriver to search for the phase cable.
Circuit breaker replacement
After installing a new switch, the visible flicker disappears. The light bulb will pulsate, but without the perception of the glow by the organs of vision. Less technology - increased eye fatigue, the negative impact of blinking on the nervous system.
The normal ripple coefficient is not more than 5%.
Diode removal
The technology is suitable for models without anti-blink protection in shutdown mode. For work, you need a slotted or Phillips screwdriver, nippers, pliers, voltage indicator.
If the design of the light source has a diode resistor on the board, you can turn it off. You will need to do the following:
- Disconnect the line through the automatic power supply.
- Check for voltage at the terminals.
- Remove the switch from the duct in the wall. Movable pads are removed with a screwdriver, and then they are pulled with an effort towards the floor.
- Remove the locking screws from the switch antenna.
- Disconnect the diode by tearing the wire with wire cutters.
In order not to cut the circuit, you need to check the lamp power with a tester.
Switch Replacement

It is worth making a replacement when there is no way to turn off the diode on the switch. For work, you will need large and small screwdrivers, nippers and pliers. The replacement process is implemented as follows:
- Securing events. The power in the shield is turned off and the network is checked for voltage.
- Removing decorative trim, removing switches from a niche in the wall.
- Removing the switch wires, installing a new switch and connecting cables to it.
- Laying veins.
- Mounting accessories so that the power cable does not fall under the clamps.
- Assembling a new switch in the reverse order.
In order not to get tangled, mark the conductors and sockets.
Organization of a separate neutral
The method is acceptable at the stage of repair work or with an external type of wiring. For illumination, you will need to connect an individual phase and neutral wire. The switch can be easily found in the dark, the blinking of the light will disappear.
Reasons for the lights to flash when on
If the light blinks when the lights in the house or apartment are turned off and on, you will need to replace the starter. When the problem remains, you will need:
- Check voltage parameters. If there is a malfunction, the light source will pulsate. An indicator below 5% will be an occasion to contact the energy sales company.
- Inspect the trigger. The LEDs in this case will pulsate when turned on, which will affect the duration of the lamp.
- Disassemble the device and check the quality of the matrix of diodes. With a classic connection, an output voltage ripple is observed. The brightness of the flow decreases, but it can be increased by a capacitor. For residential premises, this method is not suitable.
Under low voltage conditions, the life of the LED lamp is reduced by 20%.
Features of flicker testing of the lamp on

It is difficult to establish the presence of blinking, since the eye does not perceive such pulsations. To prevent fatigue, insomnia and a detrimental effect on the psyche, you need to check the lamp.
- With a pencil. In the dark room, turn on only the lamp.Above the device spend a simple pencil. An intermittent trace indicates pulsation, a solid indicates that there is no blinking.
- Using a smartphone camera. At a distance of 1 m, the camera is aimed at the switched on lamp in the video shooting mode. Dark bars on the display confirm ripple.
Breakage is most often observed in budget models. But the main reasons for blinking in the on mode include insufficient capacitance of the capacitor or incompatibility with the dimmer (the regulator load exceeds the LED load).
Flashing of LED light sources is observed due to poor connection, overvoltage and the presence of leakage current. These problems can be fixed by yourself. If after the repair the pulsations have not stopped, there is a possibility of a malfunction of the switch, the incompatibility of the lampholder with a lamp, driver breakdown, the end of the operation period or lamp damage due to high temperatures and vibrations.