Dismantling the outlet is carried out with wear, breakage, obsolescence and in the process of major repairs. In theory, this event should be carried out by specialists with education, experience and access to hazardous work. But if you follow simple instructions and observe safety measures, this procedure can be performed independently, saving money and gaining much-needed skills in everyday life.
The principle of replacing outlets
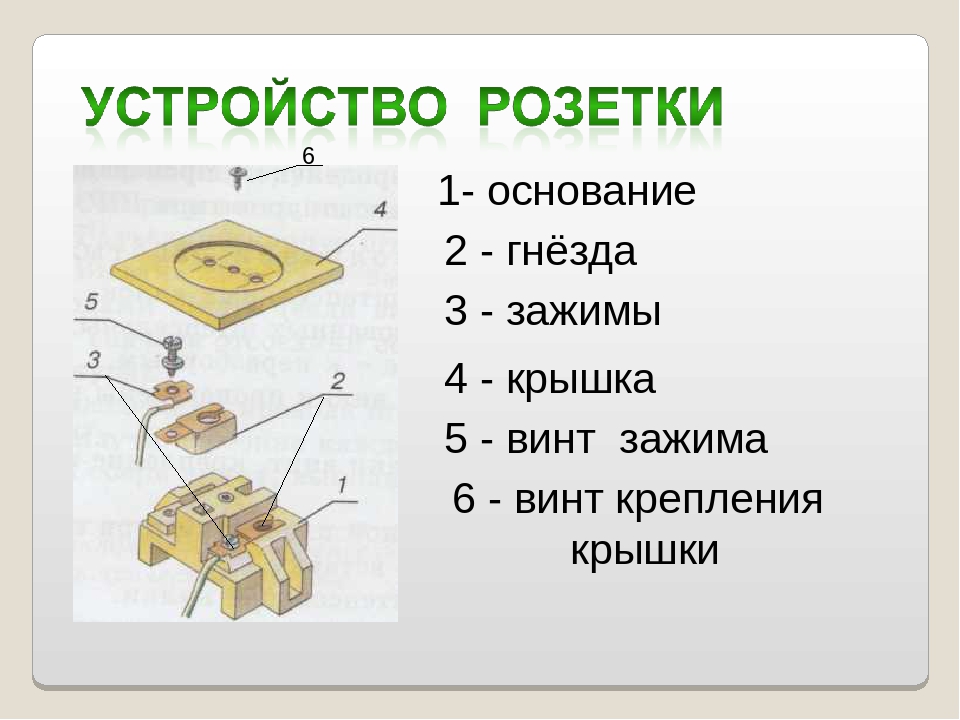
Regardless of the type and location, the device of all outlets is about the same.
The overhead products consist of a decorative cover and a terminal block in which the terminals and contacts are located. Mounting to the wall through the holes in the block. External structures are used when laying an electric line under drywall or in wooden buildings where wires are laid in an open way. To remove the patch type socket is not particularly difficult. It is enough to remove the cover, loosen the contacts and pull out the wire from them. After that, you can remove the pads and install a new device.
With internal outlets, the situation is somewhat more complicated. Their pads are fixed in special sleeves that are embedded in pre-prepared holes. The main difficulty is the correct replacement of the socket and fixing new products in them.
 To remove the outlet from the wall quickly and without unplanned stops, you will need such tools and materials:
- pliers;
- Screwdriver Set;
- hammer;
- chisel;
- indicator;
- Head Torch;
- stationery knife;
- insulation tape;
- dielectric mat;
- protective glasses.
The main condition for work is safety. Before starting the dismantling, you must disconnect the room where the work is being done. If this is not technically possible, you need to turn off the general batch switch or unscrew the plugs. In order to avoid emergency situations on a panel it is necessary to hang a plate "Do not turn on, people work!". If the door of the shield does not close, for the period of work, one of the neighbors or relatives should be constantly next to it.
After de-energizing the room, you must once again make sure that no voltage is applied to the terminals. To do this, use an indicator or any serviceable household appliance - a table lamp, a razor, a fan.
Step-by-step dismantling instruction
After checking the absence of voltage in the network, you can proceed to dismantle.
To disassemble the outlet, proceed in the following sequence:
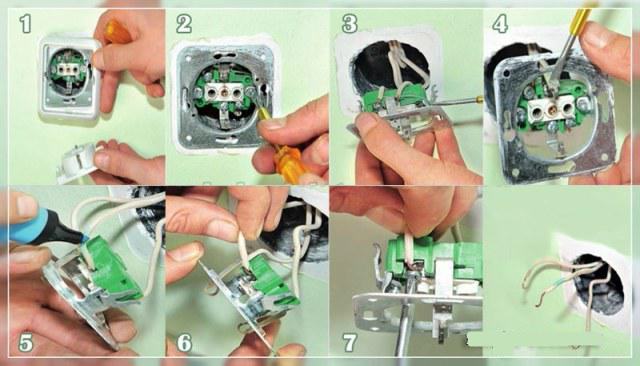
- Remove the cover of the old outlet. To do this, unscrew the bolt or screw in the middle. If the cover is stuck to the wall, it must be gently pry off with a flat screwdriver.
- Once again we check the absence of voltage on the line. We put a dielectric mat under our feet, arm ourselves with goggles and a headlamp.
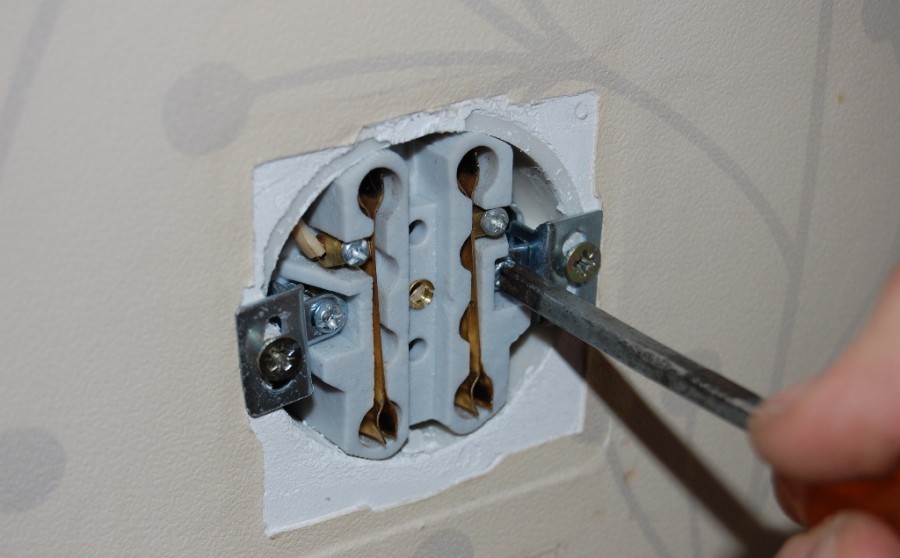
- Turn off the bolts that adjust the position of the legs. If they are stuck to the block, you need to slightly press on them with a screwdriver, having previously cut the wallpaper.
- We take out the block from the glass, unscrew the wires from the contacts. If the thread on the bolts is rusty and does not lend itself, a little engine oil should be dripped onto it. If this does not help, the wire must be cut off if there is sufficient margin for this.
- Disconnect the ground wire. If it goes to another device, it cannot be cut, as this will negatively affect the grounding parameters.
- We remove the old socket. The iron sleeve can be crushed with plumbing pliers, and the plastic one can be pulled out with pliers over the edges.In order not to tear out a piece of plaster, you need to make a groove with a knife around the sleeve or drill several holes.
- We clean the hole from crumbs and debris. Check the conformity of the new glass to the existing hole. If it is small, expand it with a hammer and a chisel. You can use a diamond crown. The diameter and depth of the recess should be 4-8 mm larger than the size of the cup. Again, clean the hole from debris and dust. It is advisable to close the bottom with felt in order to avoid the penetration of noise, bugs, fleas and cockroaches from neighboring apartments.
- Knead the starting putty, coat it with a sock, thread it into the hole in the wire and insert it into the niche. The product must be aligned so that its edges are in the same plane with the wall.
Before proceeding, wait 2 hours for the solution to set. After solidification of the putty, it is necessary to grout and polish the wall. Then you need to treat it with a deep penetration primer to strengthen the surface.
If you plan to replace the wiring, you should firmly fasten the old and new cable and pull the new wiring through the channels, using the old line as an exhaust cable.
Setting a new connection point
After installing a new glass, you need to clean the ends of the wires from debris and dirt, check the integrity of the insulation. If there is damage, they are repaired using cambric, insulation tape or heat shrink tubing. The veins need to be cleaned from oxidation. It is advisable to solder the copper wires, since over time they oxidize, the contact becomes worse and the socket starts to heat up, which is fraught with fire and fire.
Installation is carried out in the following sequence.
- We check the new product for integrity and completeness.
- We look how tight the plug enters the terminals. If necessary, carry out adjustment.
- Loosening the legs, we fix with clerical gum so that during installation they do not cling to the walls of the sleeve.
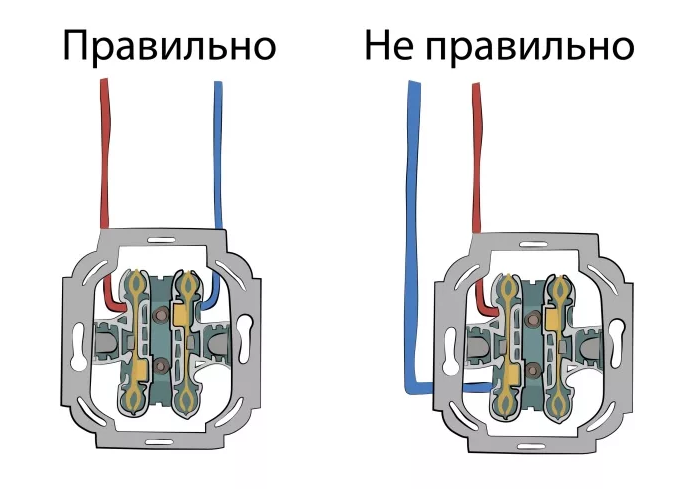
- We insert the cores into the contacts so that they protrude from the other end by 2-3 mm. You need to insert on the left side of the bolt so that when it rotates, the wire does not push out of the socket.
- Tighten the bolt tightly. It is desirable that it is flattened a little when twisting. Tightening quality is checked manually by tensioning the core by hand.
- We fold the slack of the cable with an accordion, we recess the socket into the hole, controlling its correct horizontal position.
- When the bracket rested on the edges of the glass, we begin to twist the bolts of the legs. This must be done alternately, several turns, so that the product does not warp.
- Install the cover. Some models have bolts, some hold on snaps.
- We check the operability of the outlet using an indicator or any electrical device. Fastening strength is tested by inserting and removing the plug.
After that, you can turn on the package switches or screw the plugs.