To install a power supply system in a new house or during a major overhaul, it is necessary to perform wall chipping for wiring. If you have the skills and knowledge of the norms for performing work, even a master novice will cope with the task. The main thing is to strictly observe all principles and recommendations.
Basic rules and restrictions
The main requirements for gating are regulated by SNiP.
- All channels should be located strictly horizontally or vertically. Strobing diagonally is strictly prohibited.
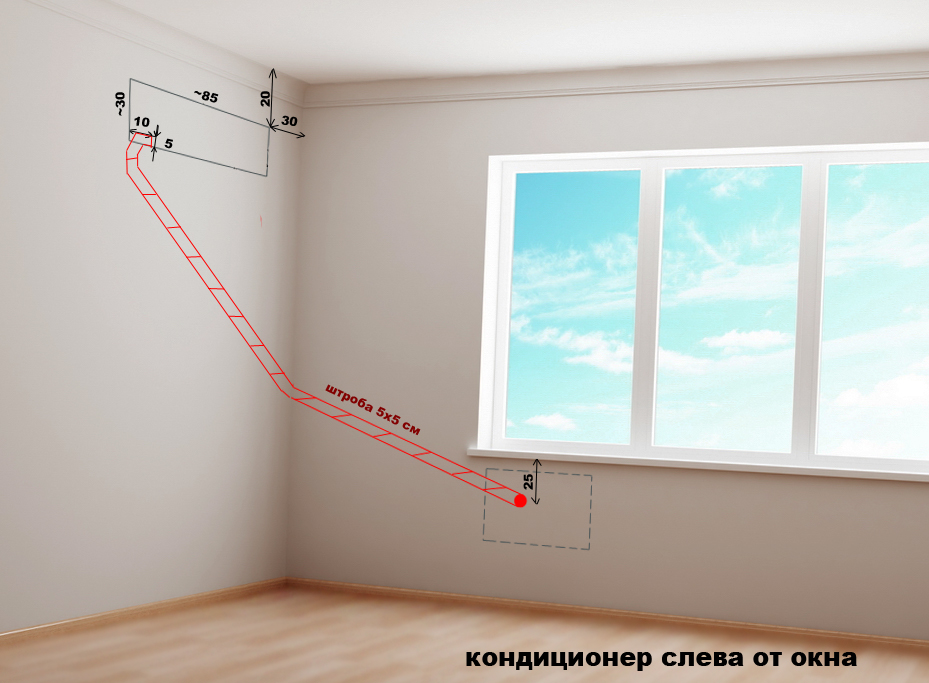
- Allowed channel parameters for the cable are 30 mm wide and 25 mm - depth. It is allowed to make the strobe more only for air conditioning. Here, the maximum depth is 50 mm, width is 60 mm.
- It is forbidden to make multiple turns at right angles between two power points. When laying the wiring in this way in places of bending, the cable will overheat, which can lead to its possible melting. Norma is one turn.
- The total length of the route to the power point from the junction box should be up to 3 m. Therefore, when developing a circuit for forming a plug for electrical wiring, you need to choose the least short path.
- The distance from the door jambs, from the floor and ceiling is 10-15 cm each. You need to remove the channel from the gas pipeline and heating pipes by 40 cm minimum.
- When working on load-bearing walls, they must always get permission from special organizations. It is forbidden to touch the main partitions of the building, as this can violate their strength. Subsequently, a serious emergency occurs until the collapse.
- When working on concrete in prefabricated houses, touching the reinforcement is strictly prohibited. It provides the desired tensile strength of the walls.
- To make strobes in floor slabs is prohibited. If you really need to lay the wiring on the floor, it is poured into a concrete screed.
Detailed information on how to ditch walls for wiring and how best to not do this is prescribed in SNiP 3.05.06-85.
Features of work on different material
The complexity of the gating (the duration and the complexity of the process) directly depends on the material in which the channels will be made.
Brick walls

This option masonry may not require complex dirty work. If the walls are not plastered yet, you can choose a certain thickness of cement mortar between the bricks and lay a flat cable with the right number of cores. Top wiring is covered with a plaster mixture. In its hardness, it is identical to cement.
If you are going to make vertical sections in brick walls, gently hammer and chisel in the blocks knock out the desired channel depth.
Aerated concrete (foam block)
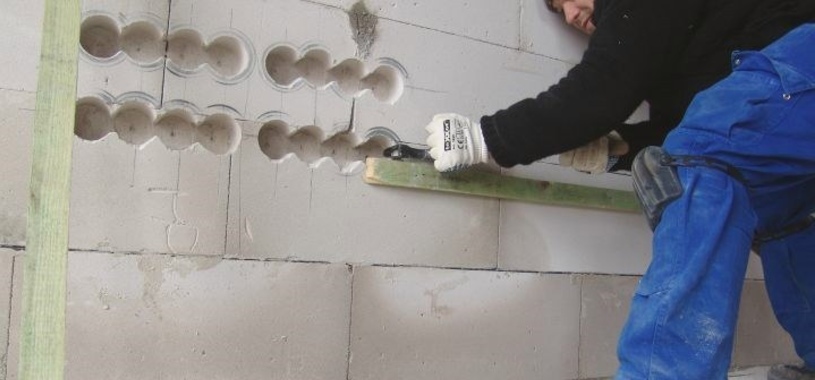
This material is as easy to use as possible. To make a shtroba for wiring in this case, you just need to prepare a hacksaw. The softness of the blocks makes it easy to cut them with little effort. But you need to work carefully so as not to damage the aerated concrete. Do not be diligent with the depth of the channels in the foam block walls, otherwise the cable will be laid behind the dew point in the wall. This will not lead to good: water plus current provoke emergency situations.
Concrete walls
Work on the reinforced monolith must be very careful. It is extremely undesirable to touch the load-bearing walls. If it is possible to stretch the wiring along the internal partitions, it is advisable to do just that.
Strobing concrete walls, especially in prefabricated houses, is best done with a puncher or grinder. The percussion instrument should be discarded so as not to violate the tensile strength of concrete. Even if the reinforcement is clearly visible under a layer of old cement mortar, it still does not touch. The depth of the gate for electrical wiring in concrete is a maximum of 20-25 mm.
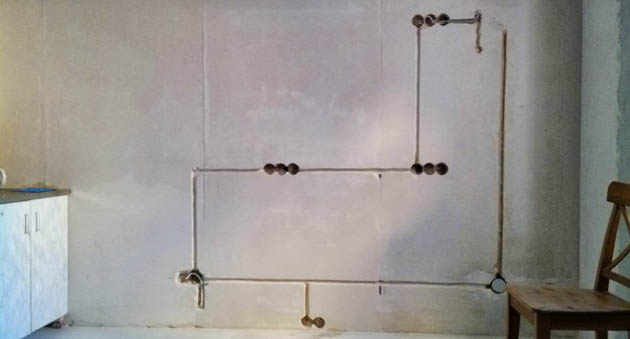
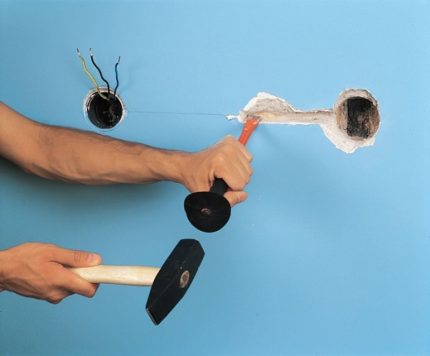
Wall preparation and marking
Before proceeding with the gating, it is important to determine the old wiring in the walls and eliminate the risk of damage to it. You can use indicators or testers for this. After testing, you need to apply a preliminary scheme of branching channels under the cable onto the wall. Draw lines with a marker from the junction box. It is then easier to move through them with a chaser or grinder (puncher).
Basic do-it-yourself strobing methods
There are several effective ways to get the job done. They differ in the type of tool used.
Chisel and hammer
This method is the most antiquated. Even with good skill the wizard will have to work with a hammer and chisel for a long time. Strobes turn curves. Of the minuses - the complexity of the process. Of the advantages is the relative cheapness of the method.
They work on this principle:
- The tip of the chisel spire (to one or two of its depths) form the channel course.
- The tool is placed with a blade across the strobes and the excess cement is knocked out - they form the depth of the grooves.
Work is best done with safety glasses, as pieces of bouncing concrete can injure your eyes.
Hammer or hammer drill
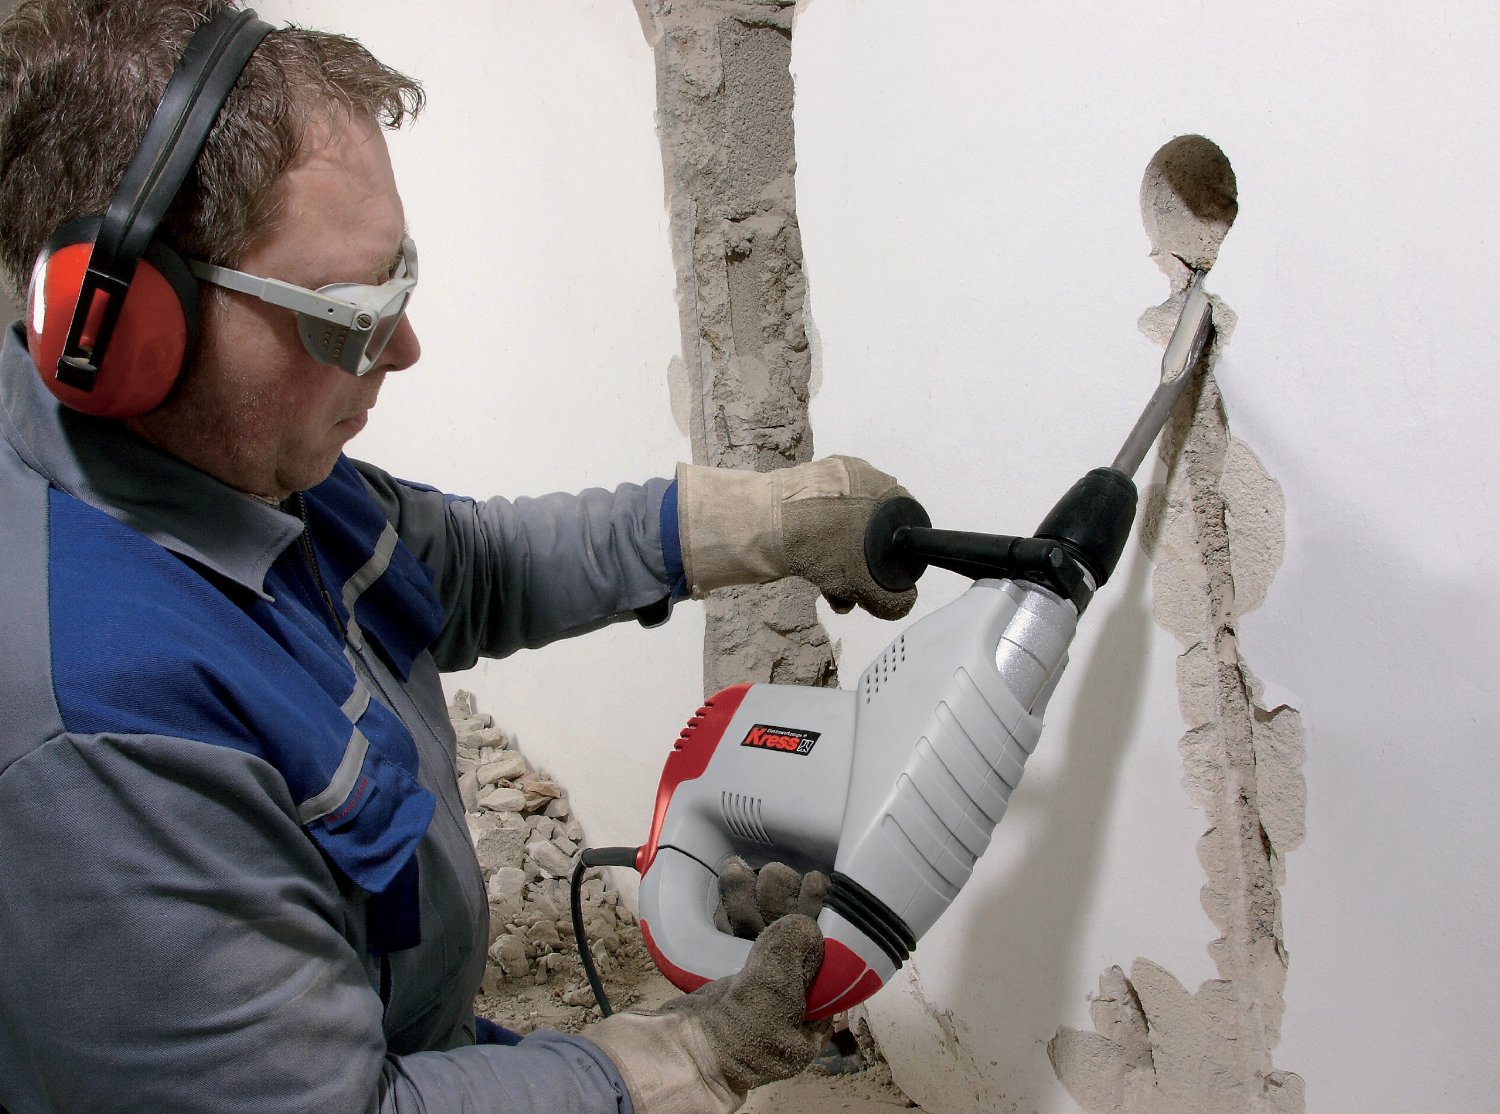
To ditch the walls for electrical wiring using a punch (impact drill), it is worth preparing three nozzles for it - a blade and two drills of different lengths.
- With a step of 1-1.5 cm, holes 2.5 cm deep are made along the designated lines.
- Change the nozzle on the blade and connect all the points in a solid line.
- It remains to knock out the channels inland using the same scapula.
Of the advantages of working with a puncher, a high speed of the process and relative purity are distinguished. Of the minuses - the formation of channels with curved edges.
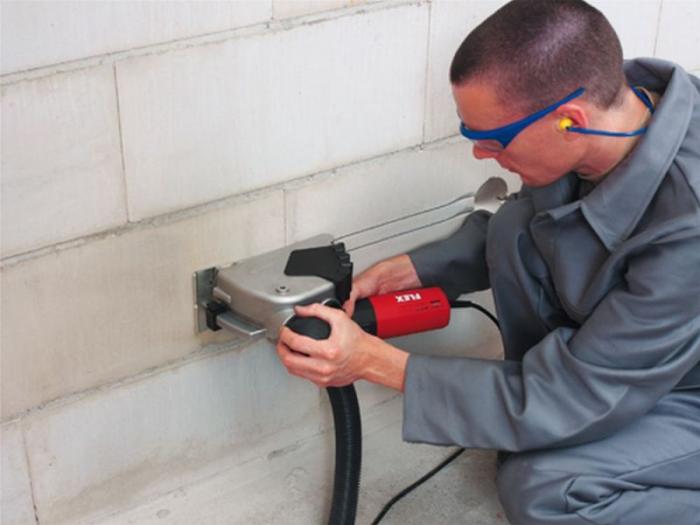
Bulgarian (grinder)
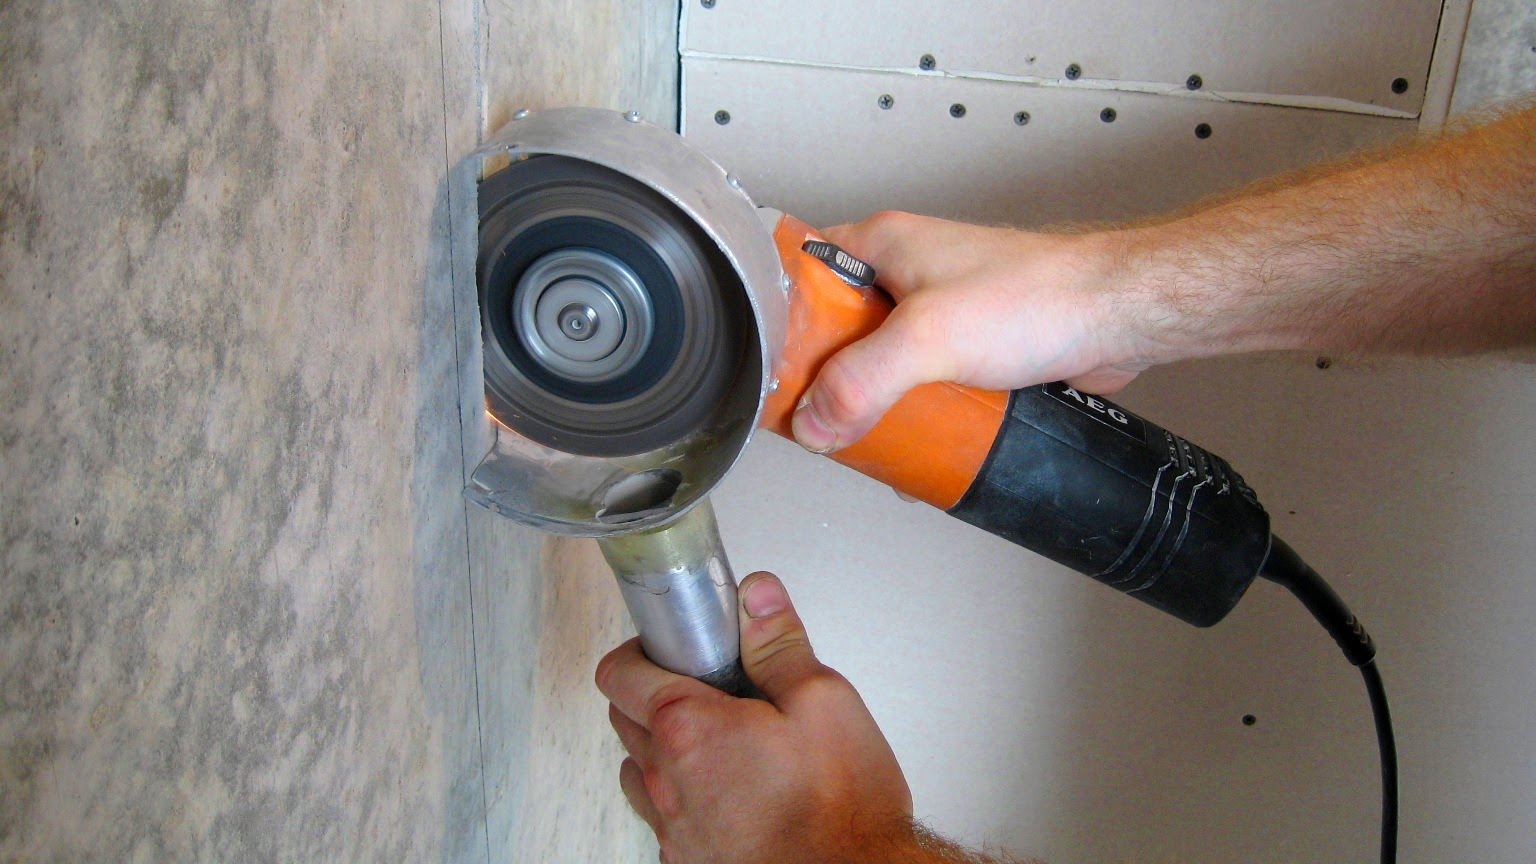
You can grind the walls under the wiring with your own hands using a grinder in the presence of a special diamond disk. With its help, it is possible to make the fastest and most even cut along the edges of the grooves. Then, with the help of an impact drill and a nozzle-blade, the depth of the strobes is selected.
Of the main advantages of working with a grinder, a high speed of the process and minimal damage to the wall are distinguished. Of the minuses - intense dusting of the room. Therefore, it is better to work in a respirator. Ideally, if there will be an assistant with a construction vacuum cleaner nearby. The suction nozzle of the unit must be kept as close as possible to the working diamond blade. Then dusting can be minimized.
Stroborez
This unit is most suitable for forming channels for wiring. Two parallel-mounted diamond discs quickly cut the strobes of the desired width (the distance between the working elements is adjustable). The advantages of a chamfer are as follows:
- high speed of the task;
- the presence of a protective casing, which is almost tight to the point of formation of the cut and thereby does not allow dust to scatter intensively;
- the ability to adjust the size of the channel (width);
- the presence of a special outlet for connecting a construction vacuum cleaner.
Of the minuses, the cutter is presented only with its high cost. It makes no sense to buy a tool for single use. In extreme cases, you can rent it in special stores. Here they will tell you which shtroborez to choose for wiring.
Individual features of strobing for each case
There are several additional features that you need to consider when working with walls:
- Strobing for air conditioning requires the formation of deeper channels. Then they can hide the copper tubes of the unit together with wires. Before starting gating, it is advisable to use a metal detector so as not to stumble on the fittings in the wall.
- Canals are not cut into wood. This is prohibited by fire safety regulations. On wooden walls, only external wiring for an electrician is done by using cable channels. So that they do not stand out against the background of natural walls, buy a protective cover for wiring. Cable channels are sold not in linear meters, but in pieces of 2-3 m.
- Drywall is also not gated. Here the cables are laid behind the GKL panels. The maximum allowable work on the drywall sheet when laying the cable is the formation of a socket for the socket. It is made with a punch and a 70 mm crown.
- To grind the tiled floor, it is more correct to use a grinder with diamond disks. The punch will break the tile.
Doing it yourself saves the master a budget. The price of laying electricians per running meter is from 200 to 500 rubles.
How to patch channels
Finished strobes are cleaned of building dust and passed through them with a primer layer. You can not spare the solution.
After the primer dries, a cable is laid in the strobes and the channel is wetted before the final termination.
They cover the grooves with gypsum or blow out with foam for pipes. A decorative finish (plaster) is applied on top.