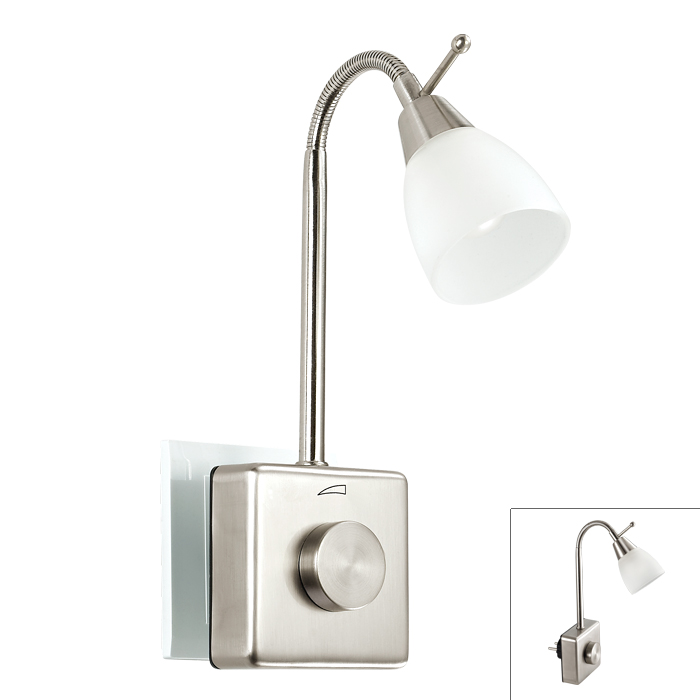
Sconces with a cord switch are often used in apartments. They are convenient for use in the bedroom near the beds, in children's rooms, in the recreation area in the living room or kitchen, for illuminating paintings and mirrors. They are easily attached to any flat surface. The light from such devices is soft and diffused, after which the eyes do not get tired. Such lighting devices are inexpensive and have two modes - on and off. You can connect the sconce with a cord yourself, you only need to understand the design features of the product.
Description of sconces with lace

A sconce with a rope switch is a popular type of lamp. They are often used to highlight a specific area - for example, a reading place, a bedside area.
Main advantages:
- Ability to adjust the level of general lighting. Also, there are models in which the luminous flux is regulated.
- Compact, light weight.
- Low power consumption.
- Possibility of reliable installation even on walls made of fragile materials, ease of connection.
Classification is carried out according to different indicators. The shape distinguishes:
- Closed sconces. Products from this category have a continuous cover, which is made of frosted or glossy glass. Also closed are hemispherical shades.
- Decorative. There are various forms - from classic strict to fixtures in the form of toys or flowers. They are made of different materials, which is selected according to the style of the lamp.
- Elite. These include lights that are used for the main light source. They are distinguished by high power and functional features.
By design, we can distinguish:
- Stationary Do not rotate, fasten in one place.
- Rotary. Light can be directed in any direction, depending on the sconce's capabilities.
According to the number of bulbs, single-lamp and multi-lamp sconces are distinguished.
If possible, control the level of illumination:
- Constant light.
- Models with a dimmer.
By type of switch:
- With a button. It can be located on the lamp itself or on a separate box. Connects to electrical wiring.
- On a key or button on an electrical wire. An analog of the previous view, but the connection is made through a power outlet.
- Sensory. It is turned on in different ways - with the help of claps, movement.
- With a cord switch.
As a cord, a chain, rope or other device can be used.
Location selection

For comfortable use of the lamp, you should choose the best installation location. The lamp must be accessible and at such a height that all family members can turn it on. This task is especially relevant when installing paired sconces, which should be located on the same line.
The sconce can be the main source of light in the corridor. In long hallways several lamps are hung symmetrically on each wall.
The sconces can also be hung in the bathroom. Since this room has a special complex microclimate, you should buy waterproof models.
To choose the right location, you need to make calculations in advance. The optimal installation height is 1.5 meters. For models with a plug, there should be a socket nearby so that you can connect the lamp to the mains.
What tools will be required to connect

Connecting a sconce with a chain for one lamp to the mains does not cause difficulties. This will require the minimum set of tools that every home master has. To connect you need:
- screwdrivers: Phillips, indicator, flat;
- nippers, pliers;
- ruler, pencil;
- insulating tape;
- electric drill with drills, the choice of drill depends on the material of the walls;
- knife or device for stripping insulation from cores;
- stepladder if the lamp will hang high.
Complete with a sconce is the installation diagram. It shows in the figures how to connect the lamp to the wiring.
Before starting installation, you need to clarify several nuances:
- Adequate IP degree of protection. When used in a kitchen or bathroom, the protection should be enhanced.
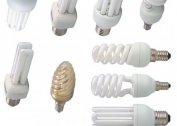
- Type of bulbs and their power. The lamp load must not be exceeded; it must not be higher than that declared in the lamp passport.
- Supply voltage. If the lamp requires a voltage of 12-24 V, you should select a step-down transformer and connect it to the circuit.
Then you can proceed to installation. It will differ depending on the type of sconce.
Connection to the wiring of the rope model
 Before starting any electrical work, the room should be de-energized. To do this, find the appropriate switch in the distribution panel. It is forbidden to turn on electricity until the work is completed.
Using an indicator screwdriver, make sure that there is no voltage on the wires. A tester is alternately applied to each core and checks to see if the indicator lights up.
You need to take the back cover of the sconce and attach it to the wall. It is necessary to mark the places with a pencil where the holes for installation will be made. Then holes are drilled with a drill, into which fixing mechanisms will then be put.
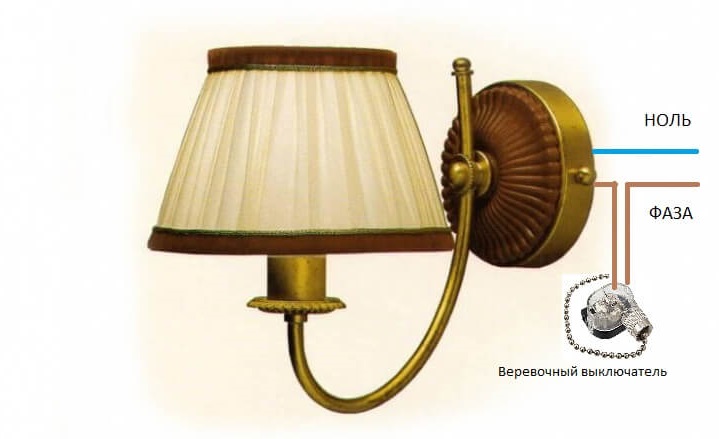
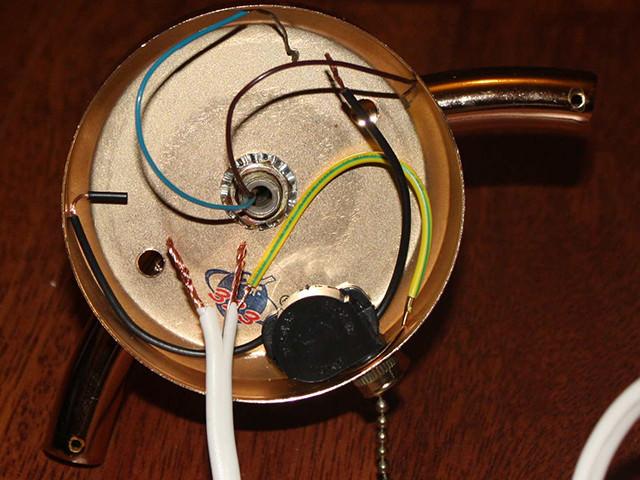
The next step is connecting the wires. All electrical wiring in the house has at least two wires - zero and phase. They can be distinguished either by marking, or using a tester. The corresponding wires must be connected to each other. The ends of the cables must be cleaned with a sharp knife or a special tool to remove insulation. Contacts are smoothed approximately 5 mm. After this, the cores can be connected according to the scheme given in the instructions for the sconce. Most luminaires use the same connection algorithm.
If the house does not use grounding, the corresponding core must be properly insulated. In this case, only two wires for connection will be involved - brown and blue. If there is grounding, it must be connected to the appropriate core on the wiring. The color of the wire should be yellow-green.
Blue should be connected directly to the lamp to the corresponding core, usually it has the same color. You can connect the wires using electrical pads, soldering, and then apply an insulating layer.
The brown wire goes to black on the lace switch. The second end must be connected to the brown wire on the sconce.
In addition to direct connection via wiring, the sconce can be powered through a wall outlet. This is convenient if the lamp is used infrequently.
You can install the lamp in place and screw it to the wall with screws. Next, the ceiling is mounted and a light bulb is inserted. In the end, you need to apply voltage and test the assembled system. With the help of the switch-rope you need to turn on and off the lamp. The lamp should not blink, and the contact points of the wires should not spark, if the circuit is assembled correctly. Otherwise, you need to disassemble the assembled system and check the connection is correct.
Connecting a sconce with a key switch
In such models, the switch acts as a lace. Connecting the sconce switch:
- The phase wire must be connected to the switch, and from it to the lamp.
- Ground zero are included directly to the sconce.
The lamp is ready for use.
Connect sconce with cord and plug
Such devices are convenient to use if there is no way to ditch the walls and draw a new line to the wiring. If desired, a sconce with a plug can be hung up in any other place where there is a socket nearby.
To connect a sconce with a switch from the outlet, it is not necessary to connect the wires. It is enough to choose the installation location, drill holes for the mounting system and hang the lamp. The plug must be plugged in. Using the lace, you can check the performance.
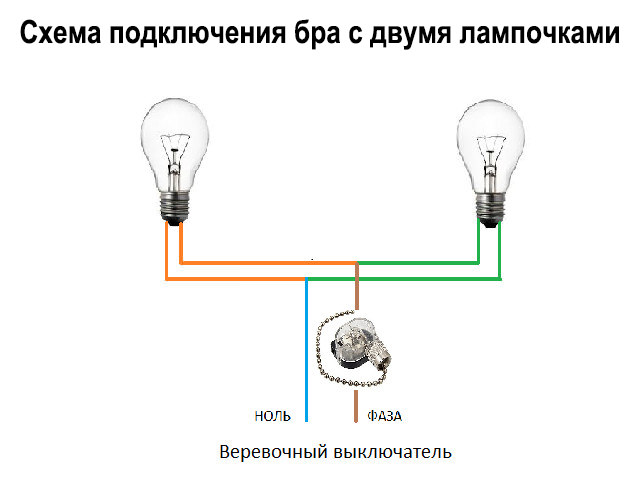
The algorithm for attaching a wall sconce with several lamps is similar, only there will be a larger number of wires. All phases, zeros and groundings from all lamps are connected to the same conductors.