To understand what a socket is, you need to imagine the wiring that leads to the outlet. The latter is hidden in a special element - a box that looks like a short glass. This will be the sock used for the arrangement of modern houses and apartments.
What are the rosettes for?
To collect high-quality wiring, which will run smoothly, you will need to make a hole in the wall and put in it a socket. The product performs several tasks:
- fixing of the socket, switch, other devices thanks to screws and spacer tabs;
- replacement of the distribution box, if the box is not used when installing the power line;
- additional dielectric insulation of the wall, switch and body of the outlet;
- Prevention of fire due to short circuit.
Thanks to the “cup holder”, the power elements are not damaged on the wall.
Varieties and classification
Depending on the material, shape, design features and parameters, various types of undergrowths are distinguished.
Production material
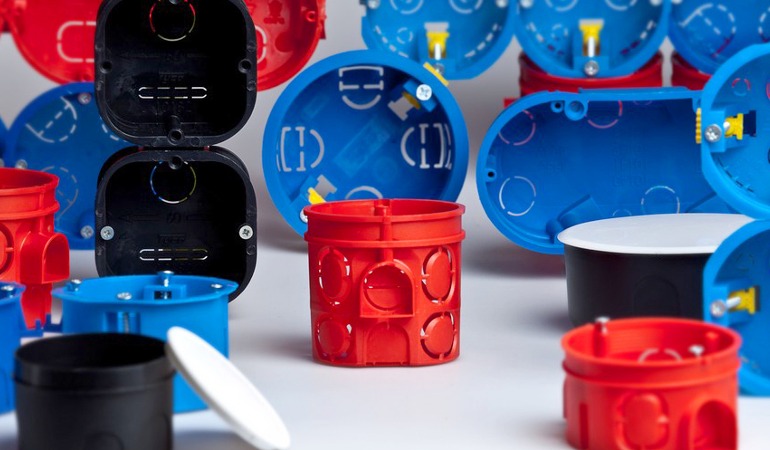
Manufacturers produce several models:
- Plastic - convenient and practical products that are resistant to ignition. The incombustibility of the material allows its use on wood surfaces;
- Metal - conduct electric current when heated. At the moment, almost never used, with the exception of houses made of wood.
- Wooden - an intermediate option, valid for rough arrangement of open wiring.
-
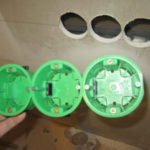
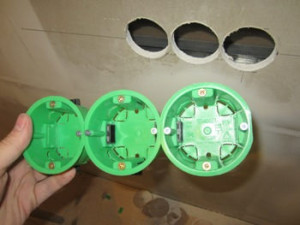
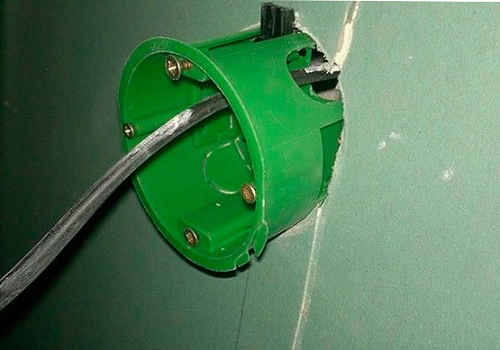
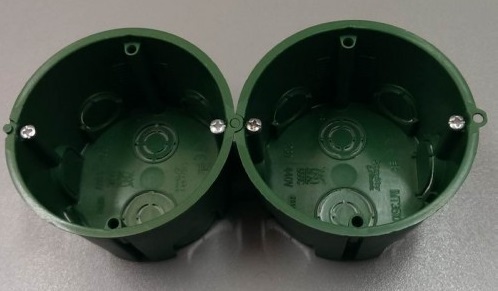
- Plastic wall sockets in drywall
-

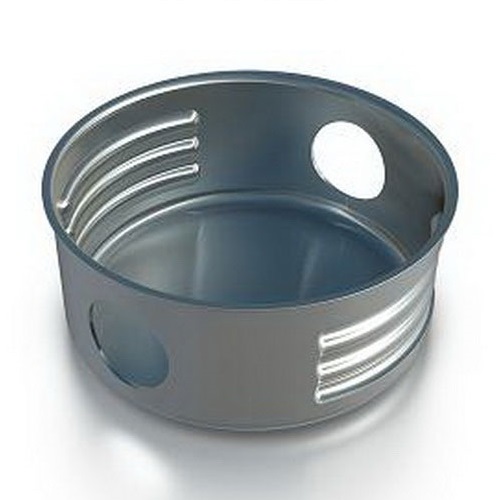
- Metal glass
-

- Wooden sockets for open wiring

Wooden sockets are sometimes found on makeshift wiring of a bathhouse, garage, and outbuildings.
Manufacturing form
Podrozetnik can have a different shape, most often it:
- Round - suitable for collecting group switches and sockets. Under them it is easier to make a strob.
- Square - accommodate 1-4 mechanisms, allow you to lay the wire with a margin. They often put elements of the "smart home" system, dimmers.
- Oval - capacious, designed for 1-5 mechanisms.
-

- Round glass under the outlet
-
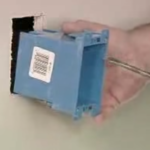
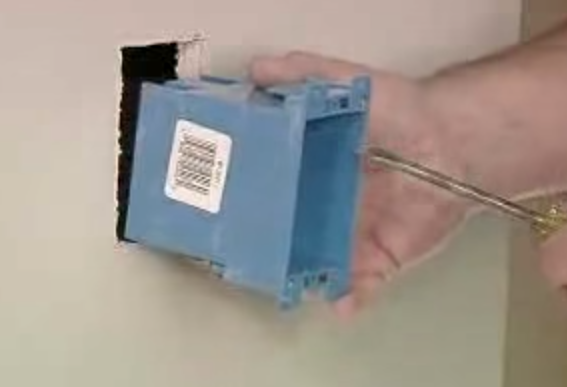
- Square Socket
-

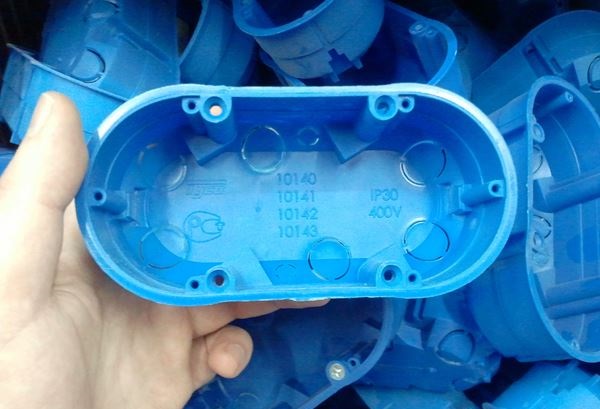
- Oval for two points
Installation of all products is carried out after surface grinding.
Depth separation
 The letter N is used to indicate depth. Mounting boxes are recessed 40, 42, 60, 45, and 62 mm. Models with a depth of 80 mm are designed for terminal blocks when the wiring is not equipped with junction boxes.
Differences in fixing system
It is better to choose fasteners of a sockets according to the surface for installation (hollow or solid walls). By the method of fixing the product are:
- with spacers - designed for installation inside hollow walls;
- with ears for self-tapping screws for fixing sockets and switches;
- with fixed connection tunnels - for combining several parts into blocks.
Socket without fasteners is installed on the alabaster.
Standard sizes for socket and crowns
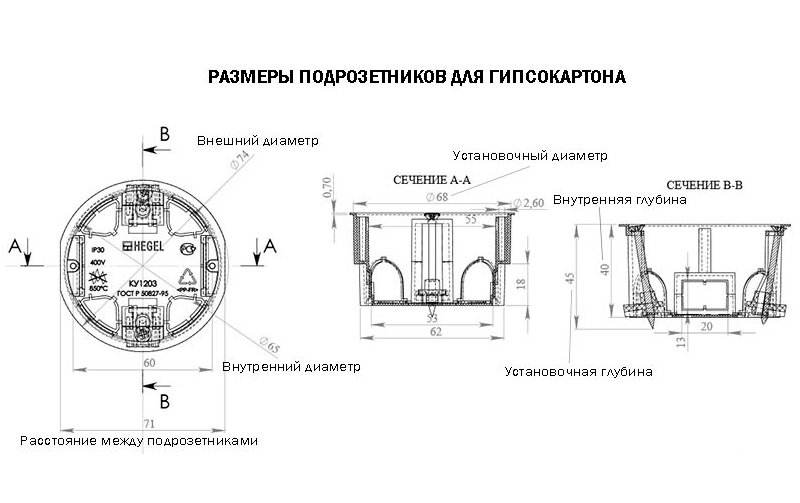
To equip the electrical network, you will need a mounting box and a crown for drilling the wall. In terms of dimensions, a sockets designed for a socket or switch can be:
- standard - with a depth of 45 mm, a diameter of 68 mm;
- large - with a diameter of 72 mm and a depth of 60 to 80 mm.
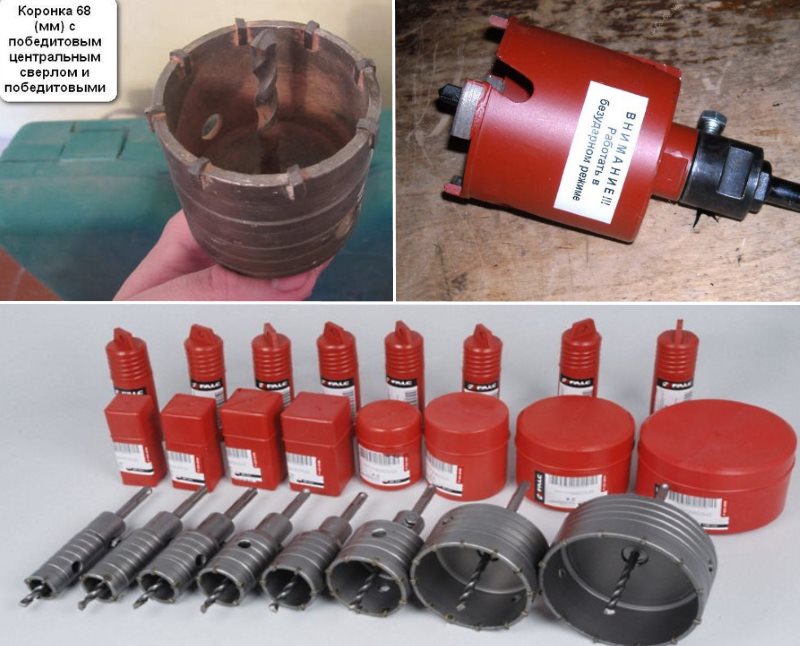
A typical cylindrical crown is 68 mm in diameter, and there are options for 60 mm.For high-strength materials, diamond crowns are used, and for drywall - soft. When working, a uniform distance between the centers of drilling is observed - 71 mm, regardless of the size of the undergrowth.
Installation in concrete and brick walls
For installation in concrete or brick, products are selected according to several criteria:
- diameter from the outer part - you need to measure the distance between the parts as far as possible from each other;
- diameter inside - are guided by dimensions which the socket has (60-68 mm);
- installation depth - depends on how thick the concrete material is and the possibility of gating;
- internal depth - there are 25-80 mm deep models on the market, the standard depth is 40-45 mm.
Concrete wall installation
The installation process in concrete surfaces is as follows:
- With a crown or a drill of 68-72 mm in diameter, a hole is drilled to a depth of 50 mm, taking into account the bevel for the wire.
- A centering drill is pulled out of the crown and concrete is knocked out of the niche.
- Residual concrete is removed with a chisel.
- Debris and dust are removed with a vacuum cleaner.
- A mixture is prepared on the basis of 2 parts of putty and 3 parts of gypsum. Such proportions will extend the curing time of the solution from 5 to 10-20 minutes.
- Niche is moistened from the sprayer for better adhesion of the mixture.
- Mounting boxes are being prepared. Block assemblies are assembled in a multibox, and then the plug for the cable is cut off.
- The solution is laid in a niche. The undergrowth is placed on it.
- The excess composition is removed with a spatula, and after drying, cleaned.
The edges of the fungus should be flush with the wall.
Assembly of a multibox in a brick wall
If there are several outlets, a block of 2-4 socket outlets is arranged. The holes are darned by analogy for a single box. The unification channels are done with a grinder. For joining the elements, installation lateral fasteners are used. The evenness of the parts is carefully checked by level.
If there is no time for preparatory work, you can purchase a block (3-5 boxes) of the undergrowth.
Features of wall mounting with ceramic tiles
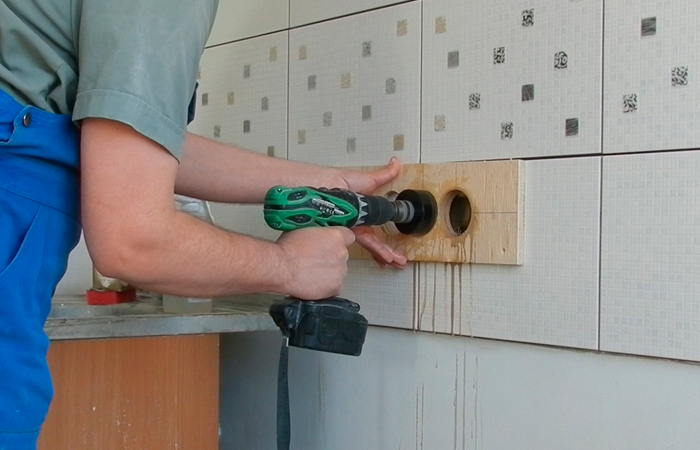
If installing on a wall with further tiling, it is required:
- make markup in advance;
- drill holes with a margin of about 7 mm so that the part protrudes slightly above the surface;
- put the "cups" at the level of the wall on the glue with a layer of 2-3 mm and fasten the sockets with screws.
Experts note that it is better to mount the rosettes on the tile without reference to the layout of the coating. The mounting box can be placed in the center of the tile, at the junction of the rows horizontally or vertically, at the junction of 4 elements.
If you need to change the socket, and the tile is already there, do the following:
- carefully cut a hole on the wall;
- make holes with a crown;
- stick pieces of tile;
- put the "cup holder".
The easiest option is to change elements or put new ones at the finishing stage.
Concealed installation method provides aesthetic appearance of the surface.
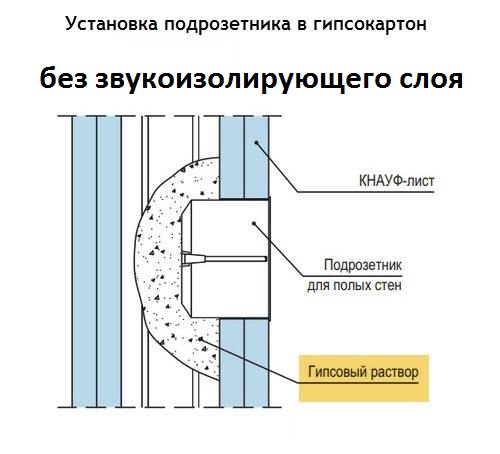
Drywall Installation
For drywall surfaces, the standard type of part is used, with a diameter of 68 mm and a depth of 45 mm. If the thickness of the partitions allows, elements with a depth of 60-62 mm are installed. Designs replace the distribution box, eliminate excessive load on thin material.
The plastic socket should have 4 screws with a distance of 83 mm between each. A pair is used to secure the working parts of the outlet. The second pair is for fixing products on drywall.
When installing sheets without soundproofing
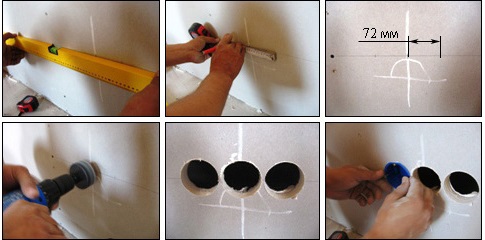
 Installation work is carried out according to the following algorithm:
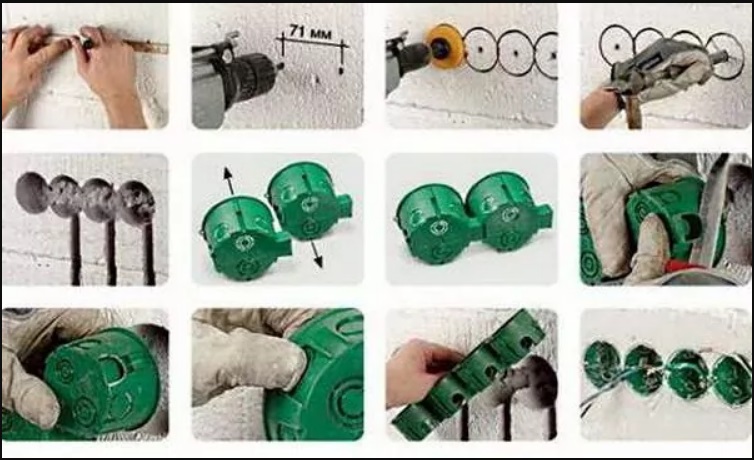
- Marking is made taking into account the location of the profiles of the GKL framework. The height of the outlet from the floor is 30 cm, the height of the switch is 90 cm.
- If it is necessary to mount the unit, 71 mm recedes from the central part of the first “cup holder” and the center of the second is marked.
- Landing niches are made with a drill or a screwdriver with a crown of 67 mm in diameter.
- Side plugs are removed. One is removed from the first socket, from the second - two, from the third - one.
- The design is combined by installing an adapter in the landing niche. The element snaps into place.
- For the installation of the socket, the partitions between the holes, the plastic plug with an office knife or a file are removed.
- Details are diagonally inserted into the niches - so the mounting tabs will not break.
- The power cable is pulled through the plug hole, and then the unit is inserted.
- The clamps are screwed with a screwdriver.
- The symmetry of the multibox is checked by level.
Do not use excessive force when working with drywall.
In the presence of a soundproof layer
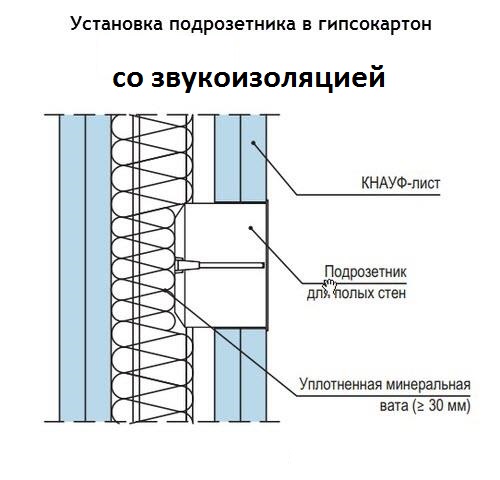 You need to install podrozetniki exclusively on your own technological paws:
- Niches are drilled in the GCR according to horizontal marking.
- Drywall spills are weakening.
- Holes in the socket for breaking power cables are broken.
- The box is put in a finished niche.
- Tighten the spacer screws.
- The end of the wire is cut by 15 cm.
In order to prevent loss of the undergrowth, it is possible to organize an individual box for it from GKL strips 10x10 cm.
Manufacturers of specific manufacturers
Depending on the brand manufacturer, the dimensions of the products vary. When laying the electricians of a particular brand, you need a socket for their own production.
Schneider electric
The products of the Russian brand have a standard diameter of 65 mm and a depth of 45 mm, but there are also models with 65x60 mm. Polypropylene parts are suitable for installation in solid walls, including in gas silicate brick. Fire resistant, withstand temperatures up to 650 degrees.
Hegel
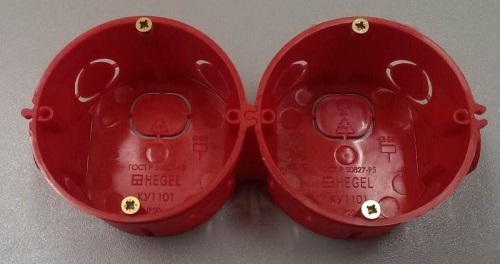
The Tambov company produces podrozetniki for mounting switches and dimmers. Dimensional details, their depth is 60 mm, and the diameter is 68 mm. There are options 68x40 and 68x45 mm. Wear-resistant propylene boxes can be combined into multi-boxes. In the lineup of the manufacturer there are models for drywall, hollow walls, brick and concrete.
Legrand
If you need a dimensional socket 70x65 mm or 80x50 mm, it is worth taking a closer look at the products of the French brand. Standard products are 68x40 and 68x60. Suitable for group and single installation. The frame for sockets is mounted on the floor, walls, countertops, ceilings. The body of the products is plastic, the shape and type of fasteners depend on the series.
When arranging an apartment electrical network, it is necessary to choose the socket outlets by the type of fixation, shape and diameter. Before buying, you should pay attention to the integrity of the case, the purpose and the possibility of combining into groups.