The membrane in the accumulator helps to maintain the required pressure of water. It allows you to mitigate water hammer and extends the life of the pumping station. But the elastic part becomes unusable over time. Correct the situation allows repair or complete replacement of the rubber element.
Features of accumulators
The rubber diaphragm divides the hydraulic tank into two compartments - air and water. The space between the membrane surface and the housing of the hydraulic accumulator is filled with high pressure air. Due to this, water flows to the point of consumption through the water supply system under the necessary pressure.
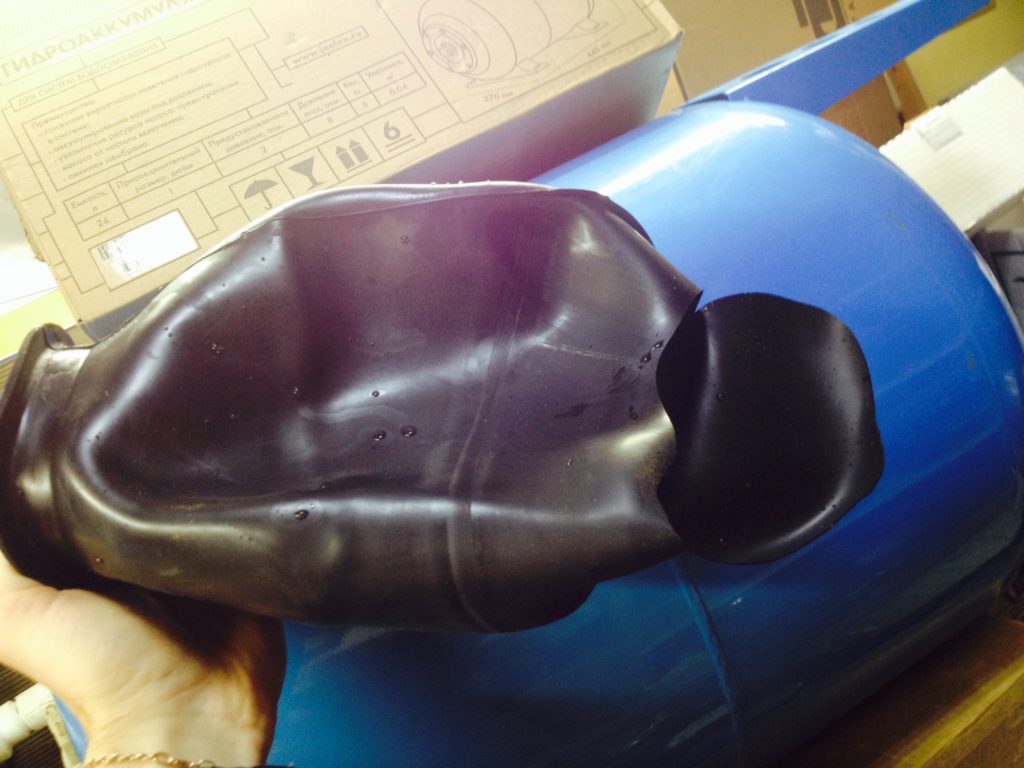
The diaphragms can be flat and balloon, can be in the form of a heating pad in tanks up to 100 liters, pears or bottles in large tanks.
White membranes made of natural or bottled rubber are used in hydraulic tanks intended for drinking water supply. Black from temperature-resistant rubber EPDM or SBR - for heating systems. The former are inferior in resistance to increased temperature and pressure, but are not afraid of pathogenic microorganisms.
Manufacturers produce two types of expansion membrane devices - with a replaceable and stationary membrane. The first ones are more expensive, but allow you to change the part when tears and deformation appear. The second is cheaper. But in this case, there is no possibility of replacing damaged elements. When the diaphragm is damaged, the entire device will become unusable.
When choosing a new membrane, you need to pay attention not only to the color or composition of the material. The part should be dense, strong, without signs of cracks. It must comply with the volume, length and size of the neck of the tank. It is recommended to buy components of the same brand as the main unit, since spare parts from different manufacturers can vary significantly.
The main causes of wear
Factors that adversely affect the state of the membrane:
- continuous compression and stretching;
- pressure and temperature drops and an increase in these indicators over the standards;
- diaphragm friction on the walls of the apparatus.
The operating conditions in water supply systems and heating networks are such that it is simply not possible to avoid the negative impact. Manufacturers give a five-year guarantee on the operation of diaphragms. But in reality they have to be replaced more often. With constant use of a hydraulic tank, a pear usually lasts no more than three years, and in harsh conditions - about a year. In order to detect the problem in time, it is recommended to perform a preventive examination of this node every six months.
Signs of a need for replacement or repair
The following problems indicate the failure of the membrane element:
- the pressure device often turns on and off;
- the hydraulic tank runs jerkily;
- leaking nipple;
- the manometer readings rapidly start up, and then fall sharply;
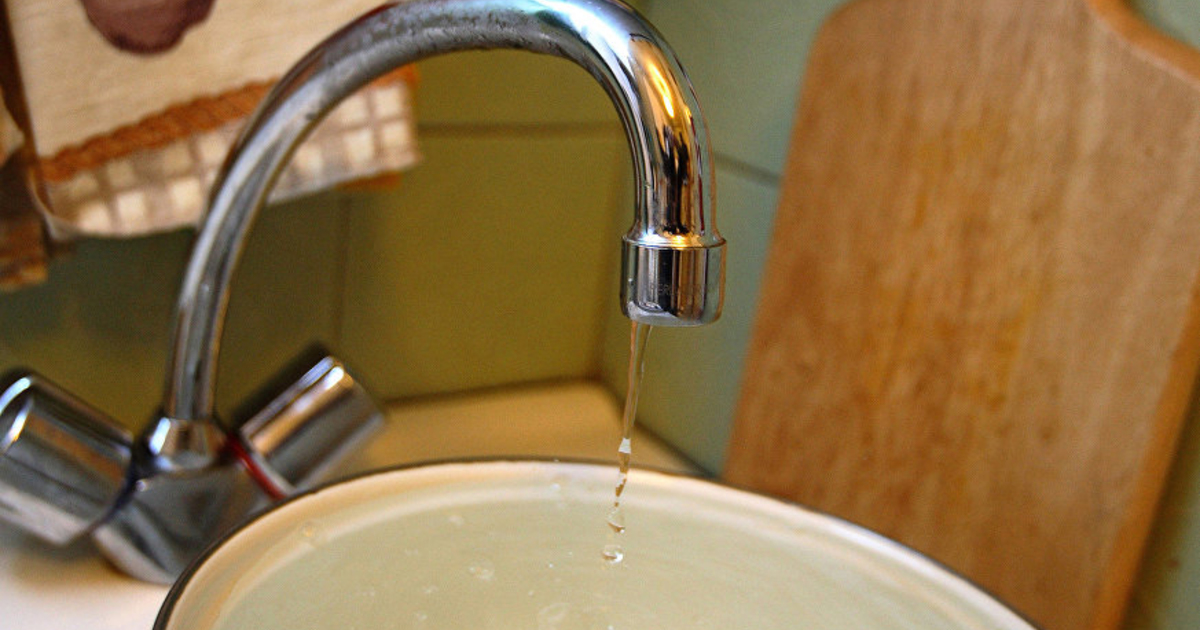
- flow from the tap flows intermittently;
- there is a leak behind the air valve.
Diagnostics is necessary to confirm damage to the diaphragm, since these same symptoms may indicate cracks in the battery case.
The test is carried out by disconnecting the hydraulic tank from the water supply system, after which the remaining water is drained. If air escapes with the liquid, it means that there are mechanical damage on the rubber part.The same means if the nipple starts to leak when bleeding air. Therefore, it is necessary to change or repair the membrane in the accumulator with your own hands, which, in principle, is not difficult.
A loose connection between the battery case and the flange fitting can also cause malfunctions.
When using the equipment without water, the diaphragm can be pressed against the inlet fitting by pressure. Because of this, fluid does not enter the accumulator via the supply pipe. To solve the problem, you need to unscrew the flange and straighten the membrane, at the same time checking it for damage.
If the cause of the failures was cracks in the tank body, messing with the membrane does not make sense. If the damage is small, they can be repaired by cold welding. In case of serious defects, you will need to buy a new device.
Aperture repair
Repair of the accumulator membrane is possible if the damage is slight. This is especially true in units with fixed diaphragms. After all, there, when the rubber part is worn out, you will have to change the entire apparatus.
A very tiny crack is sealed using an adhesive for rubber.
You can repair the part yourself using a vulcanizer for bicycle or car cameras. A similar problem is being addressed in tire fitting. Before installing a repaired diaphragm, you must carefully check the inside of the drive. Protrusions and barbs are not allowed.
Repair work will extend the life of the membrane, but not for long, on average - for half a year. After that, you still have to buy a new one.
Steps for installing a new part
The problem of replacing the accumulator membrane occurs quite often. It’s good that this process is extremely simple, you can do it yourself without the involvement of professionals. And the price of components is relatively low - from 200 rubles depending on the volume.
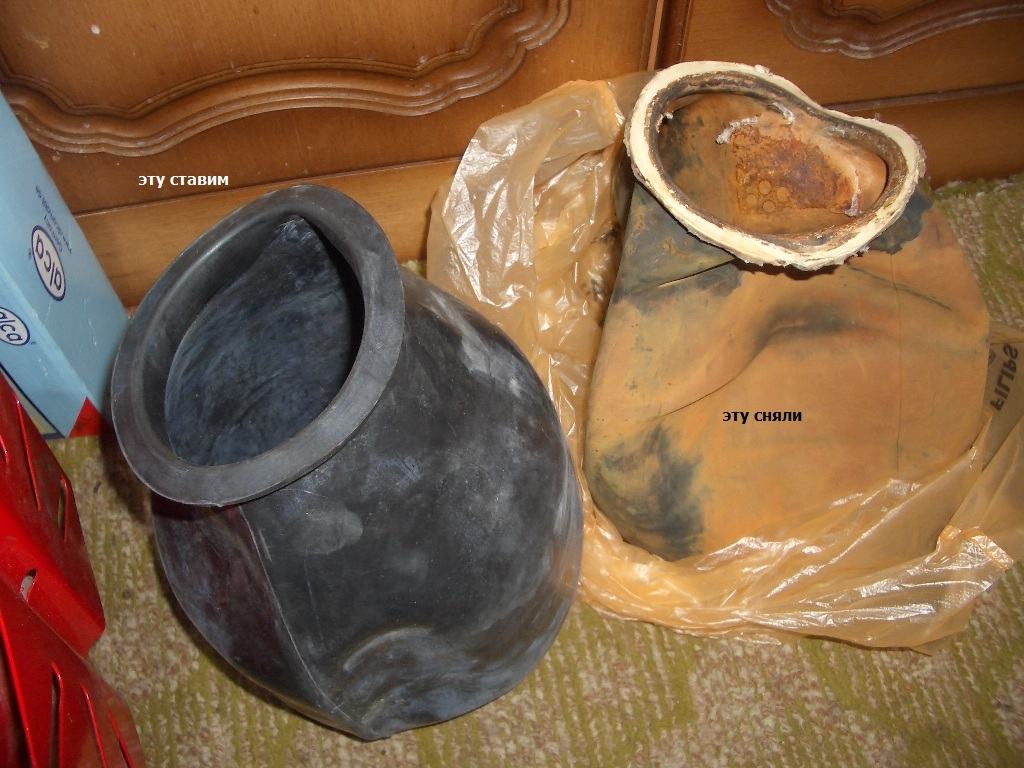
It is first necessary to check the compliance of the new membrane with the volume and other parameters of the battery. If all indicators match, you need to disassemble the drive. Before replacing a worn pear in the accumulator, you need to relieve pressure in it, blocking the flow of water and draining the residues, then disconnect from the power supply.
To change the aperture, proceed as follows:
- Loosen the mounting bolts of the flanges and remove them.
- Remove the damaged part through a hole in the bottom of the tank.
- Inspect the diaphragm and assess the size of the damage - suddenly it can be repaired.
- Clean the tank itself from corrosion and plaque, and the flange from any burrs.
- Take the holder and insert it into the hole that is on top of the diaphragm.
- Place the membrane in the hydraulic tank, and screwing the bolt into the holder, insert it into the opening located in the bottom of the housing.
- Spread the neck and tighten with the flange, tightening the bolts on opposite sides.
After assembling the device in the reverse order, pump air into the tank. This will allow the instrument to function normally. The injection is carried out using a conventional pumping device through a spool located at the bottom of the housing.
Then comes the connection to the water supply and electrical network and the operation of the equipment is checked. Water must be connected gradually so as not to provoke a rupture of the new diaphragm.
In order for problems with the membrane part to occur as rarely as possible, it is necessary to ensure comfortable operating conditions of the device. In particular, to ensure that there are no pressure drops and temperature surges in the hydraulic tank, and regularly conduct routine inspections. If the device is not used, it is stored in a dry place, away from heating devices, so that the diaphragm rubber does not dry out and does not crack.