Installation of an autonomous artesian or sand source at the site requires further improvement of the well for water after drilling. Such works can simultaneously ensure the purity of the water resource, protect the well shaft from small debris, prevent the freezing of the upper part of the casing in winter, and correctly install and connect at one point all the necessary equipment for the source to work. In addition, the upper chamber serves as an obstacle for vandals. Thanks to a well-equipped well, the master is able to maintain equipment at any time of the year, and if necessary, carry out repair work.
Well Design Options
Refine the well (competently finish the upper part of the casing) can be one of several popular options. Each master selects for himself the one that is more convenient, profitable in terms of finance.
Placement of a hydraulic structure inside a building
More often this option is applied if the source was drilled on the site before the construction of the cottage. In this case, the box of the house is driven out so that the upper part of the casing is located in its basement. Ideal option - in any outbuilding, greenhouse, greenhouse.
The advantages of such a well arrangement are as follows:
- The top of the column is in constant heat. Freezing does not threaten the source.
- To bring the pipeline to the house you need less consumables. In addition, the smaller footage of the highway is the lack of cold bridges on the line.
- There is no need to incur additional costs for the installation of a caisson or other auxiliary premises for the placement of a pumping station.
However, this source location has a number of disadvantages:
- Loud noise of a running pump. You have to soundproof the basement.
- The presence of moisture in the lower part of the house. The work of the source is associated with the constant movement of water. High humidity is not the best way to affect the box at home over time.
- Difficulty in carrying out repair or conservation work. Sooner or later, any hydraulic structure will be silted up. We will have to carry out its washing, buildup. It will be difficult to do this at home. The same applies to the grouting of the source after the expiration of its useful life.
Mounting wells within residential buildings is prohibited by SNiP. You can only make an Abyssinian well (igloo-well).
Elevated house
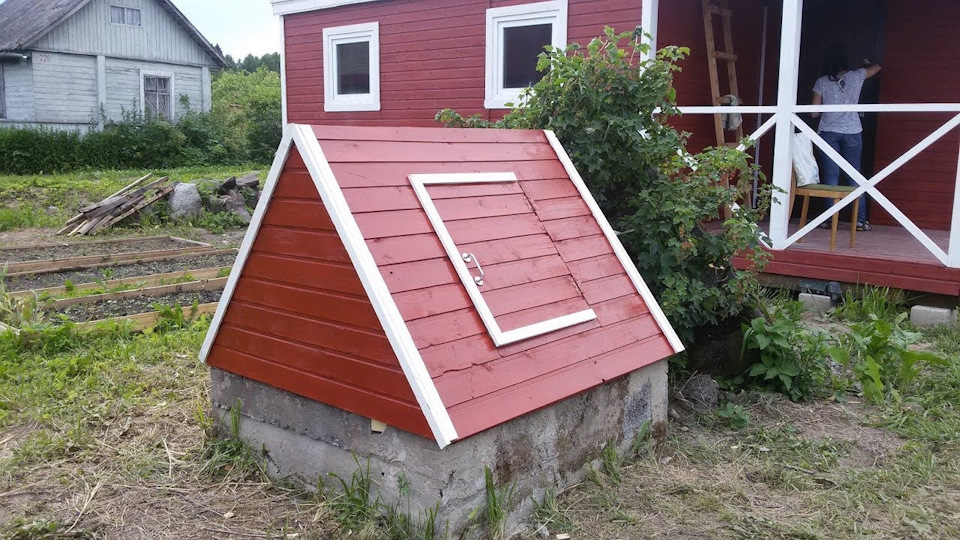
This is a good option for a well device. Especially if the site is spacious and you can dream up on it relative to the original landscape design. Externally, the pavilion can be made in the form of a fairy hut. Inside, it is a slightly in-depth (like a cellar) room with pumping equipment housed in it.
It is advisable to deepen the pavilion just below the level of soil freezing. The device of such a technical house will definitely cost more due to the greater consumption of building materials.
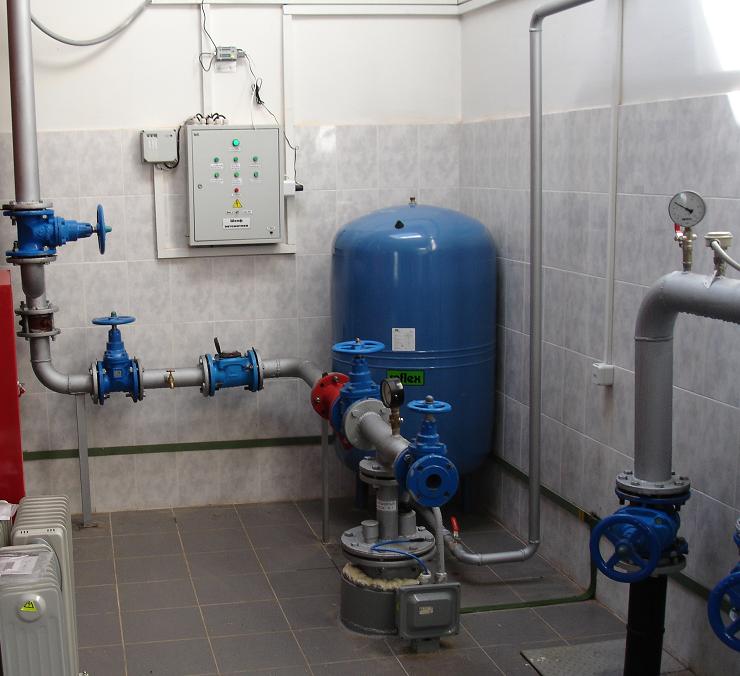
Underground caisson
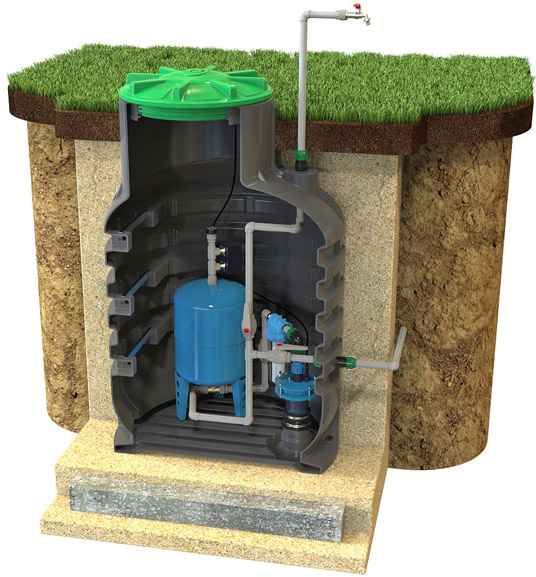
This is the best option for a well device. The well goes deeper below the level of freezing. On the surface of the site it is practically not visible, if you provide for the decorative design of the hatch. In addition, noises from a working pumping station will not be heard at all.
You can mount the caisson with your own hands from brick or monolithic concrete pouring. You can install a factory polymer camera. The second option is less labor intensive and financially expensive.The exception is the volume of brick blocks remaining from the construction of the house. Then the master will have to spend energy on the construction of the caisson.
Making a camera out of reinforced concrete rings is unprofitable. You will have to bear the cost of transporting heavy items and renting special equipment to lower them into the pit.
Preparatory work
At the preparation stage, you need to purchase all the necessary equipment:
- a pumping station with a hydraulic accumulator, or a downhole pump for wells over 20 meters;
- pipes for laying water pipes;
- sealant - bituminous mastic or roofing material;
- fine cement, sand and crushed stone;
- all adapters, fittings, stopcocks - they are calculated according to the previously drawn up water supply scheme.
Also, at the preparatory stage, the necessary tool should be prepared:
- concrete mixer;
- bayonet and shovel spades;
- tape measure, construction level;
- tamper;
- Master OK;
- formwork boards.
The preparatory phase is also the conduct of land work. It is necessary to dig the necessary parameters around the casing pit. A square chamber of 1.5 x 1.5 m will be sufficient. The depth of the caisson should slightly exceed the level of freezing of the soil. When digging a pit, it is important to take with a margin of 20-30 cm to the sides and inland.
Installation Steps
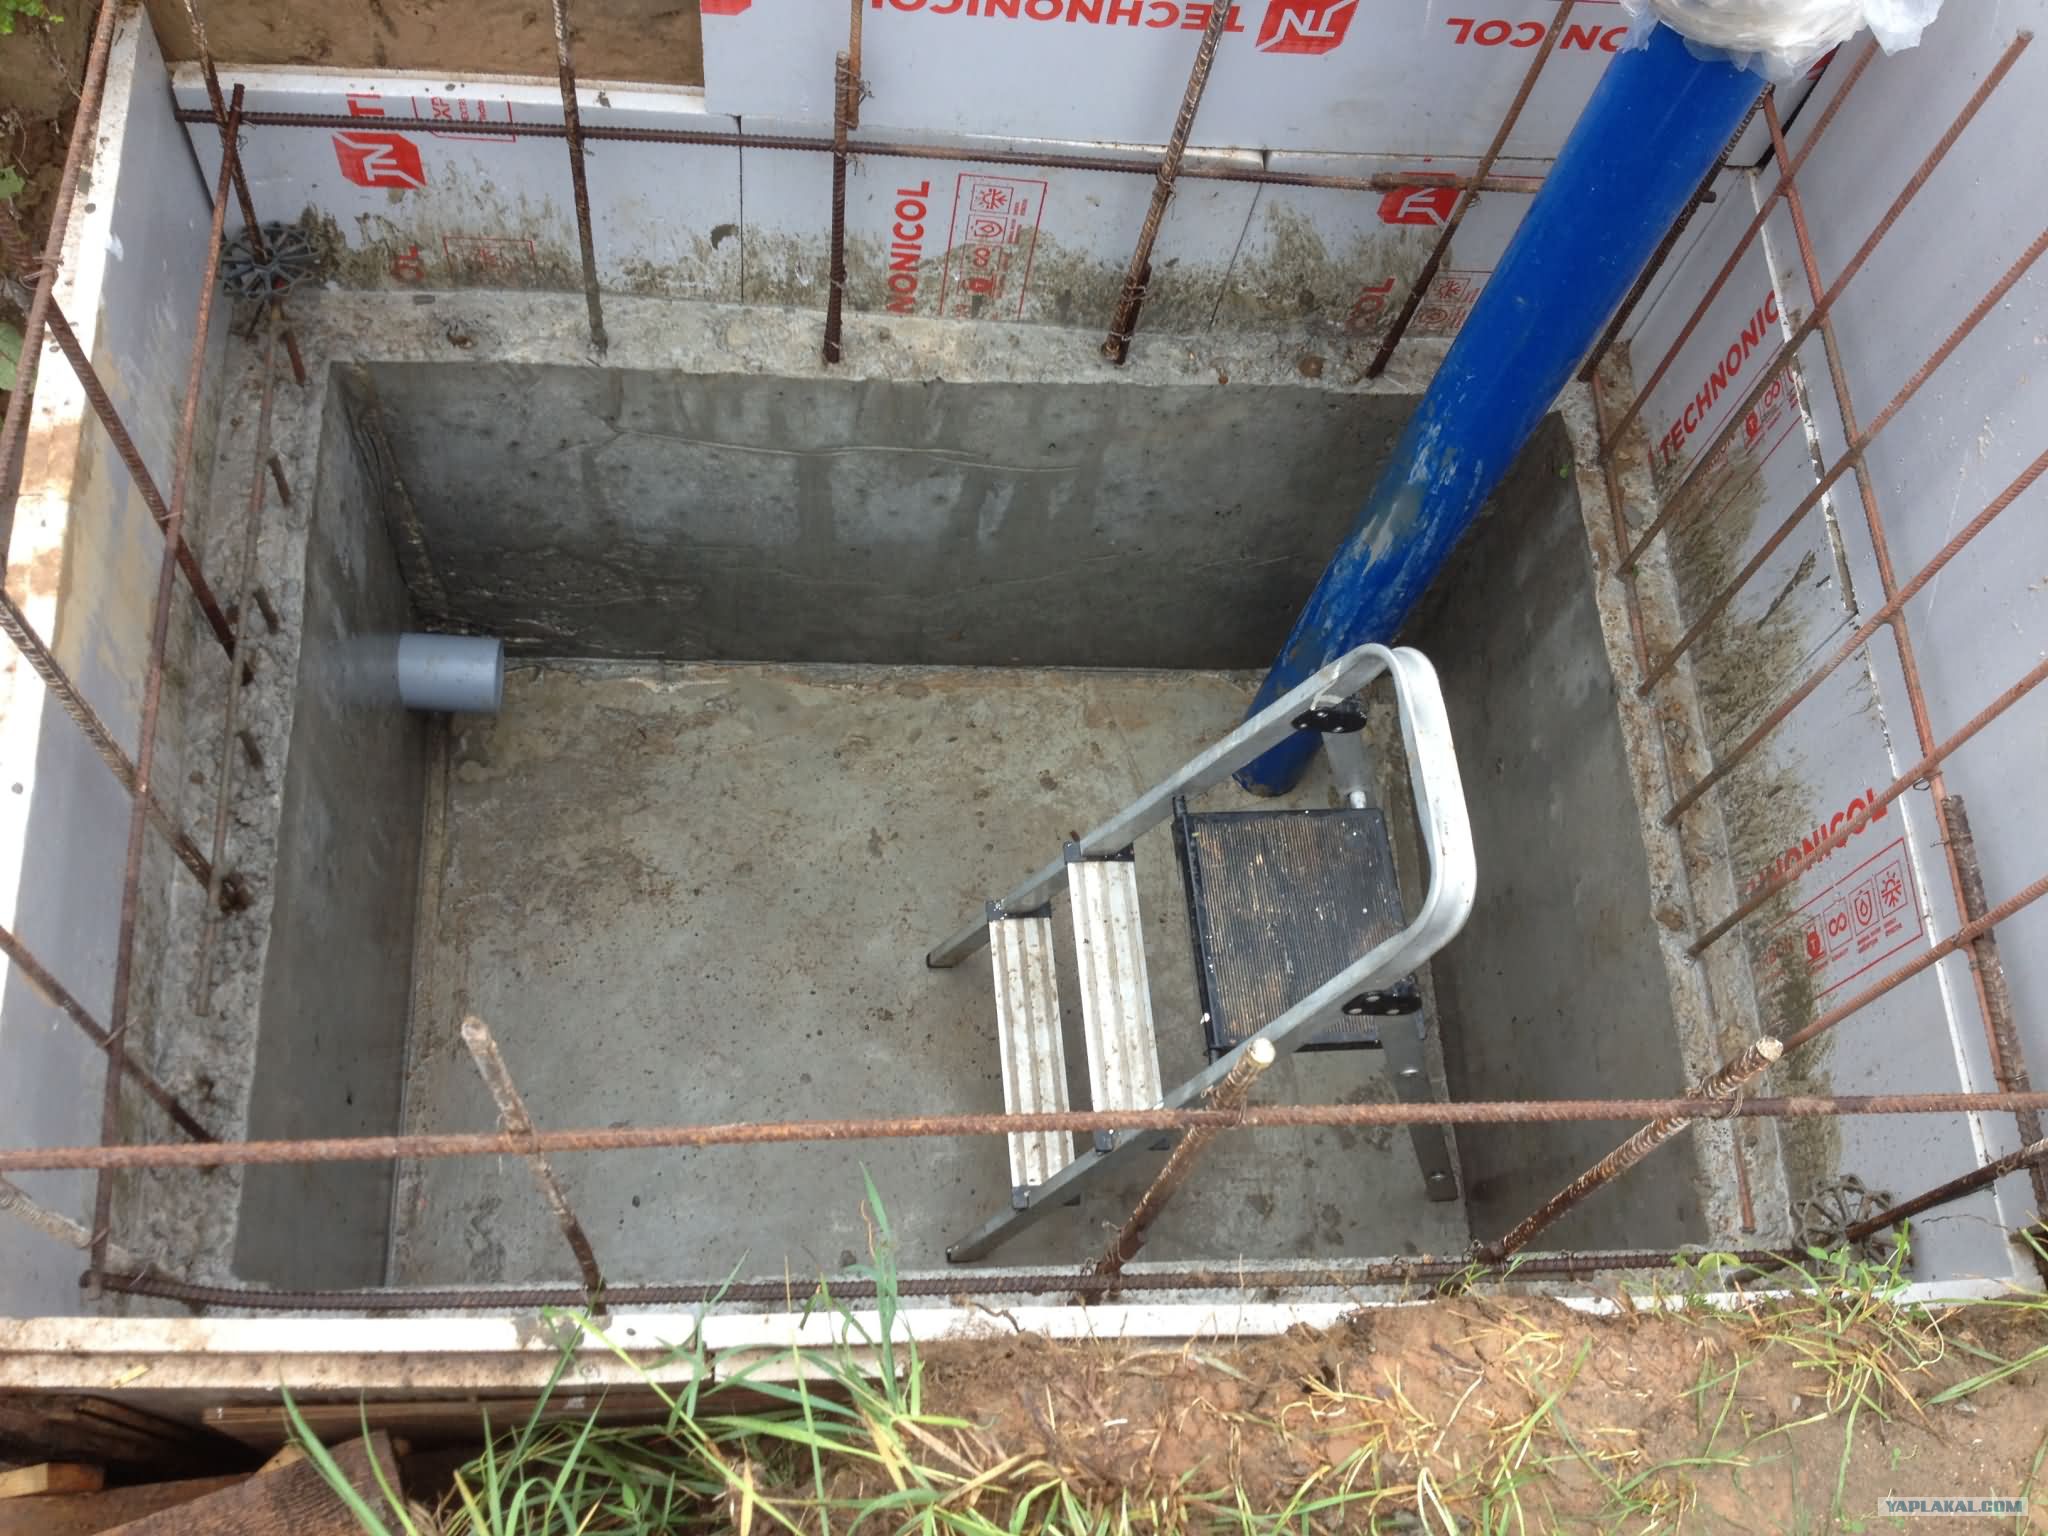
When building a brick or monolithic caisson, it is important to prepare a concrete base for them. To do this, first tamp the bottom of the pit and pour a sand cushion 10 cm thick. It needs to be slightly moistened and well compacted.
- On the walls of the pit expose four boards for pouring the pillow-base. Prepare a solution of cement, sand and gravel in a ratio of 1: 3: 5, diluting loose water to the consistency of thick sour cream. The finished solution is poured about 5-7 cm and the reinforcing mesh is placed in it. The remains of the concrete mixture are laid on top and allowed to dry completely. When filling the pillow, it is better to wrap the part of the casing, which will come in contact with the monolithic slab, with roofing material or coat with bitumen mastic.
- Once the base is completely dry, you can proceed with the installation of the walls of the caisson. Do not forget about the gaps of 30 cm on each side of the earthen faces of the pit. Brickwork is performed by first laying under it strips of roofing material. The same must be done if monolithic casting is to be carried out.
- Brick is laid starting from the corners. The concrete mixture is poured into the installed formwork. Moreover, it can be driven right away to the full height from wooden boards or mounted in stages (30-40 cm each).
- When pouring, the monolithic walls of the caisson are necessarily reinforced with a mesh.
- As soon as the camera is ready, it must be completely dried and coated with bituminous mastic on all sides.
- After this, a backfill of the caisson is made, densifying the soil in layers. Instead of ordinary land, you can use a cement-sand mixture.
The roof of the chamber is poured from concrete mix or arranged from a durable wooden / metal shield with a hatch. The tree can be wrapped in roofing material. The metal should be treated with anti-corrosion compounds.
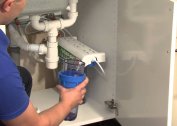
Installation of pumping equipment
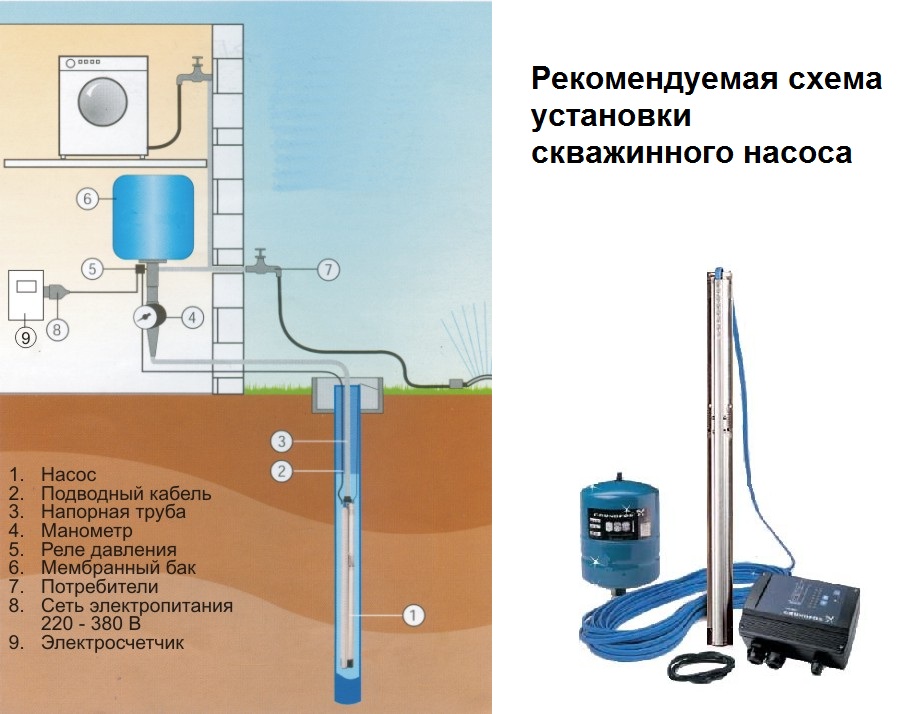 It is important to install the submersible pump correctly. Its lower intake point should be located from the bottom of the source no more and no less than a meter. Therefore, it is worth considering the use of a durable insured cord.
When installing the pump, it is advisable to tighten the unit cable, the safety cable and the water supply hose with clamps so that they do not tangles, do not hang in the source. The pitch of the clamps is 1-1.5 m. The cable or cable tension is not allowed.
After installing the pump, a hydraulic tank is installed. It is connected to a pumping equipment and filled with water. At this stage, it is important to equip an autonomous source with adjustable pressure accumulator. Do this with a relay.
The accumulator must be equipped with a check valve at the outlet. Here and at the entrance to it, it is advisable to install drainage taps to preserve the system in the country.
Head installation
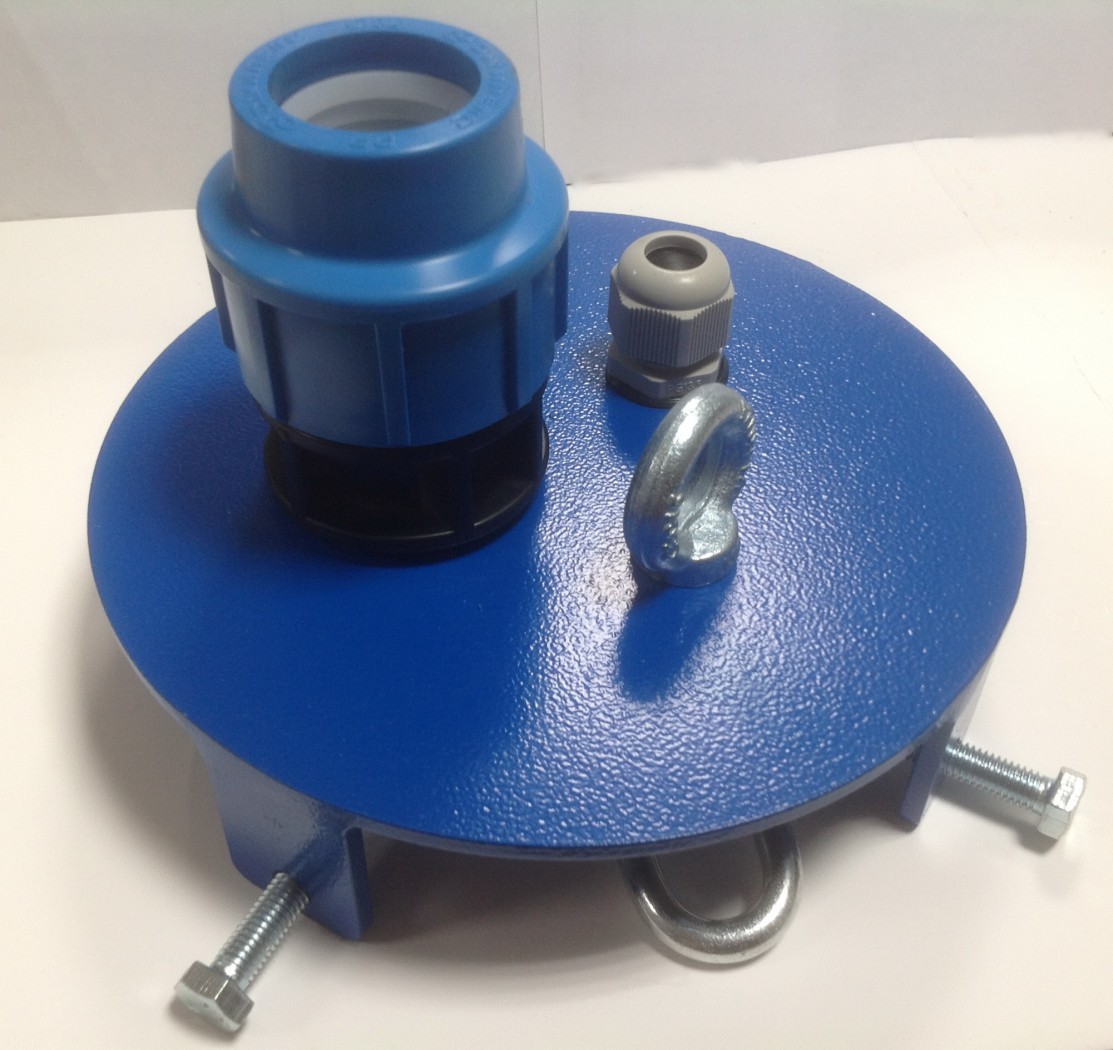
To completely seal the top of the source, a head can be installed. The follow-up guide is as follows:
- The top of the casing pipe is cleaned and coated with an anti-corrosion compound.
- A water supply hose and an electric cable of the pump are conducted into the cap of the head.
- The flange and rubber ring are put on the pipe, having previously fixed the safety cable to the carbine in the upper part of the cap.
- It remains to put it on the casing and squeeze the fixing bolts.
As an option, the device wells in warm regions, you can do just the tip. If so to equip the source, you can incur a minimum of costs.
Well construction costs
Price for arranging a water well up to 40 m deep in the Moscow region:
- land works - 1600 rubles;
- installation of a caisson (from reinforced concrete rings, monolithic castings or a polymer chamber) - from 12,000 rubles .;
- installation of pumping equipment - 10,000 rubles;
- installation of a hydraulic tank and its connection - 5000 rubles .;
- installation of the head - 2300 rubles;
- automation - 1000 rubles .;
- piping for drinking water - 100 rubles / mp;
- commissioning - 1,000 rubles.
If you refine the well with your own hands, you can save up to 20,000-30000 rubles.