To protect the upper part of the casing from frost, precipitation and vandals, the masters prefer to mount a caisson for a well made of brick, concrete, reinforced concrete rings or polymer. You can do the work yourself, knowing the basic principles and stages of installing the camera.
Types of home-made caissons
The master can make a special chamber for placement of pumping equipment, automation, a hydraulic accumulator of the following materials in it:
- Reinforced concrete rings. This option is good only in that with a high groundwater level and strong heaving of the soil, the camera will not budge due to its mass. But here it is important to consider that the joints of the rings often have fistulas. Caisson will be periodically flooded. The installation of such a protective chamber will require serious costs: delivery of reinforced concrete elements, rental of special equipment for their installation.
- Monolithic concrete pouring. It is considered more durable than the design of the rings. In addition, the work, although time-consuming, is within the power of even one master. With proper reinforcement, the final concrete caisson will be strong, tight, and durable. More often, such a camera is made square because of the particular formwork installation. As with reinforced concrete rings, a solid foundation is necessary for concrete.
- Metal. Such a chamber is mounted less and less, since steel is prone to corrosion, and therefore, to destruction over time. To avoid this, when arranging a metal caisson, it is necessary to additionally process the material with special paints. In addition, the quality of the welds is not always perfect, which leads to the formation of fistulas and further flooding of the chamber.
- Brick. The best option for the caisson, if the master wants to independently mount the camera. This form is especially relevant if there are remnants of blocks from the built cottage on the site. The brick caisson is durable and reliable. The main thing is to treat its outer walls with bituminous mastic for complete sealing.
- Polymer. Here you can use a large barrel, or buy a plastic caisson with stiffeners. Working with polymer tanks is easier than with others. In addition, plastic caissons from 50 years or more are used.
Choosing the type of camera by type of material, the master should rely on such criteria as the installation speed, the cost of the process, the durability of the caisson, and certain difficulties in its construction.
Necessary tools and materials

If the master decided to mount a monolithic concrete caisson, the following materials should be prepared:
- cement M-400 and above;
- medium fractional crushed stone (30 mm);
- river sand;
- reinforcing mesh or rods;
- bituminous mastic;
- boards for formwork.
To install a brick caisson, you should prepare:
- cement M-400 and above;
- crushed stone (fraction 20-25 mm);
- river sand;
- brick blocks (the number of pieces is calculated by the estimated width and height of the walls divided by the width and height of one block);
- bituminous mastic.
From the tools you will need:
- a concrete mixer or a special tray for manual mortar preparation;
- bayonet and shovel;
- tamper;
- roulette;
- hammer and nails;
- Master OK;
- mallet;
- buckets;
- building level;
- gas-burner.
For all other types of caisson (made of polymer or rings), the containers themselves will be required plus a shovel and rammer.
Preparatory work
The initial stage in the installation of any caisson is the preparation of a foundation pit for it and the foundation device. A hole is dug in the dimensions of the future camera, plus 20-30 cm from all sides, including the bottom.As a result, the neck of the caisson should rise above the ground by 20 cm. This allows to prevent atmospheric precipitation from entering the protective structure.
The bottom of the pit is well tamped. Pour a sand cushion with a layer of 10 cm and compact it well. If the installation of concrete, brick or caisson from reinforced concrete rings is envisaged, a cement site with a thickness of 15-20 cm must be made. It is better to reinforce it. Once the base is ready, you can proceed with the construction of the caisson.
At the junction of the concrete slab with the casing, it is desirable to lay waterproofing material. Before pouring the solution, the pipe must be treated with mastic from bitumen or tightly covered with roofing material.
DIY installation steps for caissons
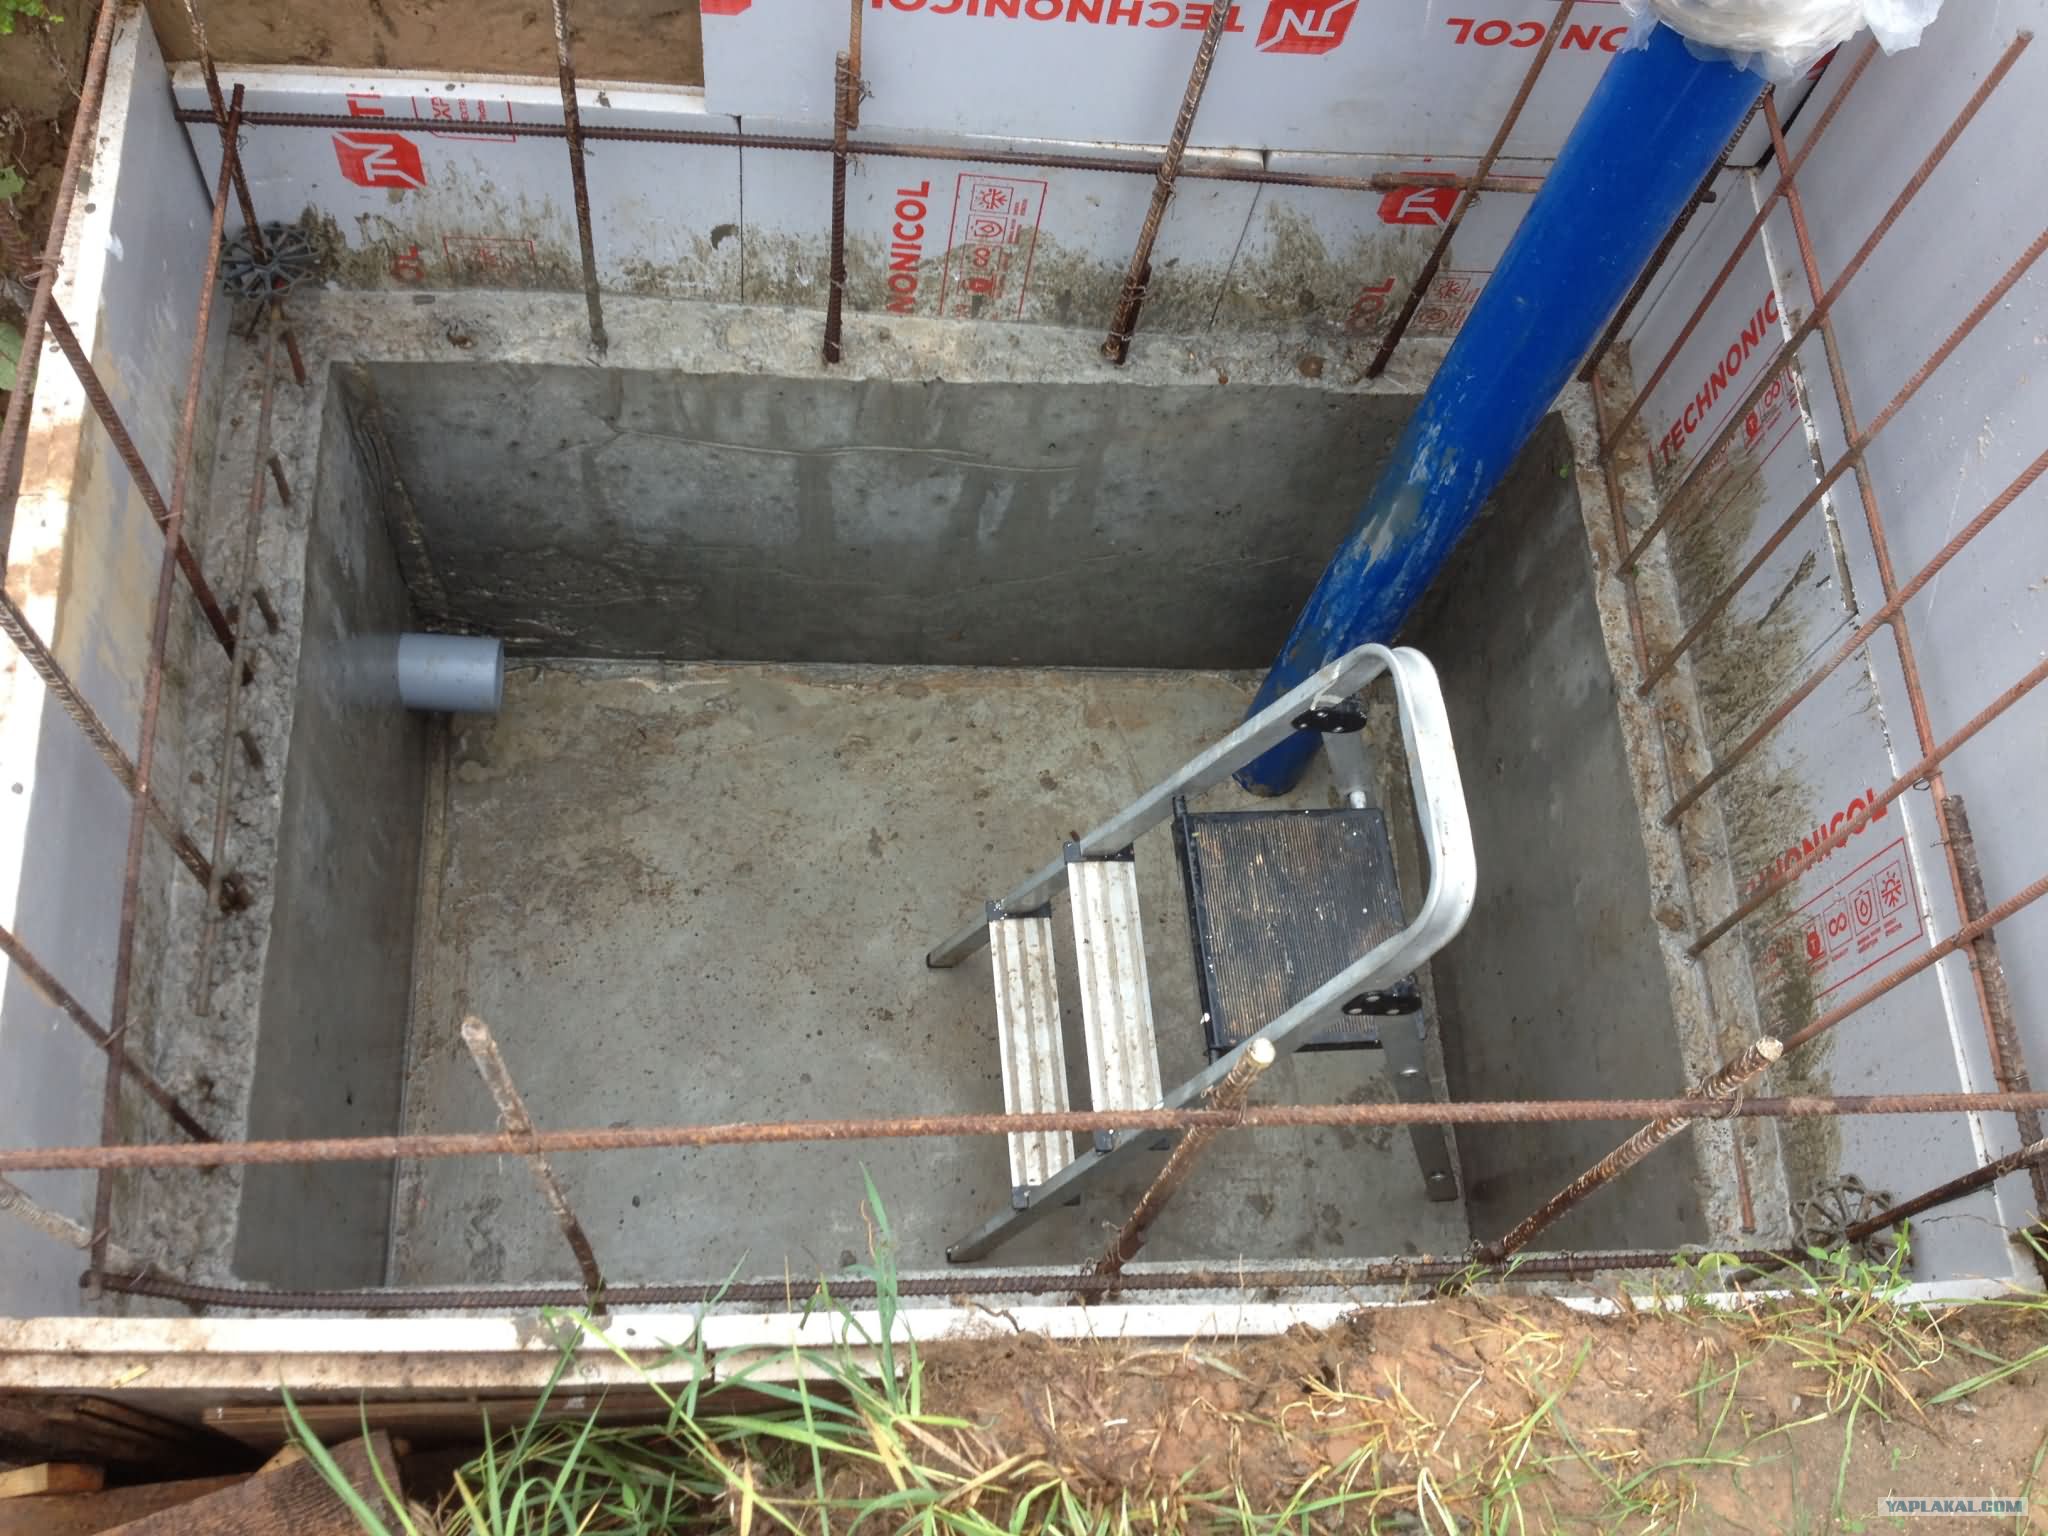
A monolithic concrete tank is poured in this way:
- The formwork is installed on the prepared base, stepping aside 20-30 cm left from the walls of the pit. You can drive the frame out of the boards gradually (30 cm) or immediately to the entire height.
- A reinforcing mesh is installed in the formwork.
- Prepare a solution of cement, sand and gravel in a ratio of 1: 3: 5, respectively. Loose diluted with water to obtain a mixture of sour cream-like thick consistency.
- The finished solution is poured in portions into the formwork and gently rammed with a metal rod to expel the remaining air.
- As soon as the tank completely hardens, the formwork is removed and, with the help of a puncher, holes are made in the walls for the outlet of cables and the water main. All technical gaps are closed with cement-sand mortar.
- The outer walls of the finished caisson are coated with bitumen mastic.
The top of the chamber can be equipped with a wooden board covered with roofing felt or pour a monolithic slab, first installing a wooden formwork from strong boards. In the stove, it is important to leave a hole for the hatch.
Caisson of reinforced concrete rings
Since it is difficult to make a caisson for a well from concrete rings with your own hands, here you will need the help of special equipment. Elements before installation must be treated with bitumen mastic on both sides. After it dries, the rings are alternately lowered into the pit on a previously prepared base. It is desirable to smear all joints with polyurethane foam and once it has dried, go over with mastic again.
Using a punch, technical side holes are made, and the gaps are sealed.
The top of the caisson from the rings can be from a concrete slab with a hatch or just a metal welded shield.
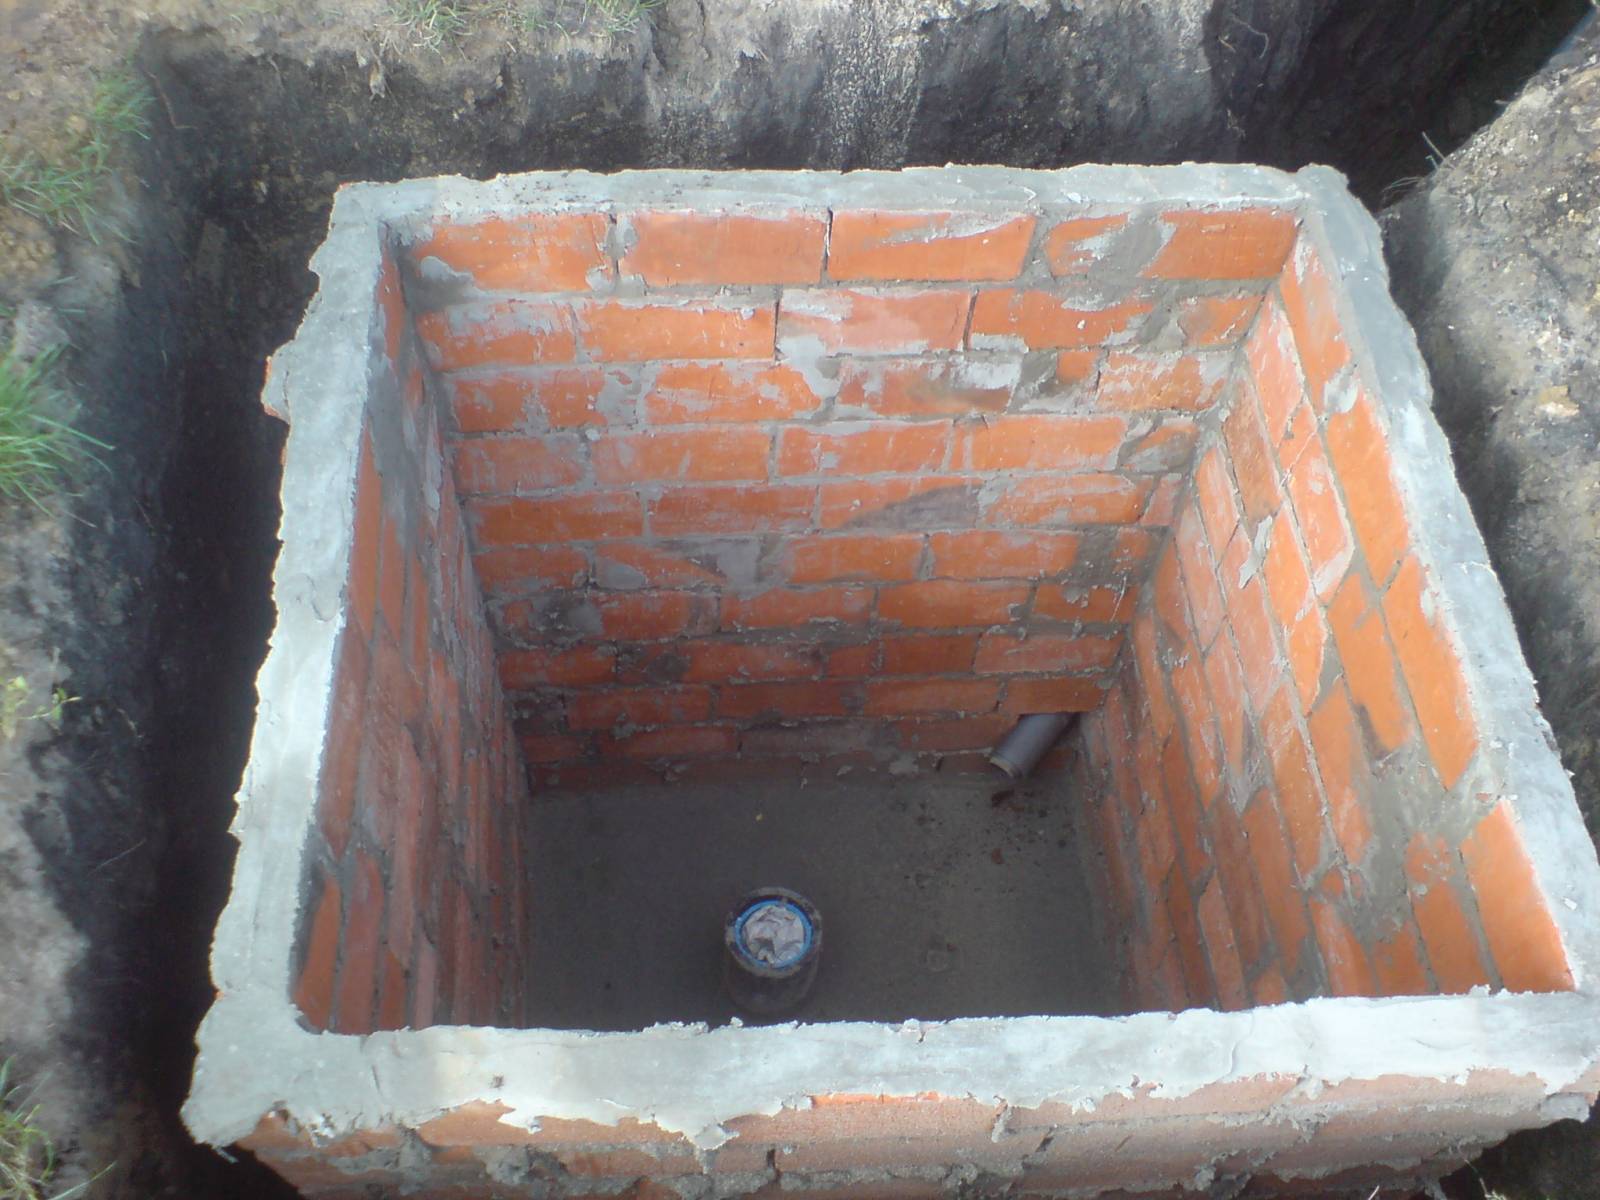
Brick caisson
Given the fact that the bottom of the pit has already been prepared (there is a concrete platform), strips of roofing material should be laid along the perimeter of the future masonry. Only after this they begin to masonry. Putting a brick is necessary from the corner, advancing to the opposite from one and the other side. The thickness of the solution between the blocks is 1-1.5 cm. It is important to install metal sleeves where the water pipe leads and cables are supposed to be. Then they expel the walls of the caisson to the desired level.
As soon as the camera is completely dry, it is plastered and coated with bituminous mastic from the outside and from the inside. After the waterproofing dries, the chamber is backfilled.
The upper part of the caisson can be made of ready-made concrete slab, monolithic casting or a wooden board covered with roofing material. It is sure to make a hatch.
Polymer caisson
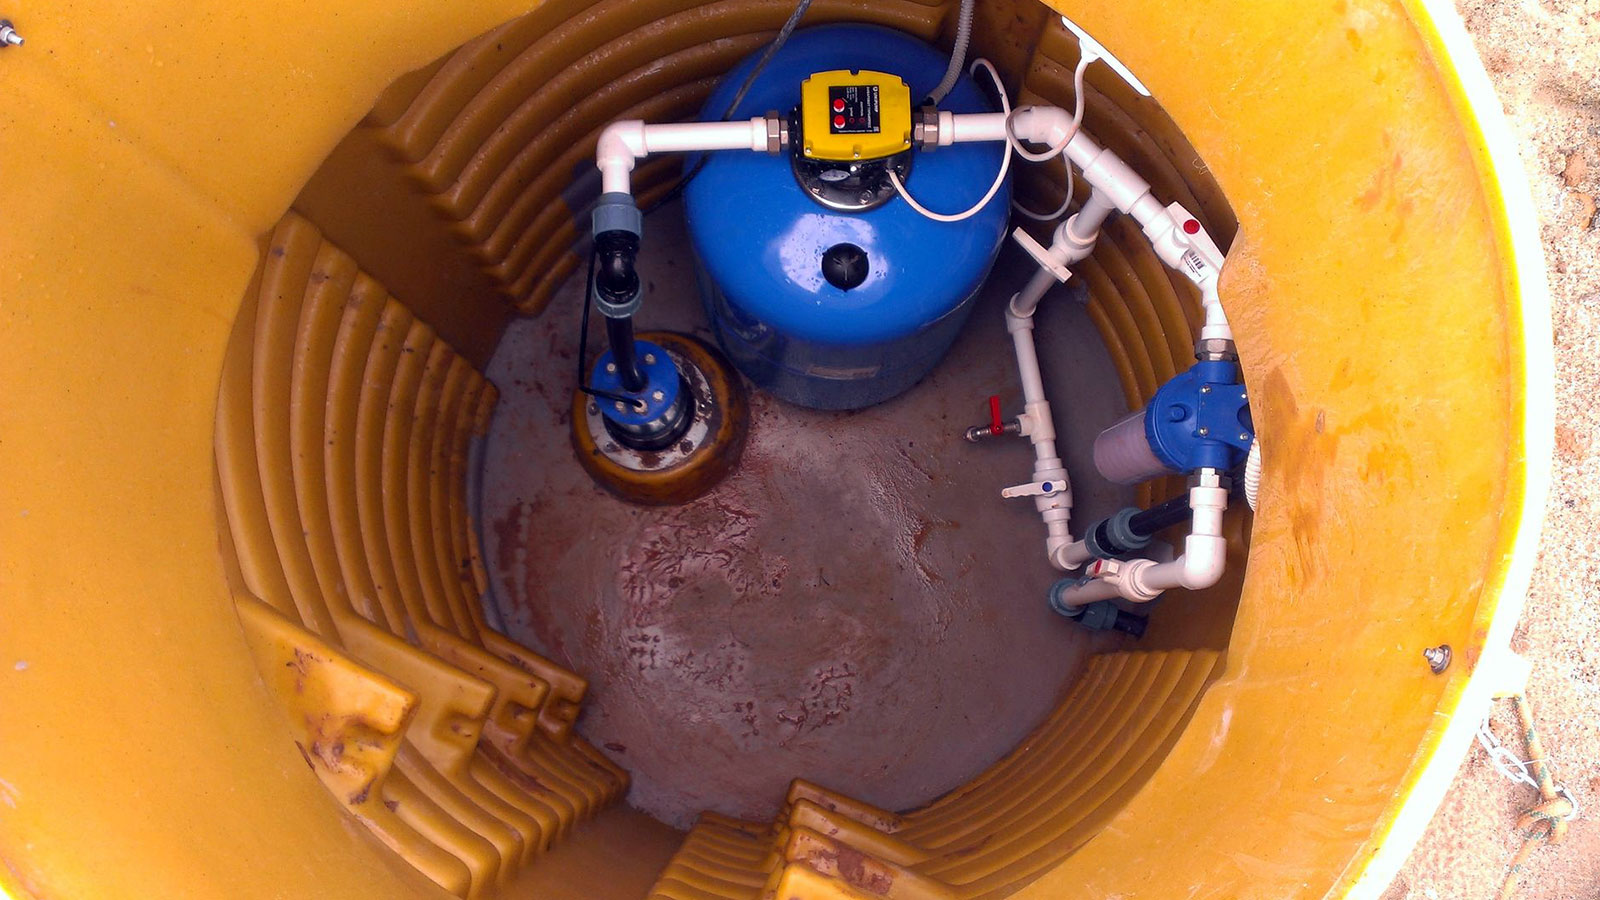
You can make a caisson for a well from a plastic barrel or buy a ready-made solid construction with stiffeners. The second option is preferable, since the tank can withstand the pressure of the heaving soil.
Often, it is permissible not to make a powerful concrete base for the installation of a polymer tank. A sandy bed of 10-15 cm thick is enough.
Installation technology of polymer box:
- The camera is mounted on wooden beams, having previously formed a technical hole for the casing in the bottom.
- Carefully put the caisson on the pipe and lower it down.
- For the conclusion of pipes and cable, it is desirable to immediately make additional holes on the surface.
- The backfill of the polymer chamber is made of a sand-cement mixture. It is slightly moistened and densified well in layers.
- Equipment in a plastic caisson should be placed 10 cm from the walls of the tank.
When constructing a protective structure for a well with your own hands, it is always worth considering the features of the site relief (the presence of stony rocks) and the level of soil freezing in the region.