The quality of tap water, as a rule, does not meet sanitary standards. Often it is unsuitable for use due to the high content of harmful impurities and pathogens. The regular use of untreated tap water not only shortens the life of household appliances and plumbing, but also negatively affects the well-being and human health. For example, a high concentration of salts and minerals contributes to the formation of sand in the kidneys and the deposition of tartar, hair and nails become brittle. Water filters help solve the problem.
Preparatory work
Before you begin to study the installation sequence of water purification filters, you need to perform all the preparatory measures. They begin with the assembly of some parts of the purification system, which are a plunge insert. This is a small shut-off valve and a tee. This work is carried out in two stages - assembly and installation of the unit on the water supply system.
- Collection of the working unit - tie-ins. This stage does not cause difficulties, since it is only necessary to correctly and hermetically connect the tee to the crane. One edge of such a tee is equipped with a 0.5-inch internal thread, a second 0.5-inch external thread, and a third, designed to be connected to the shut-off tap, has a smaller internal thread. A fum tape or tow is tightly wound around the tap, after which this part is screwed into the tee and is well fixed with a wrench. Now is the time to shut off the water supply to the house and proceed with the installation of the prepared tap.
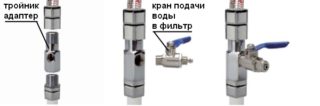 Tee and tap for feeding water into the filter
 - The next stage is more troublesome, but its implementation does not require special knowledge and skills. First of all, you need to find where the cold water pipe is located. It is equipped with a shut-off valve, it needs to be twisted. The prepared working unit is mounted on a cold water pipe. Particular attention is paid to sealing joints, otherwise the likelihood of leaks is not excluded.

After installation, it is recommended to check the working node. To do this, a small filter tap is placed in the closed position and the water supply is turned on. If there is no leak, you can proceed with the installation of the water purification filter.
Necessary tools and materials
In order to independently install the filtration system of tap water, you need to prepare all the necessary tools and materials in advance.
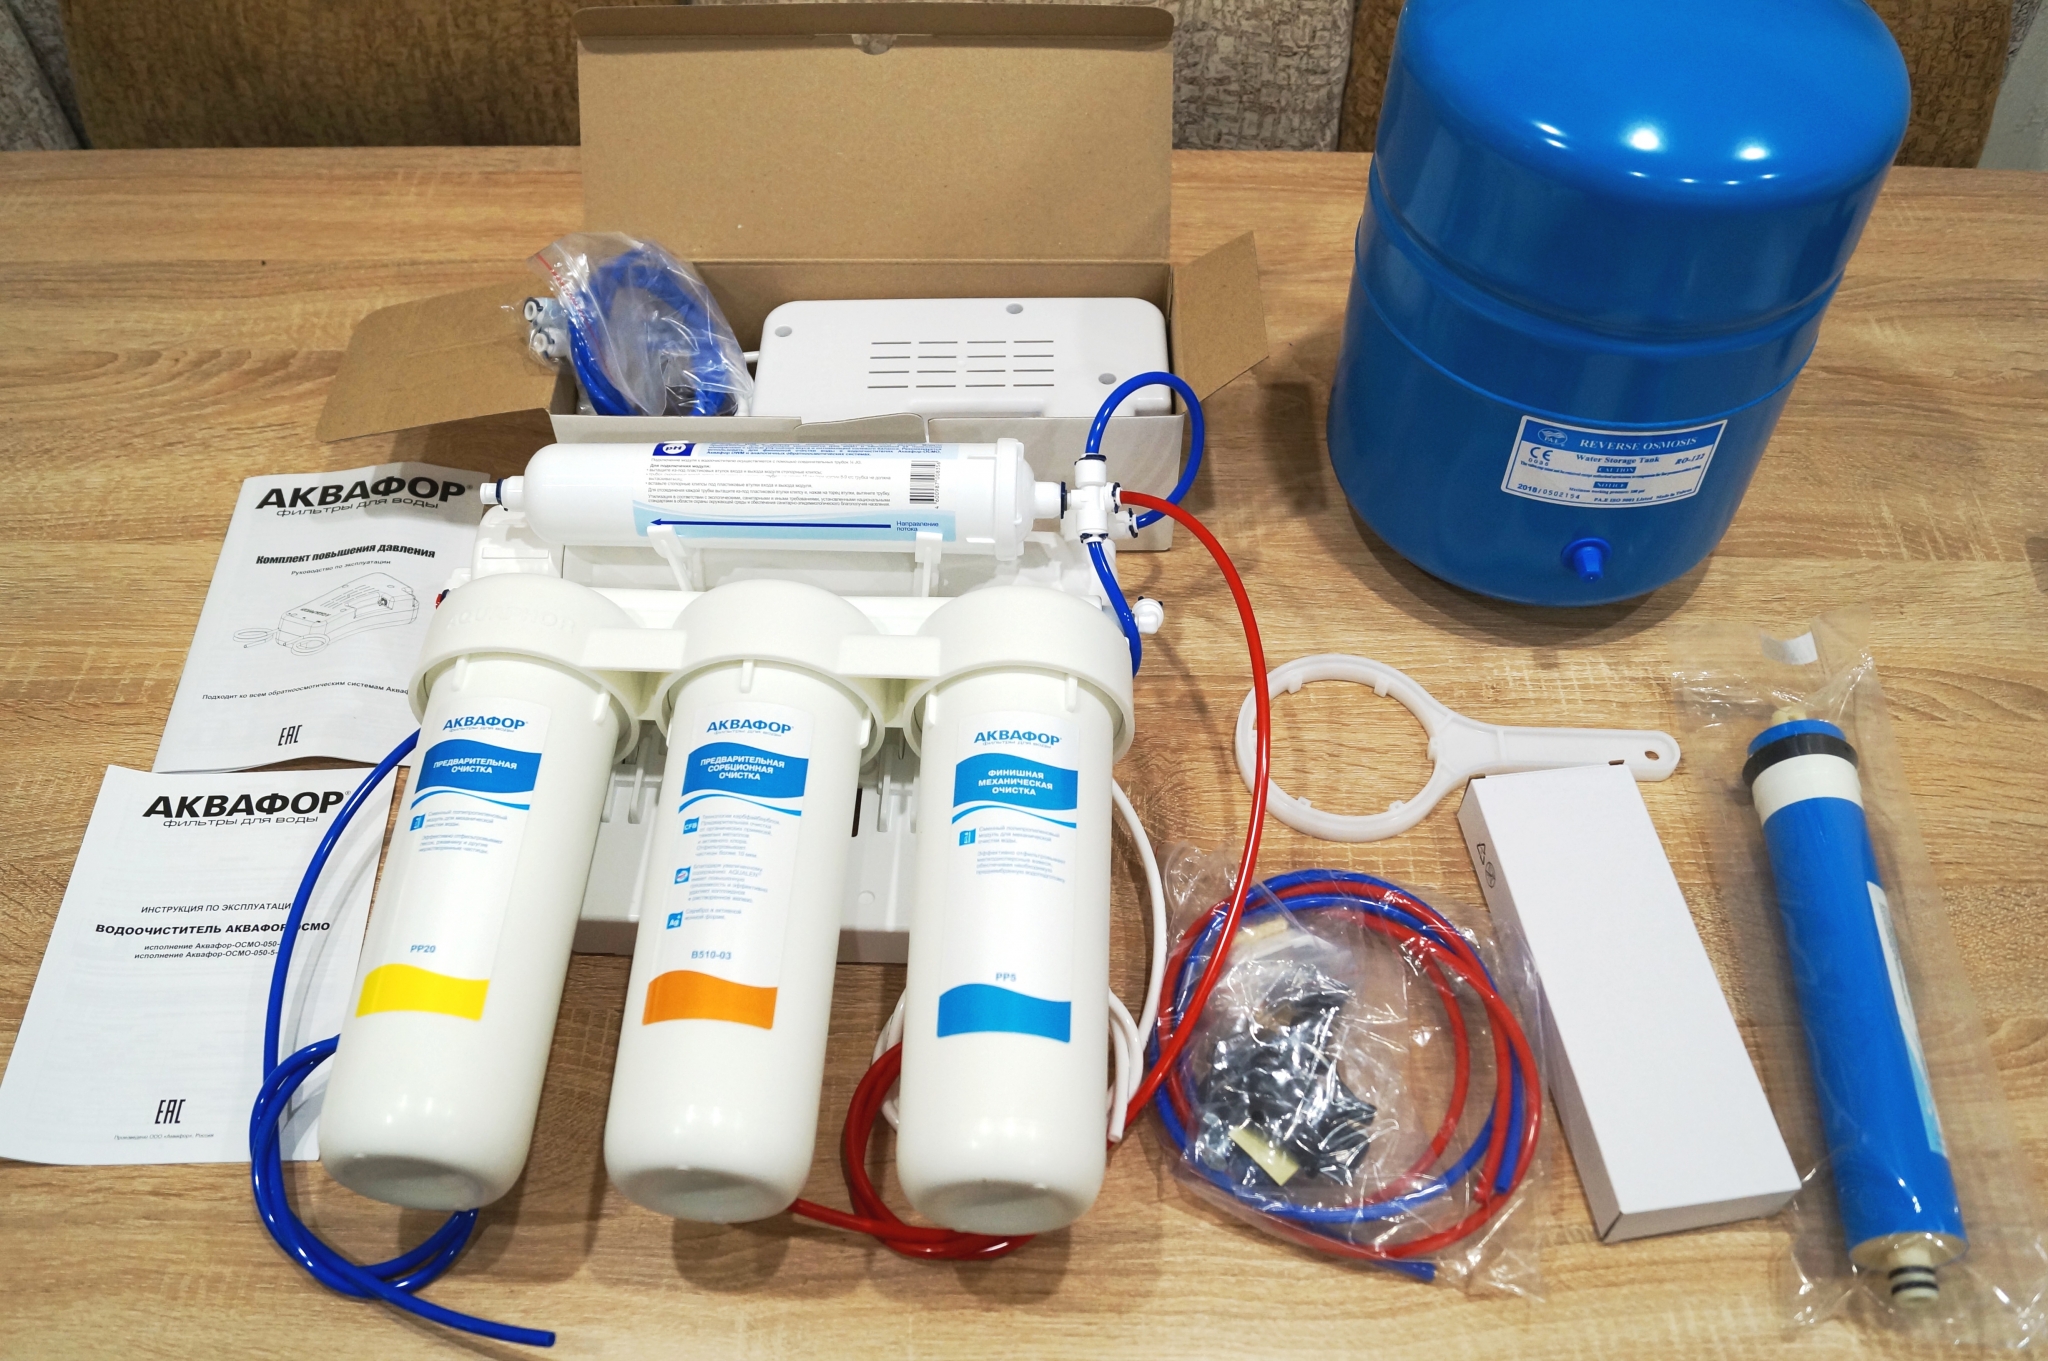
The following items are included in the package of equipment:
- Instruction: installation, operation and maintenance manual;
- cartridges: each should be stored in a separate flask for the preservation of active substances;
- through tap or tee;
- 2 connecting hoses - on an exit and an entrance;
- tap designed for purified water;
- key for unscrewing and replacing cartridges, fittings;
- gaskets;
- bracket for secure fit.
Some systems are additionally equipped with a storage tank for purified water. To install the filter you will need:
- adjustable wrench and knife;
- pipe cutter;
- drills with various diameters;
- fum tape and tow.
Before proceeding directly to the installation, it is necessary to familiarize yourself with the various installation methods and a step-by-step algorithm of actions.
Ways to connect the water filter to the water supply
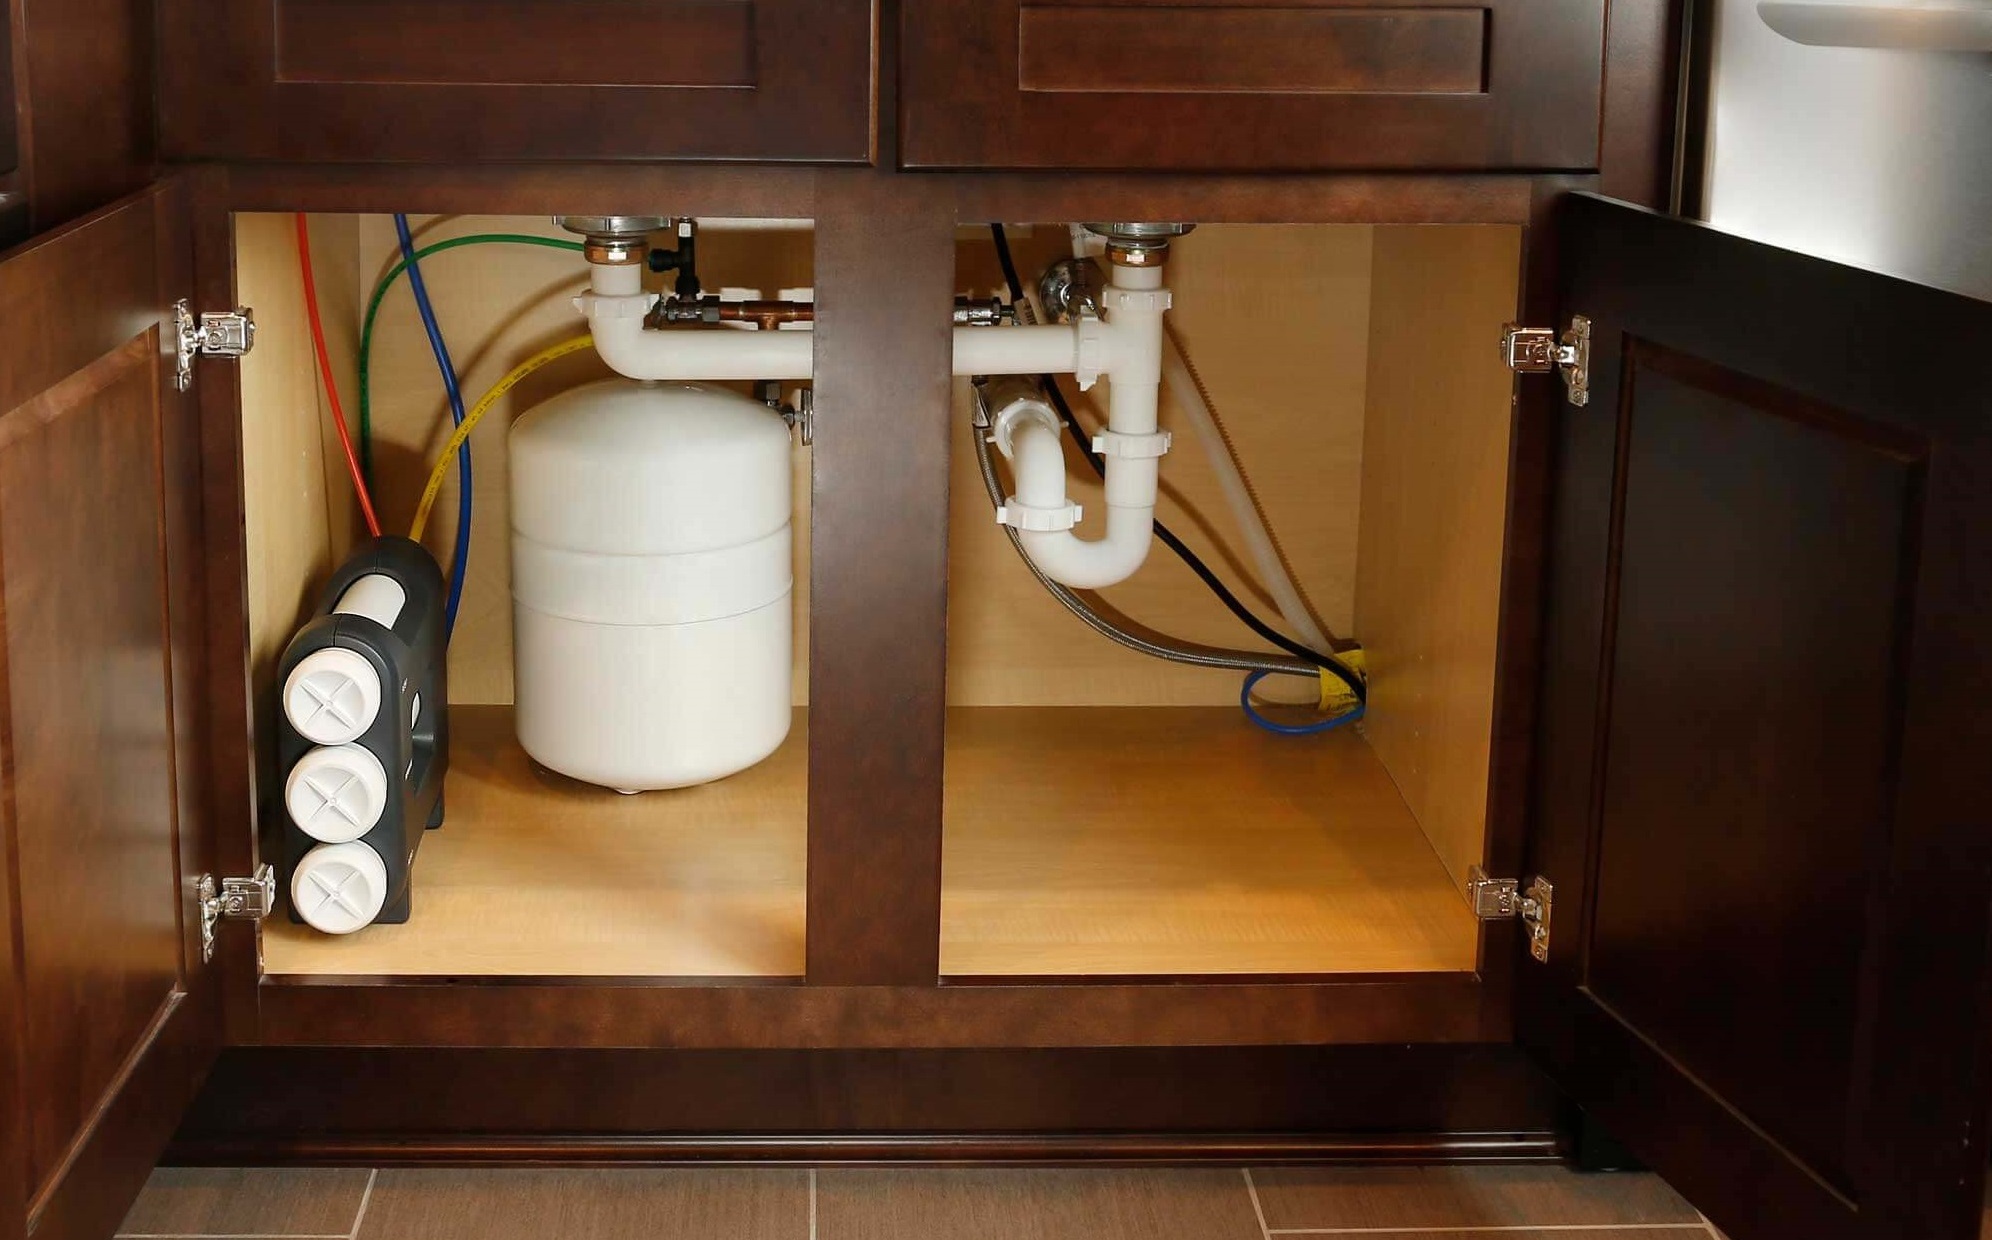
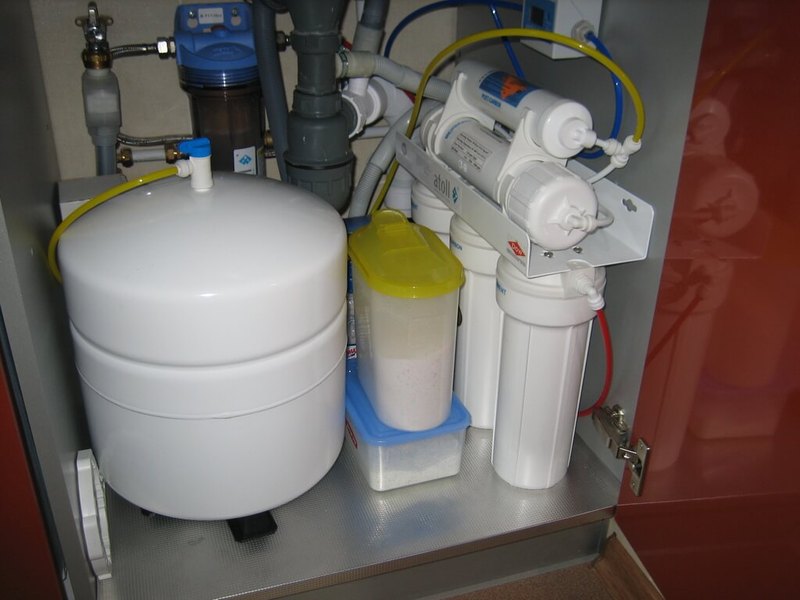
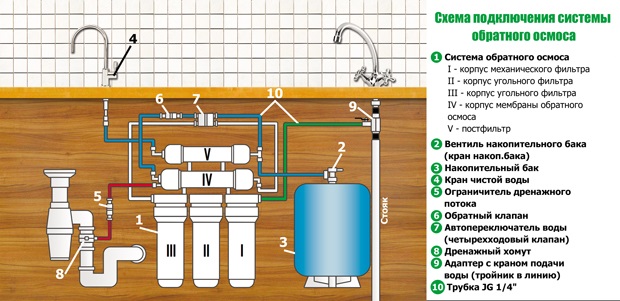
The algorithm for installing different types of cleaning equipment is not fundamentally different. Filters are mounted in a horizontal or vertical position, this does not affect the performance and service life. The most popular installation option is under the sink or sink. The equipment is of two types - reverse osmosis system and flow option.
Typically, a system that is installed under the sink consists of several sections for phased purification of water. Each section has a bulb shape and is equipped with cartridges. They are made of glass, steel or high-quality plastic.
Filter Installation Procedure
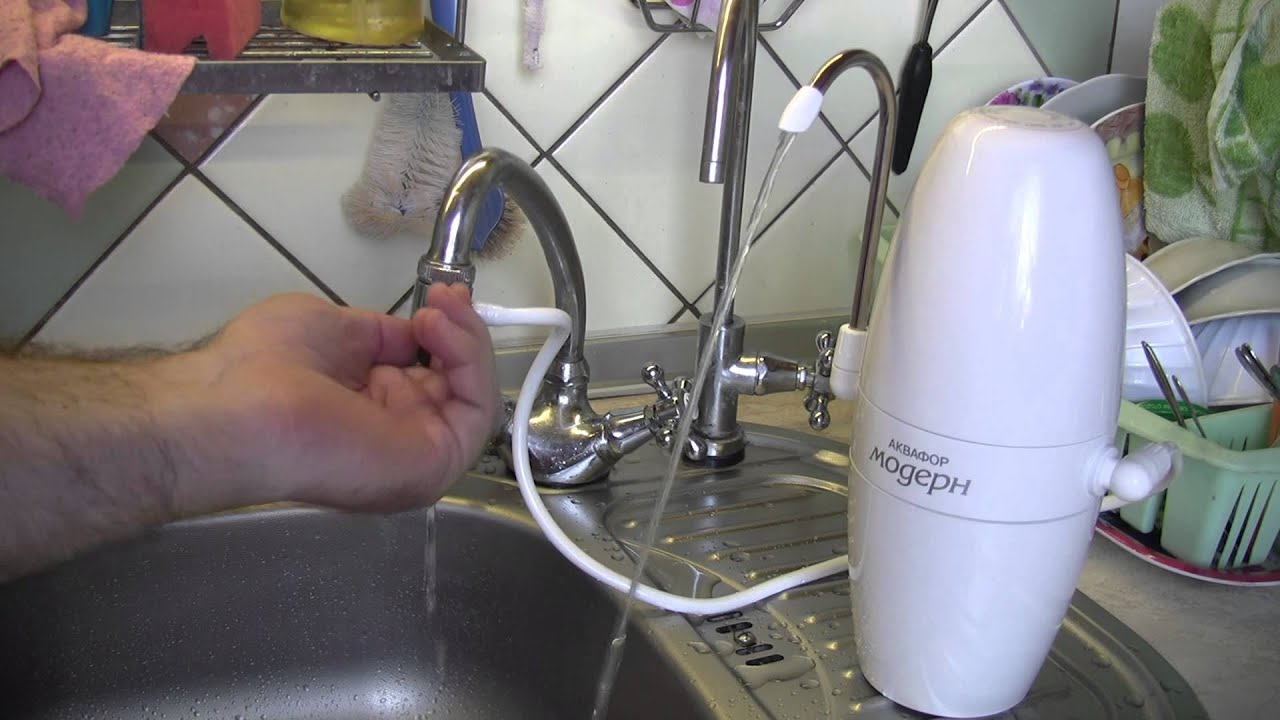
The easiest and cheapest way to clean the tap fluid in the house is a filter nozzle. Its peculiarity lies in the fact that it has a direct connection to the water supply. If the rough filter in a particular case is not enough, it is better to purchase more expensive equipment that is mounted under the sink. All work can be done independently without the help of specialists. The algorithm of actions is as follows:
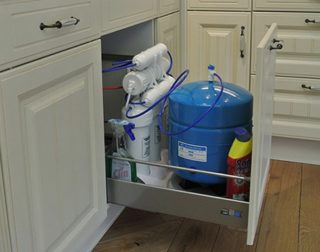
- Decide where the filter will be located. It is important to keep a short distance for unhindered access to equipment, its maintenance and cartridge replacement. It can be located horizontally and vertically under the sink, this moment is unprincipled. Since its location does not affect its performance and service life, it can even be mounted in a kitchen cabinet.
- Insert the filter into the central water supply. First you need to definitely stop the water supply to the house. After that, all threaded joints are carefully processed using a fum tape. Then you can proceed with the installation of the sidebar. Under the sink there is a cold water supply line, it is disconnected and the previously mounted insert is carefully brought down. It is important that all tubes maintain their natural position, without any movement or crushing.
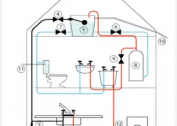
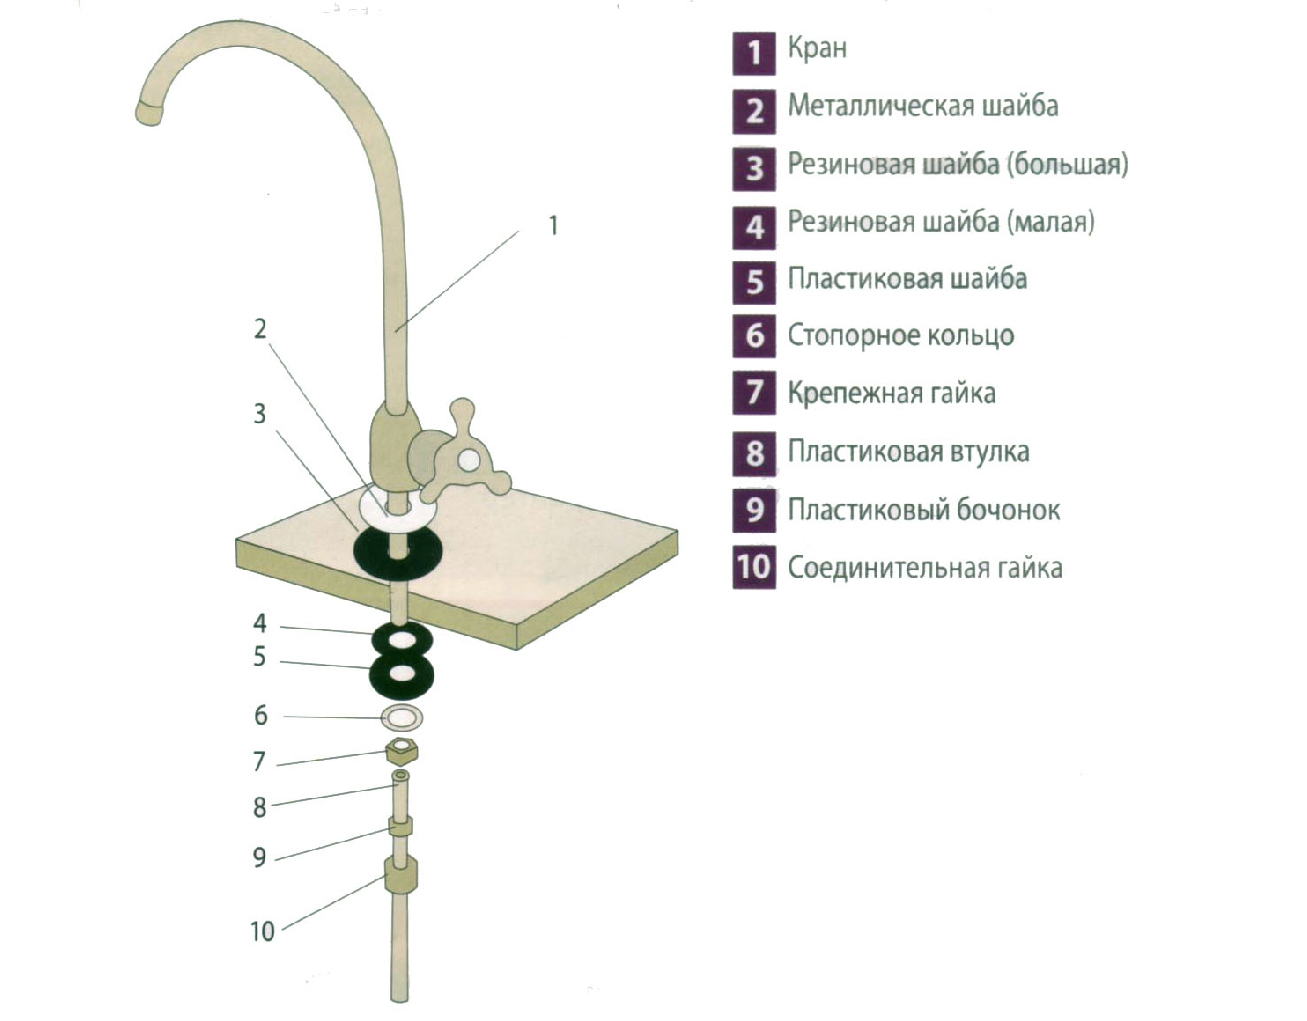
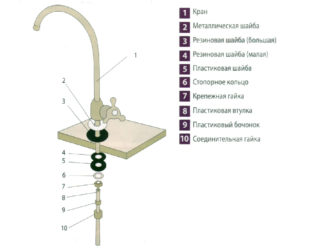 Installation scheme for a drinking tap under the sink
 - Installation of a drinking water tap. During the acquisition of the filter, you need to pay attention to its configuration, the composition necessarily includes fixing nuts and clamps for pipes. For proper installation in the sink for an additional tap, make a hole. The diameter of the drill used is not more than 13 mm. During operation, you need to be extremely careful and careful. Once the hole is ready, you can install the crane.
- The installation of the clamp is also an important stage, which can not be done. Mount it above the hydraulic shutter on a vertical or horizontal hose. Again, you need a drill, a diameter of about 7 mm. With its help, make a hole in the drain pipe. A tight rubber band is attached to the sealing hole. Next, a clamp support is installed so that the holes on it and the pipe coincide.
-
 Before installing the storage tank, you need to consider whether there is enough space for it.
One of the final stages is the installation of a storage tank. During installation, it is important to take into account its internal working pressure, it ranges from 0.5 - 0.9 atmospheres. First of all, you need to wrap the thread with teflon tape. Next, install a small plastic tap in the storage tank. In order not to damage the entire system, it is strictly forbidden to overtighten the thread. Before installation, it is important to find a suitable place for the tank so that it does not “get confused” underfoot.
- Test run the filter. Turn on the water supply. To eliminate the possibility of leaks, it is necessary to ensure that the valve on the storage tank is closed. Next, a tap opens, through which purified water will flow. After 10-15 minutes, a thin stream will appear. Closely examined equipment, taps and pipes for leaks.

Water after the first filtration is unsuitable. Before using filtered water for food purposes, it is recommended to flush the system at least twice.
The cost of installing a water treatment system varies widely, depending on the complexity of the system and the region where the homeowner lives.
Before installing the purification system, it is recommended to conduct a water analysis, take the sample to a sanitary and epidemiological station. A detailed description of the composition and chemical formula will allow you to choose the most suitable filler in the cartridge, since each of them has its own individual characteristics and affects the tap water in different ways. Cartridges must be replaced at least once every six months.