Without an installed hood, it is rather difficult to imagine a modern kitchen. Indoors, this device provides effective removal of various odors, products of combustion, as well as fumes.
The household appliances market is now represented by a wide variety of types and types of such appliances, so everyone can choose the best option for themselves. After acquiring the equipment, a problem arises regarding the installation of the hood. There are two ways to carry out such work - call the master or do it yourself. What and how to do in the second case - try to figure it out.
Existing types of hoods

Before you begin to consider the process of installing a kitchen hood with your own hands, you should understand what types of such a household appliance exist, since the installation process itself largely depends on it.
All modern models of hoods are conventionally divided into three main types:
- flat;
- recessed;
- domed.
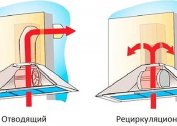
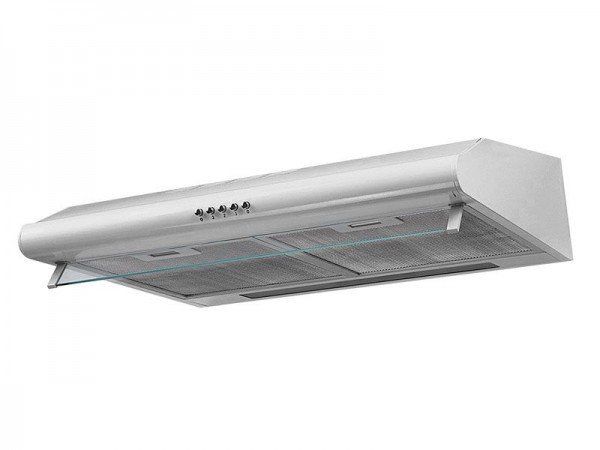
 The first option is a pendant type design that in most cases is mounted directly above the stove. Almost every such model is capable of operating in recirculation mode, it is also equipped with special filtering elements that trap the fat contained in the air mixture in the kitchen. Such equipment models are suitable for use in kitchens where there are no ventilation openings.
It should be noted that the installation of the hood in a kitchen of this type is carried out directly on the wall, so it is important to prepare reliable dowels in advance. If the wall is drywall, then the only way out is to install a wooden beam on the opposite side of the plate.
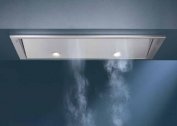
 Built-in models are mainly used in compact kitchens where space savings are required. Such a device is installed directly inside the cabinet, as the previous version, can function if there is no connection to the ventilation system along with a grease filter. Some models are equipped with a special panel, which, when put forward, increases the size of the surface that carries out air intake.
It is believed that embedded models have a high cost, but this is not so - often their price is practically no different from other models.
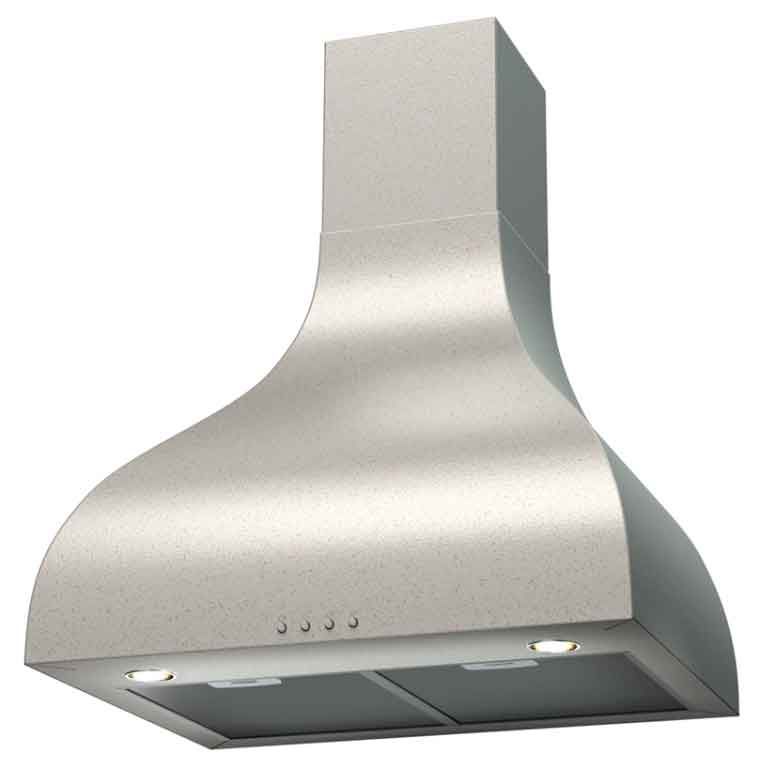 The last option - domed - got its name due to its shape. Models of this type are the most expensive, but at the same time the most suitable for rooms with a modern interior design. The frame of the case of such devices can be metal, glass or natural wood, so you can find hoods of any style solutions.
Work Tools
Before you install the hood with your own hands, you will need to prepare some tools for the work. Among them:
- drill for making holes in the wall; if the structure is too strong, a hammer may be required;
- screwdriver for installing fasteners;
- skein with tape measure for measurements;
- level for accuracy of installation of the device.
Cooker hood installation methods
As already noted, the installation scheme of the hood in the kitchen directly depends on the variety of such a device. Let's see how you can install a cooker hood ..
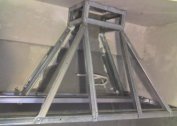
Installation inside the cabinet
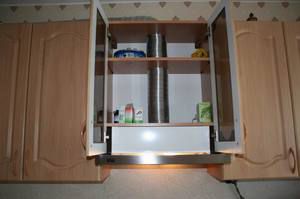
Installing the hood in the kitchen in this way implies the presence of a separate cabinet for an air-cleaning device. The main feature of this furniture element is that there is no bottom in it, and the device itself is attached directly to the middle shelf.
The distance between the bottom of the cabinet and the shelf depends on the height of the hood.
If the device is supposed to be connected to the ventilation system, holes for the duct are made in the shelf and cabinet lid.
There are 4 holes on the plane attached to the shelf. In them, you can screw ordinary screws or make through holes - the choice is determined by the type of hood fasteners.
The next step is the dimensions of the cabinet. If non-adjustable devices are used in it, then it is important to measure all parameters with an accuracy of millimeter. If universal fasteners are used, which can be put on a metal strip on the wall, then a slight error is permissible during measurements.
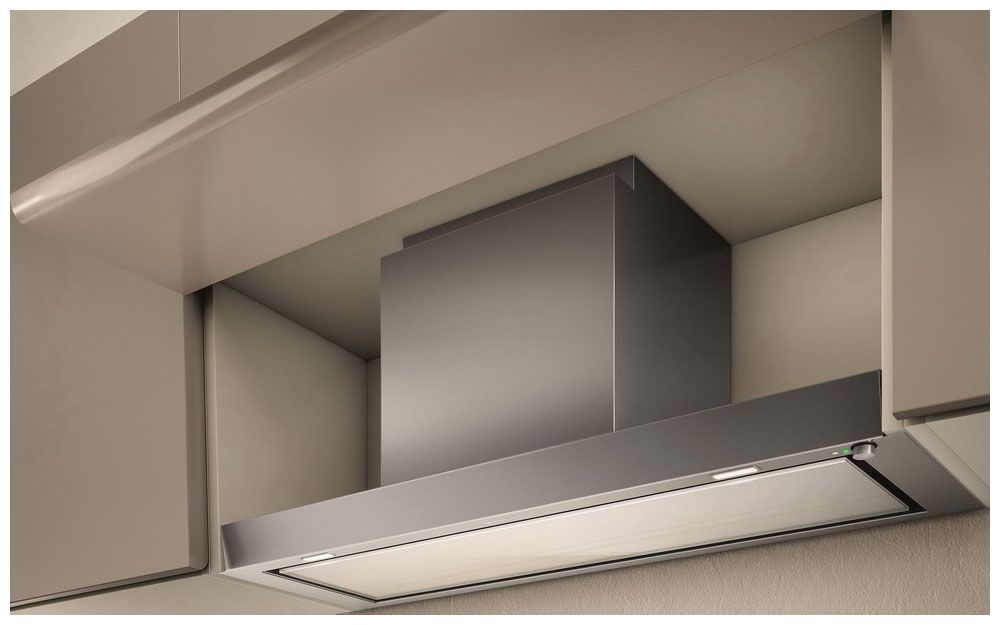
By installing the cabinet on the wall and a kitchen hood, and if necessary connecting it to the duct, the appliance will be ready for use. Installing a kitchen hood in this way allows you to hide all unnecessary details behind the furniture doors. If the hood supports operation in recirculation mode, then the corrugation will also not have to be pulled. In this case, the device will become completely invisible.
Cabinet mount
Installing a kitchen hood in this way involves fixing it to the bottom of the furniture element.
If ductwork is required, you must first make round holes for it. Do-it-yourself cabinet is mounted on the wall in the same way as in the previous version.
To hide the hood panel, the same material is used as the facade of the furniture. You need to install it as a false panel - on special glue or double-sided tape.
You can install the hood in the kitchen in this way if it is a minimized model that will easily look in the interior of the room. Typically, these types of appliances are used in kitchens, where plentiful cooking is rarely carried out, and usually only one stovetop is used.
Wall mounting
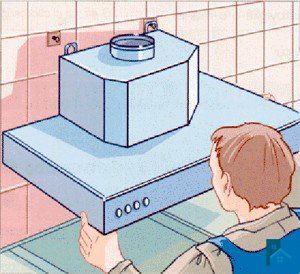
A similar way to install an air-cleaning device with your own hands is the simplest and most reliable.
First of all, the distance between the surface of the stove and the hood is measured. Typically, the minimum indicator of this parameter is 55 cm, and the maximum is approximately 80 cm. Otherwise, the suction efficiency of the device will significantly decrease. The upper threshold of this indicator is applicable for cases when a gas stove is used in the kitchen, the lower - for electric ones.
After measuring a suitable distance, the hood is applied to the mark and 4 marks are made on the wall for fixing the device. Then, removing the hood, holes are made in the wall for the selected dowels. Having twisted the upper fasteners, an extract hood is installed on them. If it hangs securely, without removing the device, two lower self-tapping screws are screwed in.
Usually a detailed scheme for installing the hood in any way is in the instructions for the device. If it is absent, there is no problem, because all the necessary circuits can be easily found on the network.
Some nuances of installation
In the case of using an air duct, it must be ensured that its diameter is larger than the diameter of the outlet of the device. If it is the other way around, the device’s engine can be subjected to increased loads, the efficiency of the work it performs may decrease, in the process, the noise level will increase.
When laying the air duct with your own hands, it is important to remember that it should not be very long and too curved. For example, a 90-degree turn of the corrugation leads to a decrease in the work performed by the device by 10%. In the case of bends that form an angle of more than 90 degrees, the engine will often overload during its operation.
Before installing the hood, it is recommended that you install all the necessary furniture or mark it up. This will make it possible to determine the appropriate location of the outlet and duct.Hoods are usually equipped with short cords, so the outlet should not be placed far from the appliance. Also, there should be no crushing of the cord, its sagging or location in close proximity to the stove.
Thus, installing one or another type of hood in the kitchen with your own hands does not mean anything complicated. Now everyone who has not even encountered such a problem before will be able to do such a job on their own, without resorting to the services of a master and without spending extra material resources on it.