With the onset of summer, heat becomes a real problem, which complicates the conduct of any event, deprives people of comfort and coziness. An inexpensive and practical way out of an unpleasant situation can be a home-made fan made from auxiliary materials and devices. The manufacture of this device will save on the purchase of factory goods and it is interesting to spend time assembling. To make a choice in favor of a particular solution was easier, you should understand what you can make a fan of yourself.
Aspects of Fan Design
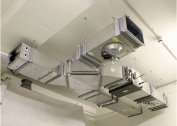
Before proceeding with the design, it is necessary to imagine the design of a product of a cooling type. At the location they can be floor, ceiling and table.
Both factory and homemade fans consist of such parts:
- Propeller. The larger its diameter, the greater the volume of air will be supplied to the object.
- Electric motor. A product powered by a household network, adapter, batteries or rechargeable batteries may be used. The performance of the finished device is directly proportional to the power of the motor.
- Stand. Here you need to show imagination and ingenuity. The stand should meet criteria such as safety, stability and presentability.
- The wire. For a small motor, any cable left over from broken watches, lamps and other small household appliances is suitable. It is advisable to install a switch on the wire to control the device without getting up. If you plan to connect USB, an extension cord, cord from an old mouse or keyboard will do.
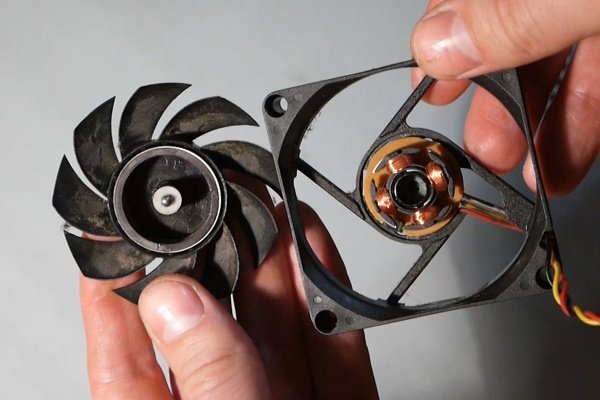
The initial stage for the start of design and construction is the search for a motor. If the house has unnecessary tools, toys and kitchen appliances, they can be sacrificed. Motors from a drill, screwdriver, screwdriver, mixer, baby car, trimmer, electric shaver can be used. Sometimes in the apartment you can find broken coolers from system units or laptop stands. Given the saturation of modern housing technology, finding a motor is not difficult.
Necessary materials and equipment
Since all air coolers have almost the same device, a kit for their manufacture will be standard.
To make a compact and silent fan at home you will need:
- ruler, square, pencil;
- soldering iron;
- scotch tape, scissors, stationery knife;
- 220 or 12 V motor;
- cable with appropriate plug;
- thermal glue;
- Styrofoam;
- CD discs;
- wine cork made of natural material;
- cardboard sleeve and box;
- insulation tape;
- building hair dryer, candle or lighter.
To ensure that the work is safe, it should be done with goggles and construction gloves. When handling the soldering iron, good ventilation should be arranged.
DIY fan options

Having at its disposal an electric motor, you should come up with a reliable, stable and beautiful base for it. It is better to use polystyrene as a socket for the motor housing. A niche is cut under the device, after which it is glued with silicone.
Then the following actions are carried out:
- 7 thick tubes for cocktail stick together.
- The wires in the right amount and with a sufficient margin are passed through them.
- In a wide and low plastic bottle, holes are made for wiring and a channel switch.The joints are sealed with sealant.
- Sand, cement or lead shots are poured into the container to add weight to the stand.
- Glued tubules are inserted into the neck of the bottle to the desired depth and fixed with glue or colored electrical tape.
- The foam bed and stand are connected. The final connection of the wires and power source is performed.
In conclusion, the product is decorated. To do this, use paint, duct tape, decoupage or paper. At the bottom of the bottle you can glue a CD, which will give the design a presentable appearance and additional stability.
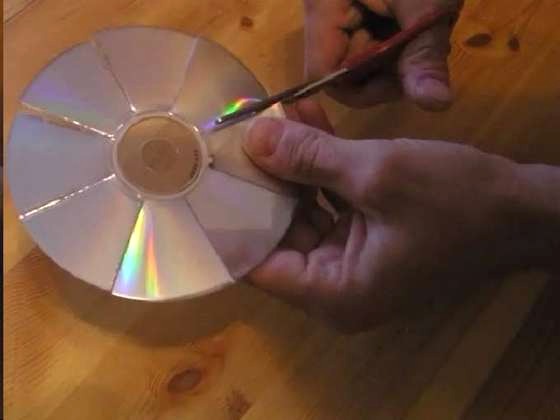
The easiest solution to the issue with the blades is a CD. Production is carried out in the following sequence
- The disk is divided into 4, 6 or 8 identical sectors.
- With a soldering iron, a heated knife or grinder, slots are made to an opaque base of the disk.
- Products warm up at the base, the petals rotate in one direction. You need to look so that the angle of attack is the same everywhere.
- The blades are cleaned with a knife or file.
- A bottle cap is inserted into the center hole. It makes a hole for the rotor of the motor.
- The engine and propeller are connected together. After achieving perfect centering, the docking station is fixed.
It remains to fix the finished block on the stand and carry out its decoration.
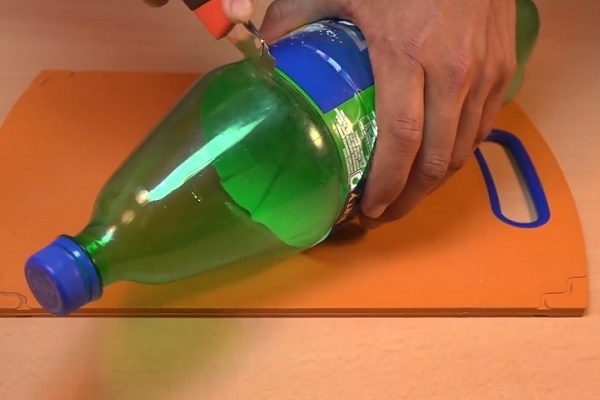
Using a cork as a central axis attachment, a propeller is made from a plastic bottle. The work is performed in the following sequence:
- A plastic bottle with a capacity of 1.5 liters of the desired color is selected.
- The neck is cut off at the top of the label.
- The upper part is divided into 4, 6 or 8 sectors. The marking lines are cut to reach the seal area.
- The blades are rounded in shape. This is best done using a template.
- The base of the petals are heated above the fire and rotated to a certain angle. Each time you need to withstand a few minutes, so that the plastic cools down and takes a new shape.
- A wine cork is tightly inserted into the cap screwed on the neck. A neat hole is made in the center to fit the axis of the motor.
- Glue is added to the hole, after which the propeller is mounted on the axis of the engine. Until the glue has set, the fan is centered.
The final stage is the installation of the block on the basis and its design.
An even simpler measure is the manufacture of a propeller made of cardboard or thick paper. Production is carried out in the following sequence:
- A sleeve is glued from several layers of thick cardboard. In order for the product to have sufficient strength, it should be treated with a primer so that the cardboard is saturated through it.
- An empty rod from the handle, a cocktail tube or a telescopic antenna link from the receiver are glued into the center of the sleeve. The motor axis will be inserted into this hole.
- Align the sleeve so that its shape is as round as possible.
- Cutting the propeller blades according to the pattern. This is a condition that they will all be the same, and the cooler will be quiet, and during operation will not create vibration. The base of the petals are fitted under the sleeve to achieve a full fit.
- The places of fixation of the blades are noted. They are mounted on thermal glue. The more petals, the better the balance of the propeller.
In conclusion, the finished product is painted with waterproof paint. After that, it will not swell from dampness, and removing dirt from it will be faster and easier.
A fanless fan is made from a computer cooler by placing it in a pipe. The advantages of this solution are that the air flow will be concentrated and directed.
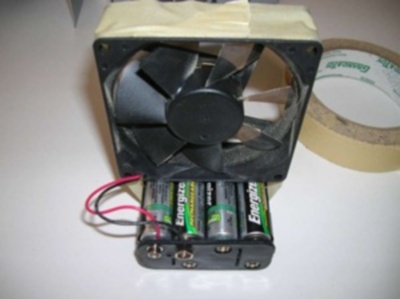
A fan is made from a cooler with its own hands in the following sequence:
- Cooler measurement is in progress. The diagonal of the square will be the minimum diameter of the pipe that you need to find or make yourself.
- The housing for the propeller is selected or made independently. It can be a plastic sewer pipe or a twisted piece of flexible cardboard, plastic or metal. The edges of the cylinder are glued together, fastened with brackets or rivets.
- A circle is cut corresponding to the shape of the internal section of the body. A cooler is applied to it, excess material is cut out under the propeller opening.
- The wires are connected, the unit with the cooler is inserted into the cylinder, leveled and glued.
It remains to make an adjustable stand and decorate the product.
To make a homemade 12 volt fan, you can use a power supply for a laptop, LED lamps or other household appliances of the corresponding voltage. Connection is made through the connector, and the device itself is turned on using the red button located on the left.
The modernization of the existing fan is carried out when the devices for one reason or another cease to satisfy their owners. For this purpose, a new propeller with enlarged petals is made, LED strips and boards are installed on the case, and an insert for a continuously adjustable power switch is inserted.