A metal tile or corrugated board is an excellent durable material that creates a reliable coating for any building. But the metal roof has a minus - it does not let air through, as a tile does. In this regard, it is necessary to provide measures for ventilation of the under-roof space: on the roof they make special ventilation outlets for the metal tile, resembling a short chimney. If you neglect these devices, condensation accumulates under the roof, destroying the rafters and worsening the properties of the insulation.
A competently constructed roof made of metal tiles will last for many years, if you provide for the removal of moisture from under it. But if the roofing sheet is laid correctly, where does the moisture come from?
Moisture under the roof
A person in the process of life emits a lot of moisture in the form of vapors: when breathing, bathing, washing dishes and cooking. Vapors rush up, penetrate through the overlap and linger in the insulation layer under the roof. Some owners from below cover the insulation with a layer of plastic film, protecting the roof. So all the moisture remains in the living room, which is also very bad. Sometimes the problem is partially solved by venting through the wall.
Another source of moisture under the roof is condensation. In winter, heat penetrates the attic from the house, so warm air comes into contact with the icy metal surface and “dew” falls out.
Moisture in the under-roof space is dangerous:
- Wooden rafters, getting wet, are deformed, moldy and dry out. Stronger destructive effect if the rafter system is not covered with an antiseptic;
- The insulation layer ceases to insulate and perfectly conducts heat or moisture;
- In winter, the metal warms up from below and the snow on the roof melts, freezes and melts again. The load on wooden structures is increasing;
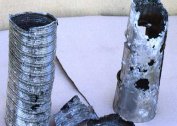
- Moisture may cause the metal to rust. It is impossible to cover the roof without damaging the coating of the sheets.
All these troubles recede when under-roof ventilation is equipped with ventilation outlets.
Roof ventilation
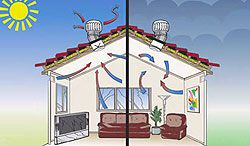
Roof ventilation is organized in a continuous or spot way. With any of them, air enters under the roof from below, into the eaves, passes under the entire area of the roof and goes outside with water vapor and heat.
In the first case, through the ridge duct (continuous ventilation outlets), in the second through the isolated ventilation outlets (point). Some owners fear that precipitation will fall through the ventilation outlets on the walls and floors. In vain, the design of point aerators completely eliminates this possibility.
The movement of air in the under-roof space solves a number of problems:
- Water vapor that gets into the roofing cake from the house is evacuated;
- The metal tile cools, preventing the melting of snow in winter and the appearance of icicles and ice blocks;
- In summer, the roof does not overheat under the sun.
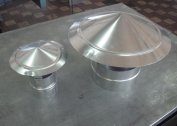
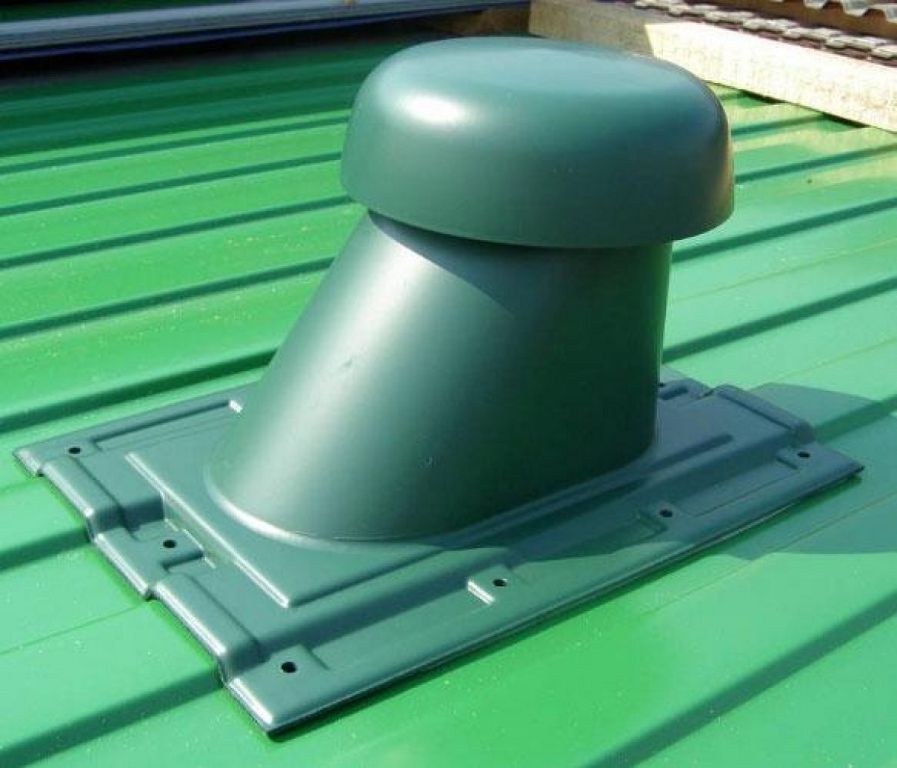
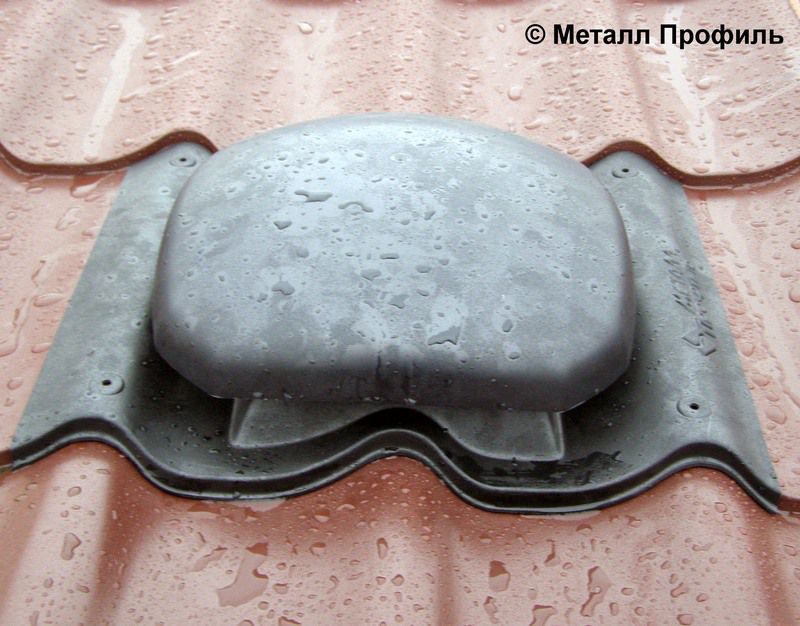
The advantage of using point ventilation outlets is that they can be installed on a completely finished roof. Whereas the eaves are equipped directly during the construction of the roof.
Insulated ventilation outlets are located as close to the roof ridge as possible. There are several varieties of aerators, their size and quantity depends on the area and material of the roof.
Selection of ventilation outputs
If the roof area does not exceed 60 square meters.meters, it is hip or gable in shape and covered with metal tiles, the only ventilation outlet is enough.
The larger the roof area, the more ventilation outlets are needed.
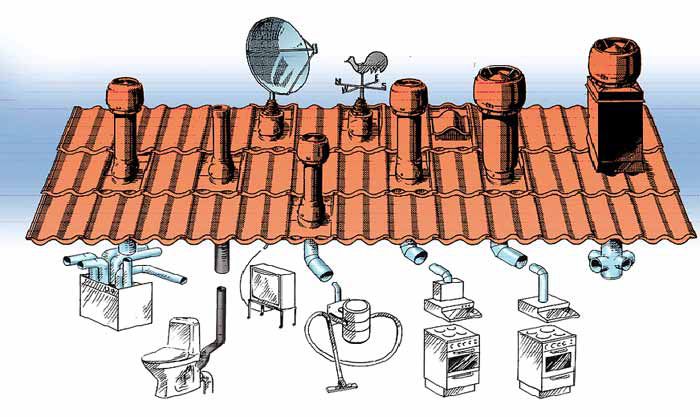
With a complex shape of the roof with several ribs, ventilation exits for the metal tiles are installed at each rib. The location is determined by the owner of the house or architect.
The main rule: from the ridge to the ventilation outlet with a cap should be no more than 0.6 meters.
However, it is not advisable to install more than one ventilation outlet on each sheet of metal tile or corrugated board so as not to damage the unnecessarily roofing.
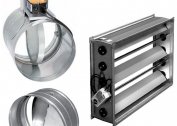
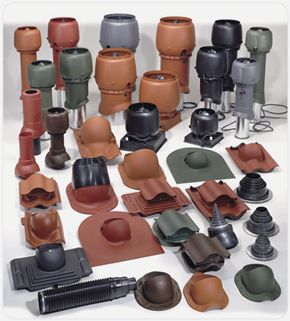
On sale there are many options for ventilation outputs for profiled sheet and metal. Although the principle of operation of all types of isolated ventilation outputs is the same, there are slight differences in the designs of different manufacturers, fasteners and equipment.
When choosing a ventilation outlet for a profiled sheet or metal tile, you must consider:
- The mounting profile of the ventilation outlet with the cap must match the profile of the roofing;
- Temperature differences for which the ventilation output is designed for corrugated board;
- Equipment. The kit should include: the pin output itself, the installation manual, template, fasteners, lining. It is important that there is a passage element, otherwise it will be very difficult to do the work accurately. Some manufacturers do not supply a lead-through element;
- Diameter of ventilation outlet with cap. It is directly proportional to the roof area. To save money, on roofs of complex shape with a large number of attics, the ventilation exits to the roof are made of pipes of the smallest diameter;
- The color of the point element is selected depending on the color of the roof and the house;
- The presence of additional functions that enhance air exchange (fan) or facilitate installation (built-in level).
Setting the ventilation outlet
Before installing the ventilation exits on the roof from a profiled sheet or metal tile, purchase tools and supplies:
- scissors and a hacksaw for metal;
- drill and screwdriver;
- marker;
- construction level.
To make the ventilation outlet to the roof tight, you will need silicone sealant.
Before starting work, check again that there is a passage element.
It is most convenient to purchase a fully equipped ventilation outlet, for example, from Wirplast or Technonikol. Read the instructions for your model carefully.
Progress

The first step is to make a hole in the roof. The passage through the roof is one of the most important points in installing a ventilation outlet for corrugated board. The quality of the passage determines whether the roof will leak at the installation site of the Wirplast ventilation outlet, whether the factory coating of the metal is broken and if rust appears.
Next, it is necessary to install the pipe hermetically so that the air exits only through it, and moisture does not penetrate into the gap. The device of the ventilation outlet TechnoNIKOL d110 is such that with proper installation and assembly a reliable design is created that meets all the requirements.
- In the kit there is a template that is applied to the roof at the place where the Wirplast ventilation outlet is planned. The template is surrounded by a marker;
- Drill along the line holes, as close as possible to each other;
- Scissors for metal (you can use a hacksaw) cut a hole that matches the template. You can not use a grinder! Sparks and heat destroy the polymer layer of metal, creating a place for corrosion;
- The passage element is installed in accordance with the instructions for it;
- The place where the pipe passes through the roof is coated with sealant, after which the o-ring is put on. It is screwed with screws.In accordance with the latches, a passage element of the Technonikol ventilation outlet is inserted into the o-ring;
- So that the upper casing of the passage element rigidly holds the pipe, it is cut, leaving the hole a quarter smaller than the diameter of the pipe. Some manufacturers preassemble the feed-through element, making it ready for installation;
- Before tightly screwing the pipe with screws, check the vertical with a building level;
- Decorative and protective elements are attached.
Now from below, from the attic, review the installation accuracy and seal all broken layers of the roofing pie with a sealant.
When installing the ventilation outlet TechnoNIKOL d110 or any other model, do not forget:
- Carefully observe the sequence indicated in the instructions;
- Work carefully and do not rush.
Once you have installed a ventilation outlet through the roof, you can independently make a ventilation outlet for the metal tile of the house and antennas through the walls. Do not forget, the duration of operation of the roof depends, inter alia, on the quality of installation of ventilation outlets and pipes.
A video about installing a pass-through element will help to do all the work without errors.