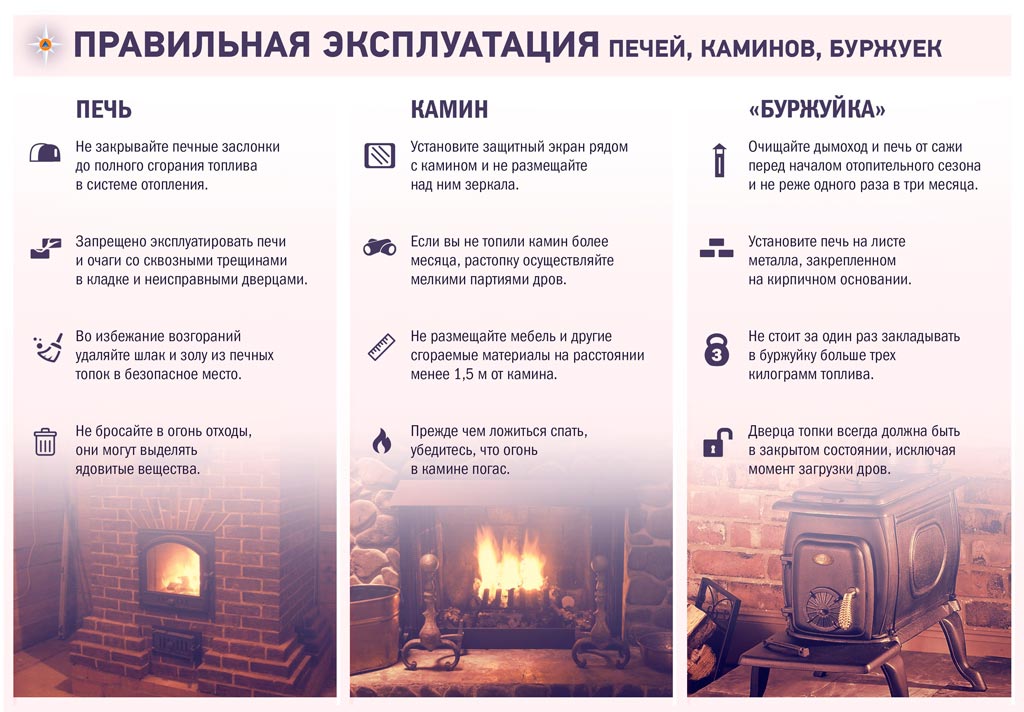
Installation of a metal bath stove will help save time on the construction of stone structures and reduce financial costs. It is necessary to think over the area where the system will be installed at the design stage, taking into account fire safety, dimensions and weight of the product. Self-installation of the furnace in the bath also provides for the organization of a chimney, water supply, drain and place under the water tank.
Step-by-step algorithm for installing a bath stove
Before starting installation work, it is required to draw up a project taking into account the fire safety of the structure. You will need:
- pick up non-combustible finishing materials;
- choose a covering for wooden buildings - thermal insulation and steel sheet;
- leave a gap of 110-125 cm between the stove body and the wall surface;
- lay the heat-insulating coating so that 50-80 cm remain.
Bearing structures, shelves and partitions are located 110 cm from the furnace.
Features of the choice of place
To install a finished stove in a sauna or bathhouse is such that the heating of the dressing room and the steam room is of high quality, the operation is comfortable. At the same time, a person should freely move around the steam room.
You can put a heating device:
- In the steam room. The owner controls the process of burning fuel, can put it under. The disadvantage of this zone is the cost of arranging ventilation and the presence in the room of a place for firewood. For year-round use of the bath you will need a second stove.
- In the dressing room or bathhouse. The unit will heat two rooms, and the steam room will become larger. A good ventilation system is organized for the dressing room.
- With the removal of the furnace towards the street. The stove will not burn oxygen, but it will not work to control combustion from the room. Under a remote firebox you will need to tear down the wall, make a non-combustible portal.
-
- Firebox on the street
-
- Steam oven
-
- The furnace in the dressing room

After choosing a place, you will need to turn to SNiP 41-01-2003, where the location of the furnace relative to all areas of the room is indicated:
- between the steel case and the wall - 38 cm;
- from the unit to the wooden wall - 50 cm;
- from the exit point of the fuel channel to the door - 25 cm;
- the presence of a non-combustible wall 12.5 cm in thickness;
- from the ceiling with thermal insulation - 80 cm, without insulation - 1.2 m;
- from the firebox door to the wall - 1.25 m;
- from the supporting wall to the front wall of the modification with an external firebox - 3 cm.
The installation of a sauna stove in a niche is prohibited.
The nuances of preparing the foundation
The equipment of the floor under the stove depends on the material of the bath and the weight of the product. The concrete surface can not be strengthened, but for a comfortable cleaning, you can finish the furnace zone with fireclay bricks, tiles or porcelain.
If the room has a wooden floor type, it is required:
- make a special podium - a separate foundation, taking into account the weight of a metal product, a protective screen, a filled tank and a chimney;
- move the pedestal 15-20 cm beyond the line of the metal furnace;
- choose the depth of the base according to the depth of the main foundation;
- Do not connect the structure with the supporting foundation, so that the structure has normal shrinkage.
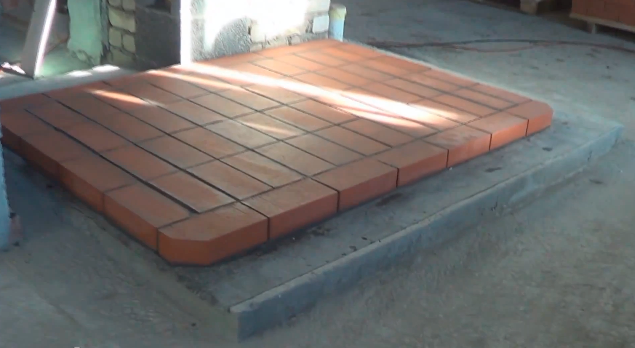
When preparing the base, a concrete solution of 1 part cement, water, 3 parts sand is used. Initially, they dig a pit, then put the formwork, lay the reinforcing mesh and pour concrete dough. After solidification, the structure is covered with double waterproofing, and then the brick is laid in two rows. As a result, the foundation will be 20 cm smaller than the final floor.
Preparatory work for the walls
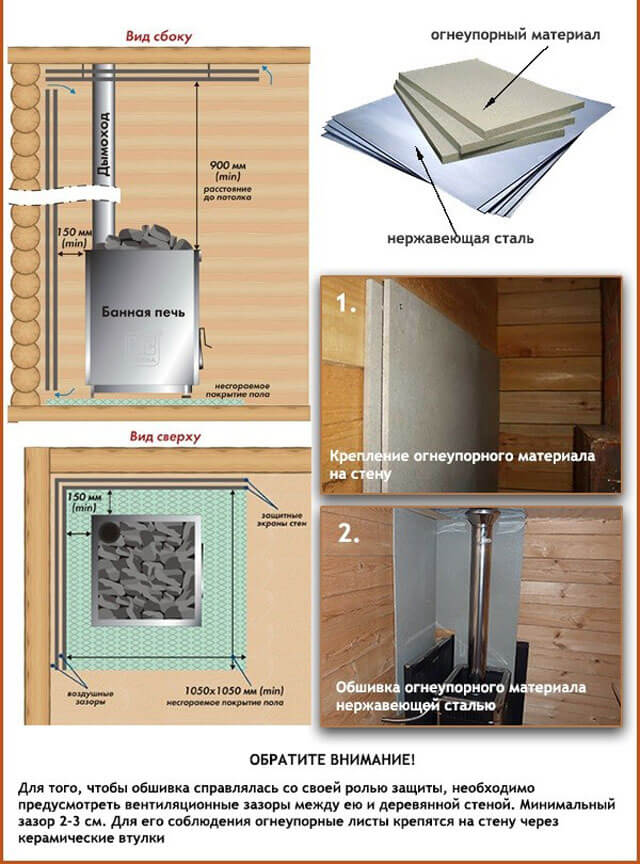
Installing a stove in a bath of non-combustible materials or mounting 50 cm from a combustible surface does not require wall preparation. Under the furnace with a remote type of firebox, you need a portal. Protect the walls from the effects of fire and hot metal as follows:
- applying plaster to a metal mesh with a layer of 2.5 cm;
- installation of a special stainless steel screen with further laying of non-tight materials;
- porcelain stoneware or stone cladding on a non-combustible surface per 1 cm layer;
- additional processing - the log house is covered with a fire-retardant agent, it is finished with volcanic stone, talchochlorite.
In the bath room it is allowed to use ready-made protective screens. Reflective sheathing is located with ventilation gaps of 2-3 cm. Sheets of refractory material are fixed with ceramic bushings. Fire-resistant GKL is mounted on a profile or glue, superisol - on glue or dish-shaped dowels.
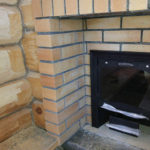
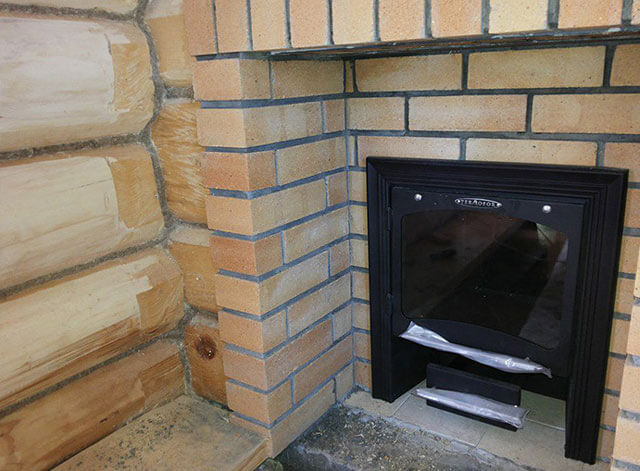
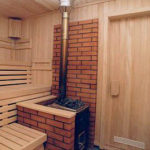
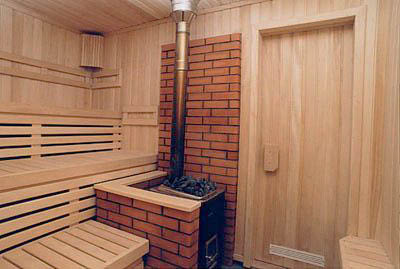
The protective frame made of bricks can be erected from 2-3 sides of the stove. It will prevent the effects of a hot stove on a combustible wall, will accumulate heat and maintain the temperature in the steam room. Laying scheme is implemented step by step:
- The choice of material is red, clinker, bassoon or chamotte brick with an arrangement in half a brick.
- Preparation of mortar - cement or fireclay clay.
- Observing the distance to the wall surface 5-15 cm.
- Compliance with the height of the structure is 20 cm more than the heating unit.
- Organization of vents (holes) or furnace flaps for the normal circulation of air masses.
The optimal thickness of the brick screen is 120 mm.
Heating device assembly
A step-by-step algorithm for assembling the furnace is usually indicated by the manufacturer's instructions. For example, Vesuvius models with a remote firebox are difficult to install, but easier to operate. In general, the assembly of units is carried out according to the general principle:
- Installation of the furnace taking into account the distance to the ceiling (120 cm) and walls (32 cm). For versions with asbestos-steel protection, it is allowed to reduce the distance to 26 cm.
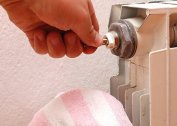
- Installing the hinged tank to the duct nozzle. The volume of the tank is selected according to the number of family members at the rate of 10 liters per person.
- Installation of heat exchange equipment. The heat exchanger is positioned so that the bottom of the tank is above the upper fitting.
- Organization of the pipeline. The pipes are fixed at an angle of 30 degrees. To eliminate the risks of freezing water, a drain valve is built in.
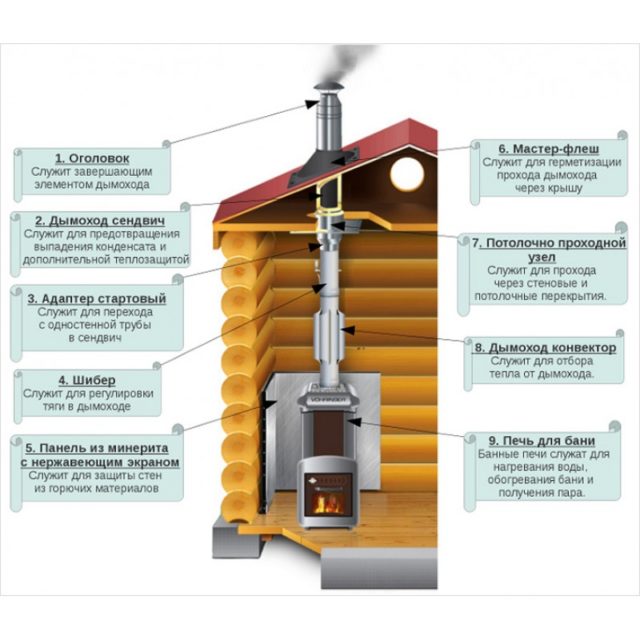
- Mounting a straight chimney 5 m long (from the mouth to the grate). The chimney channel should rise 50 cm above the roofing or ridge and 150 cm away from the parapet.
To protect the roof from fire, you can put a spark catcher.
First fire
The stove is melted on the street with a preliminary inspection of the body, grate, door, heat exchanger for damage and ease of opening. The furnace is performed as follows:
- Installing the unit on a level surface.
- Connecting a temporary heating system to a heat exchanger and filling it with water.
- Mounting a temporary chimney to a height of 2 m.
- Stacking ½ volume of firewood in the furnace, kindling a fire.
- Burning support for 1 hour.
- Periodic lining of firewood.
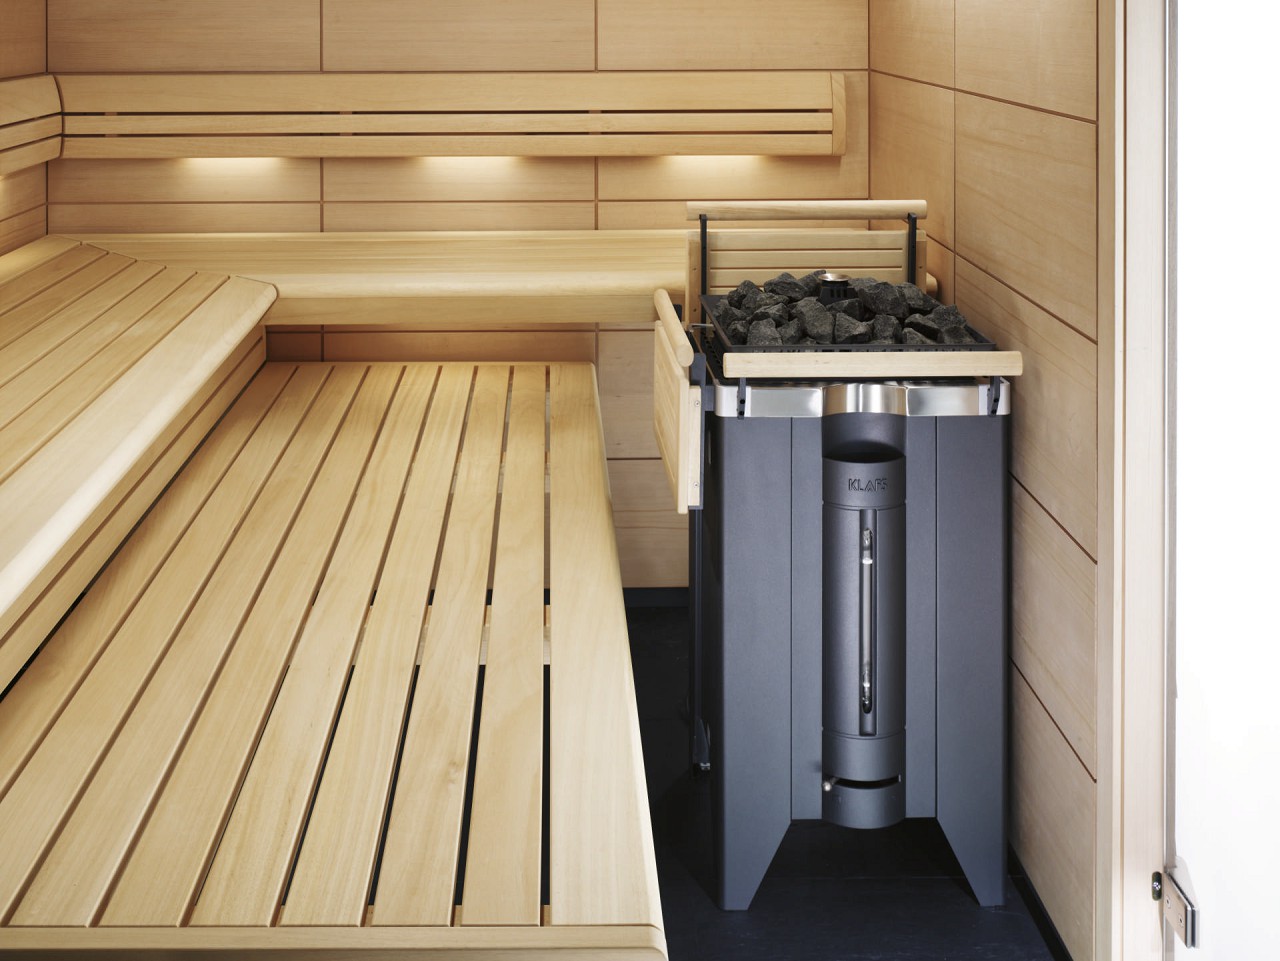
In the course of the furnace, the quality of the stones is simultaneously checked. An unpleasant odor indicates the presence of sulfur compounds in the material. It is not recommended to use it in a steam room and bathhouse.
Chimney installation
The Finnish sauna or bath can be equipped with ceramic, brick, single-walled metal or sandwich channels for smoke exhaust. For independent arrangement, a sandwich pipe in the form of two tubes made of acid-resistant steel with internal thermal insulation is suitable.
During installation, follow the instructions:
- Mark the holes for the cutting pipe from stainless steel and dismantle the overlap in a line.
- Apply fireproofing to the log house.
- Fix the cutting pipe with self-tapping screws and fill the gap with a heat insulator to a layer of more than 7.5 mm. A 13 cm blockage should remain from the pipe to the beam, 38 cm from the chimney to the wall.
- Attach a single-walled pipe to the chimney, weld or mastic along the seam, put the gate.
- Fasten the adapter to the chimney sandwich.
- Install the remaining parts on the brackets so that the joints do not fall into the groove.
The deflector is placed after the roof cutting.
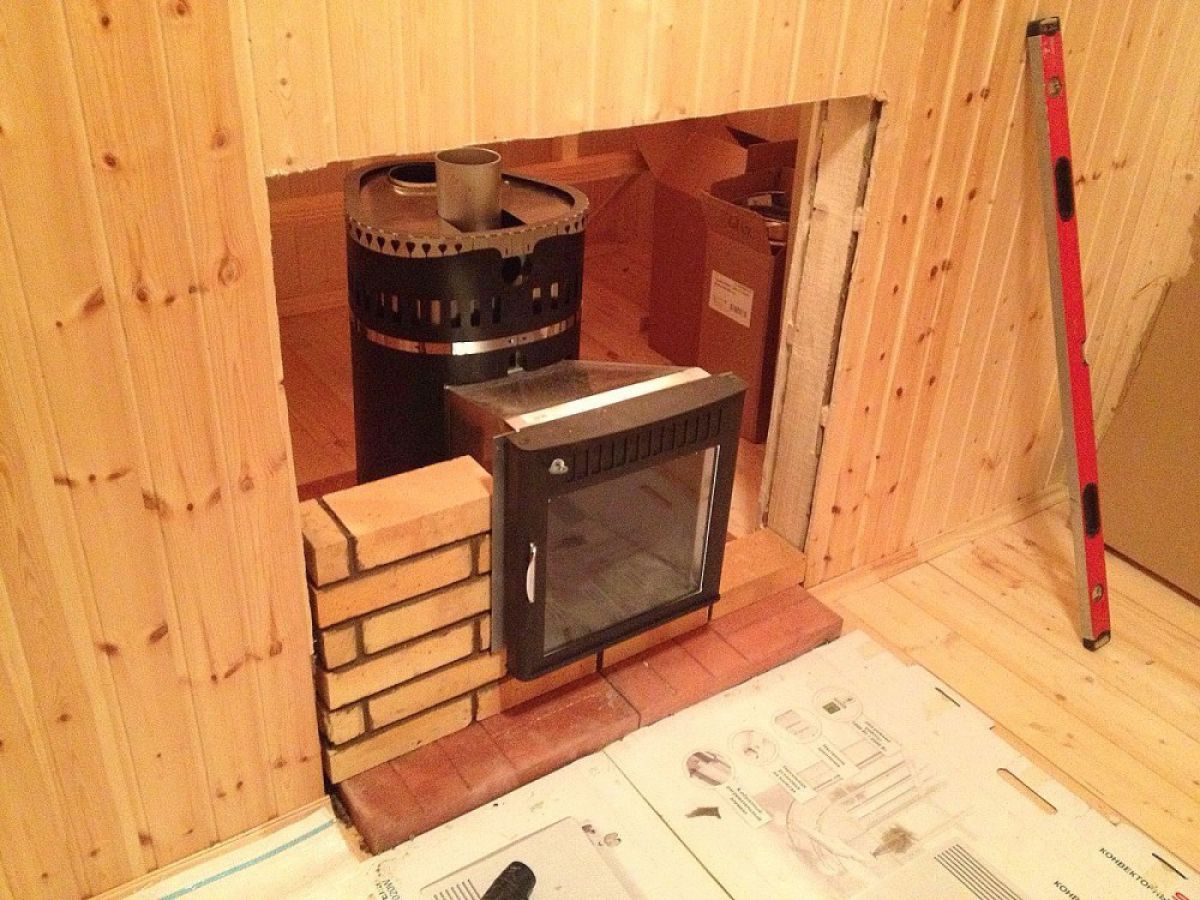
The process of installing a wood-burning stove in a bathhouse

A wood-type metal stove is the best option for self-installation. The work is carried out as follows:
- Primary driving on the street to remove production coverage and integrity testing.
- Preparing the hole for the pipe. When it is withdrawn through the ceiling, a non-combustible protective ring is applied to the area.
- Installation of heat-insulating materials and protective screens on the walls. If the stove in the sauna or bath is equipped with a furnace from the steam room or dressing room, you will need a protective portal.
- The metal unit is mounted on a prepared place.
- Execution of a brick casing.
- Installation of a chimney and other elements.
- Test firebox - the quality of heating and the level of smoke formation are checked.
The furnace in the room is subject to a tank filled with water and the presence of cobblestones in the heater.
Installing a stove structure on a wooden floor
If the iron unit weighs up to 700 kg and needs to be installed on durable logs, the foundation is not equipped. The organization of a heat-resistant podium is allowed:
- a sheet of metal is placed on a sheet of basalt cardboard;
- brick, natural or artificial stone is laid out on the floor;
- the pedestal is decorated with ceramic or porcelain tiles.
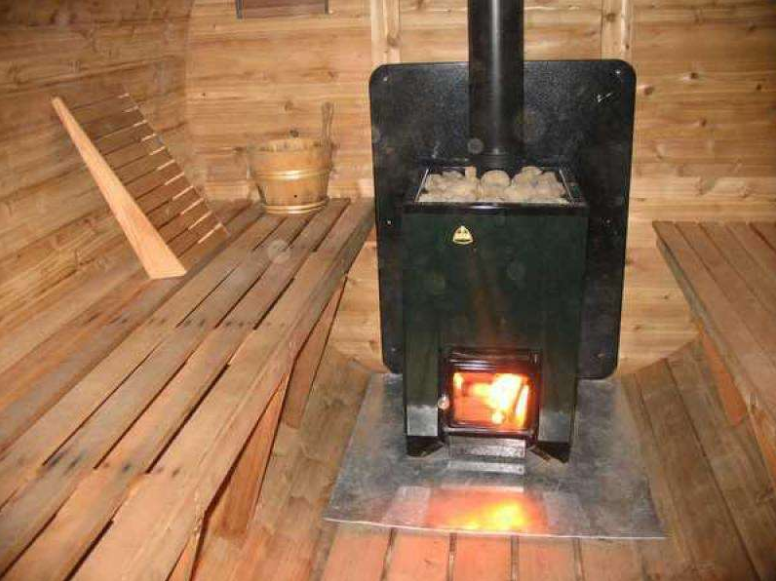
To prevent fire from sparks or coals, the area in front of the firebox is finished with a metal sheet with sides of 40 cm.
A massive sauna stove is placed on the foundation:
- For plastic soils with high groundwater level - screw. At the corners of the furnace, a pile is screwed into the depth of the main foundation, to which the channel and the heads are attached. A sheet of metal is welded on top, a concrete dough is poured on it;
- For hard soils - shallow. The monolithic base is poured 30-40 cm.
The foundation with a shallow depth does not need reinforcement.
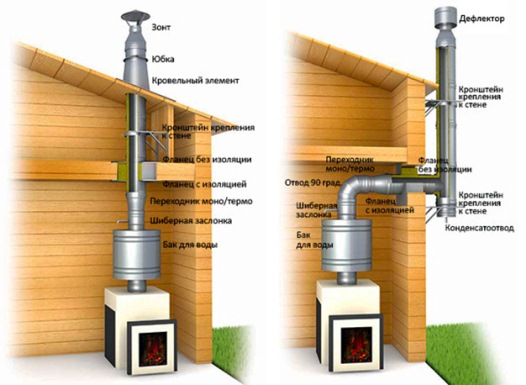
Installation of modifications with an external firebox
The factory heating device is installed in accordance with the manufacturer's instructions. If it is planned to install a powerful bath stove after the construction of the building, the distance from the product with an external firebox to the wall is respected. Models in a heat-resistant case are removed by 25 cm, without it - by 40 cm.
The wall surface is covered with thermal insulation, then with a steel sheet. A gap of 50 cm is required between the unit and the wooden wall. The area adjacent to the furnace is lined with refractory materials.
The fuel niche is bricked with a thermal gap for metal expansion of 2-2.5 cm. Asbestos cord should be placed in the lumen. Masonry is allowed around the enclosure.
Rules for the installation of electric furnaces
In private construction, to equip saunas and baths, electric stoves with power from a 220 V network are used. When installing them, the following rules should be observed:
- Select the type and cross-section of the cable according to the power of the stove. For modifications to 3; 4.5 and 6 kW a 1.5 mm2 conductor is suitable.
- Spread the floor under the sauna heater with ceramic tiles.
- From the fence of the slab to the shelves and inflammable objects, leave a gap of at least 7 cm.
- Place washed stones only on top of the heater.
- If there is a furnace, use lamps designed for a temperature limit of up to 140 degrees.
- Place the ventilation hole behind the heater at a height of 5-10 cm from the floor.
- Serve the water as carefully as possible, do not water the stones with sea water.
Do not use abrasive products to care for the sauna heater.
Extinguishing media and personal safety
 Baths and saunas must be equipped with fire extinguishers marked A (for hard surfaces). Water, air-foam, air-emulsion and powder devices are suitable.
The bath room may be equipped with automatic or manual fire extinguishing systems. In saunas, deluge or sprinkler sprinklers are justified. In the dressing room or locker room, you can put detectors or smoke detection devices.
For personal safety, you must:
- Do not cover the stove with various objects.
- Monitor steam temperature and air circulation;
- Do not be in the bath with high blood pressure or taking alcohol.
- Use special aromatic oils intended for baths.
- Do not put clothes on the drying oven.
The air temperature in the steam room is set individually.
Self-installation of a metal stove in a sauna or bath room is possible subject to certain rules. Serviceability of equipment and human safety depend on the preparation of the installation site, walls and chimney.