In many city apartments, cottages and private houses, an electric water heater serves as a source of hot water for domestic purposes. If the boiler does not heat the water, this can cause a lot of trouble to property owners. There can be several reasons for the breakdown, and in almost all cases they can be eliminated with your own hands. First you need to find out why the water in the boiler does not heat up. Only after this should a decision be made: undertake repairs on your own or invite specialists.
Common causes of water heater failure
The performance of the device is violated when they fail one of the following parts:
- TEN - provides heating of the liquid in the tank;
- thermostat - measures the temperature of the liquid, turns the relay on and off when the specified higher and lower values are reached;
- batch switch - supplies voltage to the device, cuts off the current supply when the system overheats and a short circuit on the line;
- anode - is responsible for the extraction of salts from water, prevents the formation of sediment and plaque;
- electrical wiring with indicator - provides energy to the parts of the device.
When the boiler does not heat the water, the cause of this phenomenon may be:
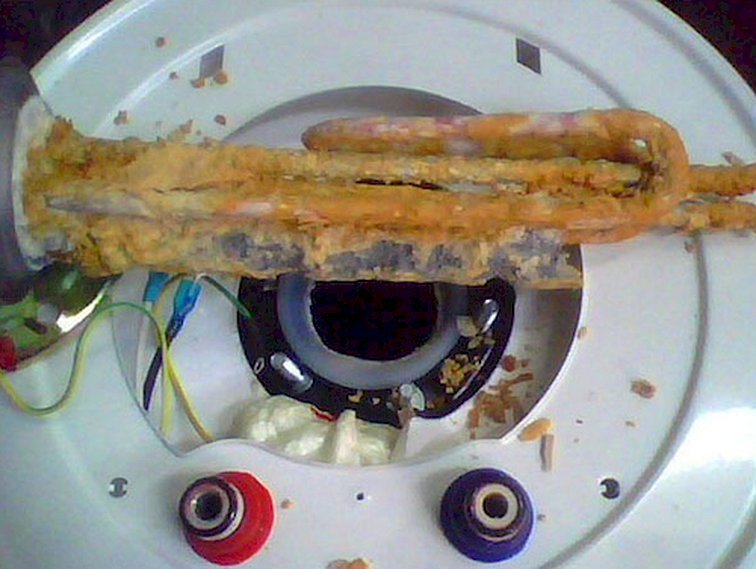
- Failure of the heating element. This happens due to the development of a resource or sticking to the walls of the tubes of limescale. This leads to the fact that the heater heats up constantly, but the relay does not work. As a result, the product simply burns out. In such cases, the boiler does not heat water, the light does not light.
- Incorrect settings. During assembly, the thermostat was set to “0” or “off”, and then a protective cap was connected. Given the flexibility of plastic, this can be done without breaking the casing.
- Wire damage. The products are powerful, over time, the contacts oxidize, begin to heat up very much until they burn out. The failure of the wiring is indicated by the absence of the indicator light and cold water.
- Poor water quality. The result is the formation of a thick layer of porous fur coat around the heating element. In such a situation, limescale becomes a heat insulator, so the boiler does not heat the water to the end.
- Pipeline clogging. Most often this happens at the joints of fittings, where there are protruding fragments. In the absence of water in the tank, the relay does not allow the heater to turn on, since it immediately heats up to 100 degrees, which is the threshold for the operation of the safety device.
- Wrong choice of cable, plug and socket. If the power of the equipment does not match, they get very hot, because of which the automation is triggered, interrupting the current supply.
The cause of the malfunction may be a breakdown of the electronic control unit. At first, the device will often turn off until it stops working completely.
Self-diagnosis and repair

Having found out the possible reasons why the water in the water heater does not heat up, it is necessary to diagnose the device in order to identify and eliminate the malfunction. First you need to prepare tools and supplies.
To work, you will need:
- indicator or tester;
- screwdriver;
- pliers;
- set of wrenches;
- plumbing pliers;
- rubber pads;
- FUM tape;
- flexible hoses;
- capacity for collecting water;
- rags and rags.
In order not to stop working at the dismantling stage, it is advisable to purchase an emergency valve and ball valve in advance.These devices need periodic replacement, it is better to do this in advance, without waiting for their breakdown.
Diagnosis is carried out in the following sequence:
- External inspection of the boiler and the devices connected to it. Darkened areas indicate poor contact or burning of wires.
- Checking outlets and plugs. Over time, the petals of the outlet weaken and oxidize. The same thing happens inside the plug. Products need to be customized or replaced with more powerful ones. Ideally, the plug should effortlessly enter the nests and be removed from them with difficulty. For prevention, it is better to replace the power cable.
- Functional check of TENA. To do this, the thermostat control is turned clockwise to the extreme position. When working, it will light up. If the relay does not work, you should buy and install a new thermostat. This is easy even for a housewife.
- Disconnecting the boiler from communications. The water taps are closed, the bag turns off. You must immediately make sure that there is no voltage on the contacts. You need to photograph the wiring diagram in order to reassemble correctly. After that, the cable cores are disconnected, the indicator wire terminals and the cover is removed.
- Draining. Pipes are unscrewed from the pipes, plugs are put on them. After that, you can open the water supply to the apartment. It is better to screw long flexible hoses to the nozzles in order to direct the flow of water in the desired direction or in the tank.
- Laying in the bath protective material. In the course of further actions, solid and heavy objects that can damage the enamel will fall into it. Old carpets, blankets, coats, and jackets are best suited for this purpose.
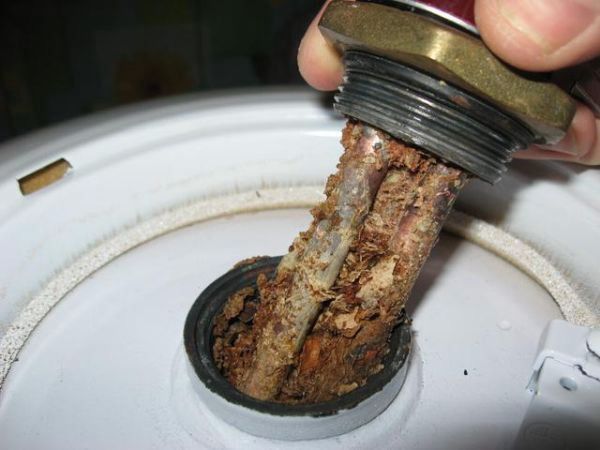
- Removing the heating element. In different boiler designs, this happens according to its technology. For some models, it is enough to unscrew one nut holding the clamp bracket. In other products, loosen a few bolts. When removing, proceed slowly and carefully. The element may have a thick layer of scale, and above it there is a loose sediment clogging the hole in the tank. First you need to raise the heater and remove deposits. Then it is pulled out after tilting to the right or left side.
- The removed heater is cleaned of contaminants under running water. Rinsing is best done on the toilet so as not to clog the sink or bath drain.
If the boiler tank is not damaged, it should be cleaned from the inside. To do this, it is better to use a shower head and a soft brush on a long handle. The advantages of this method are that you do not need to remove the heavy boiler from the wall. For such manipulation, plugs are installed on the underwater pipes. After flushing, remove all debris from the bath. The material used to protect it can be washed or disposed of immediately.
Solving the problem of the heater failure
The procedure for removing the heater from the boiler depends on the following factors:
- Operability. If the heating element burned inside the product, there is no point in messing with it. Sawing, replacing the spiral and subsequent soldering is long, difficult, requires skills and special tools. It’s easier to buy a new product.
- Life time. The manufacturer gives a guarantee for such products within 3-5 years. If this period has expired or is running out, it is not worth the risk, it is better to put a new heater.
- Degree of contamination and damage. The raid that has been going on for years cannot be removed. In addition, it is necessary to check the absence of deformation that could arise from the pressure of the anode covered with deposits.
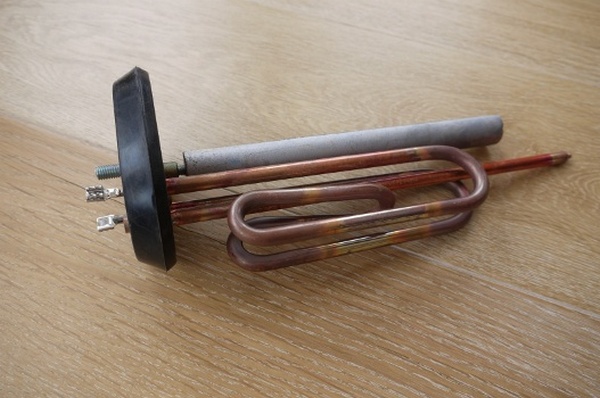
If the heater is serviceable and does not have mechanical damage, it makes sense to start cleaning it. This will take less time than a trip to the market, and will save a considerable amount.
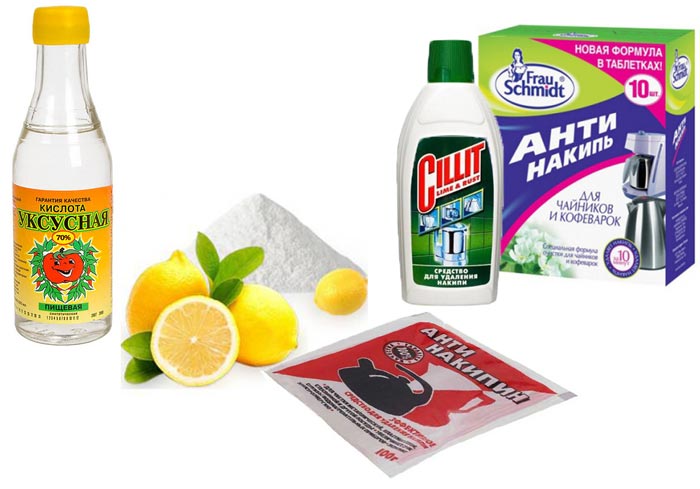
Limescale dissolves well in citric acid. The solution is prepared in a proportion of 50 g of powder per 1 liter of water. The best option is to use a three-liter glass jar or a metal can. In these vessels the heater is completely immersed. In order not to wait 2-3 days, until the scum is sour, a powerful cable from an old iron or an electric kettle is screwed to the contacts. Then the design is connected to the network. As a rule, 10-15 minutes of boiling are enough for the plaque to move away from the metal. It remains to remove the remaining fragments with a knife or a hard brush. Then you need to clean the hole under the anode well to achieve high-quality contact. After connecting the elements are installed in place, the boiler is assembled and connected.