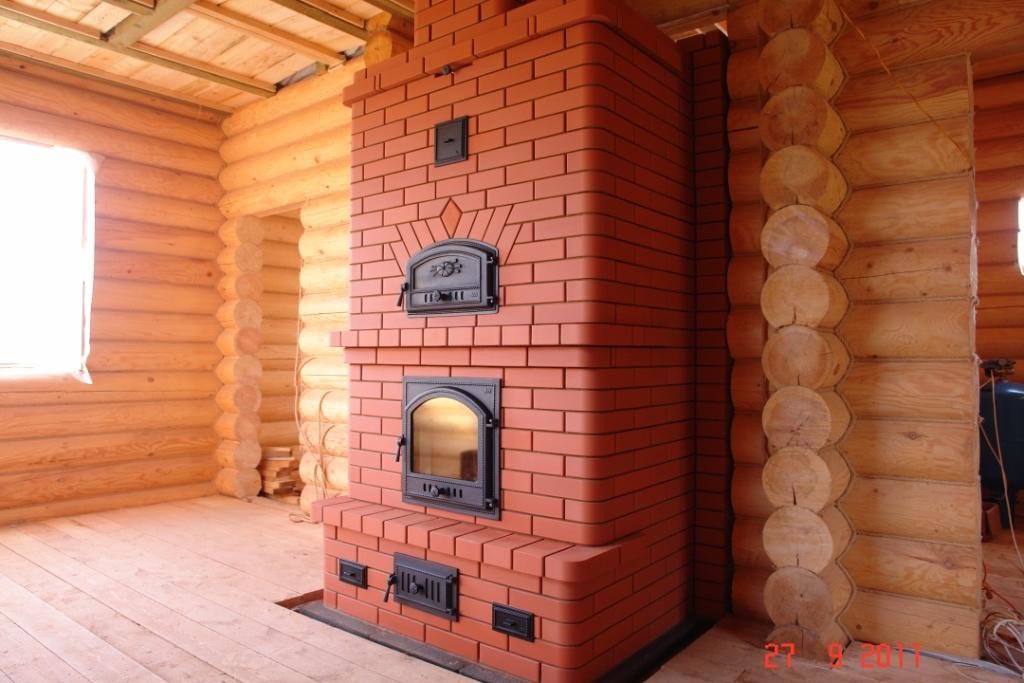
The country furnace is a device for heating the room and cooking. There are various designs of heating devices, some of them differ in volume and massiveness. The choice is determined by the heating area. A brick oven is one of the most effective devices that meets the standards and requirements of GOST and SNiP. You can build a furnace for a cottage from a brick with your own hands if you have the skills according to existing schemes and drawings.
Criterias of choice
The selection of a suitable furnace depends on many factors. They affect the design of the device, dimensions, characteristics.
Size and shape
The size of a brick stove for a summer residence depends on how much space it can heat. Stoves can be used for heating a room and act as a dividing wall between two rooms. For small rooms, you should choose a compact miniature device. They have less functionality, but will not occupy an important space.
The selection of fuel is also given great attention. Typically, brick stoves are heated with wood, but other raw materials (coke, coal) can also be used.
It is important to pre-select the location of the heater. Keep in mind that the side walls give off more heat than the back. This factor should be provided when planning the installation in a particular place.
Ovens come in various shapes. You can purchase or create a rectangular model, T-shaped, with a ledge-bed or plate.
Equipment
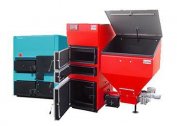
The design of the furnace is also different. The most famous include Dutch, Swedish, potbelly stove and Russian. By picking out distinguish:
- Heating furnaces without additional elements. They do not include a hob or tank for heating water. They consist only of walls, a chimney, a furnace and chambers.
- Heating and cooking products also have a stove on which to cook food. Sometimes equipped with an oven, drying chamber, water heater.
- Fireplace stove. It has two furnaces - a stove and a fireplace, which can be used simultaneously or separately.
- Combined ovens. They include the whole complex of necessary functions. Often equipped with a stove bench, which can be used as a bed.
-
- Heating and cooking
-

- Heating stove
-

- Combined
-

- Fireplace stove
The cost of the furnace and the complexity of its creation depend on the functionality. It is independently recommended to build a simple model without additional elements.
Installation location
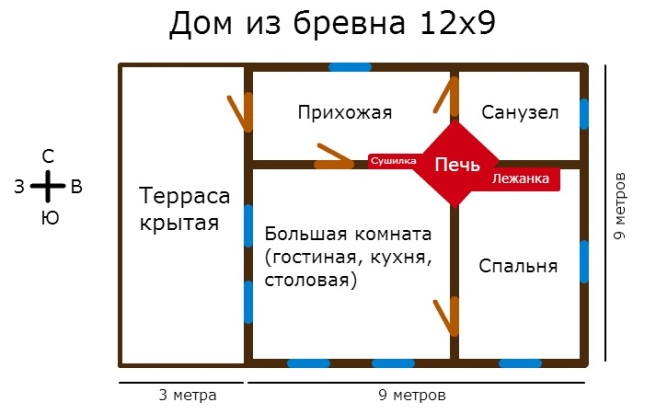
Several factors influence the choice of the installation site of the stove in the country with your own hands:
- Being close to the front door. Heat from the heater will create a barrier to cold air from the street. In addition, when the furnace door exits into the hallway, it is more convenient to deliver fuel to it.
- Free access to any of the walls should be provided. This will control the integrity of the walls and clean the chambers.
- A stove needs a separate foundation that is not connected to the base of the house.
- The chimney must pass between the beams without bumping into them.
- Heat-resistant flooring should be on the floor in front of the oven door. This is done to ensure fire safety.
The user must have convenient access to the stove. At the same time, it should be located so as to heat the room as efficiently as possible.
Basic design
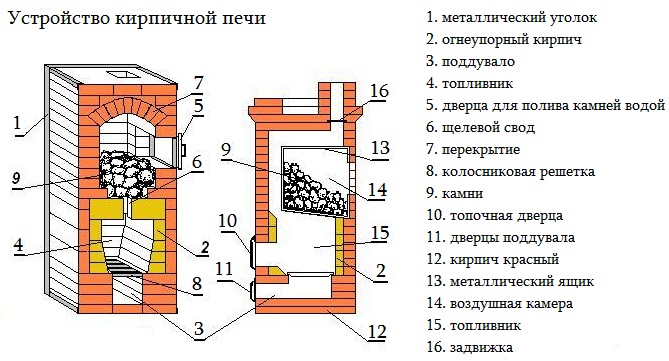 To understand how the furnace functions, it is necessary to know its design and understand what each section is responsible for. A traditional stove consists of the following components:
- Fuel chamber. Fuel is placed in it.It is separated from the blower chamber with a grid-iron in the form of a grate.
- Blowing chamber. Responsible for adjusting the air supply. It is a collection point for ash.
- Oven, hob, water tank - additional elements that are built into the oven.
- Cleaning chambers. Soot settles in them.
- Chimney channels. Through them, smoke is vented to the street. The chimney pipe can end with a house or other type of hoods.
The most important condition for effective work is ensuring good traction. To do this, it is important to observe the installation pattern and periodically clean the furnace during operation. The height of the pipe and its correct position on the roof must also be respected.
Materials for the construction of the furnace
Self-assembly of even a small furnace is a rather complicated process. To do this, you need to know how the device works, be able to select materials and put them together, as well as read drawings.
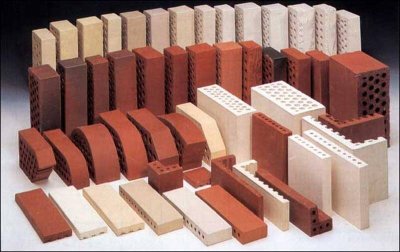
If the master decided to create a brick oven with his own hands, he will need:
- Red refractory brick. Its amount depends on the model chosen and the size of the stove. Transportation must be done carefully, as the material is fragile.
- Fireclay brick for laying the firebox. Quantity - from 40 to 200 pieces, depending on the model.
- Clay mortar for bricklaying.
- Cast iron parts. Doors, latches, grate are made of cast iron. They will be fastened in masonry to steel wire.
- Asbestos leaf.
All materials are recommended to be bought in a specialized store so that they meet the declared characteristics.
Styling specifics
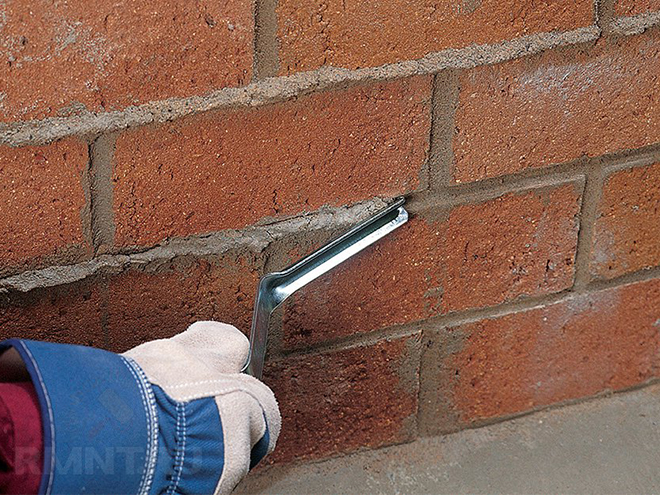
The main components of the furnace array are the body, firebox and chimney. In the masonry of the case, red brick is used. The inner lining is made of refractory bricks. The case with chimneys is laid on a solution of clay and sand. You can make it yourself or buy a special mixture in the store.
When laying, you need to minimize the thickness of the joints. Facing seams should not exceed 2-3 cm, in the masonry of the housing and channels, the limit value is 5 mm. In order for the structure to be durable, it is important to observe the dressing of the seams. Before performing masonry work, the bricks should be soaked in water containers. Then they will not draw water from the solution.
When creating a furnace, the master must observe the following rules:
- It is necessary at each stage to check the horizontal position of the row and diagonal. If deviations are found, the previous series are disassembled and errors are corrected.
- Seams should be completely filled with mortar. Surplus is removed.
- The inside of the chimney should be wiped with a damp brush.
It is recommended to do dry masonry without mortar first. After checking the position of the bricks and rowing, laying with a binder mixture is performed.
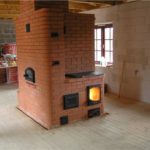
Masonry simplified Russian stove
The Russian stove belongs to the cooking and heating equipment, so it has a cast-iron panel for cooking. Also this model has compartments for baking bread. There are three in the proposed scheme.
The design has an ash pan, which is placed under the exhaust pipe. The collection of ash is carried out through a street channel made of brick, which is installed under the grate.
Under the foundation, choose soil at 85 cm. The bottom of the excavation must be covered with sand and tamped to a layer 10 cm thick. A metal case is placed on top, in which 4 rows of brickwork are placed. Waterproofing is carried out at a distance of 12 cm from the floor. A carbon drain is constructed from it, which is a hollow foundation.
The size of the finished device will be 77 × 116 cm or 3 bricks in width and 4.5 bricks in length.
The scheme according to which a small brick oven is placed with your own hands:
- The initial rows are laid and a channel device for removing ash is produced. It is performed to remove residues from the outside of the foundation.
- After 4 rows, a metal corner is placed on the walls. It is needed to create a channel.
- 5 row - overlapping the channel from the top of the corners.
- Before 7, a sheet of asbestos is placed next to it.
- After 7 rows, the channel is sheathed with a sheet of metal.
- From the 5th to the 13th row, carbon removal is done.
- 8 row - installation of metal strips.
- 9, 11, 13 rows - brick laying on the edge during the formation of carbon removal.
- After row 14, the stove matches the floor level, which is sheathed around with sheet steel.
- Starting from row 15, the structure is placed in a metal case.
- 16 row - installation of a damper for removal and removal of ash.
- In the 17th and 18th row, steel strips are laid to fix the door. Also in the 18th row, the masonry of the overlapping of the exhaust pipe is made.
- 19 row - laying of corners for the grate.
- 20 row - laying a metal frame with a door for cleaning the furnace.
- Over 22, metal strips are laid nearby.
- 23rd row - made of refractory bricks.
- Above 23 make a hob.
- 25 row - from refractory bricks. A door is set for the shutter.
- 26 row - the formation of the chimney. To do this, in the left rear corner, bricks are placed on the edge. The masonry is reinforced with steel strips. Also, at the row level, metal sheets for baking bread are stacked. There should be 3 of them.
- Before 28, a litter of bricks is made in a place where there will be a compartment for baking bread.
- 31 row - a hole is made for cleaning. Strengthened by a steel strip.
- 33 row - the creation of jumpers.
- 34 row - installation of a steam exhaust damper and view.
- In the 37th row at the bricks, the lower inner edge is squeezed. This is necessary to increase the cross section of the chimney. Pipes of 5 laid flat bricks are also placed. Connects by dressing with 31 nearby.
- 39 row - laying asbestos sheet. It is an insulating gasket. This is the last row of the oven.
After 39 rows make a smoke channel, which can be made of concrete or ceramic blocks to speed up the process.
On this work is over. Next, a small stove is inspected visually and tested.