Residents of multi-storey buildings never think about recycling, as there is a sewage system in such houses. For residents of the private sector, this issue comes first in the arrangement of their possessions.
What is a drain pit and why is it needed
 A drain pit is one of the most effective and inexpensive options for draining sewage. Without the organization of a drain pit, comfortable living in any private house is not possible. There are many options for manufacturing designs. If desired, you can make a drain pit yourself. There are several design options for drain pits:
- Sealed pit. This option is the safest for the environment. All sewage drains, falling into the pit, remain in it and are subsequently pumped out by a sewage machine. The main disadvantage of this option is the need for pumping waste from it.
- Filter pit. This is a drain pit without a bottom. This type of pit is prohibited by law. The thing is that sewage is absorbed into the soil and causes great harm to the environment. If, due to such a pit, the water source is contaminated, the organization of this type of pit can directly harm human life and activity.
- Two-chamber pit. This is the most practical type of drain pit. There are two cameras in such a pit. One of them is airtight, and the second is filtering. The drains first enter the sealed chamber, where solid particles sink to the bottom, and a little purified water goes into the filter chamber. From the second chamber, the water goes into the soil.
Choosing a place, taking into account the requirements of SanPin
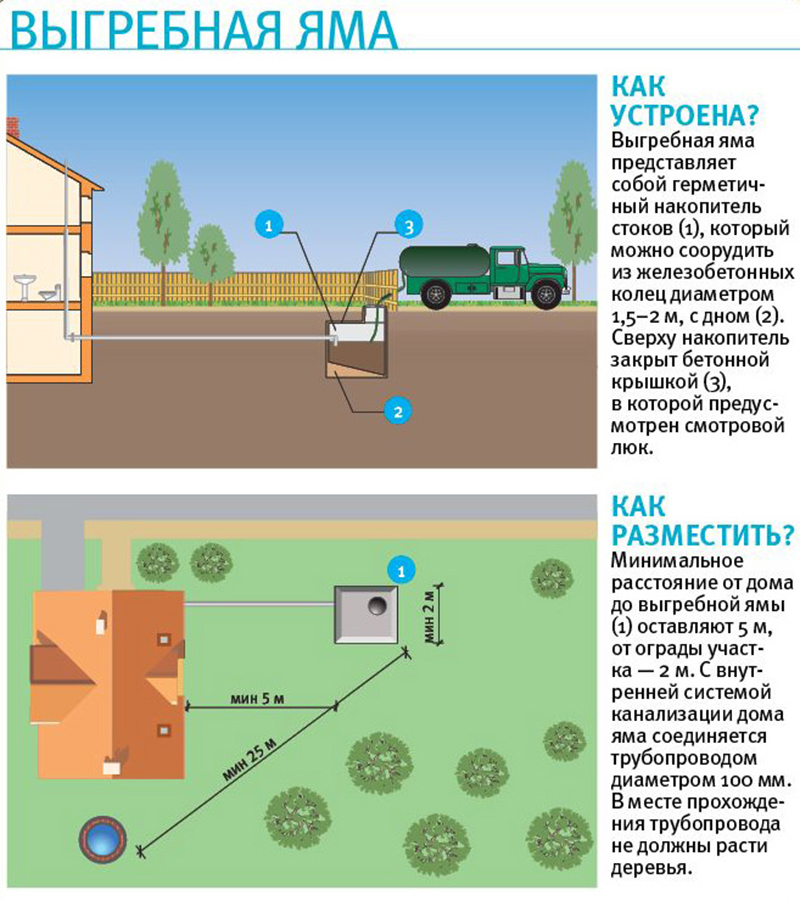 When choosing a place for the arrangement of the tank, it is necessary to take into account a number of rules and features. How much depends on this, whether sewage will be effective and whether it will be convenient to use.
What you need to focus on when choosing a place for arranging a tank for sewage:
- It is important to determine the depth of groundwater. If there is a likelihood of sewage to enter groundwater, the arrangement of a tank for sewage is prohibited;
- If there is a chance of floods, it is strictly forbidden to use tanks with openings for filtering in the walls of the structure, since there is a high probability of environmental contamination in the event of flooding;
- The possibility of approaching equipment that pumps sewage from the tank should be provided for the wastewater tank;
- The depth of the pit should be no more than 3 m. Compliance with this condition is necessary for the possibility of pumping effluents. At greater depths, this process is greatly complicated;
- The walls of the tank must be insulated to the depth of freezing of the soil. Above must be provided for the possibility of installing the cover;
- It is forbidden to place a pit on the slopes;
- It is forbidden to equip the tank for sewage closer than 5 m from the premises and from the fence of neighbors.
Construction Methods
When choosing, you need to focus on the terrain and the capabilities of the owner. The main requirement for the sewage pit material is to prevent effluents from entering the environment. The material used for the device of the drain pit must withstand the effects of an aggressive environment, which is sewage drains. For this reason, it is not advisable to use metal or wood for the cesspool.
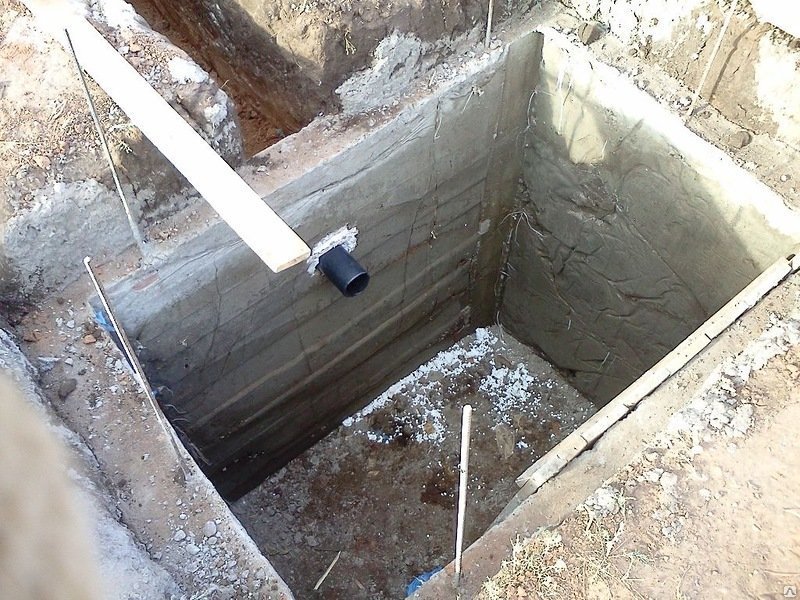
Concrete Pit Pits
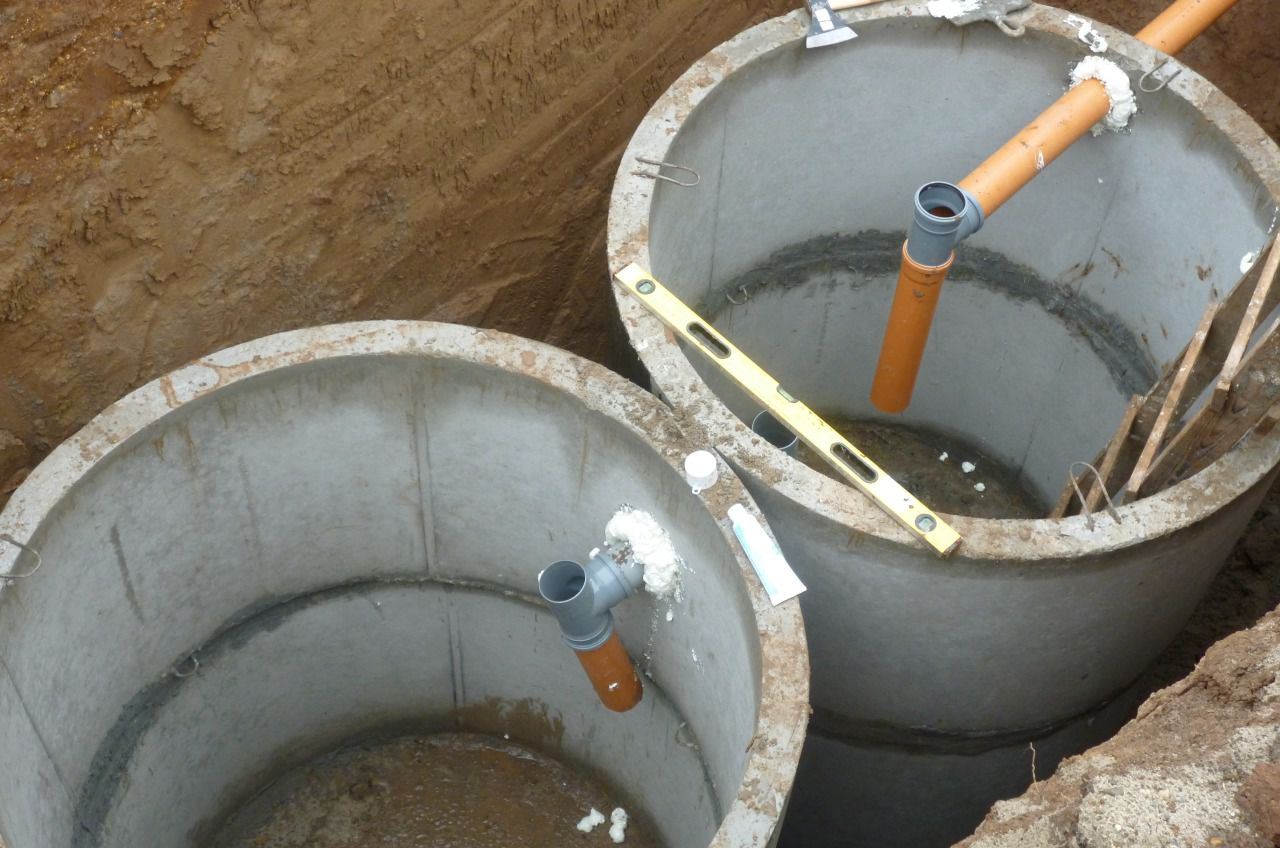 The most time-consuming and difficult will be the option using concrete rings. For one hole, 2-3 rings are standard enough. The size of the ring is 1 m by 1.5 m and can accommodate up to 1.5 square meters. mConcrete ring construction consists of the following steps:
- A pit is digging, the dimensions of which are larger than the diameter of the rings used by 80 cm. The bottom of the pit must be rammed. Then the bottom must be filled with concrete. To simplify, you can use a ring with an existing bottom.
- After 7 days from the moment of pouring the bottom with concrete, concrete rings are installed. The joints of the rings must be cemented and waterproofed with liquid glass.
- The void that appears between the outer side of the rings and the walls of the pit must be filled with the remaining soil. If at the place of installation of the tank in winter there is a sufficiently low temperature, then the walls of the structure must be insulated. Pipe laying must be carried out to a depth exceeding the freezing point of the soil.
- The last concrete ring must be covered with a reinforced concrete slab with a hole for the cover. It is imperative to arrange ventilation to remove methane and sulfur gas from the tank.
- A cover is installed on the floor slab. It will not allow the smell from the pit to spread. On top of the entire structure, soil is poured to the level of the lid.
Brick pit
 The advantages of using bricks for the manufacture of a tank for sewage include the durability of use and the possibility of repairing the structure.
Production consists of the following steps:
- It is necessary to calculate the amount of material that will be needed for the manufacture. For the correct calculations it is necessary to prepare a plan in advance. You need to calculate the number of bricks and the number of rows. It is necessary to divide the height of the wall by the height of the brick. It is important not to forget to consider the cement thickness of 6 mm. In the construction of the tank for the connection of bricks using a solution of cement and sand in a ratio of 1 to 4.
- The next step is digging a foundation pit of any shape. It is important not to forget to immediately prepare a trench for laying sewer pipes to a depth of 55 cm. The bottom must be poured with cement mortar to a depth of 10 cm. Brick walls are plastered and covered with bitumen mastic. Top pit is closed with a reinforced concrete screed. After drying, the screed must be covered with any waterproofing material and covered with soil.
Car tires
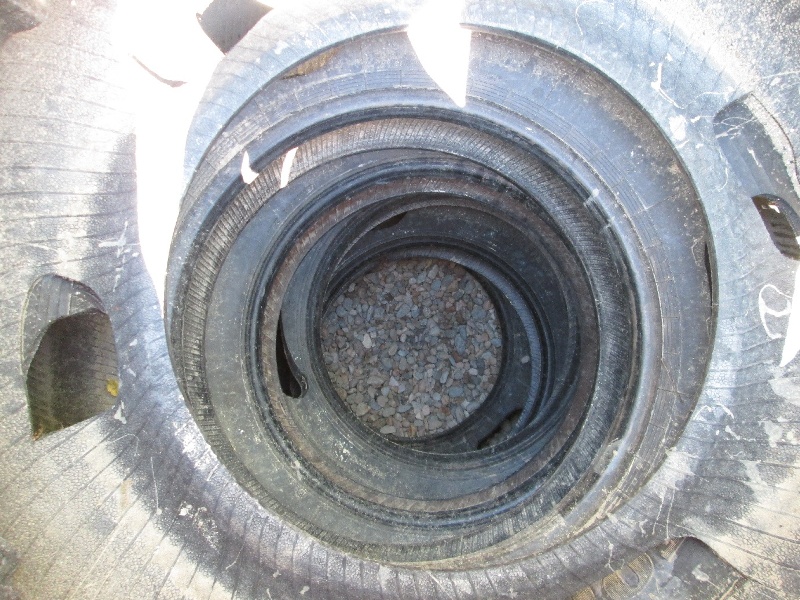 The main advantage of this variant of the cesspool is the long term of use and low cost of the material used for manufacturing. You can use such a structure for more than 3 decades. To make it easier to stack tires, and to avoid accumulation of waste, it is necessary to trim the tires from the end. The process of arranging a pit of tires consists of the following steps:
- The diameter of the pit is determined. You need to focus on the size of the tires.
- Digging a hole. If you dig yourself, the process can drag on for several days.
- Settles the bottom. A hole is made at the bottom of the pit for drainage. With the help of a pipe installed in this hole, sediment will be delayed.
- The bottom of the pit is covered with crushed stone 15 cm deep and 85 cm sand above.
- Tires are mounted on top of each other and secured. In the uppermost tire from the side, it is necessary to arrange a hole for the drain pipe.
- The joints of tires and pipes must be treated with sealant.
- The outer sides of the tires are filled with soil.
- The resulting pit must be closed from above. As a cover, boards are well suited. It will not be superfluous to protect the cover from the boards with roofing material.
Barrel pit
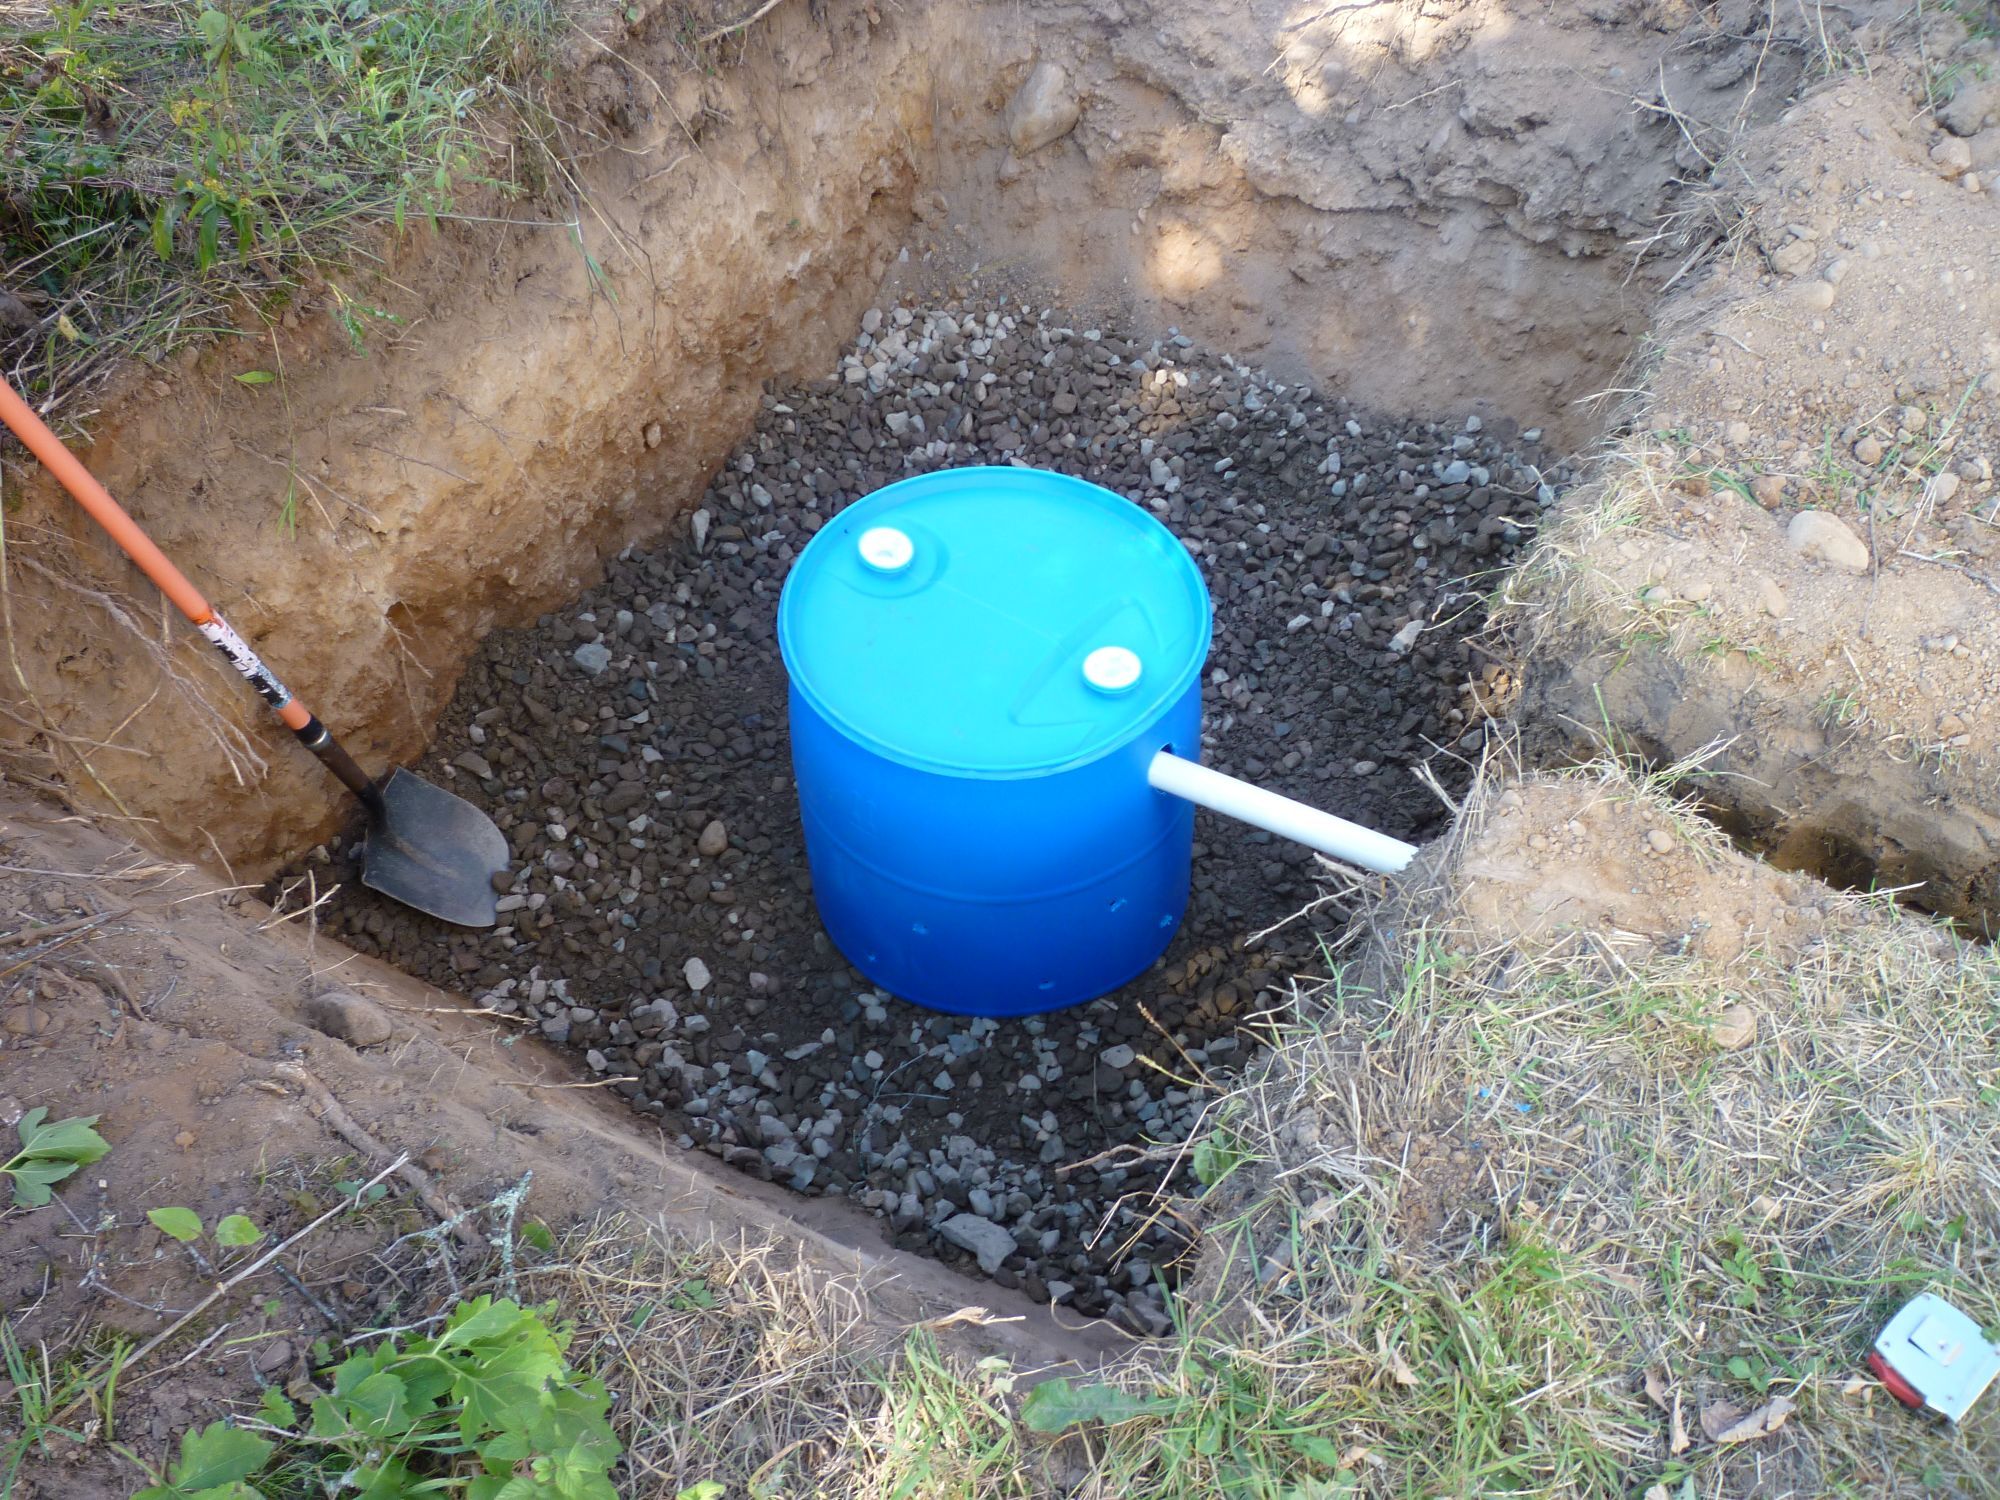 A very common option for arranging a cesspool is to use a plastic barrel. The material from which the barrel is made is durable and not subject to decay. Such a pit will last for decades.
The arrangement process is quite simple, since the weight of the barrel is small. A feature of using a plastic barrel is the need to fasten it to any heavy structure at the bottom of the pit. This is done so that the barrel does not move.A pit under the barrel must be prepared so that the distance between the barrel wall and the ground is at least 30 cm. The bottom of the pit must be filled with concrete at 20 cm. The barrel is installed on the frozen concrete bottom of the pit. To protect against soil pressure, brickwork can be built into the walls of the barrel. But this is not a mandatory procedure.
After installing the barrels, the walls are sealed from the outside with earth. To protect against damage to the tank as you pour earth into the barrel, you need to pour water. At the end, the water is removed. Pipes for drains are brought to the pit as the last step.
A manufacturing option for a sewage tank is selected based on the capabilities and preferences of the owner. Whichever option is chosen, with proper manufacture, the design can last a long time.