In everyday conditions, it is not uncommon when, during the next repair of electrical wiring, it becomes possible to replace the switches installed in the lighting network. Usually this operation is combined with updating the brand of switching devices or with the replacement of aged and worn out samples. Installing a single-button switch with your own hands is not at all complicated. To do this, you will need to familiarize yourself with the features of its design and all the subtleties of installing an external or built-in electrical device.
Choosing the right sample
After deciding on an independent replacement of the shut-off mechanism, you should first determine the appropriate model for this. When searching for a reliable outlet, you should contact only those stores that specialize in selling branded electrical products. Only when this rule is observed, is it possible to select a high-quality device for controlling indoor lighting.
In addition, the purchased external single-key switch must comply with the requirements of GOST R 51324.1 from 1999:
- it is selected only after evaluating the main operational and technical characteristics, such as the switching method, operating voltage and the maximum allowable current;
- Each model must have a quality certificate issued by a specific manufacturer;
- the product must not violate the general interior of the room.
The models produced by most manufacturers are designed mainly for load currents of up to 10-16 amperes and a voltage of 250 volts.
In practice, there are exceptions to generally accepted standards. Samples with cermet contacts with the addition of silver have a current limit of up to 4 amperes. In addition to the parameters that determine the current mode of operation, when choosing switching devices, the number of available poles is taken into account (it can vary from one to 3). One of these varieties is a bipolar single-key switch.
When buying, also evaluate the quality and reliability of the assembly of the product and check its performance. You should not purchase samples with traces of clearly visible defects and with a constantly sticking key.
Types of switching devices
 Various models of single-pole circuit breakers are divided according to a number of signs:
- switching method;
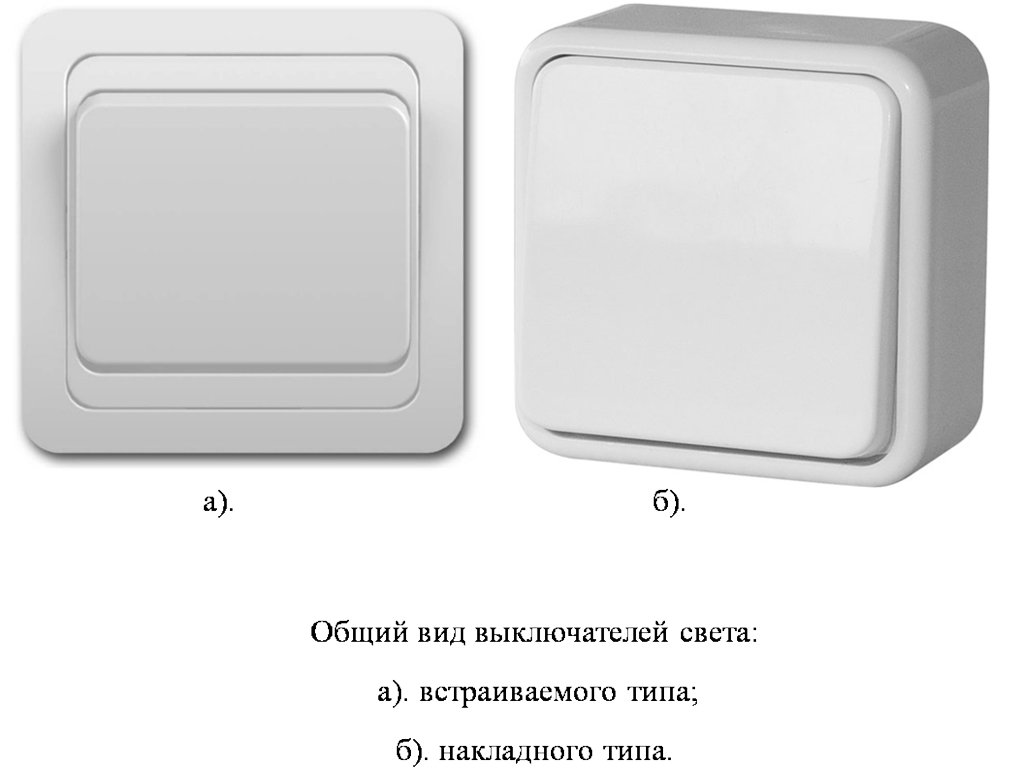
- installation option (secretive or outdoor installation);
- degree of protection against climatic influences.
In addition, they differ in brand, as well as cost and design. When choosing a switching product that you like, these features are taken into account comprehensively at the user's discretion.
According to the switching method, known switch samples are divided into the following types:
- flip models;
- devices with a rotary switching mechanism;
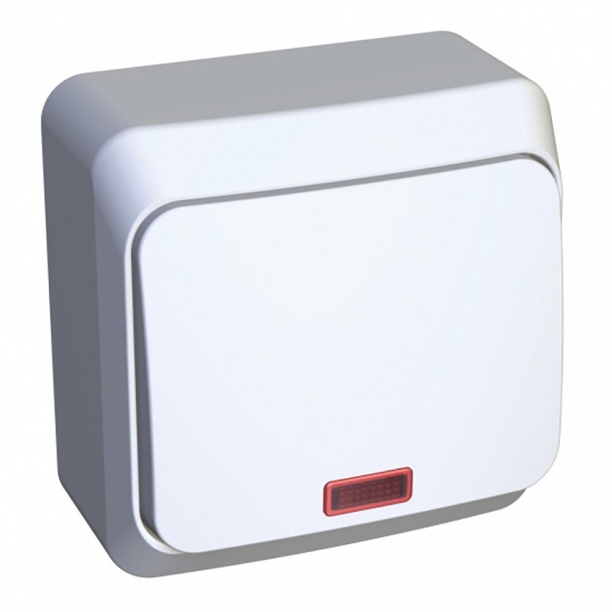
- appliances equipped with a conventional button.
By the method of installation, the products are manufactured in two versions, designed for open or hidden electrical wiring. According to the degree of protection, they are divided into samples having the usual design and models in waterproof design. The latter type is reliably protected from climatic and mechanical influences and can be operated in conditions of high humidity and strong dusting.
There are models presented in the "modular" design, assuming the presence of a power outlet combined with a switch.This type of switching devices is used in situations where in the bathroom or bedroom next to the switch you need to have a socket for connecting an electric hairdryer, for example.
Installation and Connection Procedure
 A competent approach to installing a single-key switch is possible only if the following conditions are met:
- when installing a switching device, the type of wiring is necessarily taken into account;
- a switch for open wiring, for example, is mounted directly on a wall surface, if it is sufficiently rigid and reliable;
- another option allows mounting on a special wooden lining, called a sock;
- single-key switches for hidden wiring will need to be recessed into the wall, having previously selected a socket of the appropriate diameter in it.
For flush mounting, you will need an electric drill and a special nozzle, colloquially called a “crown”.
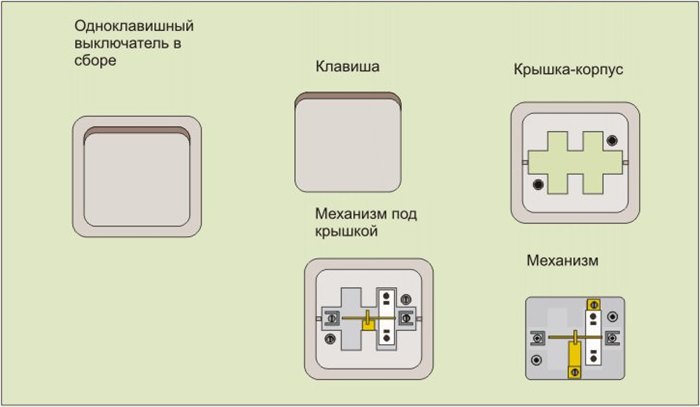
In the prepared niche, the plastic box used to fix the housing is first flushed. Experts advise to securely fix it in the thickness of the wall, coating the edges with pre-diluted alabaster. Only after fixing the plastic glass does the single-button internal switch be placed in it, after which it will remain to fix it with the hardware attached to the kit.
Disclosure Options
Difficulties with connecting the device installed in one way or another, as a rule, does not arise. According to the general wiring diagram, a phase wire from a linear circuit breaker is connected to its lower terminal, which protects this branch of the wiring from overloads. Questions arise only when choosing a method of switching conductors, assigned to the chandelier. The following options are possible:
- using a distribution box type;
- connecting the installed device directly to the chandelier.
Any of these approaches has its advantages and disadvantages and is selected based on the actual installation conditions of a single-key.
Through the junction box
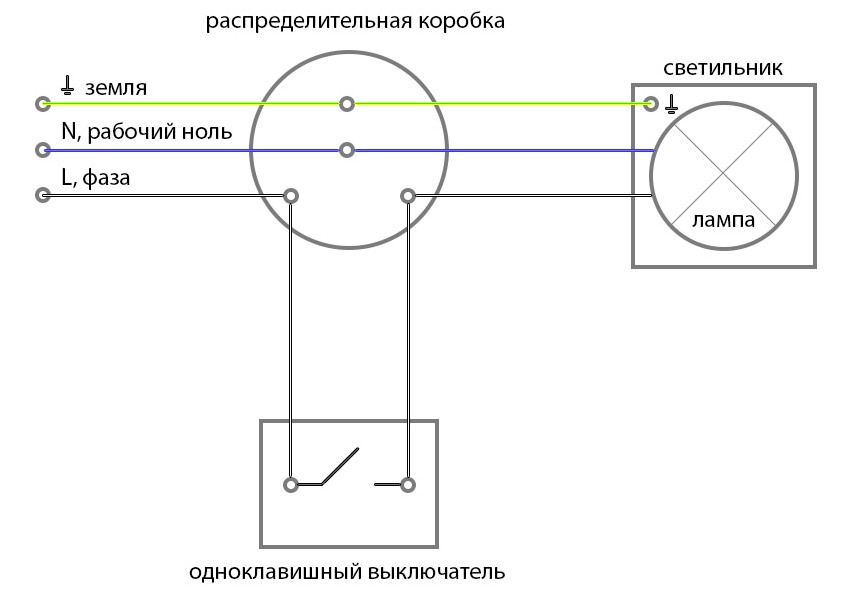
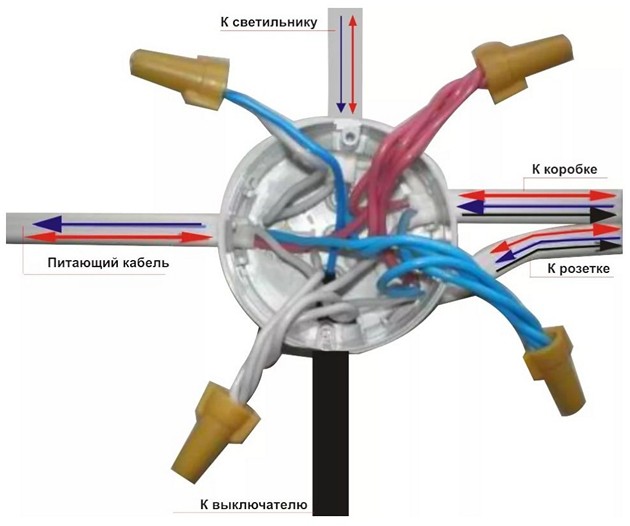
In the presence of a junction box already mounted in the wall, the procedure for switching is as follows:
- There is a box located directly above the room outlet near the ceiling. Its cover with the internal method of laying can be hidden under the wallpaper or whitewash.
- It should be opened and found inside free contacts.
- Disconnect (connect) the phase wire coming from the upper terminal of the switch with a bus extending from a chandelier or LED backlight designed for 220 volts.
In any case, this wiring section is best made open, since it takes too much time to find out which of the hidden conductors is extended to the desired lighting device. It’s easier to “throw” a new core along the top, then hiding it in the cable channel.
The advantage of the method using the distribution box is the ease of changing the cross-connection of wires and the ability to connect another light source to the mounted device. The disadvantage is the presence of additional contacts, which in electrical engineering always means a decrease in the reliability of the connecting line.
Direct connection
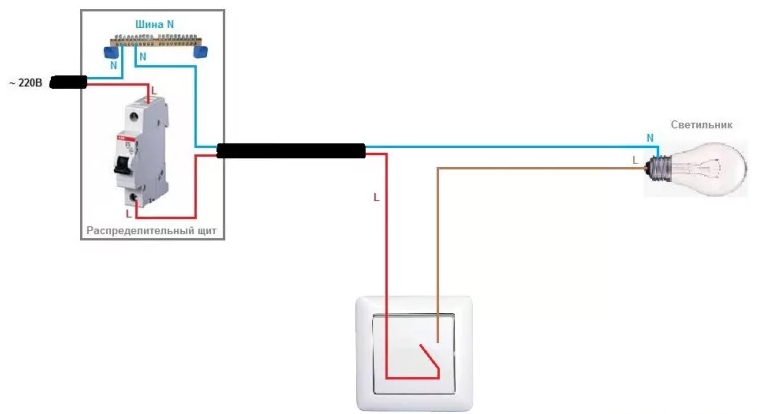
With a direct connection to the chandelier, a phase wire laid openly and at a right angle will have to be connected directly to the top terminal of the switch, and then placed in a cable channel.
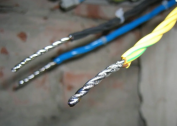
The earth conductor in most of the old buildings is led to the illuminator through the internal cavities of the ceiling. It is often displayed through an opening in the ceiling in the form of an aluminum wire in white insulation. When connecting the chandelier, you should use special adapter terminals that allow you to establish a contactless connection of conductors made of copper and aluminum.
With hidden laying, the matter is complicated by the fact that first you need to find the phase wire in the twist located in the strobes and only then connect it to the lower terminal of the switch. Well, if it is similar to the conductors in the distribution box, it is marked by color (blue - earth, red or brown - phase).
Installing a new wiring box
If a decision is made to route wires through the junction box, and it is not possible to find its cover anywhere, you will have to do the self-assembly of the new product. To do this, you need to do a number of simple operations that are performed in the following sequence:
- Purchase a junction box in the store that is suitable for surface (outdoor) mounting.
- Choose a place above the switch, which is closer to the ceiling, and secure the purchased product on it, first opening the cover.
- Select a pair of contacts inside and connect a phase wire that is withdrawn from the switch to one of them, and connect a bus stretched from a chandelier or LED backlight to the second one.
- Then you will need to install a jumper between the two pins.
- At the end of the work, it remains only to replace the junction box cover.
When carrying out any installation operations relating to the disconnection of electrical circuits and devices, it is important to comply with the safety requirements of the electrical code
Safety Compliance
 According to the main provision of the PUE, compliance with safety rules during installation and connection of a single-key device is reduced to the following preventive measures:
- Before starting work in the electrical wiring line, it is necessary to disconnect the introductory machine or the protection device that serves this branch from it;
- Before touching the exposed ends of the working conductors, it is necessary to make sure once again that there is no phase voltage on them;
- when handling an electric drill, you must be very careful and try not to damage the wiring laid in the wall;
- when working with an already installed junction box, regardless of whether the local circuit breaker is turned off or not, you need to make sure once again that there is no voltage of 220 Volts at its contacts, since the box can be connected to another linear circuit breaker.
Before installing a new distribution box, you should determine the exact place under which hidden electrical wiring is not laid in the depths of the walls. At the same time, they proceed from the requirements of the PUE, according to which any bends from it are made only at right angles. Therefore, the line for the possible laying of wires from the outlet can run only strictly vertically up or down (the latter option is extremely rare).
Installation and connection of a single-key switch is completely affordable even for a layman who knows the simplest methods of working with a screwdriver.