The need to install a wall socket in a concrete wall is faced both by newcomers and apartment owners in prefabricated houses of an old construction. It arises from the lack of tenants of the available electric points. When the room has only 1-2 sockets and an abundance of household appliances, the problem needs to be solved. This should be done by installing new devices, since the use of extension cords and tees will not give the desired effect. Drilling reinforced concrete walls is a difficult and responsible process, requiring a special approach and thorough preparation.
Preparatory work
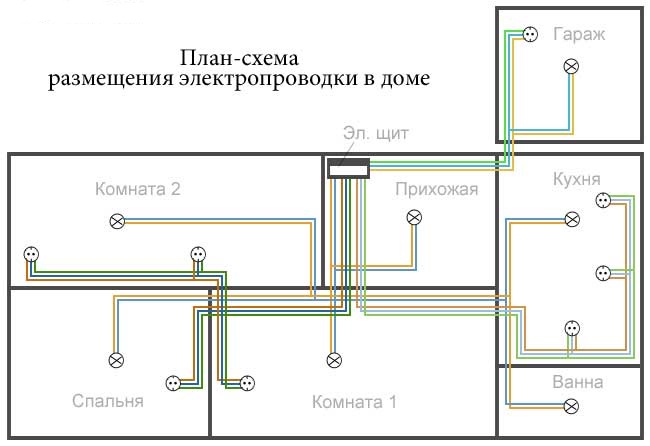
Before making a hole for the outlet in concrete, it is necessary to draw up a diagram and carry out calculations. Laying cables is allowed only in the vertical and horizontal direction, any diagonals are excluded. If strobes are made, the wire should be drawn into a corrugated plastic tube that is embedded in a groove.
 Based on the compiled scheme, materials, tools and accessories are calculated. In addition, security issues need to be considered.
To install internal outlets on your own, you will need the following tools:
- puncher, grinder;
- level, tape measure;
- pliers, nippers, knife, hammer, chisel;
- drill for sockets, diamond crown, a set of screwdrivers;
- indicator;
- narrow spatula, thin paint brush;
- corrugated plastic tube;
- pencil.
From materials you must purchase the following:
- three-core copper cable so that grounding can be done;
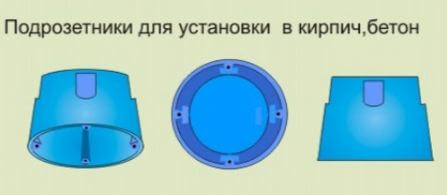
- plastic sockets;
- gypsum or putty;
- liquid primer for concrete and plaster;
- sockets with three contacts.
To facilitate the work, you should have a stepladder or a stable table to work at height. Protect the organs of vision and breathing with a respirator and construction glasses. Installation should be carried out with gloves.
Wall marking
Deciding on where and how to install the outlet in a wall of concrete, taking into account the following factors:
- Locations of previously laid lines. They can be used for connection, but not damaged during drilling.
- Arrangement of furniture, as well as possible prospects for its movement or adding new interior items. It is necessary to provide that the points are not obscured by large objects.
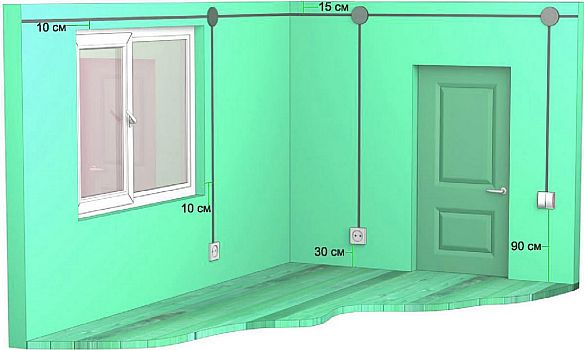
- Height. In accordance with the requirements of SNiP, sockets are allowed to be installed at a distance of 20-120 cm from the floor. This provision is based on safety requirements.
After determining the location of the devices, it is necessary to put marks on the walls along which drilling will be performed.
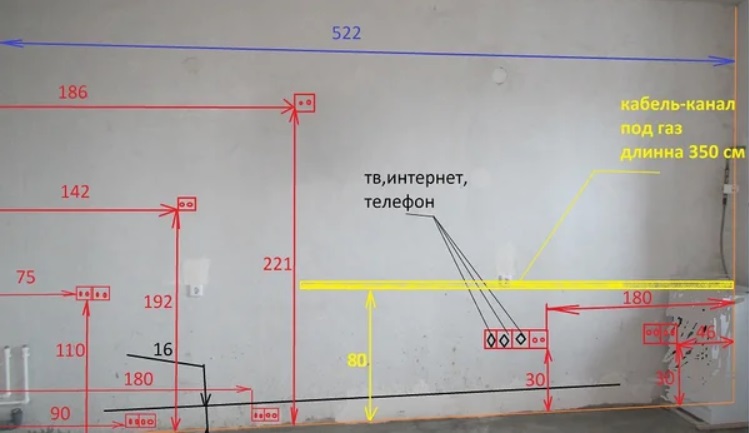
Marking for a block of several outlets is done in the following sequence:
- The center of the product, which will be in the middle, is outlined.
- At this point, an even horizontal line is drawn parallel to the floor.
- 71 mm is measured from both sides of the control point, which corresponds to the dimensions of the mounting boxes.
So that the marks are not erased in the process of further actions, they should be duplicated with a core and marked with crosses.
Hole making
This part of the work is the most difficult, long and dusty. Before it begins, flowers, paintings and other small fragments of the interior should be taken out of the room. Everything else must be covered with a protective film.Concrete needs to be drilled with the door closed, plugging the slots with a wet rag.
Drill a hole for the outlet in concrete in one of the following ways:
-
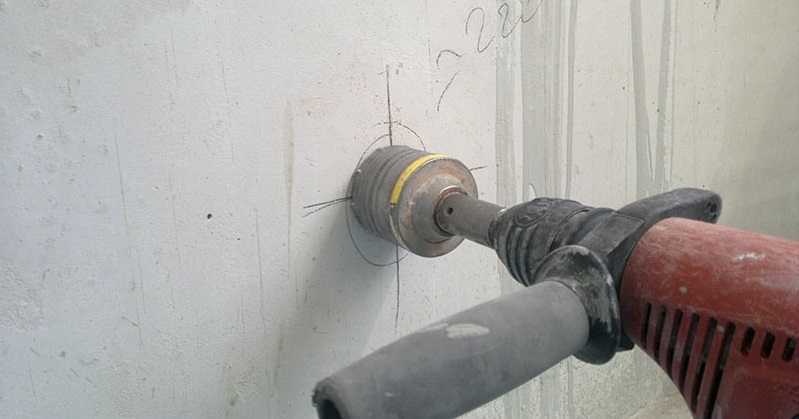
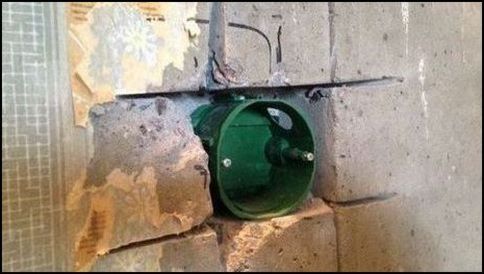
 Installation of a hole for a socket using a hammer drill with a nozzle
Using a special nozzle on a perforator (crowns). The product consists of a shank, a steel glass with teeth and a central drill, which sets the correct direction of movement of the tool. During drilling, the crown is very hot. In order not to burn the incisors, it must be periodically removed and cooled in water. After cutting into concrete at the desired depth, a cylinder remains in the hole. It is knocked out with a hammer and chisel, or destroyed by a puncher. You can knock out the entire cylinder with a powerful wedge and sledgehammer. If the edges of the hole suffer, it’s not scary - the wall will be plastered. Between the holes you need to make transitions for laying cables.
-
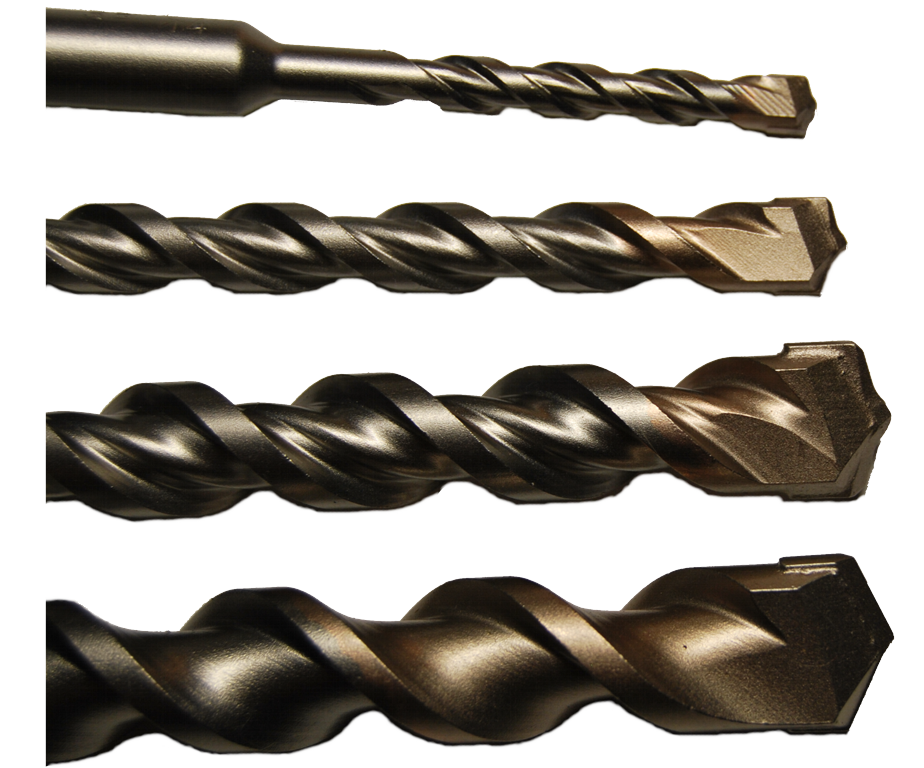
 Winning tips
Puncher. For work, a set of drills with a diameter of 6-12 mm and nozzles for destruction is used. You can use a drill with a drill bit, but this is a very long and laborious process. First, circles are drawn along which holes with a diameter of 6 mm are drilled with a minimum interval. After that, the larger drills turn into the sieve the inner space. The final stage is the destruction, grinding and removal of the thin walls remaining after drilling. It will take more time to align the inner edges of the openings.
-
 Cutting a hole for a socket with a grinder
Grinder. Instead of a grinder, a hand mill with a stone disc can be used. The choice in favor of this method is made in cases where the farm does not have a hammer drill, or for some reason it cannot be used. The outer edges of the drawn circles are connected by straight lines - a square or rectangle is obtained. Then the grinder makes cutouts. The circle should extend beyond the corners by half the diameter to get an opening of the correct shape. To make it easier to select the material from the inside, it is recommended to make several additional longitudinal and transverse cuts. Destroying and removing small fragments is faster and easier.
After receiving the holes, it is necessary to adjust them to the size of the sockets. For this, a manual or electric tool is used - a hammer drill, a hammer, a chisel, a straight grinder. According to the results of the work, holes should be 2-3 mm wider and deeper than the mounting boxes.
Niches need to be cleaned of stone chips and dust. It is advisable to treat them with a liquid primer to improve adhesion with putty, which will be used as a filler.
Preparation and installation of sockets
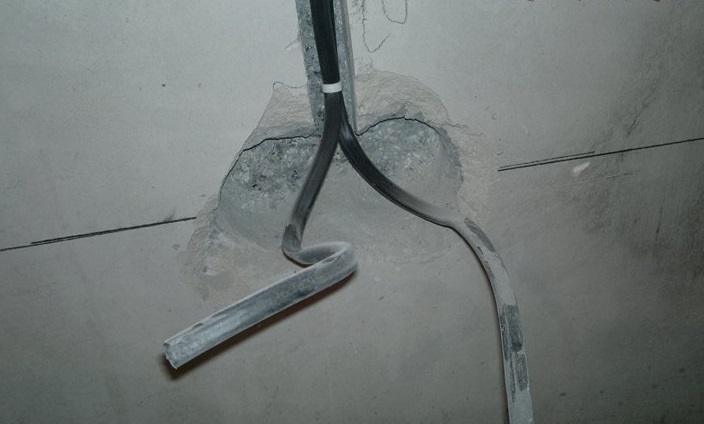
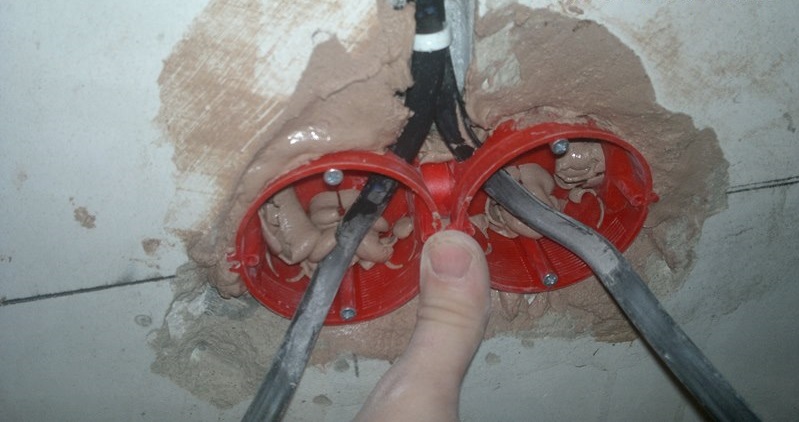
Before you start installing the socket, you need to bring the cable into the hole. If it already exists, you should check its performance so as not to do unnecessary work. If the wire is missing, it must be cut into the wall using the same tools that were used in the manufacture of holes - a puncher and a grinder. With a new installation, it is advisable to supply separate wires to each socket so as not to depend on power limitations of connected consumers.
Preparation for installing a double boom consists of the following steps:
- External inspection of products, checking their integrity and correctness of forms.
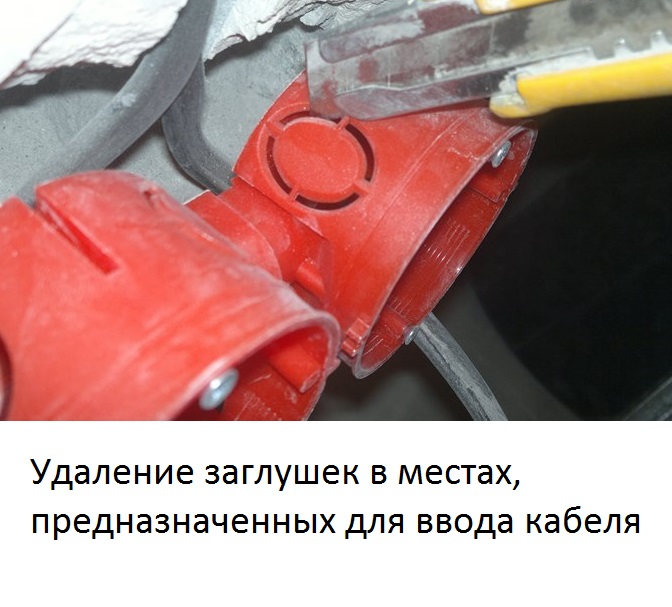
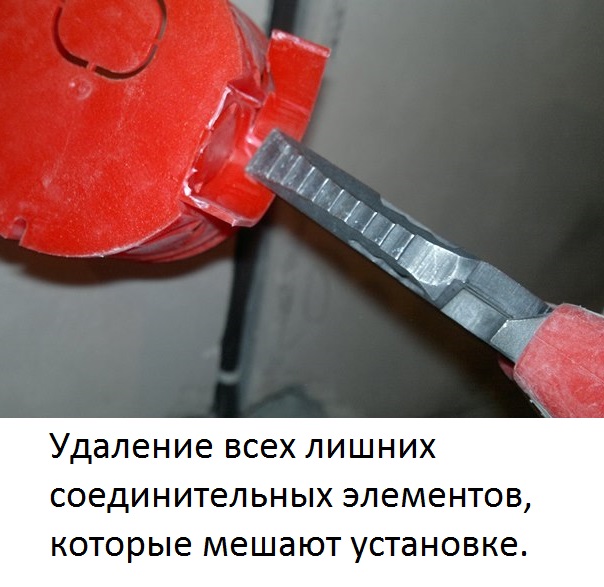
- Removing plugs designed to pass cores and other fragments that are not needed during installation.
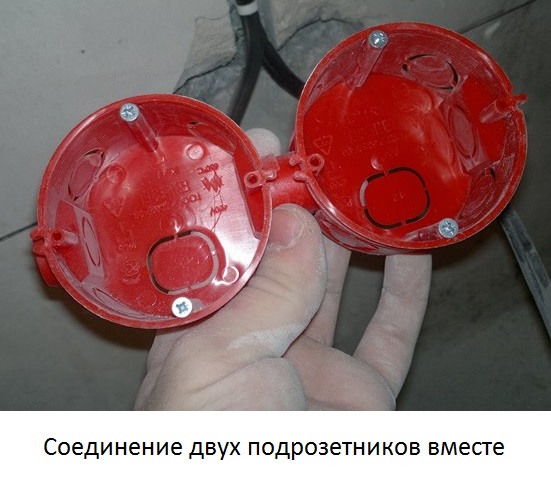
- The connection of mounting boxes together, if their design provides such fasteners.
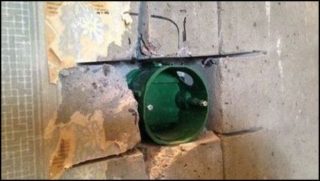
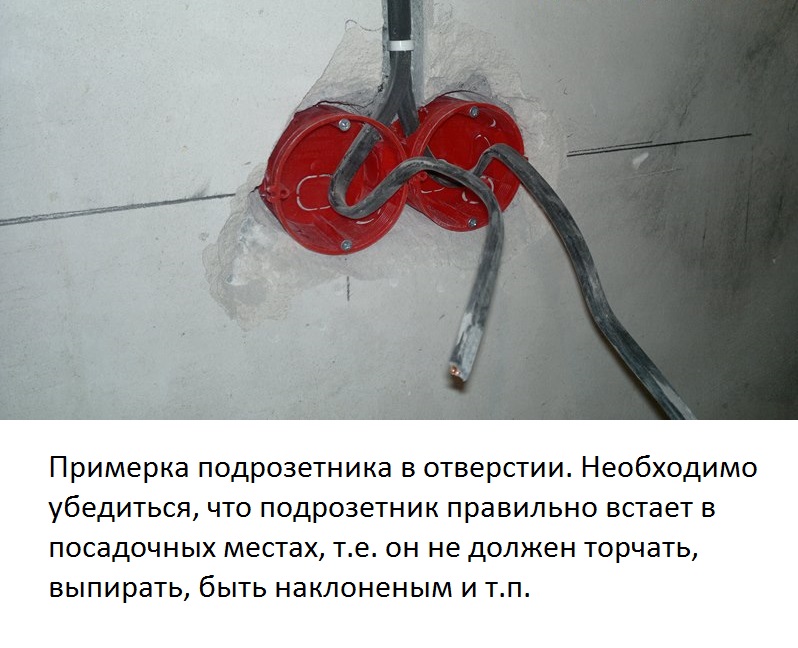
- Fitting products in a niche. It should freely enter into it without tilting and bulging.
- Pass the cable into the holes and fix the boxes in a suspended state.
To make a socket in a concrete wall, you need to choose the right putty for fixing.It is better to use a material with an average setting speed so that it is possible to correct the undergrowth after immersion in a niche.
To put and fix the mounting box in the wall, you must do the following:
- Once again clean the holes from dust and dirt, treat them with a primer. Wait for it to dry.
- Cover silicone with the hole through which the cable exits. This is a protection against insects that can crawl out of neighboring apartments.
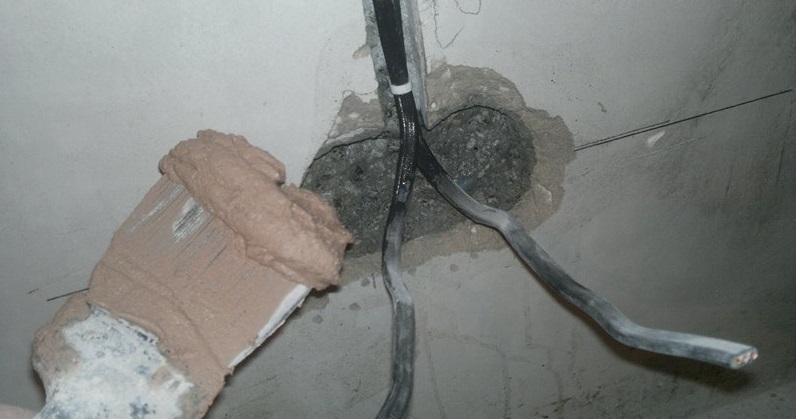
- Dissolve putty. It needs to be made of medium consistency, dense enough to maintain its shape, but also to the extent pliable, so that it can easily give in to pressure.
- Spread the solution evenly on the internal walls of the recesses. The thickness of the layer depends on the difference in size between the base and the mounting box.
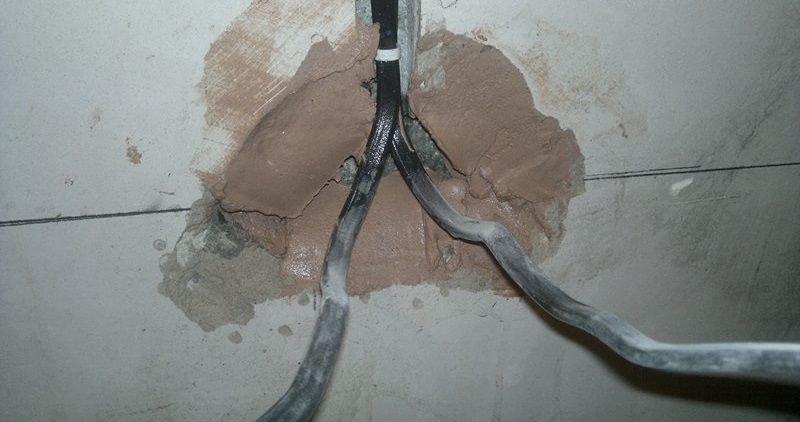
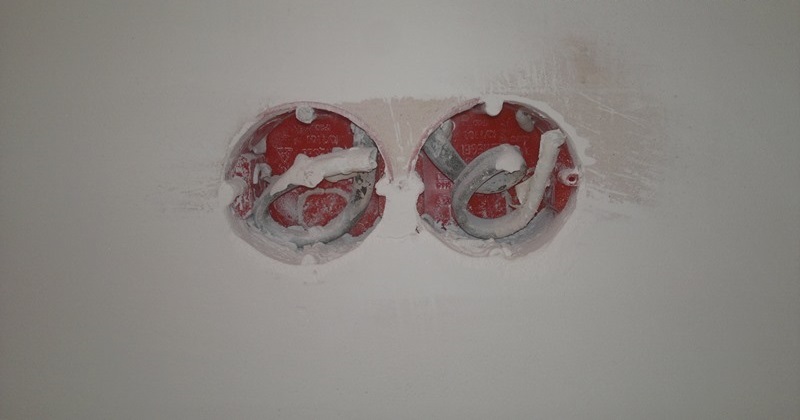
- Keeping the cable taut, push the glass into the hole until it is completely submerged. Its edges should be in the same plane with the surface of the panel.
- Use a trowel and a screwdriver to correct the position and final alignment of the products.
If a solution has leaked into the boxes, it is best not to touch it immediately. Fragments of the putty are more convenient to remove after it has completely hardened. So you can save time and not stain the glass.
Wall decoration
Finishing should begin after the mortar completely solidifies in the drilled holes. If you immediately begin embedding the strob, from the mechanical impact of the cable, the sockets can move from their place.
Finishing panels is carried out in the following sequence:
- The grooves are cleaned of foreign objects, dust and crumbs.
- Surface treatment is carried out with a deep penetration primer. If the liquid is quickly absorbed, the operation is repeated.
- The solution of sand and cement is mixed. He carries out the sealing of large dips, chips, holes. After applying the solution, a longitudinal hollow 3-4 mm deep should remain.
- Completely dried cement is cleaned of protruding fragments and treated twice with a liquid primer.
- Preparing starting putty. It is applied and leveled so that 1-1.5 mm remains for the finish coating.
- The base is cleaned from grains and covered with impregnation.
- Finishing putty is mixed and applied. After it hardens, the wall is overwritten. It should be ensured that no traces of the previously laid strobe remain.


The final decoration is chosen by the owners, depending on their own tastes and the purpose of the room. This can be wallpaper, tile, paint and other facing materials.
Hardware Installation
Connecting the outlet can be done before or after finishing work, the sequence does not matter here. Expediency and the need for an additional point decide everything.
Installation is carried out in the following sequence:
- If the cable is unlabeled, phase, zero and ground are detected. Wires are marked. Then, the premises are de-energized at the input batch switch or by unscrewing the plugs. To make sure there is no voltage on the line, you should use a tester.
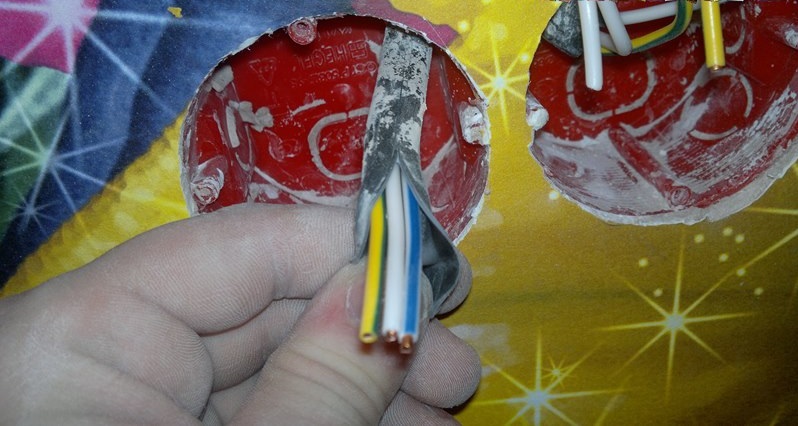
- Using a knife, the outer insulation of the cable is removed. Depending on the design of the outlet, it is cut by 3-6 cm.
- The ends of the cores are stripped 10-12 mm. Cut plastic from them very carefully so as not to interrupt the thin copper wires from which the wires are woven.
- Exempted copper is etched with acid and soldered. Tin coating of metal will prevent its corrosion during operation.
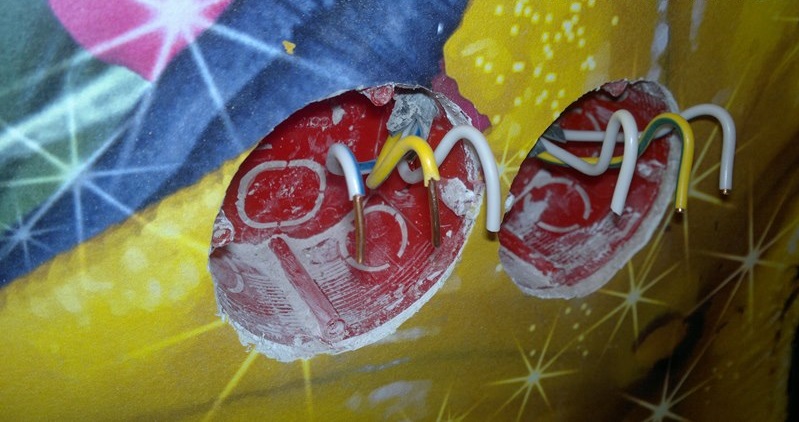
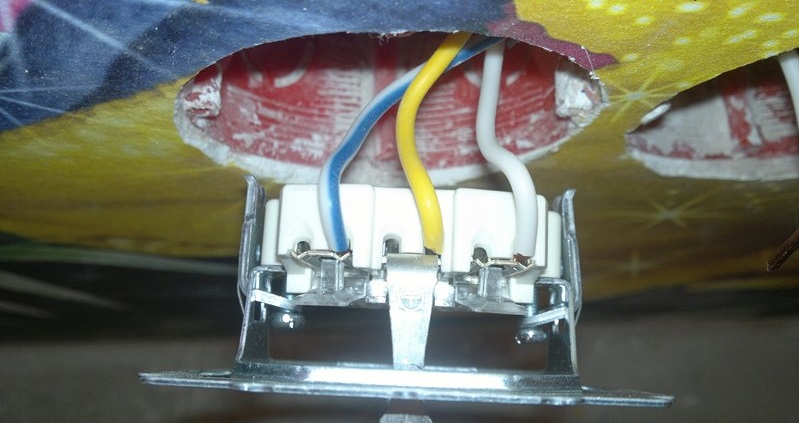
- The contact bolts loosen. The wires are inserted into them. The yellow-green ground wire connects in the middle. The black or brown phase is attached to the right, and the blue zero to the left. The bolts are tightened tightly, the quality of fixation is checked by lightly tensioning each core.
- The slack of the cable is folded into an accordion so that it fits freely and compactly in the installation box.
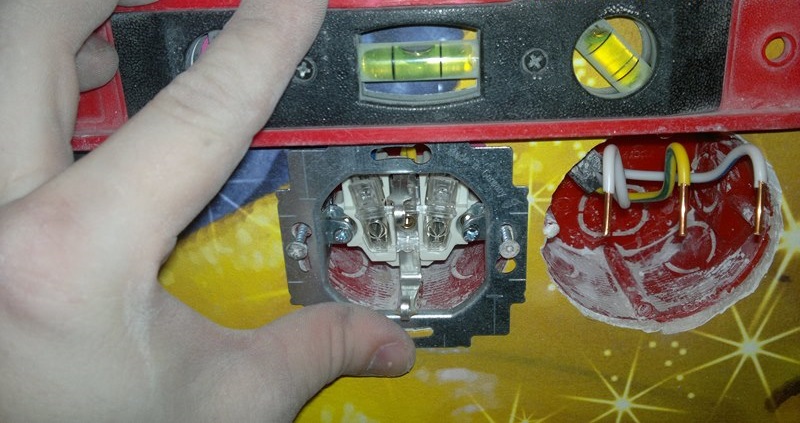
- The socket is slowly and carefully inserted into the hole.After the strap rests against the wall, the product must be firmly fixed. For this, self-tapping screws and spreader feet are used.
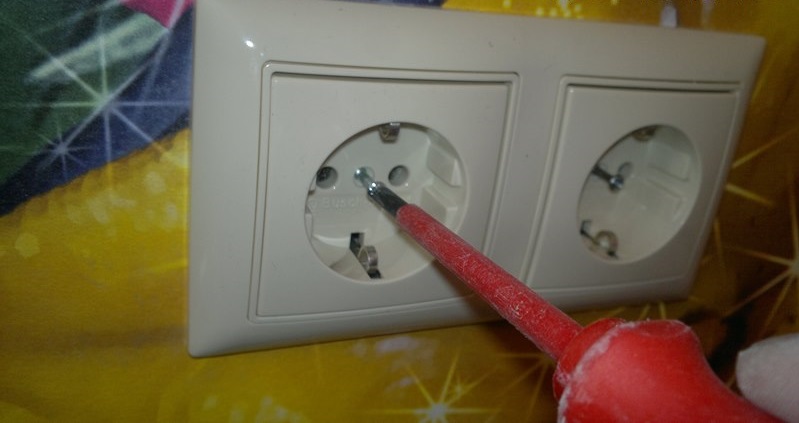
- The cover and decorative overlays are established. This procedure is carried out in accordance with the instructions attached to the product.
- The strength and reliability of mounting the socket and mounting box is checked. For this, the plug is inserted and removed several times from a powerful electrical device. When the work is done correctly, the product maintains a constant position.
In conclusion, current is supplied to the room and the operability of the device is checked.
Features of installation in high-strength concrete with reinforcement
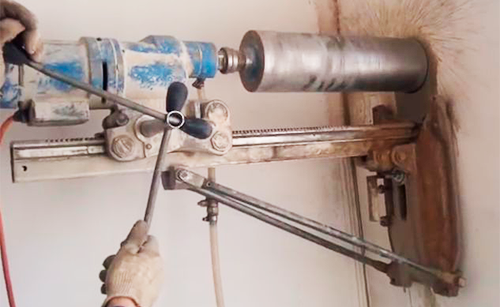
If the sockets will be installed in panels of high-quality reinforced concrete, special equipment should be used - a diamond drilling installation. The reason is that the drill punch is powerless against rebar, and metal drills are blunt on concrete. The solution may be a grinder with a diamond disc, which equally effectively saws both of these materials. After making slots, the concrete is broken, the reinforcement is cut off.