The bathroom is a room with the most difficult climatic conditions in the house. High temperatures and humidity negatively affect the finish, wiring, household appliances. It can also lead to the formation of mold, which adversely affects the health of all residents. Therefore, it is important to create a high-quality ventilation system in the room. If natural ventilation is not enough, you need to connect an electric fan. This can be done independently without resorting to the help of a specialist.
Natural ventilation check
Before installing an electric fan, you should check the natural ventilation - the shaft. There should be no obstacles to the circulation of air, as well as dust and dirt.
Using a candle test, you can check if air is coming out of the bathroom. To do this, you need to bring a lit candle to the ventilation and check where the flame will go. It should deviate towards the shaft. In the absence of natural ventilation should contact the housing office. If it is not enough, additional ventilation systems are installed.
There are many types of fans. They vary in shape, size, manufacturer.
Types of fans
The classification of fans is carried out according to the method of mounting, according to location, capabilities.
By way of fastening:
- invoices - placed at the entrance to the channel;
- ducted - are installed inside the blower.
The first are used in apartments, the second in private houses with an extensive network of blowers.
At the place of installation:
- wall for apartments;
- Ceiling for houses in which ventilation goes to the attic.
Lane and bezelless models are also distinguished. Vane are most often used in houses and apartments.
Fans may differ in their capabilities. You can buy a device with a timer, sensors, safety shutters, check valve. The wider the functionality, the more expensive the device. The cost is influenced by the manufacturer.
Wiring diagram
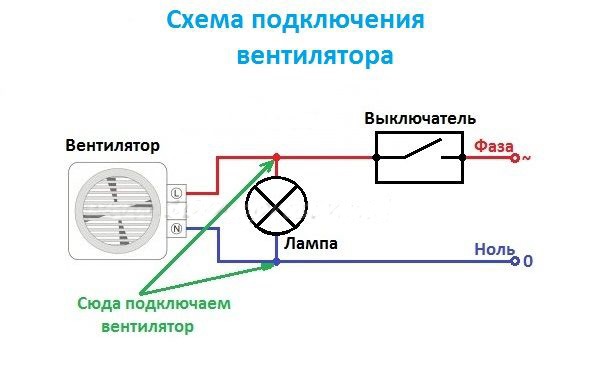 There are three ways to connect the fan to the 220 V power supply network:
- from the lamp;
- through a separate keyboard or two-gang switch;
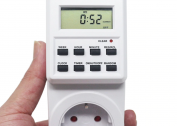
- through a timer or sensor.
The cheapest method is to connect a fan to a light switch. The cooler turns on simultaneously with the backlight and works for the entire time while the light is on. The advantages include ease of execution and low cost. The disadvantage is that the fan will work when it is not required (while taking a bath), and create a draft. You will also have to additionally ventilate the room.
You can connect the exhaust fan to a separate switch with a button. The scheme will be more complicated than when connected to lighting, and more expensive, but it is more convenient for operation. You can connect to a double switch - one button is responsible for the fan, the other for light. Minus of the method - there is a risk of forgetting about the cooler.
There is an active transition to process automation, so you can connect the fan through sensors and timers. With their help, you can set the time that the cooler will work after turning off the light. The circuit is similar in complexity to the connection to the switch. The wires are connected to the power and the lamp. The fan works with the lamp, and turns off after a pre-programmed time. 30 minutes are enough for airing. There are models that work after turning off the lights after a predetermined time.
Fan mounting
Before installing an electric fan for the bathroom, you need to make sure that several conditions are met:
- the presence of a normally functioning ventilation channel;
- the presence under the door to the bathroom slit for air circulation;
- The fan must be selected correctly.
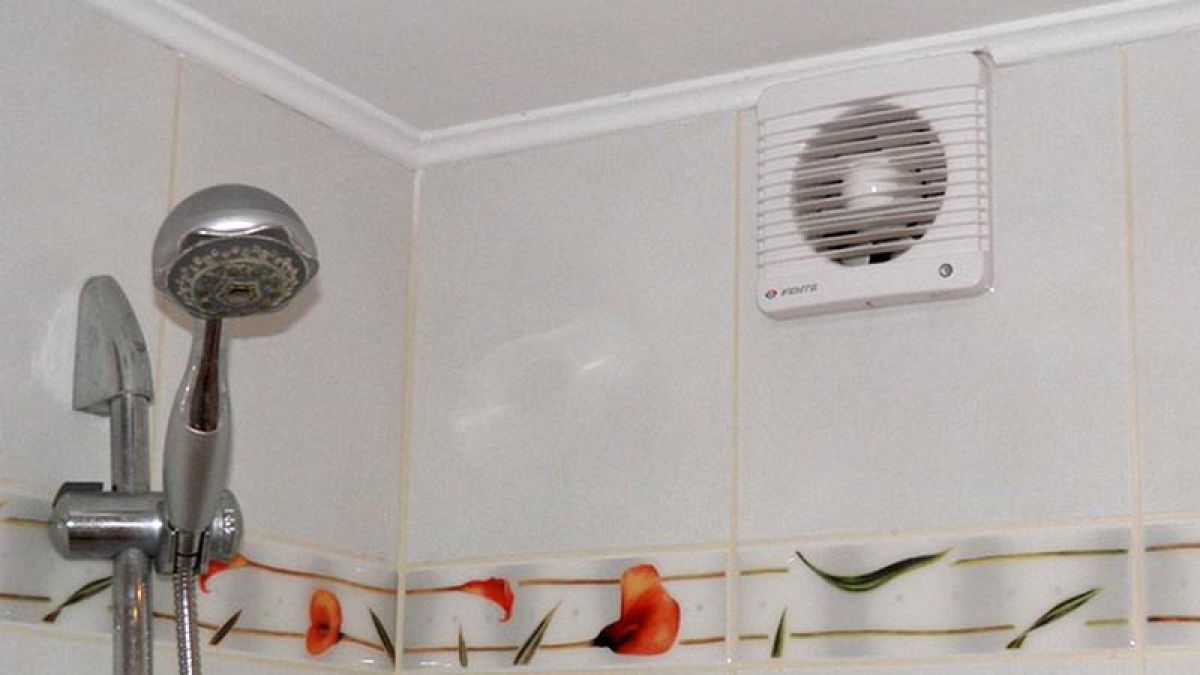
For the bathroom, waterproof models should be preferred. The self-installation process consists of the following steps:
- cable laying;
- preparing a place for installation, expanding the ventilation channel as necessary;
- connecting the fan to the network through the mounting and switching components;
- installation of a cooler in the ventilation channel;
- final finishing works - filling with foam of voids, putty.
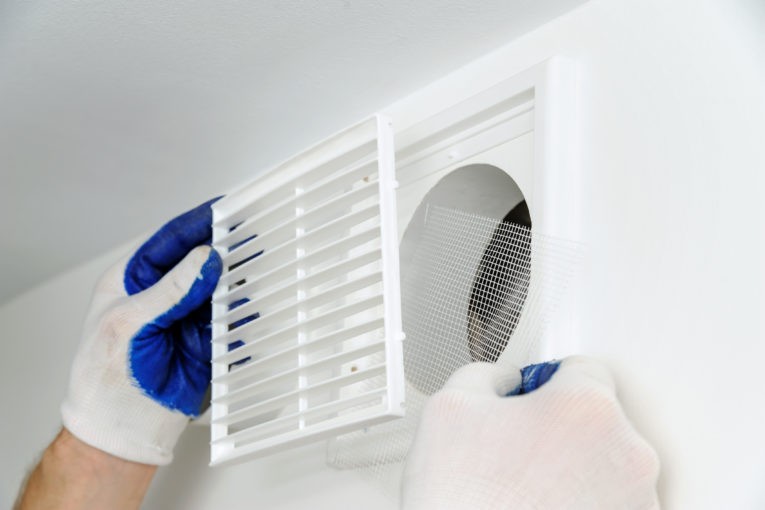
Connection of the fan in the bathroom to the switch separately from the light:
- remove the front grill;
- connect the wires to the fan through the terminal blocks in accordance with the marking (blue - zero, red, white, black - phase);
- fix the fan casing in the hole in the wall;
- install a grid on the fan.
Manufacturers have created all the conditions for easy connection of the fan. When removing the grill, the master will see the fastening and switching elements. You can connect the fan to the network through the terminal block - it is important not to mix the wires. You can fix the device on dowels, building sealant or glue.
Ceiling installation
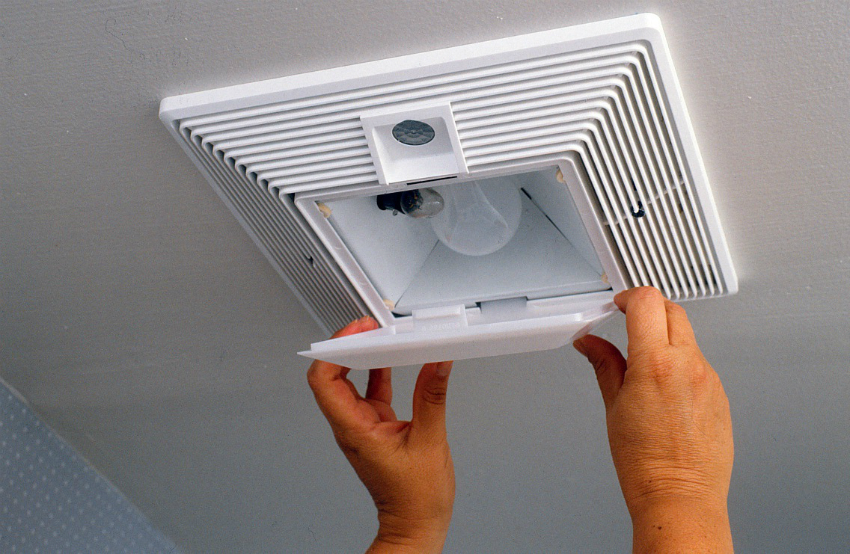
In some houses, an electric fan can be installed on the ceiling. In private homes, the ventilation duct is laid in the attic, so the ventilation system is also located there.
Installation on a suspended or suspended ceiling is complicated. On the stretch ceiling, you will need to make a special stand, and the cooler can be screwed to drywall with dowels. If the ceiling is already mounted, dismantling will be required. In order not to dismantle the ceilings, you can use one of two methods:
- pulling the wires through the hole, which will later need to be repaired;
- conduct wiring on the ceiling and hide it with a cable channel.
Performing such an installation is quite difficult. The best option is to think through the ventilation system before repair work and pre-prepare the place for installation.
Probable errors
When connecting, the following errors are most often made:
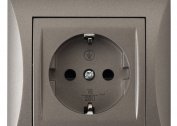
- Mounting a switch inside the bathroom. According to the PUE, the installation of switches, sockets and other controls is prohibited in toilets and bathrooms.
- Inaccuracy of work. During installation, there is a risk of damage to the lining, which may require repeated repairs in the bathroom. It is important to carefully perform all work, especially when attaching to self-tapping screws.
- Buying wires of the wrong section for connection. According to safety regulations, the minimum cross-section is 0.75 sq. Mm. Cables of smaller diameter cannot be used. For a more accurate calculation, there are tables that allow you to choose the diameter depending on the current.
When using remote sensors, and not built-in initially in the fan itself, one may encounter difficulties in operation. Sensors must have a high level of moisture and dust protection. In addition, these devices can be attributed to control devices, which are also forbidden to be placed in the bathroom according to the rules of PUE.