Ceramic tiles - a practical and aesthetic option for finishing the floor. Its disadvantage is a cold surface. In the cold season, it is uncomfortable to walk on it, especially barefoot. The solution will be laying electric heat-insulated floor under the tile. It is sold in the form of heating cables and mats. An electric wire will cost less, but it is worth considering the increase in the floor level due to the screed and the complexity of installation. It is easier to put heating mats, but their cost is higher.
Preparation for laying a warm electric floor
Regardless of the selected heating system, you will have to prepare the floor for installation. First of all, the coating is removed. After examining the old screed, its condition is revealed. In some cases, dismantling is advisable. This will win a few centimeters of the height of the room. Before laying, materials for hydro and thermal insulation are purchased.
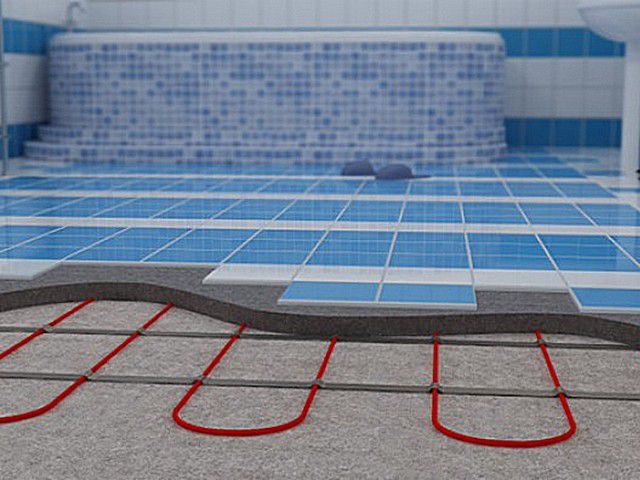
Cable floor heating
The heating cable under the screed can be used as the main or additional element for heating the room. There are two main types of devices:
- resistive;
- self-regulating.
To make a choice, you should study the advantages and disadvantages of each element.
Resistive
A feature of the heating wire is the same temperature in any area. Heat is generated due to the high resistance of the material. Resistive elements are of two types.
Single core the wire has 1 conductive core, 2 layers of insulation and a shielding braid. For connection, it is necessary to reduce the ends at one point, which complicates the installation. Pros:
- economical energy consumption;
- ability to generate heat;
- affordable cost.

Two-core the heating element consists of two cores with a protective sheath. A metal mesh prevents the spread of electromagnetic pulses. Pros:
- ease of installation, circuit closure provides a special coupling at the end of the wire;
- You can create a diagram of the desired configuration;
- high degree of shielding.
The common minus of the resistive type products is the inability to adjust the temperature on individual segments. In the event of a breakdown at any point, the system fails.
Self-adjusting
The cable design includes: two conductive cores, a semiconductor matrix, a metal braid and an insulating sheath. The degree of heating of the wire depends on the ambient temperature. Product Advantages:
- excludes overheating in certain areas;
- low power consumption;
- long term of operation.
The main disadvantage of the element is its high cost.
Cable quantity calculation
For efficient operation, the warm floor should cover about 70% of the room area. The material does not fit on the entire surface. Places where heavy furniture is installed are excluded. It is necessary to calculate the value of the covered area. When calculating the cable, the average power of the heating system is taken. It depends on the type of room and the purpose of the system:
- main heating - 180 W / m2;
- auxiliary - 110-140 W / m2.
In a well-insulated room, a smaller system is installed, on the balcony and first floor, the parameter is taken with a margin of 20%. The total cable power is calculated by multiplying the average by the usable area.
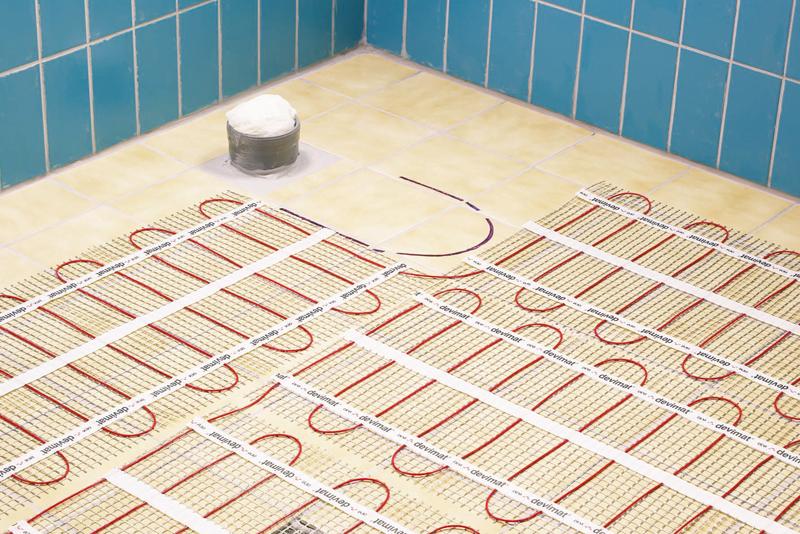
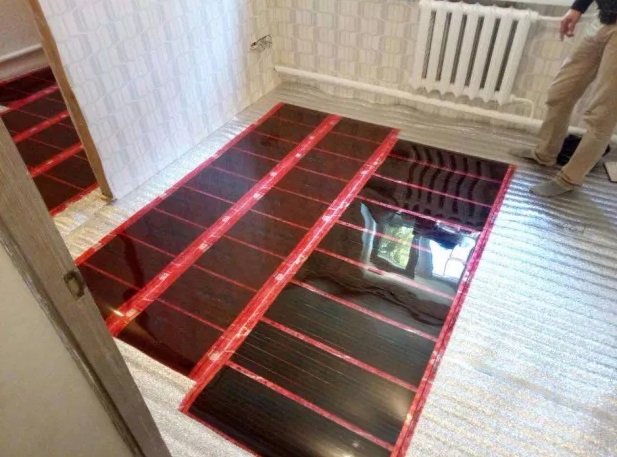
Mesh heating mats
A wire mat is a construction made of a resistive cable mounted on a polymer mesh. The wire is laid in turns and securely fixed. Systems of various capacities from 120 to 200 W / m2 are sold. The advantage of mats is a simple installation technology.
Styling technology
Installation of the heating cable of both types and mats is carried out according to a similar technology and has a common preparatory stage. Nuances in the design of systems affect the connection to the mains.
Surface preparation
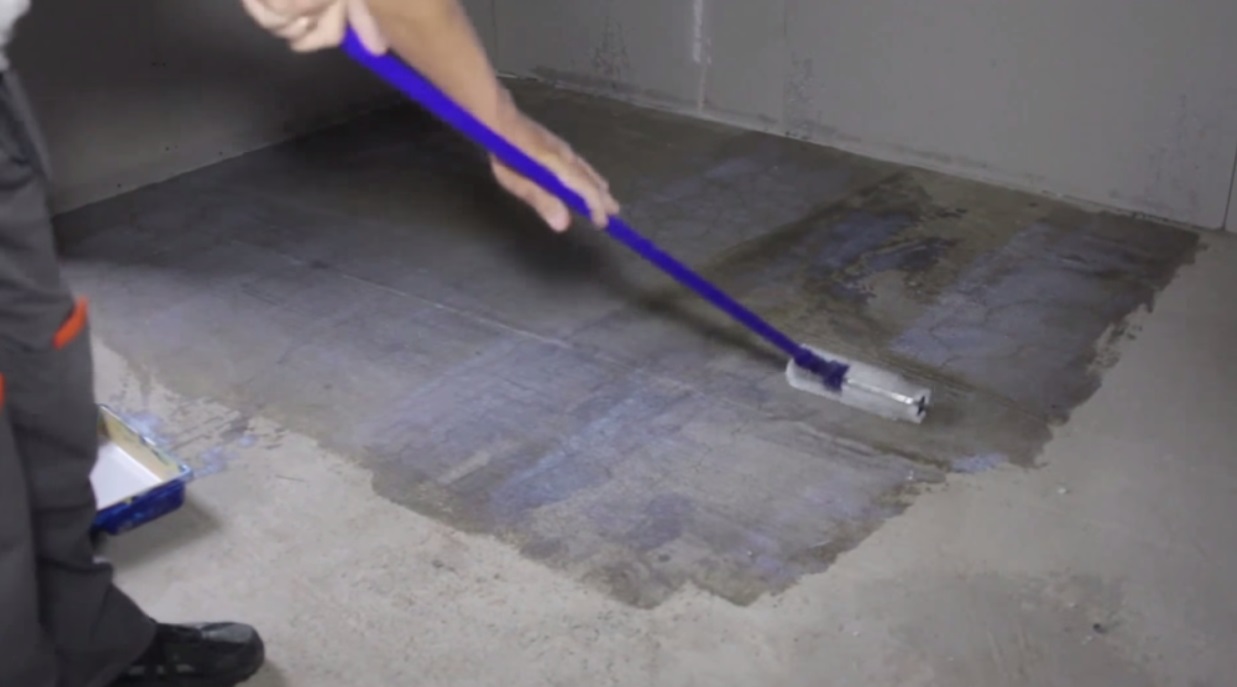
The first step in preparing the surface is leveling. There should be no level drops, cracks and protrusions. If necessary, a new screed is poured. The main work continues after it dries. Before laying the warm floor, a thorough cleaning is carried out. The surface is cleaned of dust and debris, primed. In rooms with high humidity (bathroom, toilet) waterproofing the floor with bitumen or liquid glass.
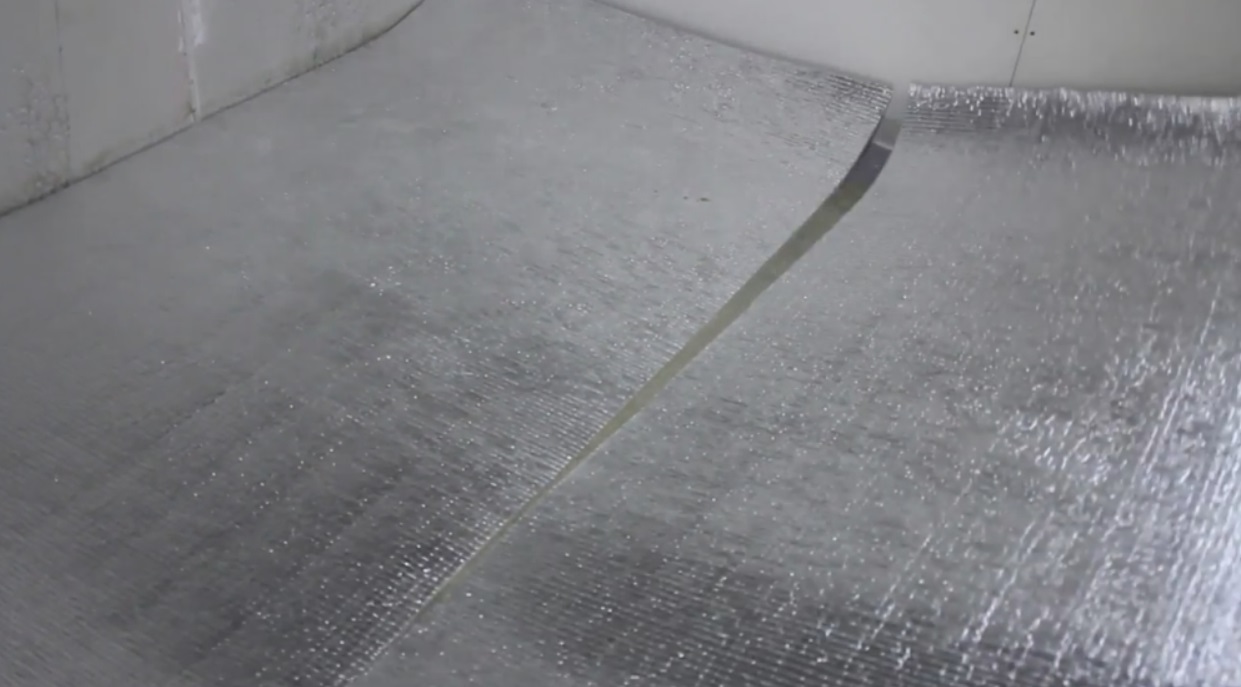
To reduce heating costs, thermal insulation is performed. The rooms on the ground floor are insulated with polystyrene foam, in the rest of the rooms it is enough to lay foil foamed foam. In places of indentation from the walls, a damper tape is placed. It compensates for concrete expansion when heated.
-
- Primer floor
-

- Thermal insulation
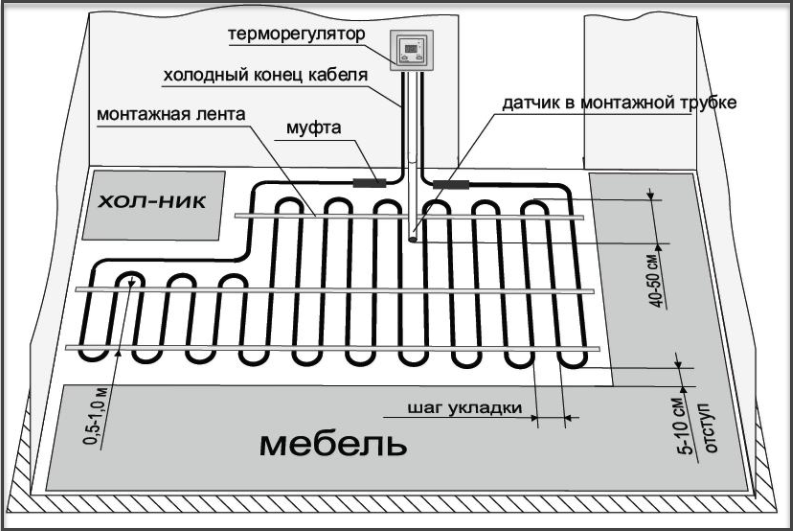
Scheme creation and calculation
Before starting installation work, a stacking diagram is drawn up. It depicts the placement of the cable (mat), the connection point of the thermostat. The scheme takes into account the recommended spacing from the walls by 50-100 mm. Marked areas occupied by furniture without legs, which can not be placed heating elements.
By calculating the specific thermal power required for the room, you can choose the length of the cable. Usually products are sold in bays of a certain size with terminations for connection. When choosing an electric heated floor, the main parameter is power. The length of the wire is calculated by dividing the total power by the linear power specified in the characteristics. The step of the coil is determined by the formula: h = Sx100 / Lwhere:h - laying step, S - effective area, L - length of cable.
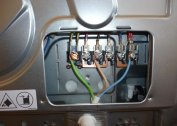
Connecting a warm floor gives an additional load of several kilowatts. Check the wiring should be entrusted to an electrician. This is a guarantee to prevent fire from short circuit.
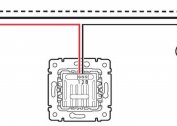
Temperature Sensor Installation
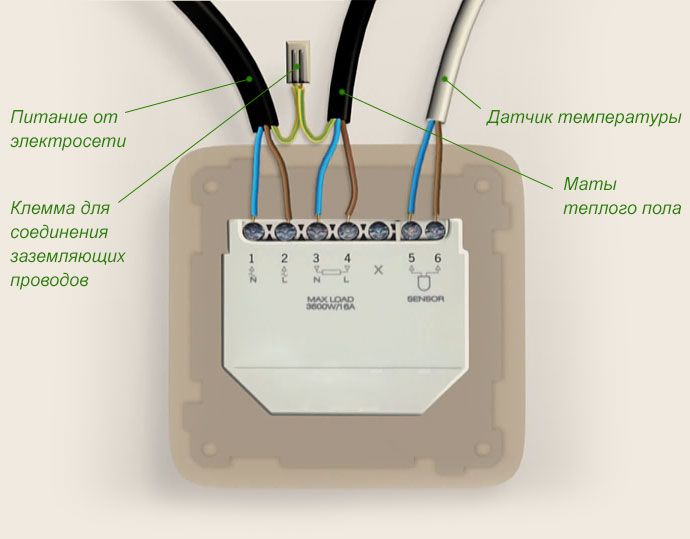
The underfloor heating kit is equipped with a temperature controller and a temperature sensor. The thermostat can be mechanical and electronic, with its help the temperature mode is set. The sensor measures the temperature of the floor heating, it is connected to the controller with a wire. Under the device in the wall, a strobe is made and a hole at a height of 80-100 cm. The sensor is placed in a corrugated pipe. It protects the device and allows its replacement. The temperature sensor is placed between the turns of the cable, the distance from the wall is 50 cm.
Installation of a cable of a heat-insulated floor
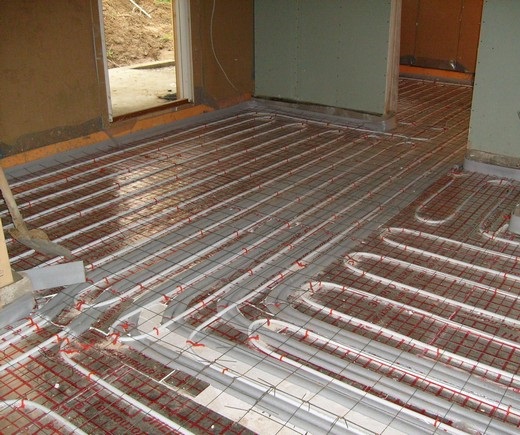
Mounting tapes are fixed on the foil surface of the insulation. These are flexible metal elements with a ready-made mount. The second option is the use of fiberglass mesh. The canvas unfolds on the surface, the cable is attached to it with plastic clamps. Between turns, the calculated distance is observed, their intersection is not allowed.
Before installation, the system resistance is checked. It must match the passport. Allowable discrepancies 10%. A single-core cable is connected to the temperature controller at two ends, and a two-core cable at one end, a coupling is installed on the second. Installation of a heated electric floor under the tile ends with a resistance test.
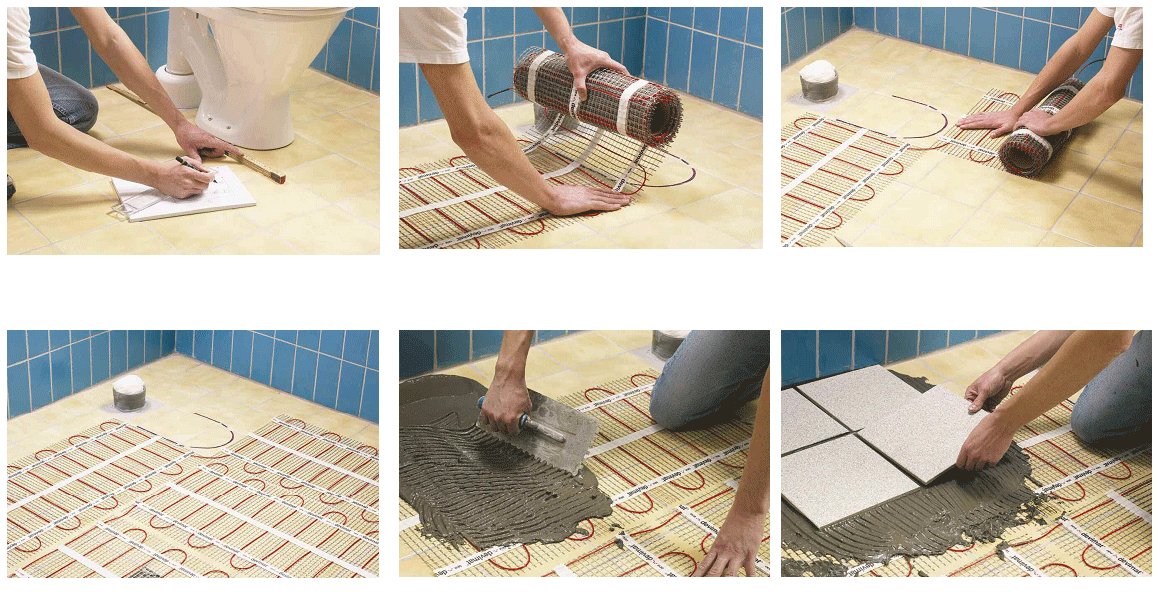
Laying heating mats
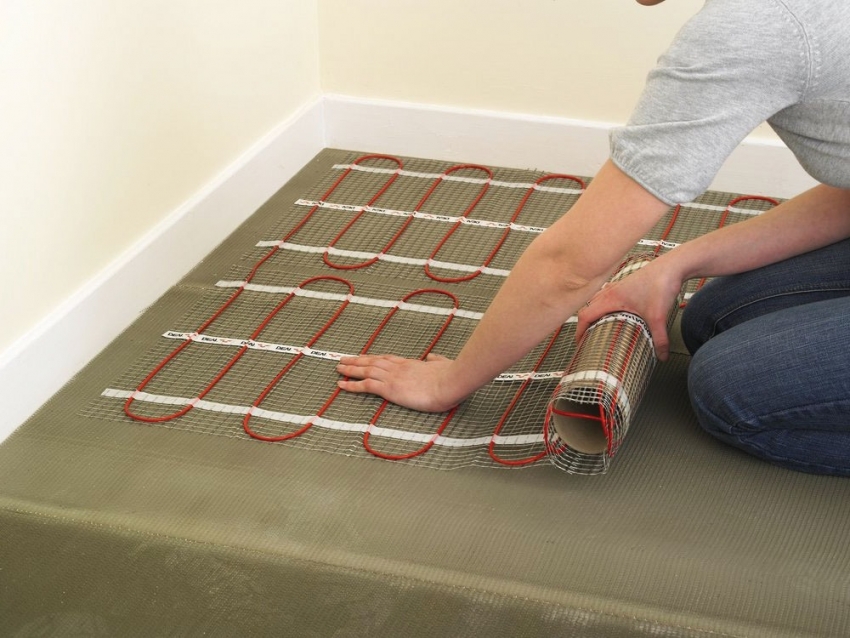
Electric mats are laid out on the floor according to the scheme. For turns, the mesh is cut without damaging the wires. After installation, a switching test is carried out. Connection to the thermostat is based on the color marking of the wires. The procedure is regulated by the manufacturer's instructions.
Pouring screed
A concrete screed with a layer thickness of 5 cm is poured over the heating cable. For mats, tile adhesive can be used, but the base must be at least 3 cm. The solution is carefully distributed over the surface. The next stage begins after the screed is set.
Before laying the tile on a warm electric floor, it is soaked for several hours. The cladding is mounted on a special heat-resistant adhesive. The mixture is applied to the base with a notched trowel. Tiles are leveled. The first electric floor heating under the tile is allowed after the screed has completely dried, after 4 weeks.