Sometimes situations arise when you need to move the switch from one place to another, but you do not want to destroy the walls. Some call professionals, and some independently seek ways to solve the problem. There are several different ways to move the switch to another location. The transfer technique in panel and brick houses is no different from each other.
The reasons for the transfer
The main reason that you need to transfer is the inconvenience of use, when the switch interferes with the opening of the cabinet door or the bed covers access to it. This can happen after furniture shifts or repairs.
Sometimes people encounter a problem when to turn on the light and the bedroom, you need to walk to the corridor. This location is very impractical and inconvenient, so you need to move or acquire a remote.
With low placement, there is a risk that they will play a child. He can disassemble the switch, swallow small parts and get an electric shock.
Technical Migration Issues
First you need to prepare materials and tools, calculate the length of the wire, and also turn off the counters. Be sure to check the absence of current with an indicator screwdriver.
There are some standards that you must adhere to:
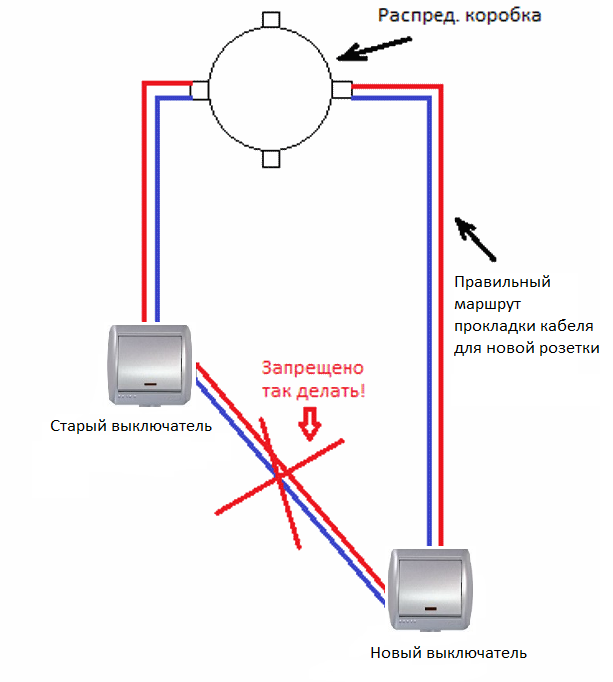
- All wires should be vertical or horizontal. You can not lay them diagonally through the wall.
- The most suitable cable section is 1.5 mm2.
- The height of the switch must be at least 60 cm from the floor. Often installed according to European standards - 90 cm.
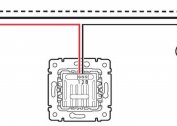
Using a loop
This method has both advantages and disadvantages. The main plus is to make it easy and simple. It is enough to lay the cable from the old switch to the new one. There will be two of them. Typically, a loop is used to move outlets.
Disadvantages are unreliable and ugly. When the apartment or house is in good repair, two switches spoil the entire appearance of the room.
If you use two switches at the same time, a short circuit may occur. If the old device breaks down, the new one also becomes inoperative.
Wire extension
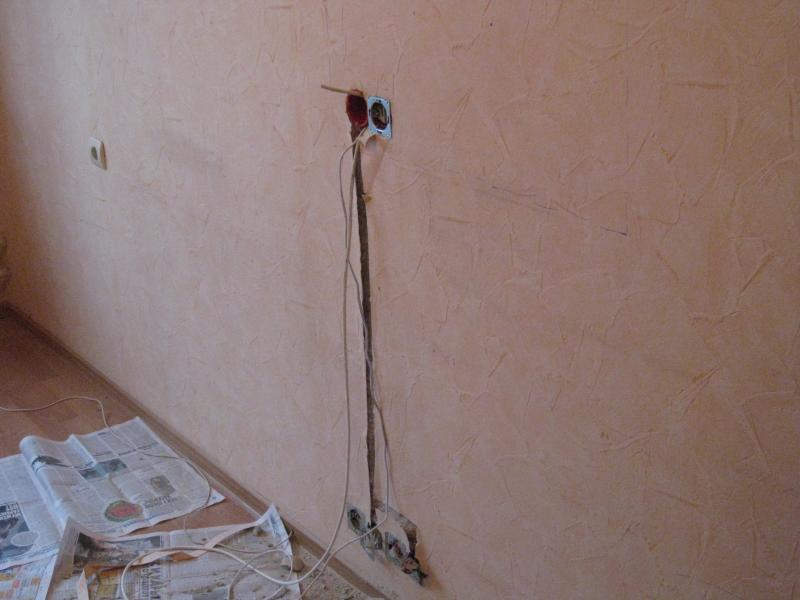
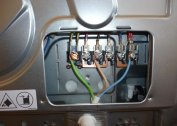
The method is considered more reliable. It consists in attaching a piece of a new cable to an old one. However, a small stroba will be required here. In place of the old switch, you need to install a junction box in which elongated wires will be placed. This box is best hidden in the wall so that it does not spoil the appearance.
For lengthening it is necessary to take out the button and the case of the old switch, and to the new puncher to make a strob. Then you can connect the wires, hide them in a junction box and proceed with the installation of a new switch.
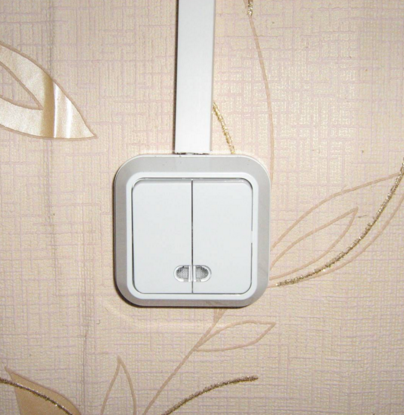
If necessary, shortening the wires is possible. The technique is similar. The two-key switch is connected in the same way as the one-key switch.
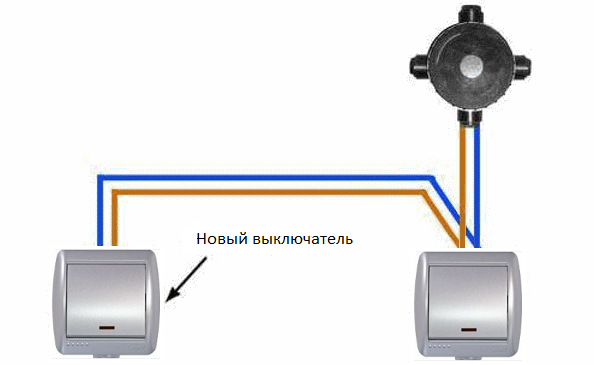
New line output
This is a reliable but not the fastest transfer method. When the electricity is turned off, a strobe is made. It should be located from the junction box towards the new switch. In the gate place the wire. All holes are covered with alabaster. When all the wires are connected, it remains only to turn on the electric current.
Connection without gating
The transfer of the circuit breaker without gating is carried out using special designs. In stores, you can purchase a cable channel.It looks like a long narrow plastic box. All wires are placed in it, and the device itself is attached to the wall. The cable channel can also be integrated into the baseboard.
To transfer without gating, you do not need to destroy the walls and make ugly holes. But there is one caveat - the wires inside the cable should be solid, not pieces.
What to do with the old hole
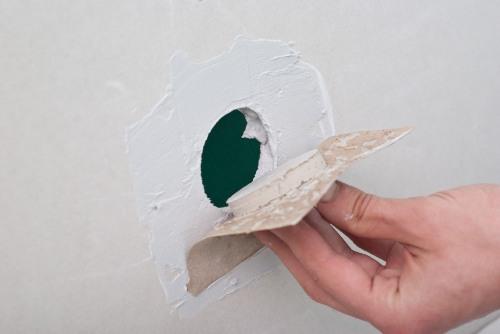
After the old switch is removed, the hole from it must be removed. For this, alabaster, gypsum, putty is used. The selected solution must be diluted according to the instructions and using a spatula to coat the hole.
After drying there, you can paste the wallpaper or hang a picture.
How to lower the switch lower on the wall
There are several ways to lower the switch down the wall. You can do this by any of the methods described above: using a loop, by extending the wire. It is also allowed to use the transfer method using a cable channel.
Migration Safety
Failure to observe safety precautions may cause a short circuit, fire, and electric shock. Often, inexperienced electricians neglect these rules, because of which they suffer.
Be sure to turn off the premises before starting any work with electricity. To do this, turn off the machines in the entrance and apartment. After shutdown, the indicator screwdriver checks for a lack of current.
It is forbidden to use cables of various sections. When the load on the network is not calculated during the transfer, a short circuit is likely.
When connecting aluminum with copper, you must definitely use adapters. It is also not allowed to twist wires without insulation.
During transfer switch operations, care must be taken to ensure that children are away. It is worth considering the location of the future device. It should be out of the reach of the child.
If a cable channel is used, it must not be placed next to heaters, a stove or a battery.
When installing the switch on the tile, special drills are used. It should not get water.
Failure to follow safety instructions will result in the circuit breaker not working. This is at best. At worst, there will be a short circuit or electrical injury, which can cost the life of a novice electrician.