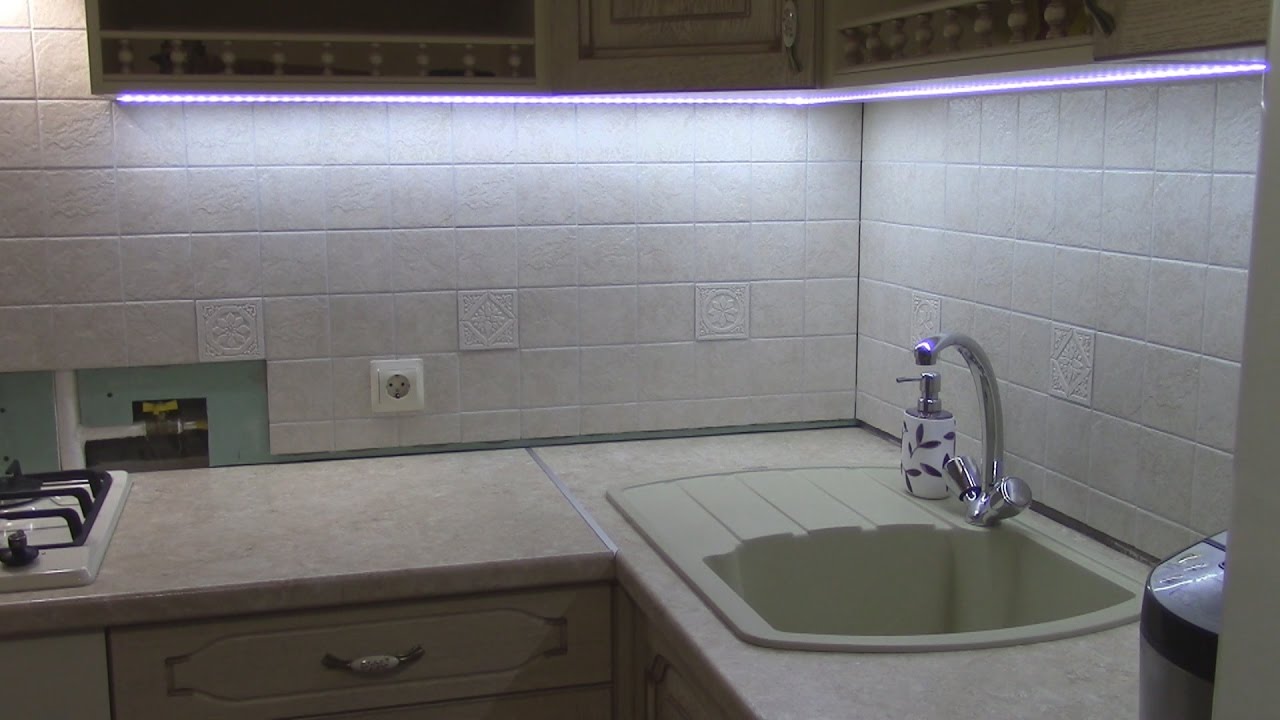
Combined lighting allows you to divide the room into zones. LED strip for the kitchen under the cabinets - a practical and aesthetic choice. Soft dim light creates a cozy atmosphere, the device does not take up free space. The backlight is easy to install, you can install it yourself.
Pros and cons of LED lighting of the working area in the kitchen
LED tapes have become a popular trend when choosing apartment lighting. Economical and attractive devices make the interior original and functional. At the market there are many products at an affordable price. Easy installation allows you to install them without the involvement of specialists. The advantages of LED-tape will help to affirm with the choice of lighting the working area in the kitchen:
- low power consumption;
- long service life;
- safety of use - no tension will harm a person, there is no fire hazard;
- fully illuminated workspace;
- the ability to choose the color of LEDs, adjust the intensity of work;
- even glow without flickering.
The main disadvantage of the device remains the high cost. Saving electricity costs is gradually offsetting the investment.
Another disadvantage is crystal degradation. Over time, it fades, the brightness disappears. The process speeds up poor heat dissipation. Manufacturers recommend placing tapes in an aluminum profile. The last moment - it is impossible to replace a burned-out LED. The disadvantages of the device are few, the advantages are more convincing.
LED Strip Selection Criteria
 A successful design decision is to mount the LED strip in the kitchen in the lower part of the hanging cabinets. It gives directional light without shadow and glare. When choosing a lighting device, its main characteristics are taken into account:
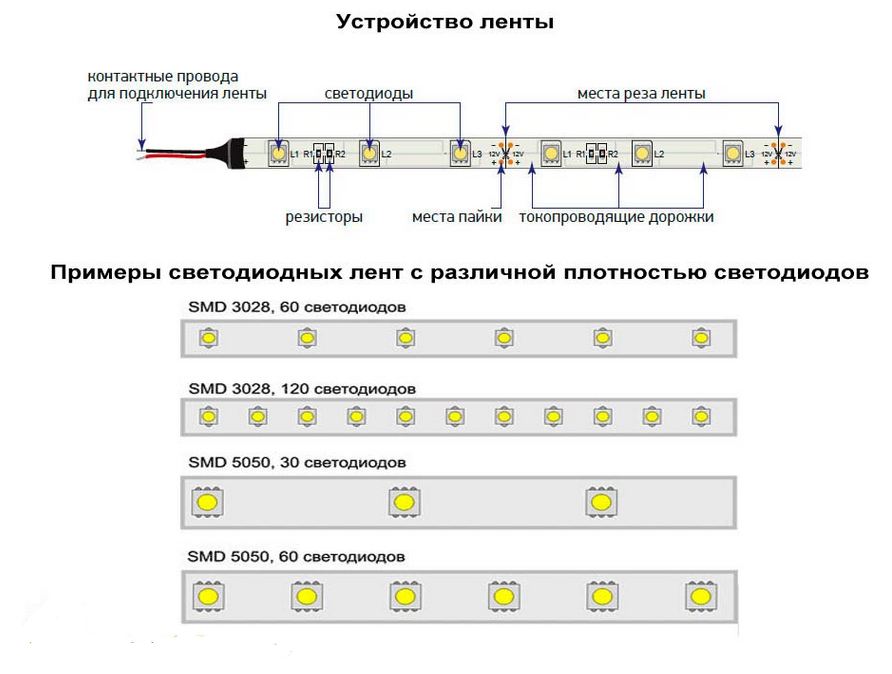
- The number of diodes per 1 meter. The installation density of the matrices is 30, 60, 120, 240 pieces per 1 m. They can be located in 1 or 2 rows. The brightness of the glow depends on the number of diodes. A density of 30 and 60 pieces is suitable for backlighting. Full lighting will provide a device for 120 diodes.
- Crystal size. The lamp is assembled from small and medium-sized LEDs. Their sizes are indicated in the marking. The most popular models are SMD 3825 (3.8 × 2.5 mm), SMD 5050 (5 × 5 mm). Large crystals give more light at the same density per meter.
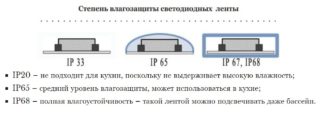
- Security class. Flexible printed circuit boards are coated with an insulating layer that protects against dust and moisture. Security classes are defined by a digital code after the letters IP. The higher the value, the more tight the coating of the strip. For lighting in the kitchen under the cabinets where contact with moisture is possible, products with a degree of protection IP54, IP55, IP65 are recommended. When mounting the strip in an aluminum case with glass, IP33 tape can be used.

Color variety
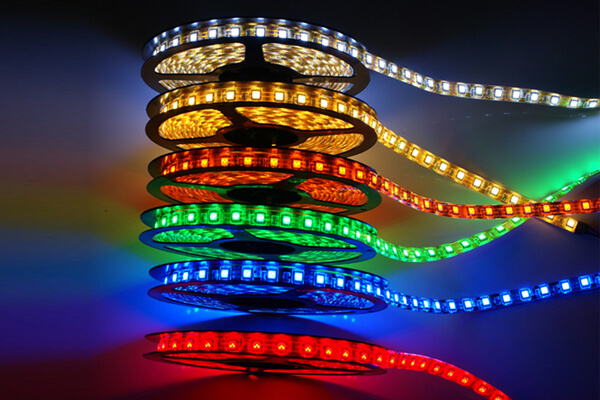
Ice-tape by the color of the light flux are divided into two main groups:
- Monochrome SMD - give one bright color. It can be white, red, blue or green.
- Multi-color RGB - several color crystals are installed on the board, creating a backlight according to a given program. Changing the brightness and built-in effects comes from the controller signal.
For a classic interior, warm-light LEDs are recommended; a hi-tech kitchen will look great with a cold spectrum. If an RGB tape is installed, you should prepare for a change in the natural color of foods and ready meals.
Lighting devices are sold 5 m long. They are wound on bobbins. In the product labeling, all the main characteristics are indicated.
How to choose a power supply and other circuit elements
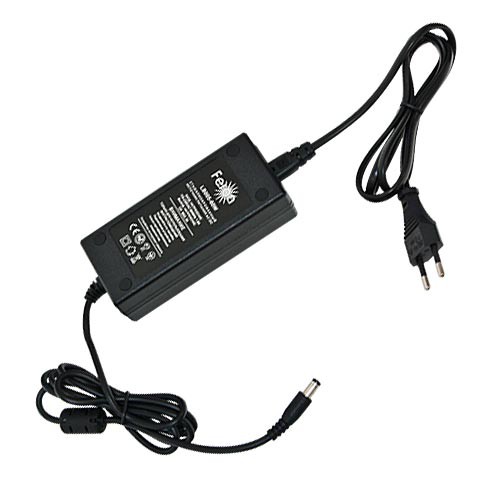
To connect a ribbon backlight, you must buy a power supply for 12 or 24 V. The voltage of the devices must be the same. The second important characteristic is power. The exact value of the indicator for the converter is calculated by the formula: multiply the length of the lighting device by a specific power of 1 meter. The required indicator manufacturers indicate on the reel. To the result, add 20-30%. The reserve will allow the unit to function in normal mode, and not at the limit of possibilities.
The converters are manufactured in a housing with varying degrees of moisture protection:
- sealed - with solid aluminum or plastic walls;
- leaky - with a perforated case, they are installed away from moisture.
When choosing a multi-color ribbon, installation of the controller is necessary. The most convenient is considered a model with a control panel. When installing several fixtures, you will need an amplifier. Glow intensity control is carried out by a dimmer. The control unit is optional.
Connection methods and schemes
The main schemes for connecting lighting under the kitchen cabinets:
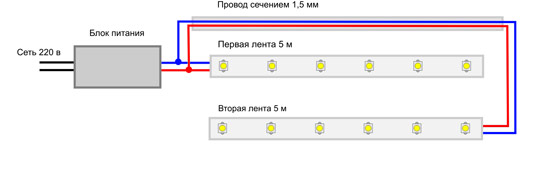
- A strip up to 5 m long is connected to the power supply. If desired, a dimmer is set between them.
- Backlight more than 5 m is divided into parallel branches. Amplifiers are included in the circuit.
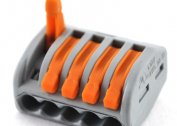
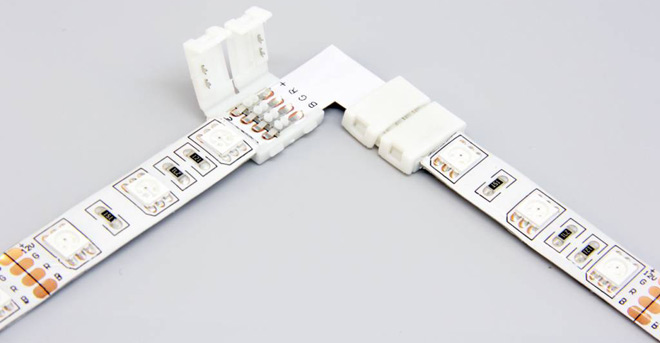
- Colored ribbons are equipped with four wires, three are responsible for color, one for power. They are connected to the controller, through it to the power supply.
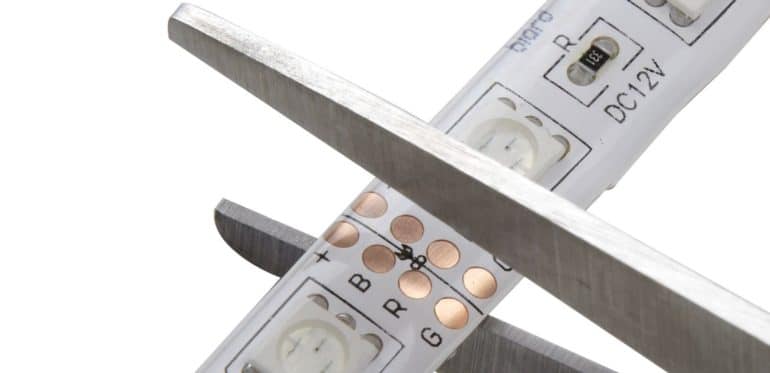
When connecting flexible cards observe polarity. Places of their cutting are indicated by the manufacturer.
Cable section selection
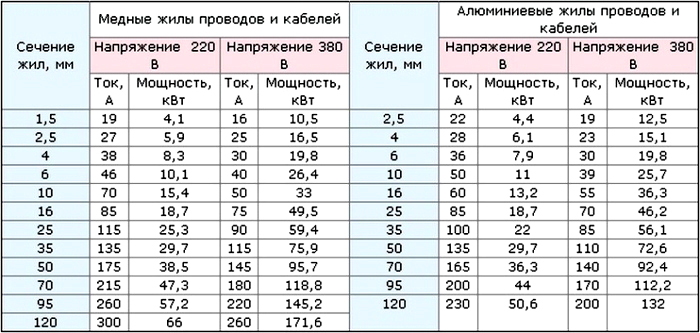
It is better to connect the lighting device with a copper wire. Its cross section depends on the power of the backlight. An acceptable option is 0.75 mm2. To obtain accurate data, there is a formula: S = (2xIxpxL) / ΔU, where
- S is the cable section;
- I - current strength, calculated by dividing power by voltage;
- L is the length of the wire;
- p is the metal resistance, taken from the directory;
- ΔU - permissible voltage drop.
Calculations can be done using online calculators on various Internet resources.
Tools and materials
The set of tools depends on the selected method of setting the backlight. If it will be mounted in the groove, you will have to use a hand mill to cut holes. Standard tool kit:
- scissors;
- soldering iron;
- solder with rosin;
- heat shrink tube or insulation;
- screwdriver and self-tapping screws (for fixing the profile).
Materials for work:
- LED Strip Light;
- Power Supply;
- Dimmer (optional)
- connector (for multi-color tape);
- aluminum box.
It is recommended to pay attention to the quality of consumables and basic elements used.
Backlight mounting
Before starting the main work, preparation is carried out. Experienced installers give some tips:
- The tape cannot be twisted and bent, cutting and soldering are performed at the turning section. A device with a temperature not exceeding 260 ° C is used.
- It is advisable to use the soldering method when switching strips, rather than connectors. The connection is more reliable, current losses are reduced.
- Do not mount the backlight on an unprepared surface. The bottom of the cabinet is dusted and degreased.
- Do not immediately press firmly while gluing the base. With installation flaws, the strip will be difficult to tear off.
- You must choose a place to place the power supply with ventilation and subsequent access to it.
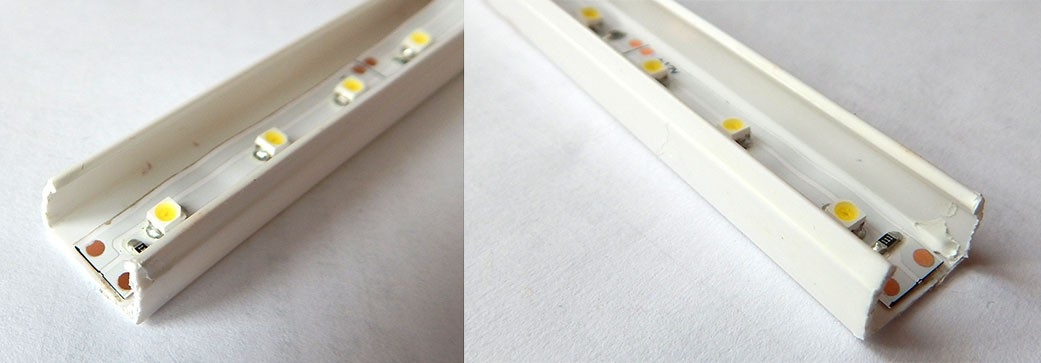
- High-power tape is placed in an aluminum profile, which contributes to the removal of heat.
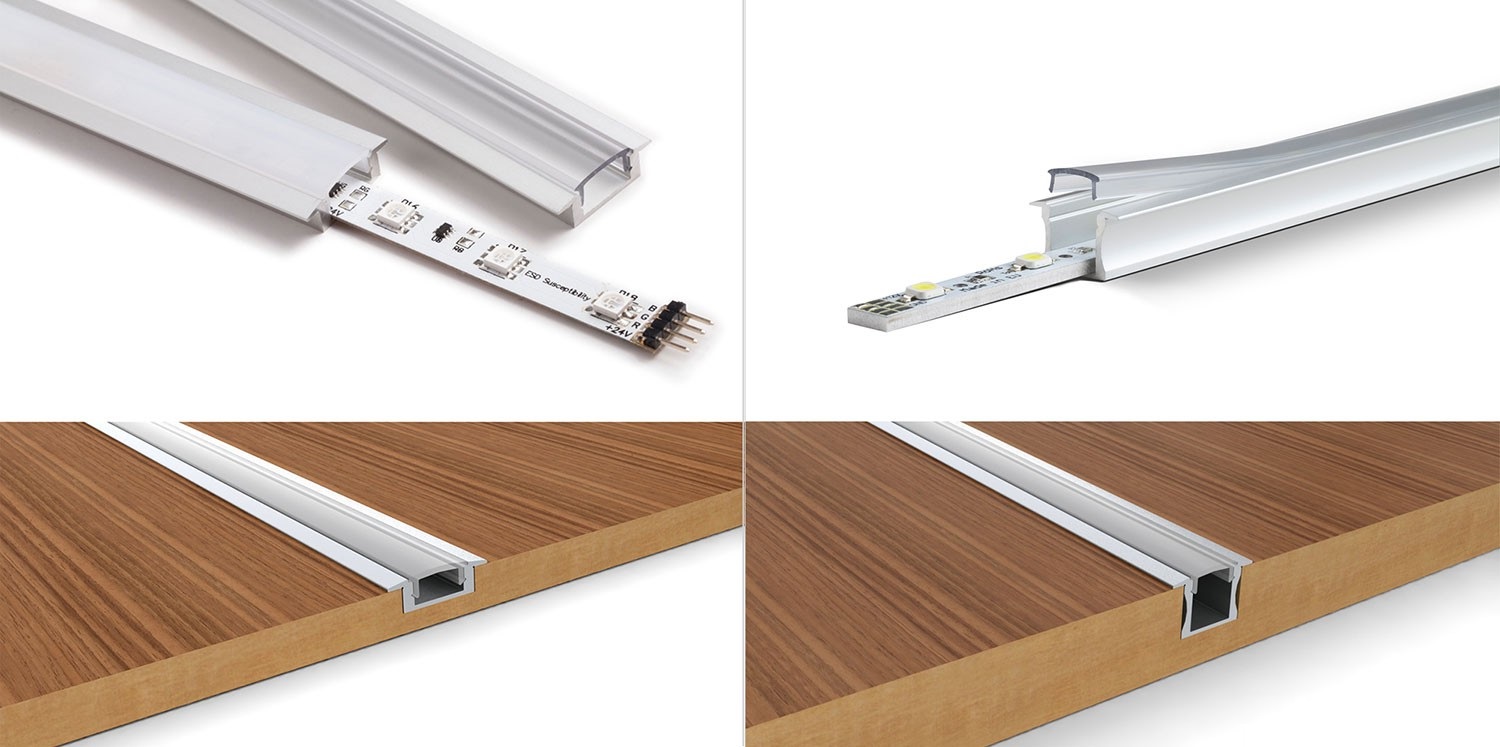
Before setting the backlight on the kitchen set, it is necessary to determine the installation method. It can be external or built-in. In the first case, the strip is glued to the surface of the cabinets, in the second - it is necessary to cut the channel. It is also important to choose a place. The created effect, the location of the shadow, depends on the direction of the light flux. The installation process is divided into stages:
- Installation work begins with laying wires. They are usually hidden behind the walls of cabinets. In the right place, a hole is drilled for removal. The power supply unit is connected to the cable and installed in a constant place, for example, on the side wall of the cabinet.
- The aluminum profile is cut into pieces of the desired length and drill holes for fasteners and wire.
- A flexible board is divided into segments. The ends are freed from the coating, soldered to the wires of the power supply. The switching point is protected by a heat shrink tube. It is heated with a construction hairdryer.
- The backlight box is screwed with screws. The inner surface is degreased with a solvent.
- The base of the LED strip is exempted from the protective coating. The strips are glued to the profile.
- From above the lamp is closed by a diffusing lamp.
- Electrical connection and check.

When mounting a color tape, the controller is attached first to it. Have to solder not 2, but 4 wires. The controller is switched to the power supply. The wire is fixed with screw clamps. All terminals on the unit are marked so as not to reverse polarity. Tape lighting adheres well to the surface of cabinets. Flexible boards of small capacity do not require the use of a box. This option is simpler and cheaper.
Original lighting with LED strip can be done independently. The modern option of lighting the kitchen will add a twist to the familiar interior.