With the help of LED strips, you can create beautiful decorative lighting in rooms of the most diverse purpose. The popularity of products is explained by their numerous advantages, a wide scope of application and a large number of models. To understand how to install LED strip in the kitchen, you should understand the principle of operation of the device and the rules for its installation.
Benefits of LED Lighting
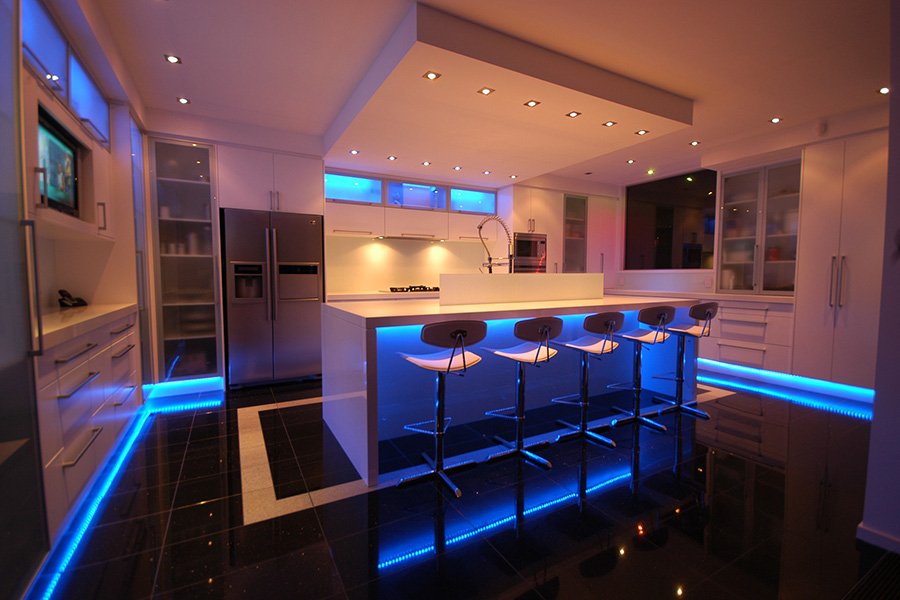
A growing number of owners of private and commercial real estate is striving to ensure that their property looks original and presentable. One way to fulfill this desire is to install an LED strip in the kitchen.
The advantages of this light source testify in favor of this solution:
- High color rendering index. Crystals recreate the natural colors that are present in nature.
- Flexibility. Products can be given complex shapes, used to decorate objects and objects with an angular and curvilinear configuration.
- Easy to install. Mounting is done on an adhesive base.
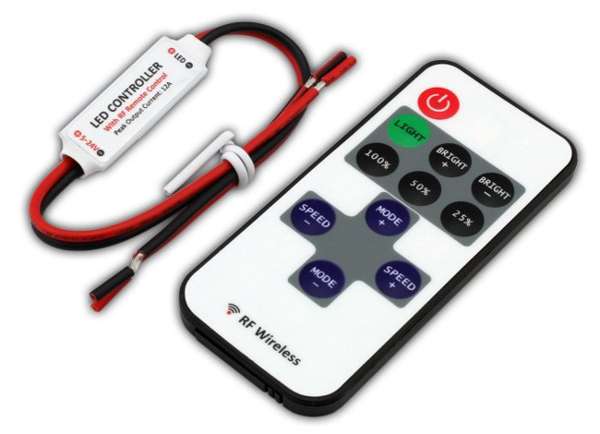
 LED Strip Dimmer
 - Durability. Quality products have a service life of up to 15 years.
- Wide temperature range of the environment.
- Possibility of dimming and setting various glow modes.
- Safety in terms of electric shock.
- Resistant to moisture and organic fumes.
A set of equipment has an affordable price for all categories of the population.
Ways and places of interior lighting in the kitchen
Connecting the backlight in the kitchen allows you to give this room a new and unusual look, make it a center for gathering families and celebrations.
To create interior lighting, you can use the following places:
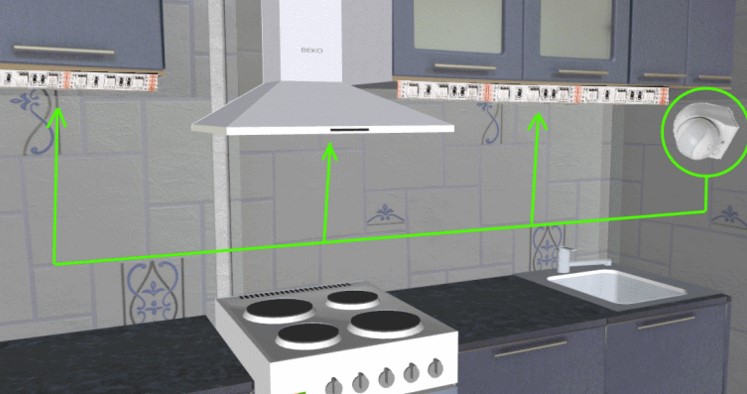
- a box in which pipes are masked;
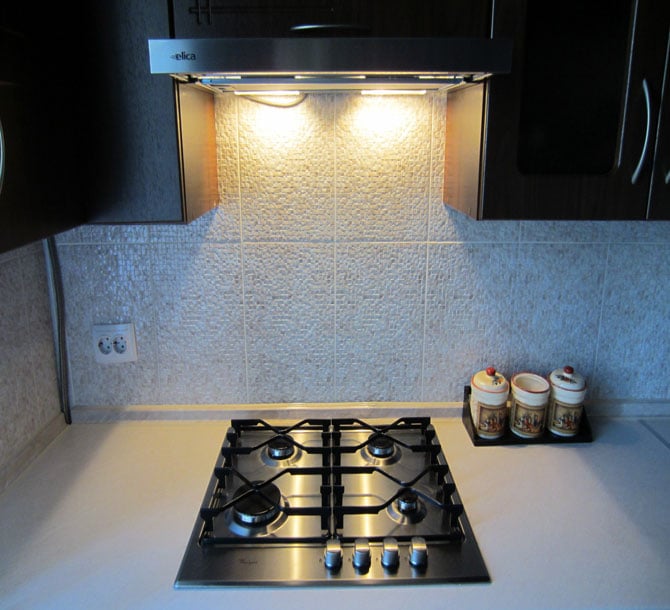
- extractor hood;
- furniture set;
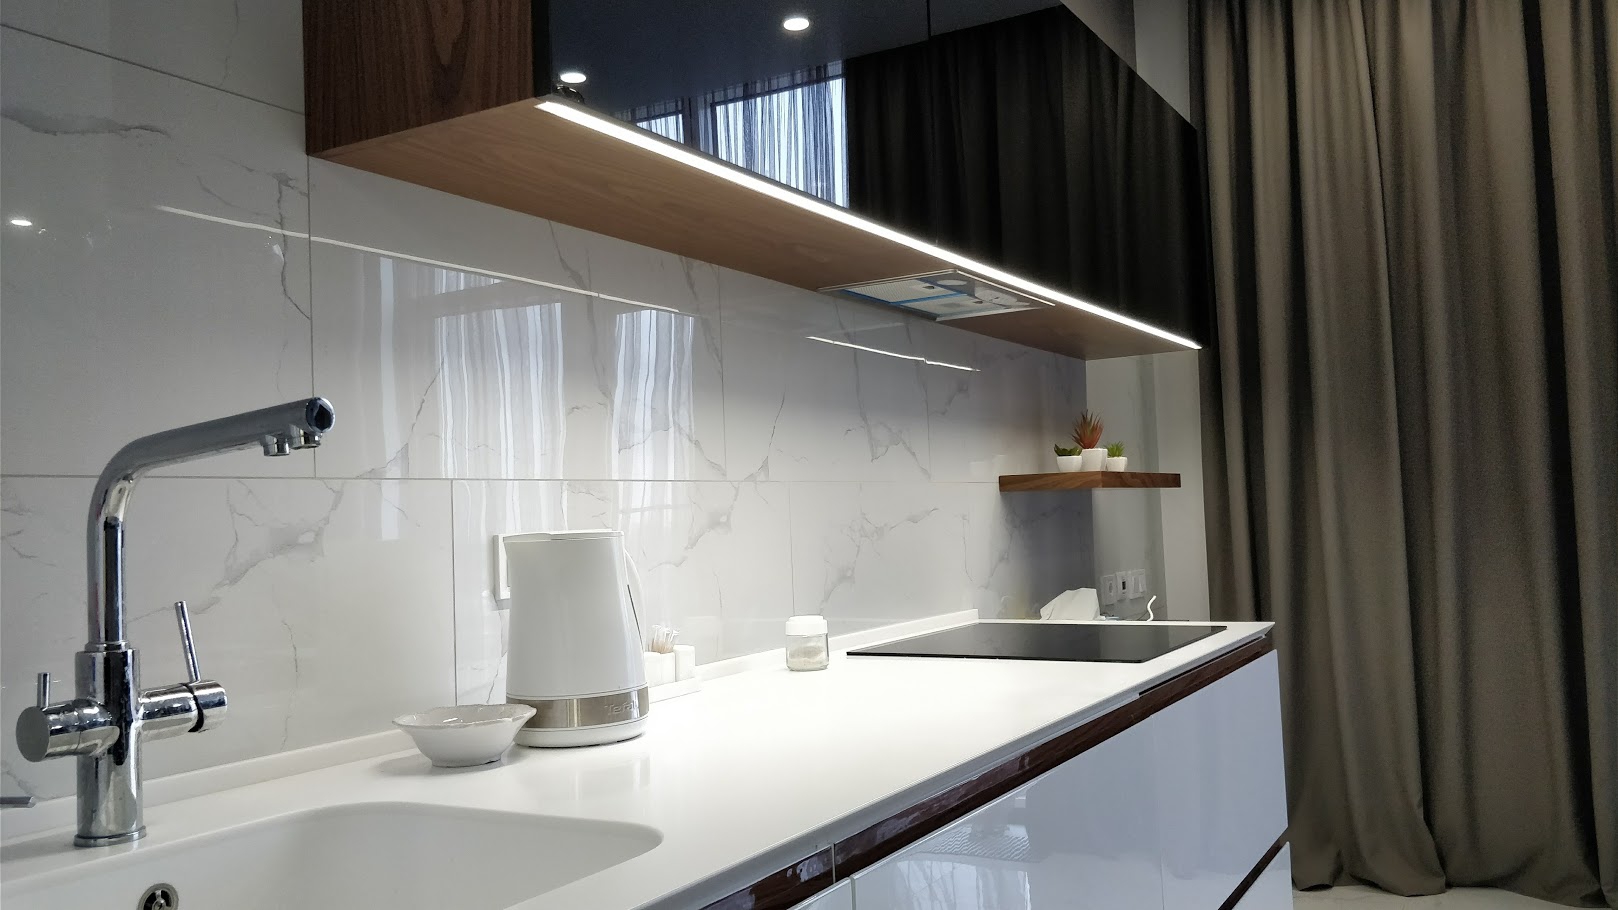
- wall cabinet;
- dinner table;
- an apron over the countertop;
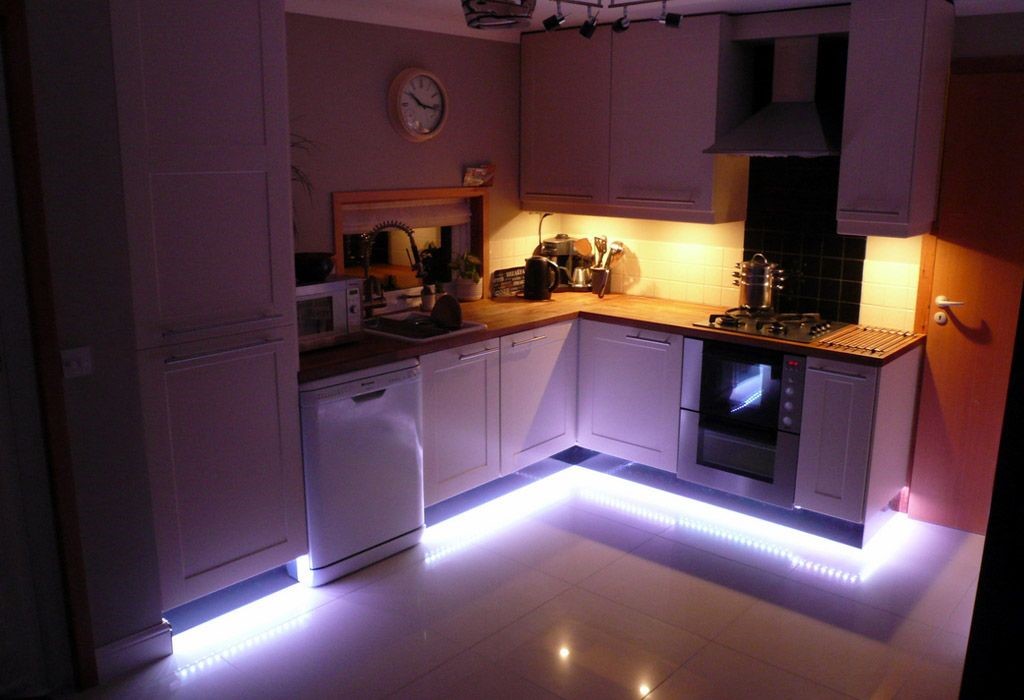
 LED backlight of the kitchen set creates a soaring effect
 - corner rack;
- plastic profile around the perimeter of the ceiling;
- Kitchen Area;
- window hole;
- skirting board;
- cornice.
You can mount products in any place where they will not interfere and will not suffer from external influences.
Classification and comparison of LED strips
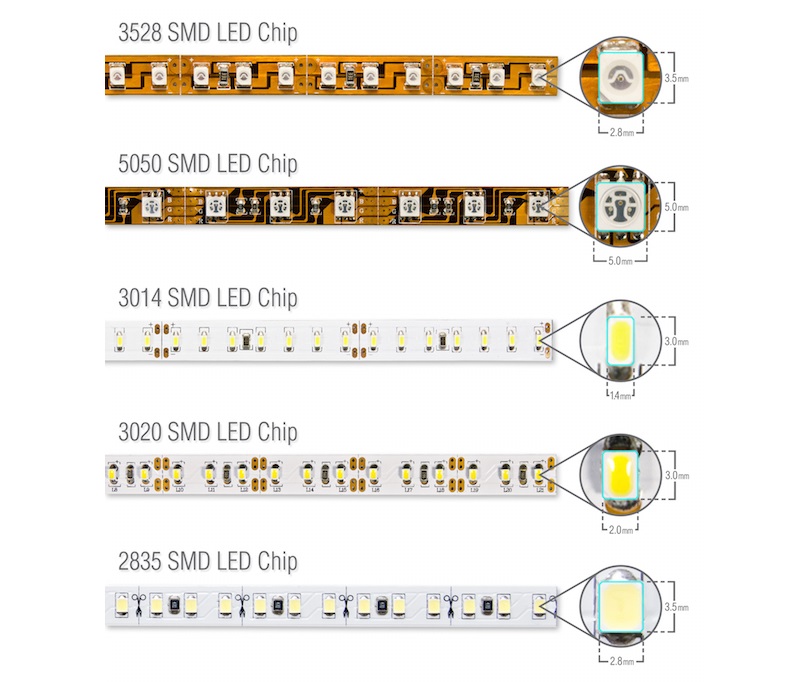
Led tapes are available in monochrome and multi-color. Products of the first type have LEDs of the same color.
Models of the second row consist of crystals of three or four colors:
- RGB - red, green, blue;
- RGB + W - red, green, blue, white.
Each row of diodes is connected to a separate channel. On the running meter is located from 30 to 240 light bulbs. Using dimmers of various designs, you can set the parameters of the device in overflow, ripple or even lighting.
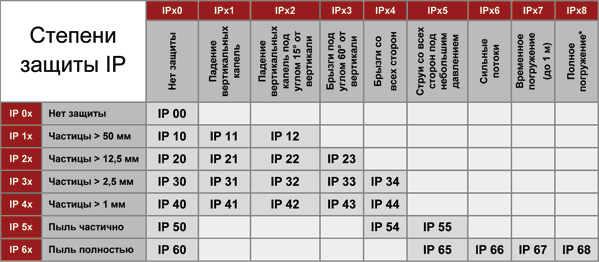
According to the degree of protection against moisture, products are divided into the following categories:
- Open. Conducting lines are on a surface. If water gets on them, a short circuit occurs. They can be used to decorate objects located at a sufficient distance from the stove, window and sink.
- One sided. The conductors on top are covered with a silicone compound. Products are protected from splashes, they can be installed almost anywhere.
- Bilateral. The strip is packed in plastic.You can mount and connect even inside the sink and hood.
When choosing a tape, you should pay attention not only to tightness, but also to filling. The tabletop should be illuminated in white. For led lighting for the kitchen under the cabinets, it is better to choose the RGB and RGB + W models.
Power supply selection
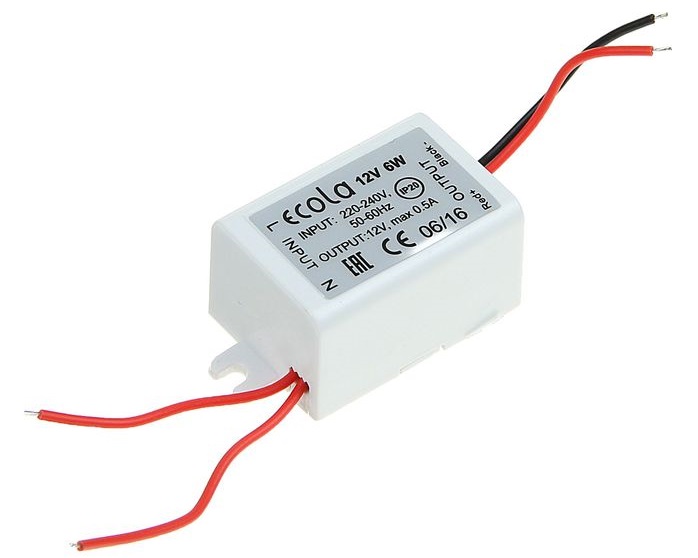
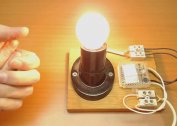
The diode backlight is powered by a DC voltage of 12 V. To get it, an electronic transformer is used, powered by a 220 V household network.
Power supplies are divided into the following categories:
- Ordinary. The electronic filling is located in a steel case, on which there are holes for cooling. They can be mounted on dry areas of the room.
- Sealed. Products have a closed aluminum or plastic case that protects the contents from moisture. You can mount such products anywhere, without restrictions.
To calculate the power of the converter, you need to multiply the indicator of 1 m of tape by the number of meters (according to the standard of 5) and add another 30-50% to the result, since the parameters of current consumption change during the operation of the product.
Illumination of countertops, dining areas
To highlight the workspace, it is advisable to use bright monochrome ribbons with white crystals. To achieve maximum brightness, you should use tapes with a density of 120 or 240 diodes per linear meter. So that the light does not blind your eyes, you need to use a U-shaped profile, which will create a narrow strip of light directed to the desktop. The connection of the tape and the profile is best done before it is attached to the cabinets.
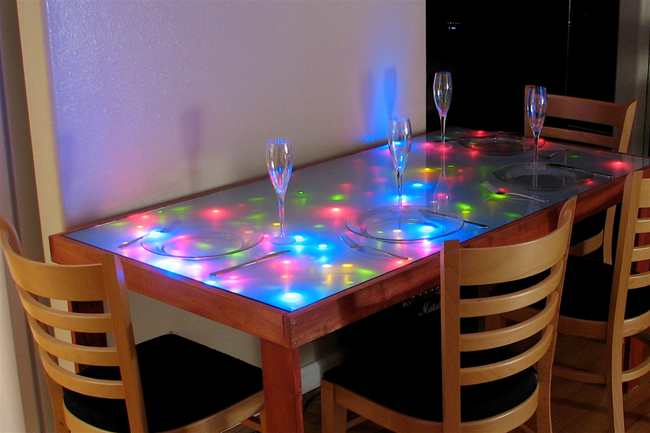
To decorate the dining area, it is better to use colored products of low power. You can fix the strip at the end of the wooden table or from the bottom around the perimeter on the glass. Run the cable over the foot and connect to the nearest outlet.
What is required for installation
The basis for the work is the scheme by which the tape should be connected to the network.
To complete the installation, you need to purchase the following equipment:
- Dimmer;
- power supply (1 to 5 m);
- switch (mechanical, touch, infrared);
- headset for connecting parts of the system;
- controller;
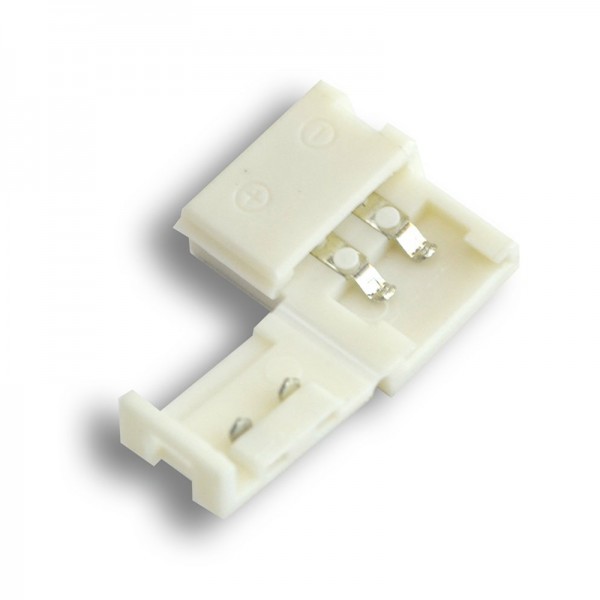
- connector for joining segments.
It is advisable to shop at a store where you can pick up goods from one manufacturer. Such electronics work better and longer.
Algorithm for installing fixtures
Installation is carried out in the following sequence:
- Designing a project.
- Markup.
- Degreasing surfaces.
- Screwing boxes (if provided).
- Adhesive tape.
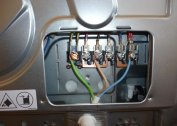
- Docking wires with the controller.
- Connection of power supply and dimmer.
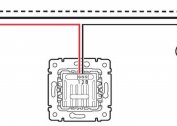
- Installation of the switch.
- Line connection to the network.
Before starting work, you must turn off the room by checking the absence of voltage indicator.
Tools and materials for mounting LED strips
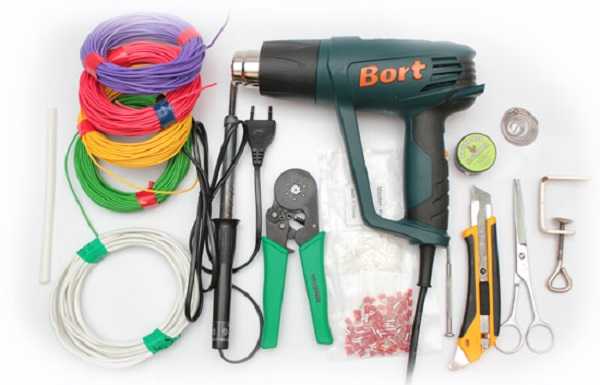
To install an LED lighting system in the kitchen, it is enough to have a standard set of household tools.
To work, you will need:
- hammer drill;
- level;
- roulette;
- tester;
- pliers;
- soldering iron;
- stationery knife;
- insulation tape;
- pencil;
- screwdriver;
- alcohol;
- cotton pads.
If the top level of the kitchen is formed, a stable stepladder is required. To avoid injury, use protective glasses and gloves.
Cable section selection
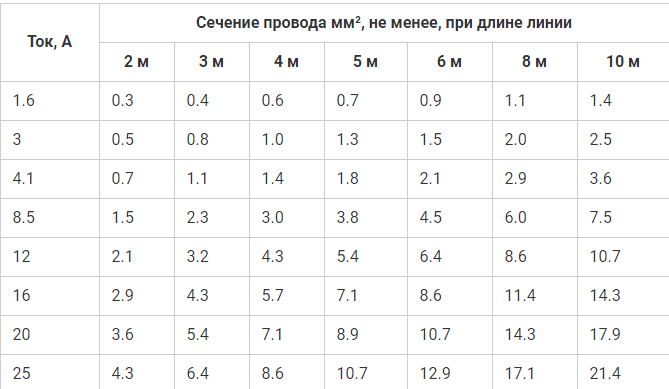
The cross section of the cable conductors is selected based on the total load that the assembled structure creates when working in full mode. Models of monochrome tape SMD-3528 and color SMD-5050 for 1 m consume up to 15 watts. To this is added the power of the dimmer and power supply, which consume 75-150 watts. In total, up to 400 watts.Given that 1 mm² of copper wire can withstand 2 kW, to connect the tape to the network, you need to take a cable with a wire cross section of 0.3-0.5 mm. In this case, you need to pay attention to the quality of insulation. Preference should be given to refractory products that do not support combustion.
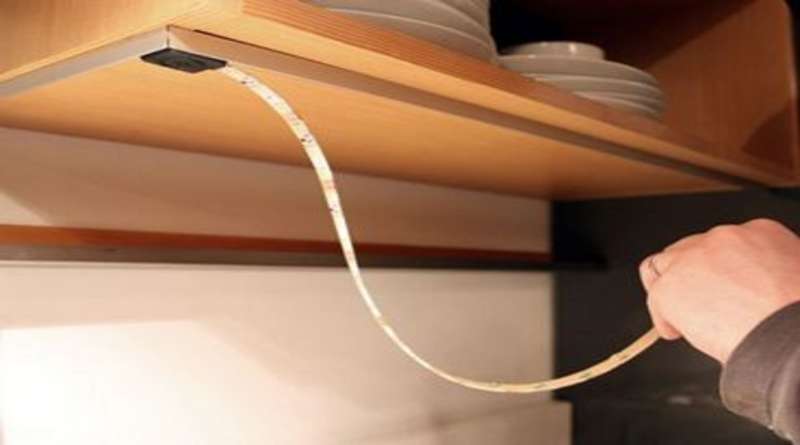
Mounting LED strips under kitchen cabinets
A feature of the room is a large number of hanging cabinets that create a feeling of crowding. The problem can be solved visually by decorating furniture with monochrome and colored ribbons.
You can connect them open and half-closed. In the first case, colored stripes are glued to the bottom of the shelves in one or more lines, creating soft diffused lighting. The closed version is used to solve two problems: lighting the work area and decor. The tape is fixed in the box away from the apron.