Installing socket boxes before placing socket devices on them is a mandatory procedure, ignoring which is contrary to the norms of SNiP and can lead to electric shock to residents. If you intend to carry out this procedure in your house or apartment, you must study how to install the wall socket in the wall and how the work progress in buildings made of different materials - brick, wood and made of concrete blocks - differs.
Requirements for Sockets
A separate set of regulations for the installation of the socket is not yet developed. PUE prescribe to observe the general rules of electrical safety. Before carrying out work, the products should be checked for compliance with the following criteria:
- The glass for the outlet must be made of durable material that can withstand the force with which the plug is removed. However, it should not be pulled out simultaneously with the outlet itself. To ensure the stability of the fastening, the products designed for operation in the wall of alabaster or gypsum are equipped with numerous bulges and hooks. For this purpose, holes work where the wires are made.
- On the inside, ribs where the sockets are attached should be well formed.
- The plastic used must not be flammable. For walls (except wood) this requirement does not matter, but its observance is necessary to prevent ignition of wallpaper or furniture nearby.
It will also not be superfluous for the group of sockets to be combined using clamps.
Sockets
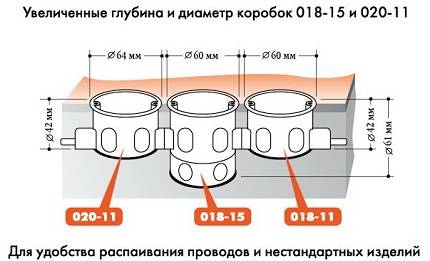
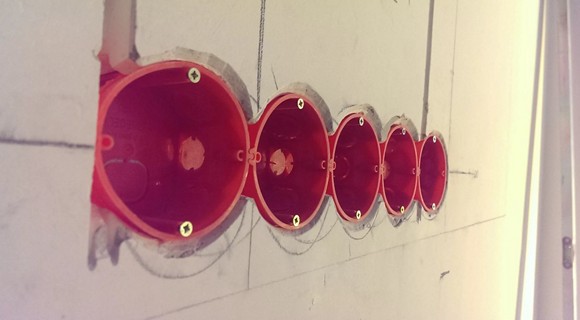
The vast majority of products of this type have a diameter of 7 cm. Outlets themselves are usually designed for this indicator. Depth is a variable parameter, and you need to pay attention to it, choosing the option that most suits the goals. If you plan to switch several wires in the cup holder (an example is the use of this product to replace the junction box), you will need to install an option with a greater depth. In general, installing sockets in deep sockets is easier.
Concrete installation
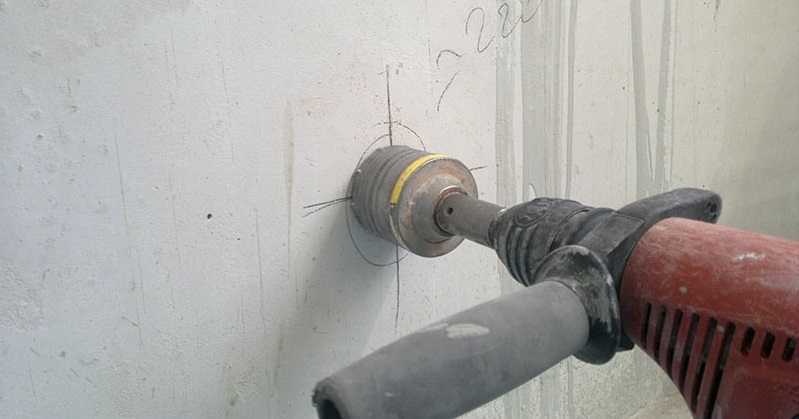
Before fixing the socket to the wall, you will need to hollow a hole under it. An electric drill with a diamond crown is best suited for this, but because of the high cost of such a tool, punchers with a nozzle adapted for shredding concrete are more often used.
When preparing recesses for installing the wall sockets in a concrete wall, it must be remembered that during these works a large amount of small dust particles is formed in the room. It is required to prepare in advance protective respirators, devices for protecting the ears and eyes, as well as a vacuum cleaner, which will be cleaned at the end of the work.
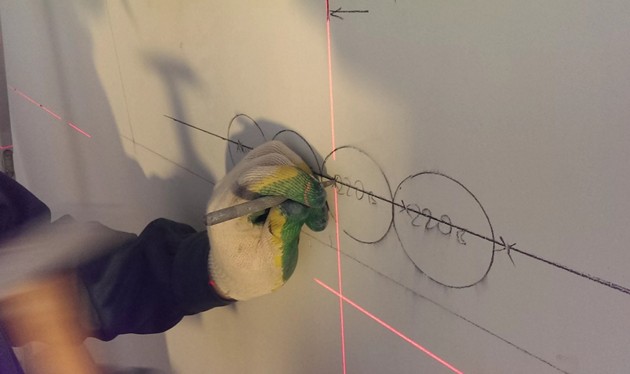
Before drilling, mark the recesses. The standard distance between the centers of the wells is 7.1 mm. Then you need to take a drill and make holes at the points indicating the centers. Then, the largest possible number of recesses must be drilled along the circumference of the circle. You can use the crown.
When drilling, a drill or a crown fell into the reinforcement
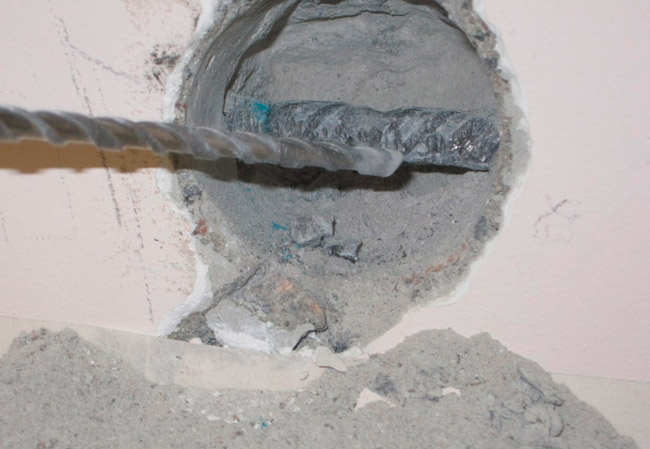
There are several methods to remove interfering reinforcement from reinforced concrete walls. The fastest way to do this is by drilling the metal parts with a chisel for a punch. It is allowed to float and a spare crown.It can deteriorate in the process, so you should not use the same for routine drilling for this operation.
Embedding a socket
It is best to install the sockets in the recesses if the products are coated with a mixture of rotband and alabaster. Before this, you need to vacuum the recesses and lightly moisten the walls with a damp cloth. The pre-prepared solution is applied with a small spatula so as to provide the greatest possible contact area with the product. Excess composition is then removed. A mixture is also imposed on the socket and then inserted into place.
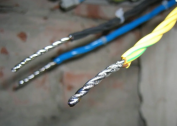
Installation of the cable can be done at the same time as embedding, or first grease the socket, and then lay the cable. The channels where the wire is pulled between several devices must be prepared in advance. The wiring should not interfere with the socket housing, especially at the locations of the spacers.
Drywall Installation
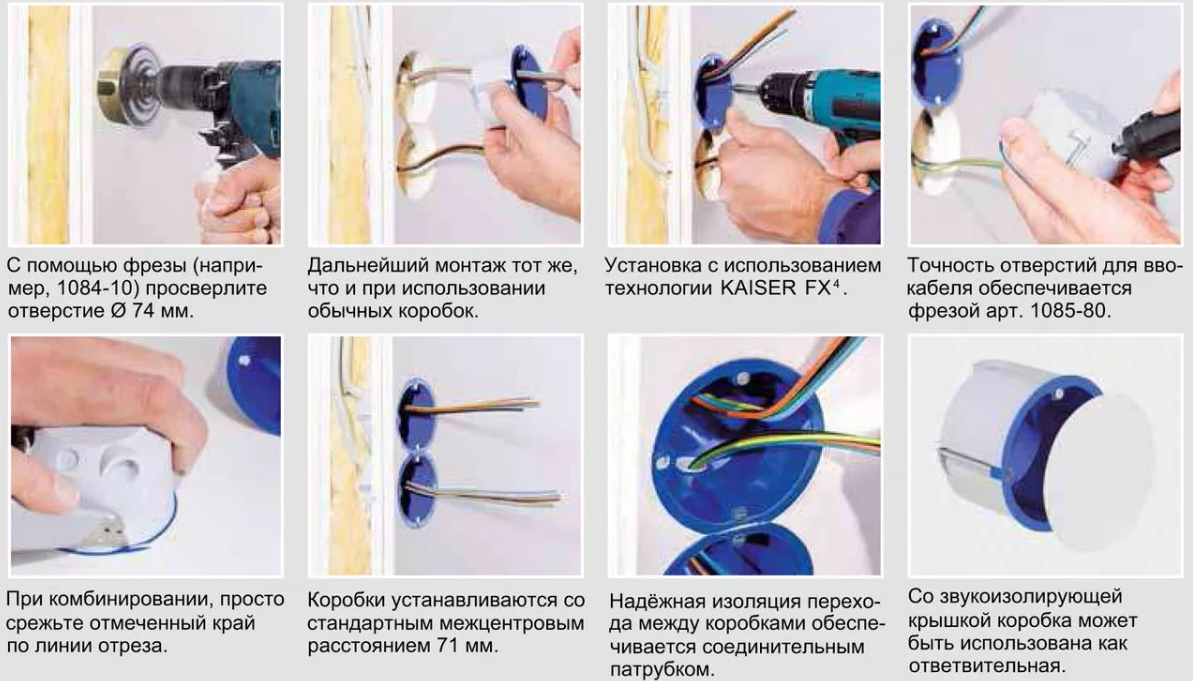
In this case, the wire is laid in advance. Where the mounted device will be placed, a certain supply of wire is left. When buying the products themselves, you need to choose such that their ears in the open form do not crawl out of the circle. The marking of the holes, as in the case of the socket for wooden walls, is carried out in the same way as for concrete. The holes are drilled with a drill bit designed for working with wood. Wires when installing plastic products in drywall are inserted into the socket before it is installed.
If the product is not well fixed, the easiest way to fix this is by installing a self-tapping nail in the base. Another option is to use a glue gun, having previously cleaned the cavity from dust particles. If the gypsum base crumbles, it is primed and then the necessary places are covered with plaster mortar.
Installation in a tile or wall false panels
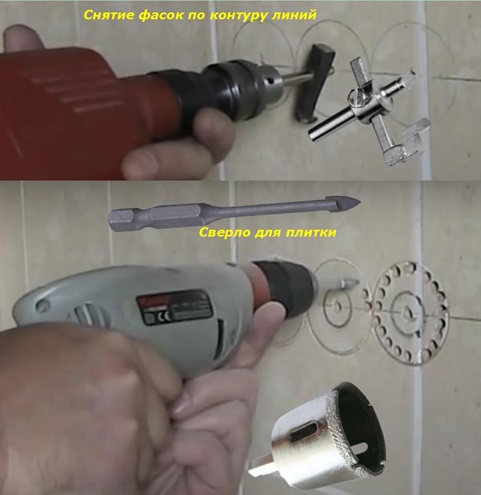
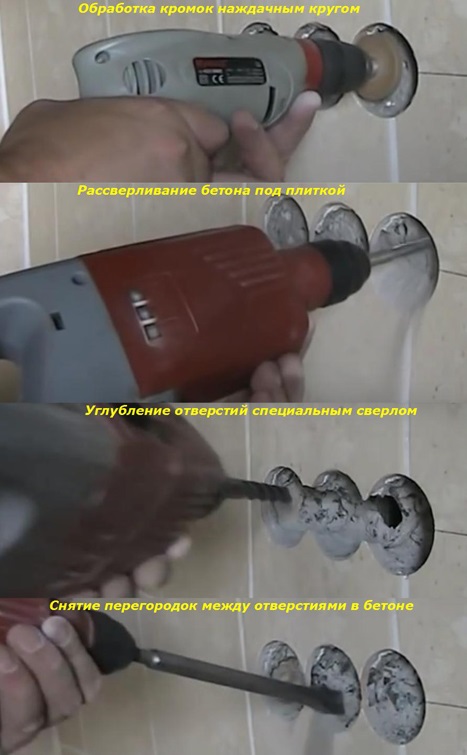
To insert podrozetniki into an already lying tile, you need to use a special crown for ceramics. In this case, it is better to ditch concrete with a diamond device to prevent damage to the tiles. However, it is better to avoid this situation and lay the tile only in a room where all the necessary outlets are already installed.
-

- 1. Drilling holes in a tile
-

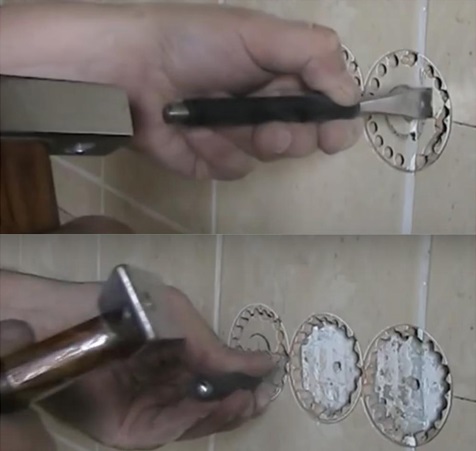
- Knocking out holes in a tile
-

- Drilling holes under the tile
Tool and supplies
To carry out the work, it will be necessary to purchase a building level for sockets, a mixture for nests, glue, power cable, protective equipment against building dust worn on the face. You can mark the location of the nests with a simple pencil. You also need to stock up on all the required nozzles for the tool, which will be used to create holes. It will be useful to use a vacuum cleaner.
Installation rules for the socket
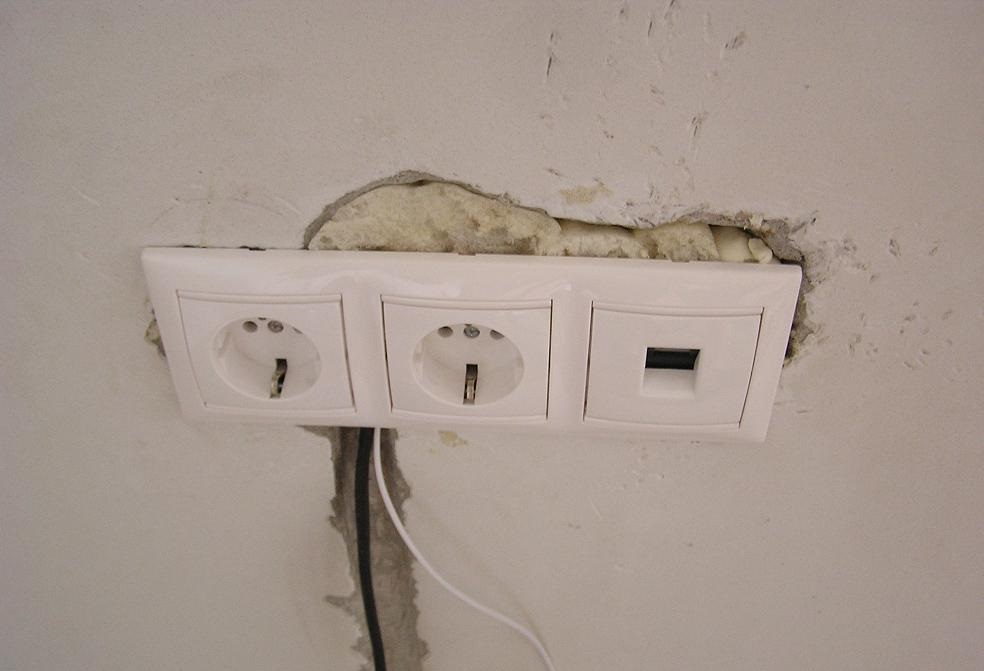
The product should be located at the same level with the finish surface, without protruding and not drowning in the wall, well kept in the nesting recess. You need to install it strictly according to the level, even if it is only one.
The instructions for placing sub-rosette products in the wall can be divided into three stages: marking holes, ditching and mounting the parts themselves.
Markup
Installation holes for outlets through which large items of household appliances will be operated (refrigerator, washing machine) should be quite high - at a level of 1 m from the floor. For other nests, a height of 0.3 m is sufficient. At least 0.1 m should be retreated from the cabinets and countertops. Do not place the outlet closer than half a meter from the elements of the heating system, as well as above the stove.
Holes
There are two options for arranging holes. In the first case, the master works with a crown nozzle to a depth of 0.1 m more than that of the undergrowth, and the core is removed with a chisel.In the second, the maximum number of holes is drilled along the contour of the hole using a conventional drill. For a brick wall, a tool with a drill from Pobedit is suitable.
Box installation
Shrinkage is carried out in pre-lubricated niches, while the cables are left with a reserve of 0.1-0.15 m. Excess gaps are covered with a construction compound.
Preparation of solution and installation in a niche

Of the mixtures, gypsum and alabaster can be used. Gypsum freezes in 3-5 minutes, and if this is not a problem for the installed product, then the prepared solution will not work after this time. To increase the curing time by 10-15 minutes, it is recommended to add plaster in a ratio of 3: 2 to the mixture. It is permissible to use the putty as an independent base, but it does not hold the installed products as firmly as gypsum or mixtures with it. Before you smear a niche with the composition, it is sprayed with water from a spray bottle. At the socket, cut off the plug for the cable, insert the box into the niche, align the position and remove the excess solution.
Before or after plastering
Technically, there are no big differences between these cases - the main thing is that the product does not stick out of the wall even a millimeter. When plastering a wall with mounted protruding podrozetnikami it will be difficult to apply an even layer throughout. You can first prepare the niches, then apply the plaster (the holes will remain, their insides will need to be cleaned) and then install the boxes.
Common mistakes
It often happens that during installation the cable is interrupted by a spacer. This is very dangerous - a risk of a short circuit or the appearance of an electric potential on the socket housing is possible. Other errors include:
- Attempts to fasten products with mounting foam - it does not hold them well enough, moreover, many samples do not meet fire safety standards;
- ignoring the use of the construction level;
- work with a diamond crown at the maximum possible depth with a drill inserted;
- installation of a single product in a place where there is a lot of reinforcement.
Before mounting boxes for outlets, you need to correctly select their location and purchase the necessary tool. The installation procedure itself is quite simple and even an inexperienced master can do it.