LED light sources provide energy savings of 1.5-2 times compared with fluorescent light bulbs and 10 times compared with incandescent lamps. To save even more, products can not be purchased in stores. Do-it-yourself LED lamp for 220 V is assembled from consumables, which can be found in the bins of the master.
Benefits of using homemade LED bulbs
On the shelves of stores there are several types of devices. Incandescent lamps with a high color rendering index consume a lot of energy. Energy-saving are mainly available with the E27 base, luminescent emit toxic fumes when heated. LED devices almost do not heat up, are resistant to mechanical damage, have a power of 10 watts. With a luminous flux of 800 lm, the LED device will last 50 thousand hours.
Minus light sources on diodes - high cost. This disadvantage can be made an advantage if you make an LED lamp efficiently with your own hands. It will be distinguished by:
- long service life - about 10 thousand hours;
- high efficiency watt / lumen in comparison with analogues;
- price range of consumables, similar to fluorescent devices.
The advantages of a home-made device are achieved if it is properly assembled.
Design differences of factory LED lamps
Factory-assembled products feature polycrystalline LEDs without multiple contacts. Light bulbs have several differences.
Varieties of LEDs
An LED is a semiconductor multilayer crystal with an electron-hole type transition. Light emission is obtained by passing current, but a fused element cannot be repaired. Manufacturers use the following LEDs:
- DIP - in the form of a crystal with two conductors and lenses. Used for garlands and backlit displays.
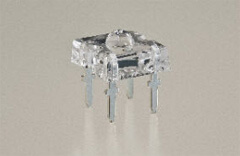
- Piranha is a crystal with a lens and four leads for conductors. Differs in brightness, suitable for headlights of cars.
- SMD is a super-bright type of small size that is mounted on the surface.
- COB - with non-oxidizable and unheated contacts, excellent luminous intensity. Soldered into a special board.
Before self-assembly, determine the power source.
Types of drivers
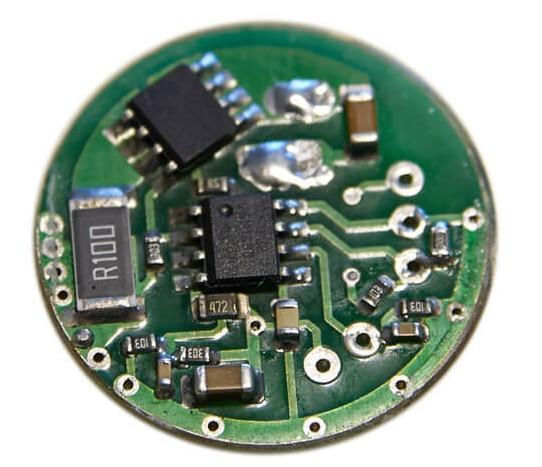
The driver provides power to the light bulb from the mains by transforming the alternating voltage into a working one. The simplest element is constructed of resistors, a diode bridge, and an input capacitor.
For LED devices, several types of drivers are used:
- linear - designed for low operating currents (up to 100 mA) or for power supplies with a voltage similar to the diode voltage drop;
- pulsed step-downs - powers up powerful LEDs, but the inductor can create electromagnetic interference;
- pulse boost - used for models with an operating voltage greater than that of the power source.
220V LED devices incorporate electronic drivers.
Types of socles of modern lamps
The cap is the thread needed to connect the light bulb to the cartridge, supply power and protect the vacuum bulb. The product already has the factory marking of the base.
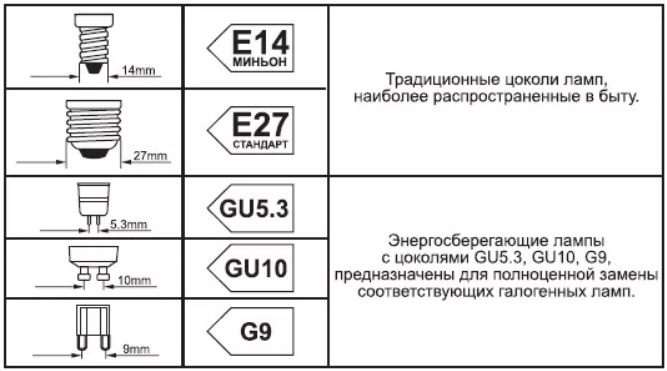
The first letter indicates the type of cap indicated in the table:
| Letter | Decryption |
| AT | pin |
| E | threaded |
| F | 1 pin |
| G | 2 pins |
| H | under xenon |
| K | cable type contact |
| R | recessed contact |
| P | focusing |
| S | soffit |
| T | for telephony |
| W | lead-in contacts in flask glass |
The second letter indicates the type of light source: U - energy-saving, A - for the car, V - with the tip of a conical shape.
The numbers after the letters indicate the diameter in millimeters.
For a voltage of 220 V, the E27 base is suitable.
DIY materials
You can make a light source on diodes yourself with the help of such materials:
- cap from a burnt fluorescent light bulb;
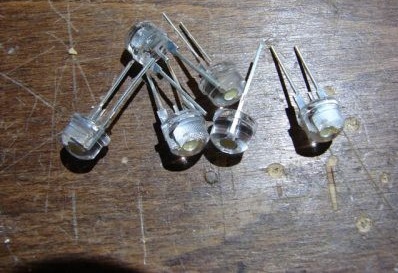
- LED elements with a current strength of 100-120 mA and a voltage of 3-3.3 V - you will need a tape or separate NK-6 LEDs;
- diode bridge or rectifier diodes marked 1N4007;
- fuse from the base of a burnt out light source;
- capacitor - the parameters depend on the assembly scheme and the number of LEDs;
- plastic frame for mounting LEDs;
- superglue or liquid nails;
- electrolytes and drivers.
Make a list of materials in advance.
E27 LED lamp from energy saving and ready-made driver
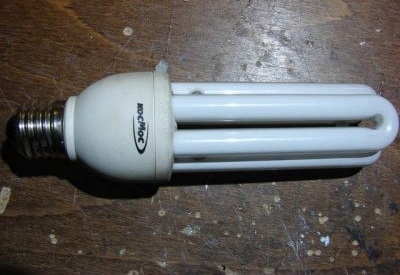
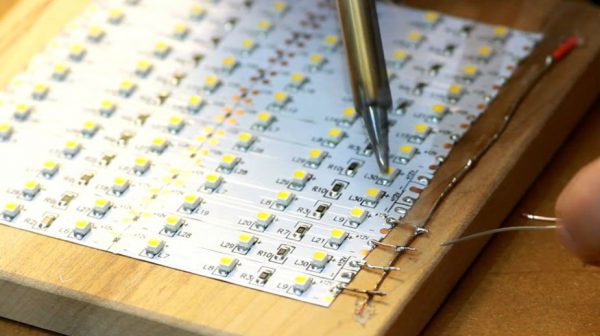
To make an LED light bulb, you need a defective CFL product, NK-6 LEDs, a soldering iron, pliers, solder and a cardboard base. Work is carried out step by step:
- A base is removed from an old 20 W bulb. You will need to pry the latches or drill areas with fine-tipped punching.
- An empty base is cleaned of excess solder, treated with alcohol or cosmetic nail polish remover.
- There are 6 holes on the cap base. On a piece of cardboard makes marking of round niches, which are then cut with the help of nail scissors.
- Disassembled a tape of diodes from 6 crystals connected in parallel.
- The crystals are connected in 3 in parallel.
- Two ready-made chains with parallel LEDs are mounted in series.
- 6 elements with a power of 1 W are connected to a ready-made driver from a broken LED-bulb.
- A circle is cut out of the cardboard, placed between the driver and the board. The driver is installed in the base.
- The bulb is fully assembled and checked for operability.
The result is a white bright analogue of a 30-watt incandescent bulb. The brightness of the product will be 150-200 Lm, and power - 3 watts.
To adjust the lighting area, you can bend the leads of the LED elements.
LED light bulb based on a homemade driver
A home-made driver will work out only if the master knows how to work with a soldering iron, read simple wiring diagrams and apply chemical reagents. Do-it-yourself LED lamp is manufactured in stages.
Preparation process
Consists of the following steps:
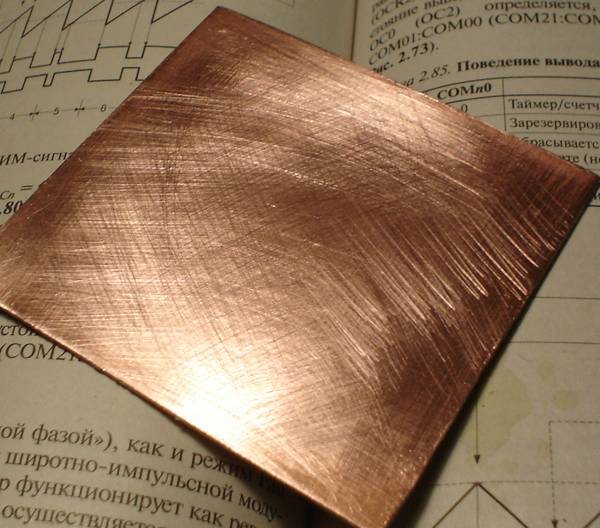
- Preparation of materials. You will need copper foil-clad fiberglass, LED elements, capacitors, a resistor, a small drill, rosin and solder, a soldering iron and pliers, nail polish or a stationery correction pencil.
- Reagent preparation. The etching of the board is carried out using table salt, copper sulfate or a solution of iron chloride.
Take fiberglass with a thickness of 0.5 to 3 mm.
Driver manufacturing diagram

To make a driver, it is worth adding a resistor R3, zener diodes VD2 and VD3, capacitors C1 and C2 to the list of basic materials. This number of elements is enough for a lamp of 20 elements. The device circuit operates on the principle of passing alternating currents to diodes through the first capacitor. The second helps to eliminate flicker and ensure the uniformity of the light flux.
The mains voltage will pass through a resistor and a current limiting capacitor, which smooth out voltage fluctuations. A second resistor will be needed to supply voltage to the diode block and get a glow.The ripple is smoothed by a capacitor.
Use the printed circuit board to mount the driver elements.
Circuit assembly sequence
A homemade circuit is made as follows:
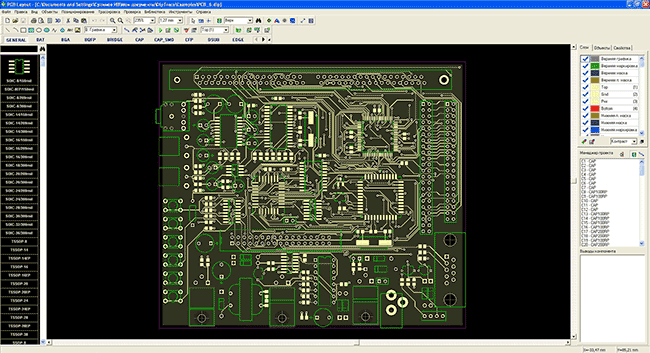
- Sprint Layout or DipTrace generates a pattern for etching the board.
- From a fiberglass plate, a circle is cut under a board 3 cm in diameter.
- The sketch of the scheme is carried over with a special marker, nail polish or printed on paper.
- Preparing an etching mixture of 1 tbsp. l copper sulfate and 2 tbsp. l salt diluted in boiling water.
- The board is lowered into the solution for 30 minutes. As a result of the reaction, all copper is removed, except for the elements coated with the pattern.
- Using a nail polish remover removes the coating from the material.
- The edges and attachment points of the contacts are tinned with solder.
- Drill holes where the LEDs will go out.
- Elements are soldered on the board, which is then placed in the case.
The result will be a bulb with the equivalent of a 100 W incandescent lamp.
Materials for the manufacture of the housing
To make a housing for a LED lamp powered from a 220 V network, you can use several improvised means.
Bulb base
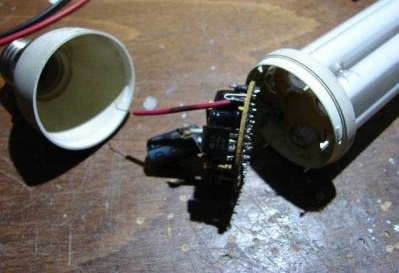
From the product you will need to remove the glass flask, and then remove the spiral. The circuit is located in the inside. Elements are attached to the top of the board. The downside of the base will be poor insulation.
Energy Saving Housing
The faulty light bulb needs to be disassembled and the converter board removed. LEDs are located in the openings of the lid under the glass flask, if the source has 3 arcuate elements. The circuit is placed inside, and the diodes are fixed in the finished holes.
Work Safety Requirements
Experienced electricians note:
- You can not start assembly without basic electrical knowledge. An incorrect manufacturing sequence can cause the product to explode or cause a short circuit.
- Devices with a voltage of 12 V are not connected to the standard power supply network
- In the absence of insulation of the structure, electric shock is possible if you touch it with your hands.
- The finished bulb does not work without a high-quality soldering of nodes.
Self-assembly of the LED light source in the presence of knowledge and skills will be simple. If in doubt, you do not understand the schemes, it is better to purchase a ready-made LED device.