A garage is a room in which powerful electrical equipment and light sources are often connected. For all these devices to work, you need wiring in the garage, made by yourself or with the help of specialists. Installation is quite simple, you just need to follow the connection instructions and observe safety precautions.
How to officially conduct electricity in a garage
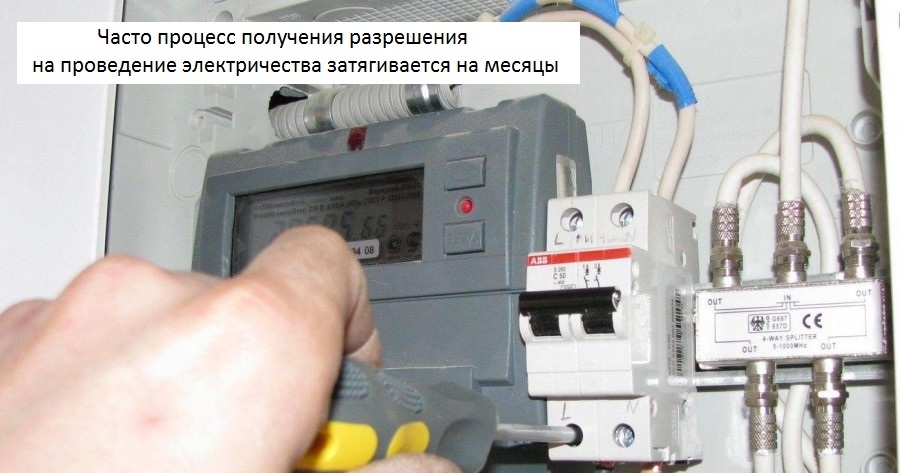 Before conducting electricity to the garage, a permit must be requested. This can be done in the administration of the cooperative. To connect the garage to the 380 V network, you need to contact the electricity company, which is responsible for the area. With the right procedure, they will draft a garage power supply, taking into account all the nuances. A similar procedure is carried out by an electrician.
You can independently install the 220 Volt network in the garage, which is a private property. It is important to select a counter with a current margin of 50 A.
Wiring diagram
Before doing installation work, a wiring diagram is developed. It consists of a circuit diagram and a layout diagram. The first describes how to decompose the network itself, and the second describes how to separate outlets and switches, where to hang the switchboard. The wiring diagram in the garage should also take into account the location of the wires.
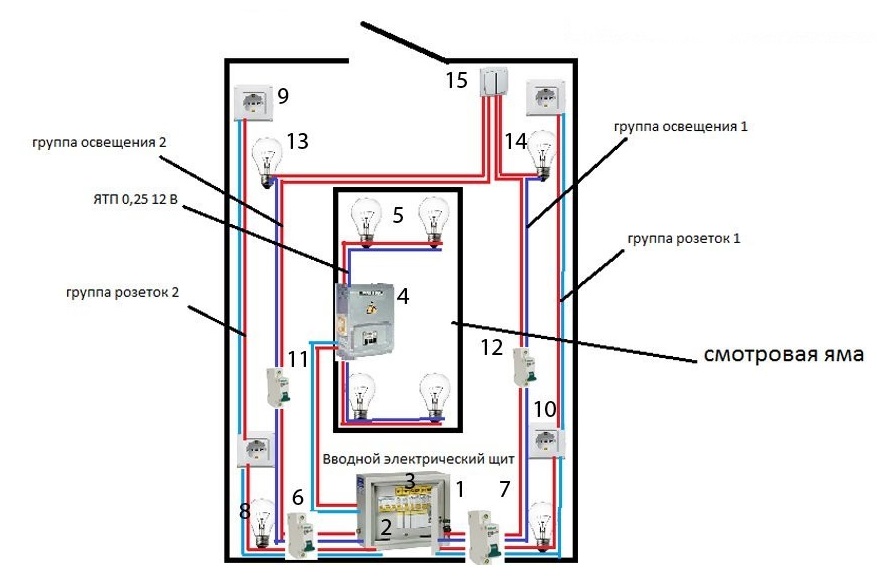
The garage scheme without a viewing hole contains the following elements: automatic machines, RCDs, counters, socket groups, switches, lamps. Installation is carried out using a three-wire wire with phase, zero and ground.
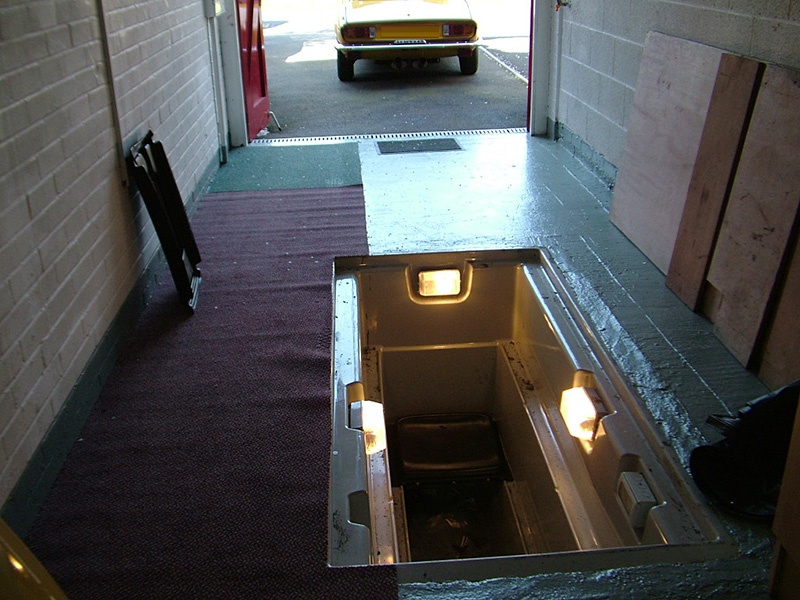
If there is a viewing hole in the garage, the layout changes. The pit is considered a basement and special rules of the PUE apply to it. The voltage should be reduced to 42 V. This leads to the appearance of a step-down transformer in the circuit. Before installing fixtures and other devices, make sure that they are designed for such a voltage. The circuit will also include automatic devices, a counter, an RCD, sockets and lamps with switches. An example of a cable for connecting fixtures is VVG 3 × 1.5, for sockets - VVG 3 × 6.
Necessary equipment
To work, you need the following tools:
- knife or special tool for stripping insulation;
- cable of necessary section;
- nippers;
- flat, Phillips screwdrivers;
- multimeter;
- grinder for gating walls;
- sampler.
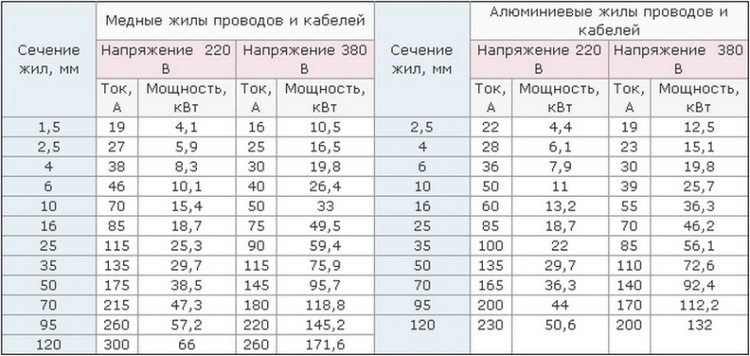
Particular attention should be paid to the choice of cable. What section is needed for connection depends on the connected load. You can determine the diameter using special tables. When calculating the total power of the devices that will be connected to the power point, a margin of 20% should be added.
It is recommended to make wiring with ground, even if grounding is not provided in the mains. When choosing a wire, you need to check the quality of insulation and its integrity. The insulation must be strong, but the wire must be flexible, easy to bend and not break. In choosing the material of the wire, copper should be preferred. It is more reliable than aluminum, has more advantages and a long service life.
The procedure for conducting electricity in the garage
The work is carried out in several stages - preparation, cable pulling, do-it-yourself wiring in the garage, connecting lights and sockets.
It is important to turn off the power before starting work. It is forbidden to work under voltage!
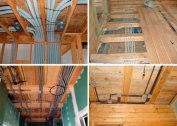
The preparatory phase begins with the creation of a detailed drawing and calculation of the cable cross-section. A wiring diagram should be created on the wall. Keep in mind that cables must be laid horizontally or vertically. The wiring itself must be at a distance of at least 10-15 cm from the interface of the walls with the floor or ceiling. Also, the cable should be located at least 15 cm from heating systems. The electrical circuit must be drawn with a pencil on the wall.
Next, external wiring is carried out. To do this, you need to get a legal document on the possibility of electrifying the garage from local authorities. Before you make external wiring in the garage, you need to choose the laying method. It is possible to lay cables underground and over the air. The overhead line is drawn using a cable that is suspended on a steel wire with a diameter of 3 mm. Wires should not touch trees and bushes, otherwise there will be interference on the line. The underground cable is laid in a corrugated tube in a trench. The depth should be 80 cm, the tube is placed on a sand cushion 10 cm high.
Step-by-step instructions on how to make wiring in the garage:
- According to the mark on the wall, cuts are made with a depth of 2.5-3 cm using a grinder.
- Install the electrical panel in a pre-selected location.
- Install the modules in the shield. It is advisable to make a label on them with a designation of what a particular module is responsible for.
- Connect the modules to the wires.
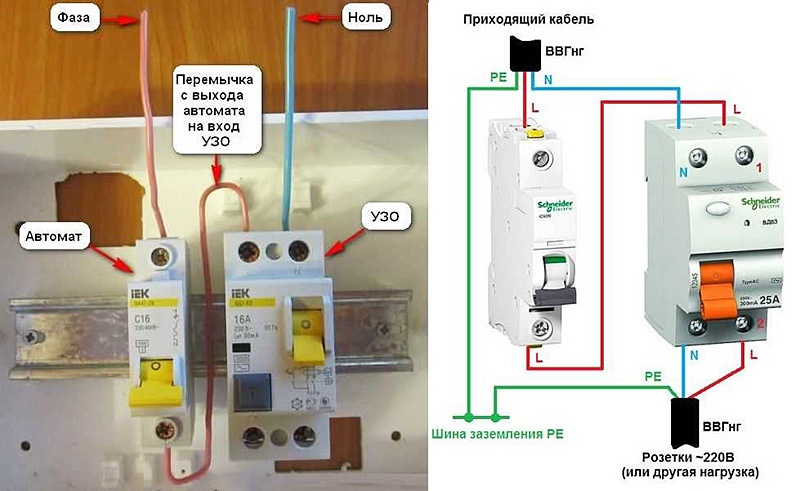
- Connect UZO, machines, counter.
- Connect the power cable.
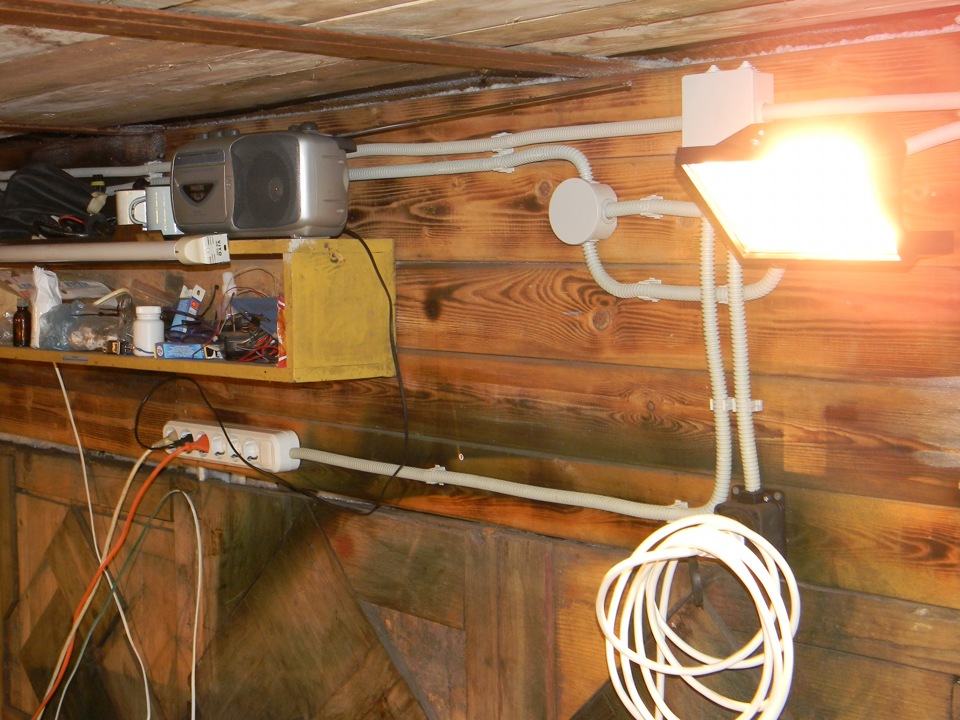
- Conduct wires through cable channels or PVC pipe.
- Mount the box and pull the wires to the sockets in the garage.
- In a similar way, the wires extend to the lighting group.
After laying the cables, you need to check the quality of the connections, the correct installation, the integrity of the system. Only then can testing be done.
DIY grounding
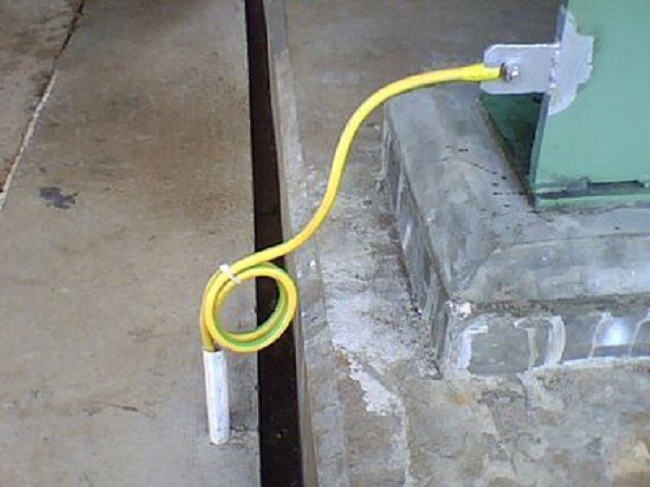
Grounding the electrical network is easy, you can do it yourself. In the room you will need to drive a two-meter galvanized steel pipe into the ground. It should be located next to the garage. A steel circle with a diameter of 8 mm must be welded to the tube. It is better to ground the wiring in a humid place.
The circle must be brought into the garage and painted with waterproof paint. It should be brought to the shield and make a good reliable connection with a thick copper wire. The grounding width should be large enough so that the resistance is less.
Work safety
The basic rule when performing electrical work is to turn off the power supply. At the work site, check that there is no voltage using a tester or multimeter. It is recommended that you provide yourself with an autonomous light source in advance.
When connecting to the home network in the electrical distribution panel, you need to know the material of the wiring wire in advance. You can not directly connect copper and aluminum conductors - this leads to oxidation and destruction of contacts. The connection is made using special pads.
Do not connect 220 V sockets to the inspection hole. This is prohibited by the rules of the PUE. Liquid can accumulate in the pit, which can damage the electrical network. For lighting, 12 volt lamps are installed in the pit. As a backlight, an LED strip can be used.
Be sure to put the shield with machine guns. This device will protect the room and facilitate the search for a possible malfunction. Connect devices with color marking.
Useful Tips
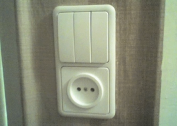
Unlike a residential building, the garage does not require the placement of sockets and switches in all corners of the room. It is enough to install several power points near the desktop.The number of sockets in the room must be at least two. One of the electrical outlets should be designed to connect powerful equipment.
When designing a scheme, it is recommended to find and use a construction plan. It already has all the necessary data with the right dimensions.
On the lighting group, you must separately put the circuit breakers and RCDs.
If possible, a three-phase input is recommended in the garage. It will be needed when connecting three-phase asynchronous motors, which are installed in most machines, both home-made and branded. This will allow you to not buy capacitors and save money. Also, this will allow you to connect a load of greater power at the same current of the input automaton.
When calculating the required length of the wire, you need to consider that the cable will be installed both on the street and in the garage itself.