Wood is an environmentally friendly material that is actively used in the construction of residential buildings. Demand for such facilities is not falling, but rather growing. This is due to the environmental safety of living in it, beautiful forms and design of a rounded log or beam. From the point of view of wiring, facilities should also be safe. Carrying out electricians in wooden houses is not an easy task, it has many technical nuances.
Wiring requirements in a wooden house
In comparison with brick and reinforced concrete buildings, wooden have one significant drawback - a high degree of fire hazard. For the selection of cables, electrical devices and installation conditions, increased requirements apply.
In more than 50% of cases of fires or fires in wooden houses, the cause is gross violations in the work of electricians. You need to familiarize yourself with the basic requirements for electrical wiring for several reasons: to control the work of hired employees who may turn out to be dishonest, as well as to carry out some of the installation work yourself.
Requirements for electrical wiring in wooden structures:
- The technical characteristics of electrical appliances and the cables used must satisfy the needs of the equipment from each individual group. Neglect of this rule can lead to spontaneous combustion of the cable due to the heavy load for which it is simply not designed.
- The cable channel must be subject to fireproof protection in order to prevent the transfer of flame from the cable to structures made of wood or other combustible materials when ignited.
- It is strictly forbidden to operate terminal connections, wires and cables with regular overheating, this can lead to a short circuit.
- The use of emergency shutdown devices, switches and sockets should be carried out taking into account the loads assigned to them.
When choosing materials for conducting electricity, you should not rely on reviews on the Internet or working electricians. You need to focus only on the normative documentation of the sections of GOSTs, SNiPs and PUE.
Preparation of a power supply project
Before proceeding with the preparation of a special project, you need to get the technical conditions in the RES. They will become the basis for construction work.
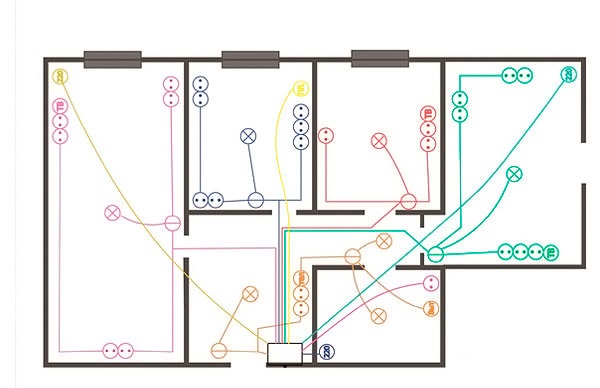
Begin by calculating the total power of all household appliances and electrical appliances. Further, according to the above algorithm, a do-it-yourself scheme of electricity in the house begins to be developed:
- Drawing up a technical plan for the entire housing construction. Schematically shows all the locations of the switches, sockets, lighting fixtures, as well as household appliances that require a separate connection.
- For each point of "fence" of electricity, the appropriate type of cable should be selected. If, for example, a switch with two keys and sockets with grounding is used, only a three-wire cable must be connected to them.
- Schematically, when wiring in a wooden house, the location of the junction boxes is indicated. It is recommended to use one box for two adjacent (adjacent) rooms.
- In a private house or cottage, when drawing up a wiring diagram, the power of each household appliance is reflected. If the equipment is equipped with an electric motor, the value is indicated taking into account the starting power.
- All lighting fixtures are connected to one group, and other, more powerful electrical appliances - to another. It is supposed to connect cables through separate machines.
- The diagram shows the interval between the cable line and the doorway, windows, as well as the distance from the places of electricity supply to the floor and ceiling. This is necessary so that during the repair, the communications are not damaged.
In conclusion, calculate the maximum power of all electrical appliances that are turned on simultaneously. The rated load is calculated on the input machine.
The importance of making a DIY wiring diagram
The implementation of all schemes and sketches allows you to accurately calculate the number of required materials and tools, as well as to prevent technical difficulties that often arise during the installation of electricity in a wooden house.
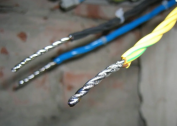
Wire and device selection
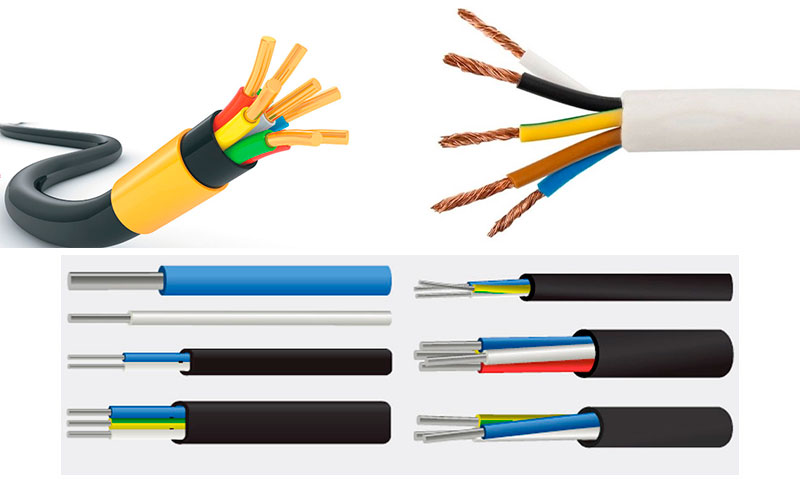
To independently and correctly conduct cabling in a private house, you can use the data from the table or independently perform complex mathematical calculations.
Table of the ratio of the cable cross-sectional area to the load:
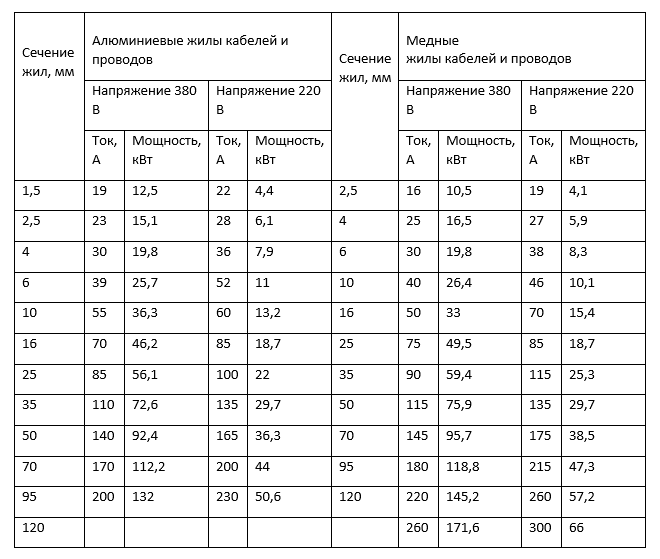
Choosing an input cable and automation Having compared the data in the table, they select a cable with a cross-sectional area that corresponds to the power of electrical appliances in each individual group.
After calculating the rated load, you can calculate the cross section of the input cable. If an update is carried out, and not a primary conductivity, do not forget about replacing the cables at the input. Cases are common when its cross section is simply not enough for large capacities and this inevitably leads to a fire.
To replace the input cable, you must contact the RES. As a rule, the replacement is carried out simultaneously with the installation of the meter for electricity consumption and its sealing.
If we talk about introductory machines, then with a three-phase network, a three-pole circuit breaker is required. Single or double pole circuit breakers are mounted with single-phase power, they break the neutral and phase.
Installation features and modern protection features
Installation of the external and internal electricity systems in a private wooden house must be performed in accordance with all the standards prescribed in GOST, PUE, etc.
If you strictly follow the rules and recommendations, pay attention to the features of installation, all the work can be done independently with your own hands. Installation is carried out in several stages:
- The implementation of the project, as well as the calculation of the total power of all electrical appliances that will work in the house.
- Selection and purchase of all necessary tools and materials. Especially carefully select cables, switches and sockets, electrical appliances.
- Carrying out the power input into the room, its connection to the circuit breaker, the final stages are the installation of the meter and electrical switchboard.
- Carrying out internal cabling.
- Installation of lighting devices, sockets and switches.
- Installation of an UZO installation and grounding system.
The final stage is the obligatory testing, which will make sure that the entire system is fully operational.
Wiring methods in wooden houses
The key to a safe life for households is a correctly selected and installed internal wiring. Poor quality work often causes fires in wooden cottages. There are two ways to wire - hidden and open.
Hidden wiring features
Installation of hidden wiring in wooden structures is a laborious and financially expensive process. But despite these significant shortcomings, most homeowners prefer this particular method.
Most often, hidden wiring begins to be laid back at the construction stage. For safety reasons, the wires are enclosed in galvanized or metal tubes. With the help of special openings, switches, sockets and lighting devices are connected.
Self-extinguishing materials are required to protect against fires and ensure maximum safety.
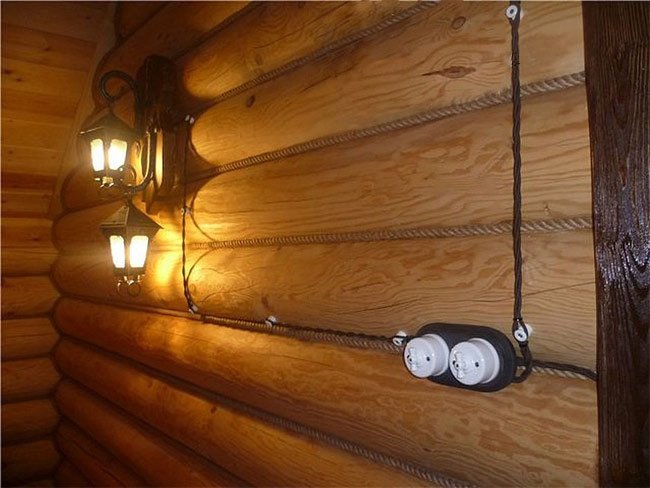
Outdoor installation
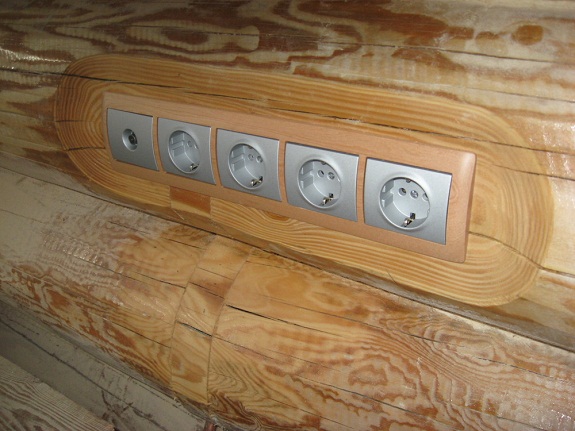
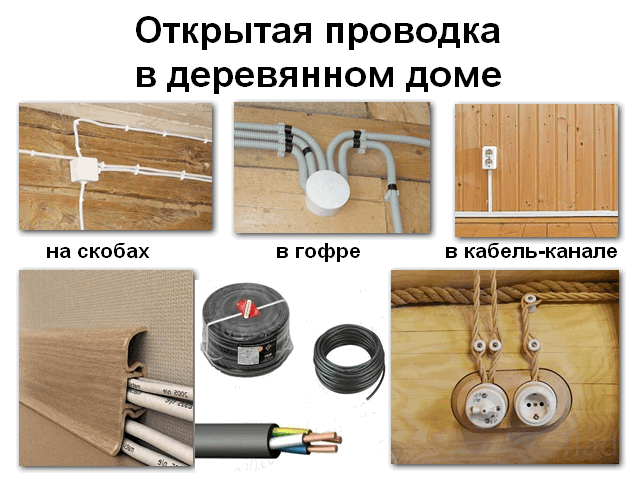 A feature of the work is that the cables are laid on the surface of walls, ceilings, etc., and not in them. There is a wide range of designs that allow you to hide the cable, for example, PVC box or retro cable.
Wires are laid in special self-extinguishing channels, which reduces the likelihood of fires. Such boxes are often used in houses that are lined with clapboard and logs, where the walls are characterized by a flat surface.
The retro cable visually resembles a twisted cord and is attached to the surface with special ceramic clips. This installation method is considered safe, because the outer insulation consists of plastic and natural silk.
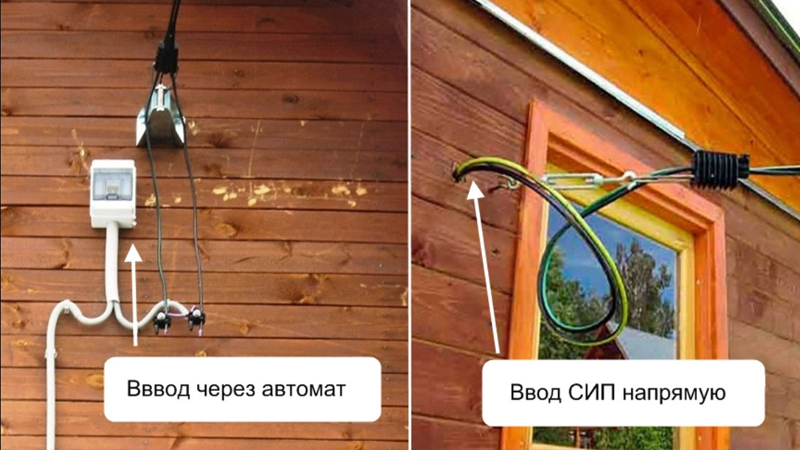
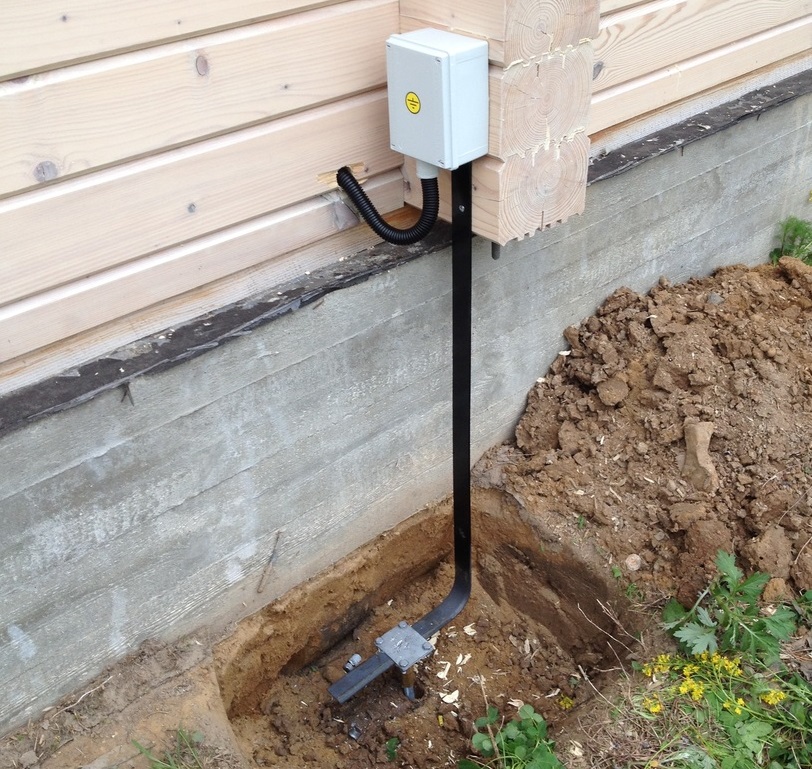
Entering the electric cable into the room
There are two ways to start the power cable - underground or by air. The latter method takes less time and more budget, but unreliable. Self-supporting insulated wires are required. A prerequisite for the introduction of an input cable in an air institution is the installation of a fireproof sleeve in the walls.
The underground cable is a metal pipe that protects it from aggressive environmental factors. This method of laying must first be agreed with RES.
Installation of distribution board

The body of the electrical panel is mounted in the place where it is displayed on the diagram. Connection is carried out as follows:
- A meter is installed in the switchboard.
- An introductory machine is mounted on a special profile made of metal. To the bipolar type of automatic machines, neutral and phase are connected.
- At the input of the input circuit breaker, previously connected output terminals are connected.
- The cable is brought into the room and connected to the meter with clamps.
- RCD, grounding, machines of different power groups, etc. are connected to the rail.
Only single-core cables can be used for clamping electrical appliances.
Grounding and RCD
Grounding and RCD - a set of measures aimed at the safe stay of household members at home, as well as preventing burnout of household appliances.
RCD is a special device that, in case of emergency, automatically cuts off electricity in the house. Installed in the distribution panel. To ensure grounding, you need to connect all household appliances with a metal case to the ground. To do this, at the construction stage, it is worth considering the implementation of a three-wire wiring system, where grounding is immediately provided.
Health Test and Common Errors
After completing all work, to make sure that the wiring is working, you need to call employees from the electric laboratory. Using special equipment, they will be able to make a set of all necessary measurements, for example, checking RCDs and loading machines, insulation resistance, resistance of the phase-zero loop and the ground conductor. At the end of the test, a report will be presented to the homeowner, which confirms the serviceability and full suitability of the wiring in the room. When sealing, they are often asked to show the meter.
The final result of the wiring diagram should be glued to the inner wall of the distribution panel - in case of breakdowns, visibility will help in solving the problem.
The most common mistake is the neglect of personal safety rules when working with electricity. This poses a threat not only to health but also to human life.