A lampholder is a mandatory part that is present in all types of fixtures. It plays the role of a bulb holder, conducts electric current, fastens all additional components on itself. Cartridges are different, they need to be connected in different ways to the chandelier. To understand how to work correctly with the device, how to replace the bulb and how to connect the cartridge to the wires, you need to familiarize yourself with its design features and characteristics.
Cartridge designation
The electrical network in the house or at the factory consists of wires and electrical appliances, as well as various electromechanical products. Such devices include an electric cartridge. It connects a lighting device (LED, fluorescent or any other light bulb) with a cable and fixes it in a ceiling, wall or table lamp.
Cartridges are used for any types of lamps. It is important that the bulb has the same base as the electric socket. Otherwise, it cannot be connected. Such devices are made of different materials - thermoplastics, ceramics, metal, heat-resistant polymers.
Types by type of socles
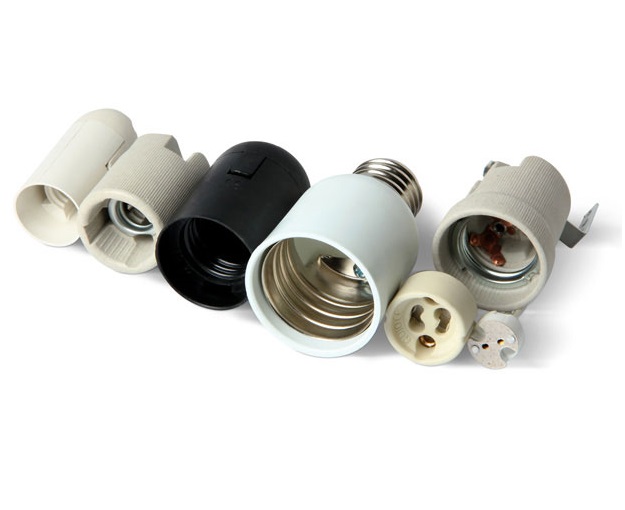
Electron cartridges can be divided by type of socles. There are two large groups - threaded and pin devices.
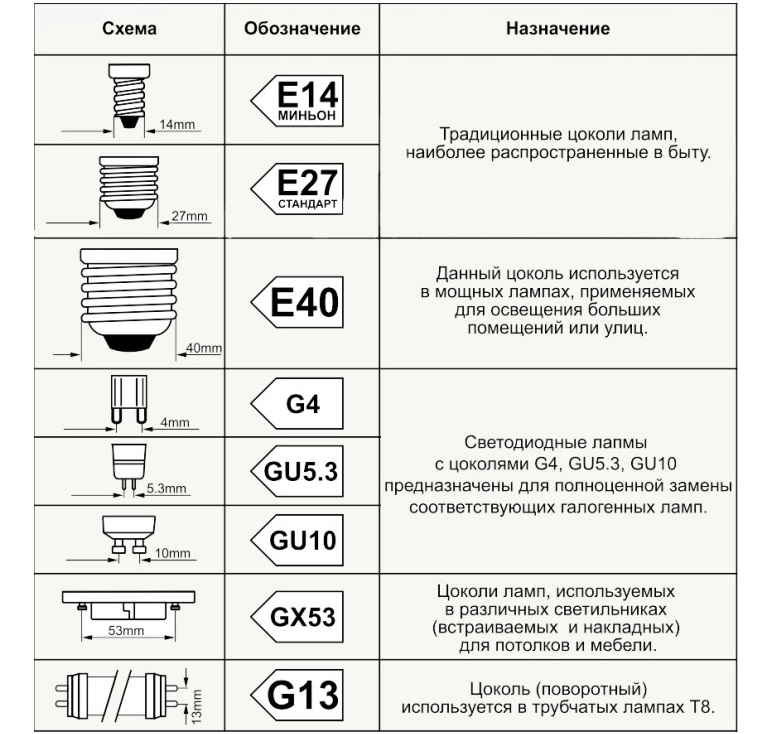
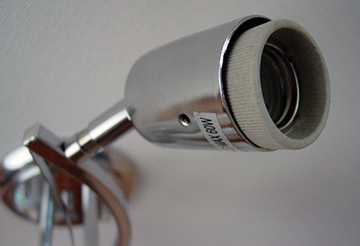
Cartridges with a thread on the inside are suitable for bulbs with a threaded base. They are marked E14, E27 and another, where E indicates the method of fixation (thread), and the number is the diameter. The following 8 sizes are standard: E5, E10, E14, E12, E17, E26, E27, E40. To put a light source, you need to screw it.
The pin models are indicated by the letter G. The number after the letter indicates the distance between the pins in mm. With a four-pin connection, the number indicates the distance between the opposite holes. Such devices are used in spotlights on suspended and suspended ceilings. Products with pins are separated according to the material of the case, the material of the insert, the type of fastening, the distance and the number of contacts.
There are U-shaped lamps and cylindrical. Electron cartridges with the marking GX23, 2G7 and others are used for them. They differ in the number of contacts.
Marking of electrical cartridges
According to GOST R IEC 60238-99, there are three types of threaded cartridges with different diameters - E14, E27 and E40. Their principle of action is the same, only the design and sizes differ.
Each product is marked. It indicates the characteristics. For example, E14 can be installed in places with a current strength of no higher than 2A and power of 450 watts, E27 is designed for currents up to 4 A and a load of 880 watts, and models E40 - up to 16 A and 3500 watts. The operating voltage for all devices is 250 V.
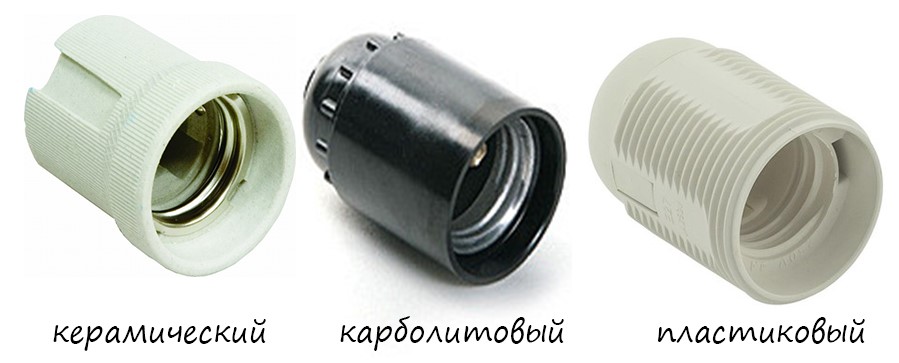
The most common electric cartridge E27. There are three standard appliances with this marking:
- Ceramic. It has a monolithic body, non-separable. Easy and quick to connect, compatible with almost all spotlights. Fragile, often breaks.
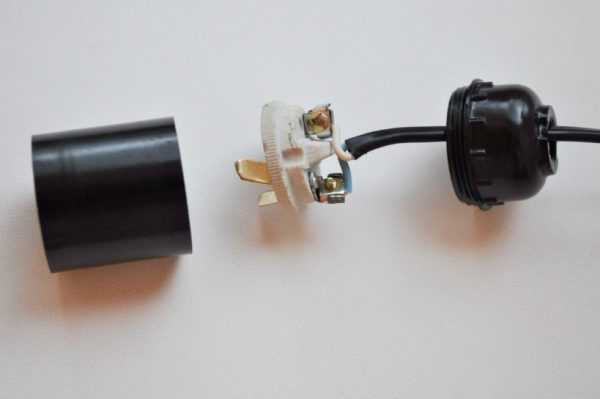
- Carbolite. Collapsible, consists of three parts - a case, an insert with contacts, a skirt. Reliable, the contact skirt practically does not fall out, it is steady against overloads. It has a complex connection and requires improvements.
- Plastic. Also collapsible, but has two parts - the lower skirt and the body. It has a reliable case, good performance and quick connection. It requires a careful connection so as not to damage the plastic latches.
The most commonly used plastic and carbolite cartridges.
Device device
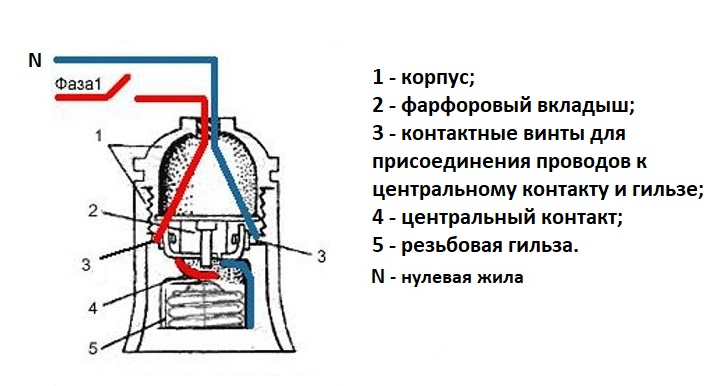
The electric cartridge consists of three parts. This is a cylindrical body with a threaded sleeve, a bottom and a ceramic insert. To transfer current, two brass contacts are used. For the device to work, all parts must be connected.
To increase safety, the phase is fed to the central contact. Thus, the risk of a person touching a metal part and the possibility of electric shock are minimized.
Connection of an electrons
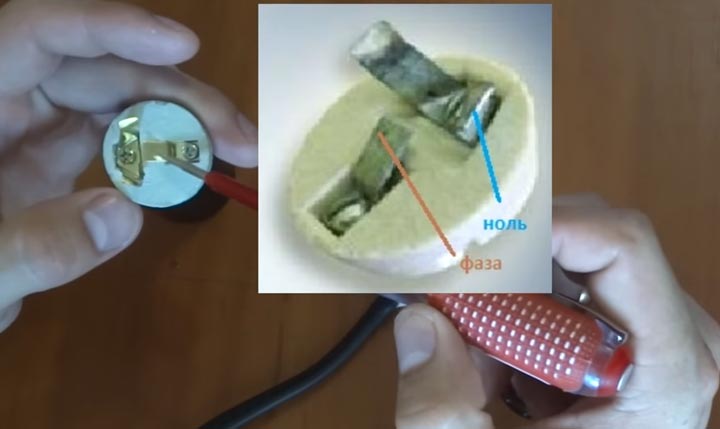
To understand the operation and method of connecting the device, you need to understand how the device works. Consider the assembly process from scratch before connecting the cartridge to the wires on the ceiling. The brass plate is pressed against the ceramic insert by a central contact. A screw screwed into the steel plate makes contact on the liner.
The screw also acts as a current conductor. For this reason, it should be tightened tightly so that a high-quality contact is created. In a similar manner, a second brass plate is mounted.
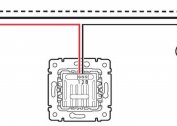
On the conductors you need to form rings. They are threaded through the bottom and attached to steel plates. When connecting the cartridge through a standard switch, the phase is connected to the central contact. The neutral wire is attached to the side contact. It is important to observe the marking when connecting the wires.
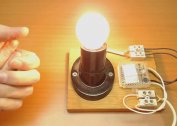
The last step is to wind the case to the bottom. Now the cartridge can be used and insert a light bulb into it.
Chuck connection with terminals
There is a new type of cartridges. In them, the wires are pressed using terminal blocks. This installation method allows you to speed up the installation of bulbs in the chandelier.
The case is made of plastic and is monolithic. The contacts are mounted on the inside with rivets. The disadvantage of such cartridges is the impossibility of repair in case of breakage.
Cartridges with terminals with a cap E14 and E27 are available.
Screwless Electron Cartridge Connection
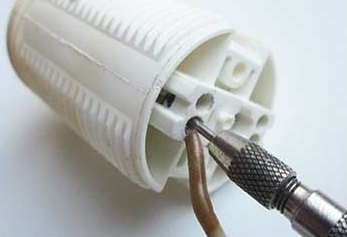
Screwless devices are easy to install. There are brass springs inside, which are used to pinch and fix the conductors. The housing has holes, usually two pairs.
To connect cartridges in parallel to the chandelier, two pairs of contacts are connected in pairs. Voltage is applied to one cartridge, and the following are connected via jumpers. In total, you can connect 10 or more rounds.
The advantage of contactless cartridges is that they are easy to replace and connect. You just need to take the wire, strip it 1 cm and put in the desired hole. But it should be borne in mind that thin veins in a multicore cable are quite difficult to fix. Therefore, manufacturers of chandeliers tin the ends of the conductors that will be connected to the cartridge. After this, the end of the cable with several wires becomes single-core, and it is easy to put it in contact. You can attach the wires with tweezers.
Mounting Methods
For conductive wire
The screw electropatron must not be directly connected to the cables. Before this, it should be fixed in the lamp. A fixing screw is inserted into the plastic sleeve on the bottom. Cores are threaded into the hole. After connecting and assembling the cartridge, you can clamp the wires with a screw.
On the tube
This is the most common mounting method. With the help of this design, it is possible to suspend shades of different weights, dimensions and designs.
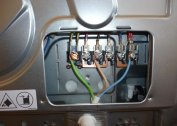
There is a nut on the metal tube with which the fixtures for chandeliers and shades are fixed. Wires are routed through the handset.
You can find cartridges in which the thread is applied to the outer part of the body. A lampshade ring is attached to it.
Bushing
There are lamps (wall, table) that are mounted on plastic and metal bushings.Using this method, you can expand the capabilities of the technology of creating a lamp. To do this, just drill a hole and secure the cartridge with a sleeve.
With screwless terminals
The case in such models is fixed with a bottom on two latches. For this reason, the mount is different from the classic.
The bottom of the cartridge is screwed onto the threaded tube in the chandelier. Then conductive conductors are held in the cartridge. At the end, the case is put on the bottom and snaps into place. The most important advantage is the possibility of repair.
To disconnect and remove the cartridge, you need to carefully release the latches in opposite directions with a screwdriver. It is important not to break the product. As a result, the body will be freed from the bottom and you can change it.
Repair of collapsible electric cartridge
When the lamp starts to blink or burns out during operation, the user can judge the problems with the cartridge. This is one of the most common breakdowns. If you turn on an unpleasant buzzing sound and smell of burning, you need to inspect the product. If blackened contacts are found, they should be cleaned. It may also be necessary to replace the cartridge in the chandelier with a new one.
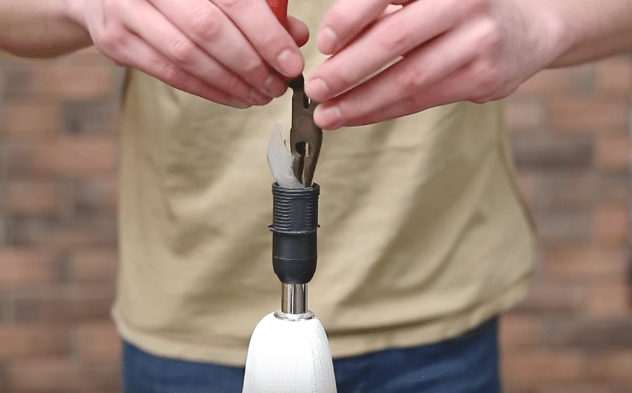
For repairs, it is necessary to disassemble the cartridge into its components, inspect and clean the contacts to a characteristic luster. The housing must be unscrewed, holding the bottom. If you can’t unscrew it, you can pull it out with thin-nose pliers, holding the edge of the base.
There are times when the bulb is not twisted out of the cartridge due to damage. Then pulling it out is harder. First of all, you should turn off the lamp, and then use one of the described methods.
How to unscrew the cartridge if the bulb burst:
- Using thin-nose pliers or pliers. It is necessary to tear off the fragments of the flask without dropping them to the floor. Then the base is twisted with thin-nose pliers. The base must be grabbed by the edge and pulled out. The work must be done carefully, taking care not to damage the E27 electro-cartridge.
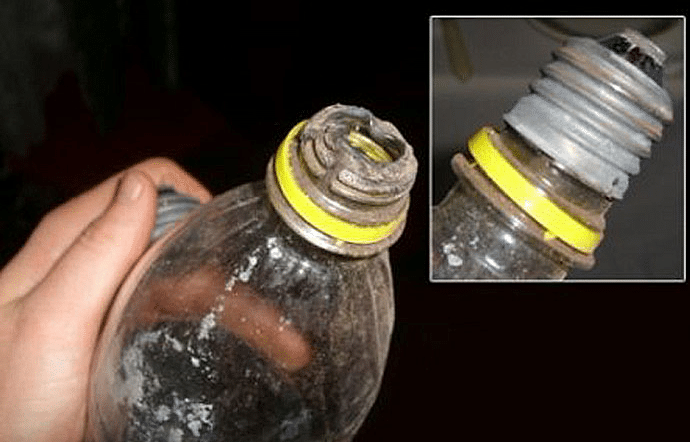
- Using a plastic bottle. It needs to be slightly melted at the neck and inserted into the base. You should wait a few seconds until the plastic hardens and sticks, and then begin to unscrew the structure. The bottle is chosen, since its neck will be easily screwed into the base.
- Dismantling of the cartridge. Only suitable for old carbolite cartridges. The product must be carefully disassembled into its components and removed from the lighting device.
The way to get a broken bulb depends on the user's convenience. Then you need to connect the light source and check the operability of the structure.