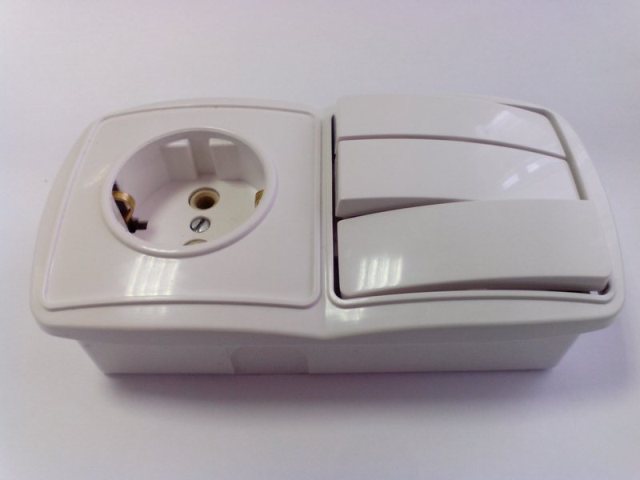
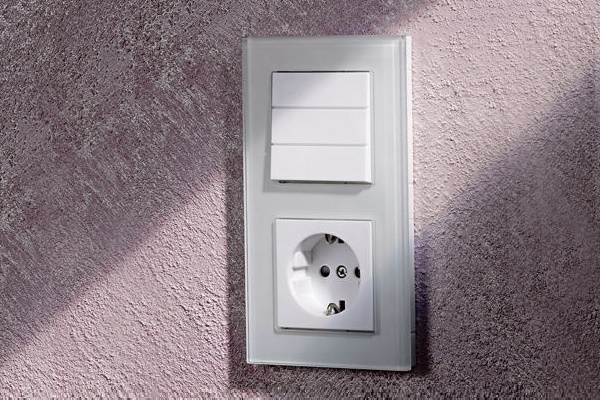
For an aesthetic interior, the convenience of owners and saving space, a socket with a switch in one housing is used. The design, combining the power point and lighting control, also provides rational power supply in the home or office. It is easy to install with your own hands.
Paired devices
The combined type of switches was not familiar to electricians until the middle of the twentieth century. The actual way to control light sources was a single-key switch. Two identical products were located side by side. A little later, manufacturers released two-key switches to control individual groups of chandelier lamps.
A three-key switch, combined with an outlet, appeared on the territory of the Russian Federation during the development of the construction of panel houses. The devices were designed to turn on the lights in the kitchen, bathroom and bathroom.
The socket was installed in the bathroom for the convenience of using a hairdryer, electric razor. After the popularization of washing machines, they began to be connected to the combi device with or without grounding.
In high-rise buildings of modern buildings, double structures are used for kitchens, bathrooms and residential premises. The reason is European standards, according to which:
- switches are located at a height of 160 cm from the floor;
- sockets output to a height of 30-90 cm from the floor.
This connection allows you to place the switches at eye level for ease of use and placement of furniture. Removing the outlet provides a comfortable turn off the lighting without changing the position of the hand.
Low-lying outlet groups in the bedroom are convenient in terms of masking wires. In the kitchen, they are located above the desktop, serve to illuminate the cooking area and connect household appliances. In studio apartments, general and local light is used as a way of zoning the space.
Combined devices are convenient for using numerous electrical appliances.
Advantages and disadvantages
The demand for combined devices is due not only to the desire to increase the number of outlets. Combined modifications have several advantages:
- reducing the number of conductors - you will need two cables from the shield and wires in an amount equal to the keys of the switch;
- reduction of time for organizing wiring - all conductors are in a common gate;
- no need for additional gating;
- ease of installation;
- the convenience of lighting control and the use of household appliances.
The disadvantages of the structures include:
- high cost in comparison with single elements;
- replacement of the entire unit in case of failure of one node;
- increased load on the power wires;
- limited location.
Power plugs and cords make it difficult to use a switch.
Features of combined products
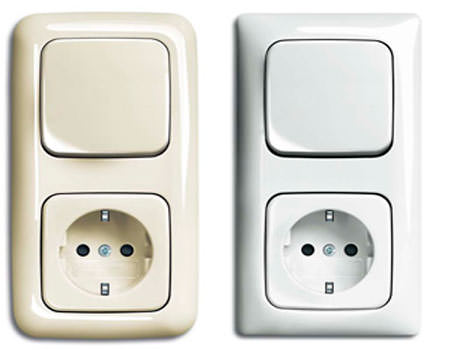
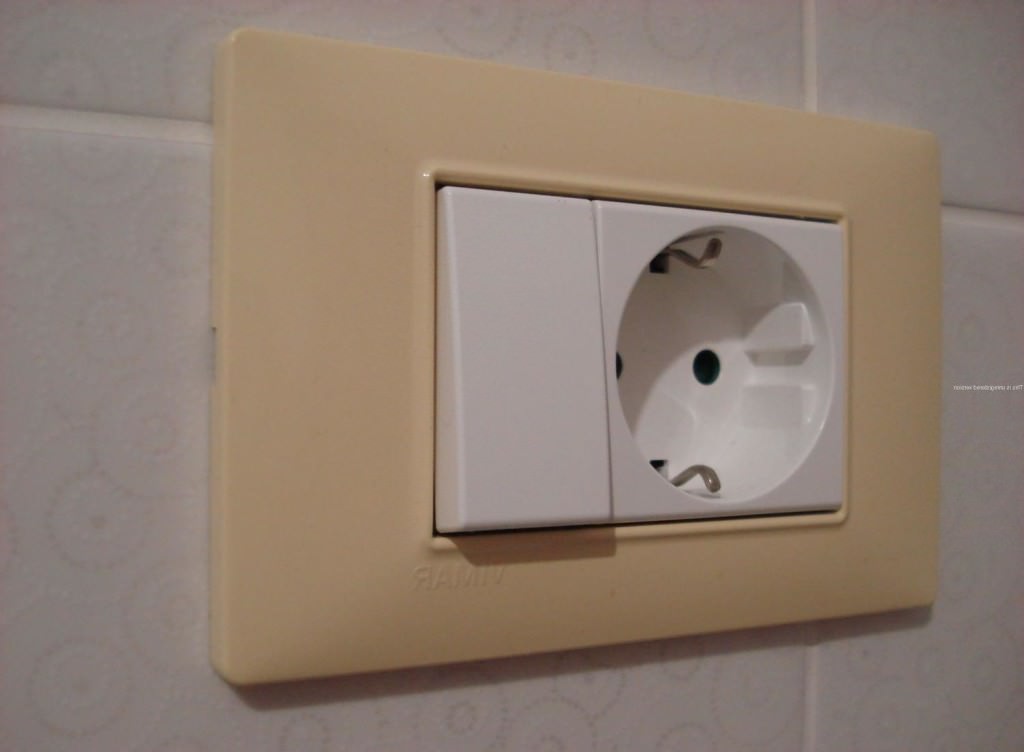
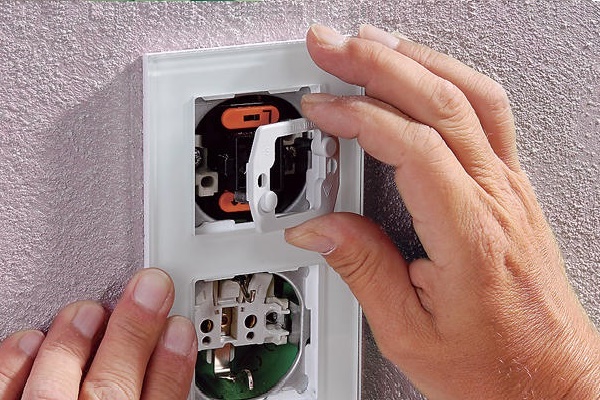
Paired modules are suitable for installation on surfaces made of wood, stone, drywall and concrete. They differ in aesthetic appearance, ergonomics and fit with a minimum number of mounting channels.
Models can be built into the wall or located on its surface. They are suitable for indoor use or are equipped with a moisture-proof housing for outdoor installation. A special cover prevents access to moisture and dust inside the case and to the contacts.Such a solution is relevant if a bathroom is equipped with a blocked modification.
How to choose a socket with a switch
When choosing a suitable device, you should pay attention to several factors:
- compatibility with technical characteristics and features of the power line;
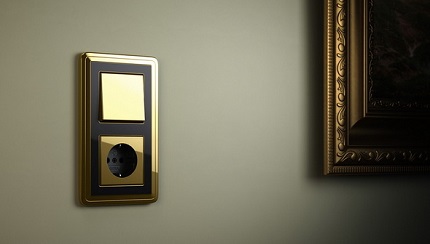
- compliance with the design of the room;
- functionality by the power of connected equipment;
- number of buttons and sockets in one block;
- installation features.
Manufacturers produce several models:
- double option - consists of a switch and an ungrounded outlet;
- indoor unit with a switch and a grounded outlet, the key is with a light indicator;
- devices for outdoor installation - the socket and button are hidden under the cover with protection class IP 54.
For sale are options with a different combination of keys, switches, outlet groups. The external part of the case can be removed - the triple device is suitable for the system socket + switch + slot or USB port.
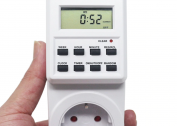
The average cost of a simple device is 200 rubles. A sample for European wiring with two buttons costs about 300 rubles. and is suitable for a total power of technology of 3.5 kW. Moisture-proof modifications will cost about 450 rubles, and the power unit for three outlets and a single-button switch - 1000 rubles.
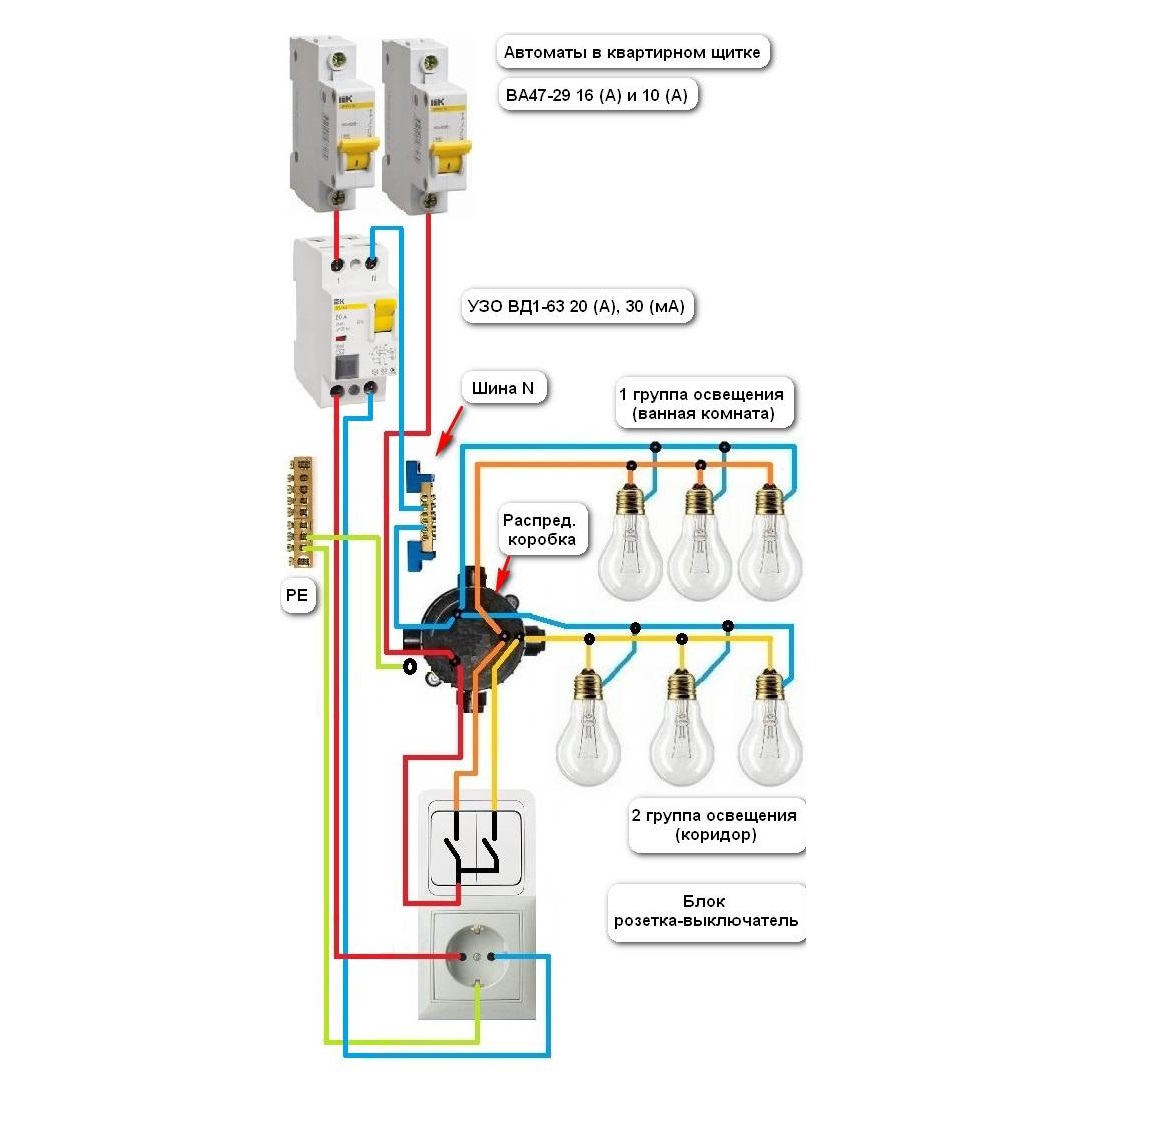
How to connect an outlet and a switch
Most often, a socket + a single-key switch and a socket block + a two-key switch are used together.
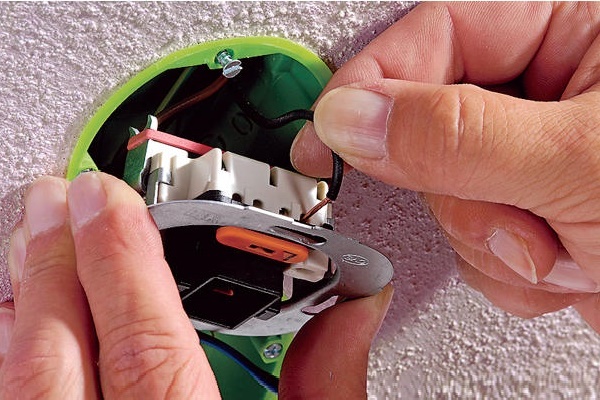
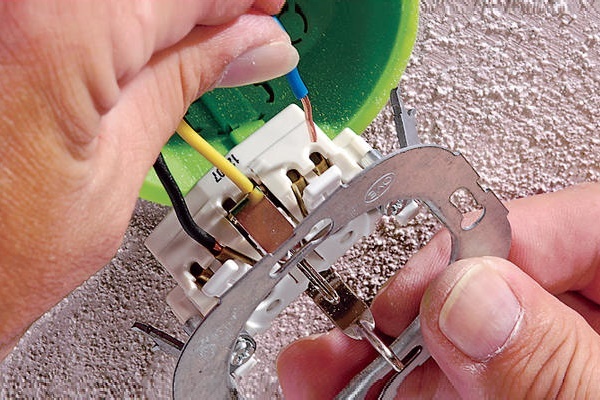
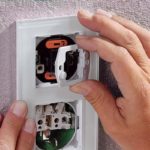
Installing a Single-Key Outlet
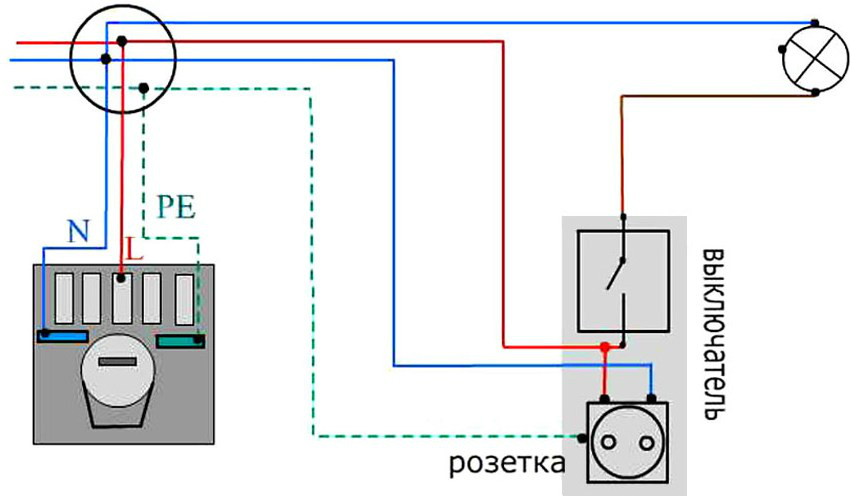
The connection diagram provides for the laying of a three-wire wire from the distribution box to the unit:
- In the junction box, the neutral of the power is connected to the zero conductors of the lighting and the socket.
- In the switchboard, the network phase is connected to the phase of the outlet.
- In the block itself, the received phase and neutral are connected to the contacts.
- The socket phase with a jumper jumps to the input contact of the switch.
- The wire connected to the lighting phase in the switchgear is integrated with the output contact by the switch.
A ground outlet must be connected to a four-wire cable.
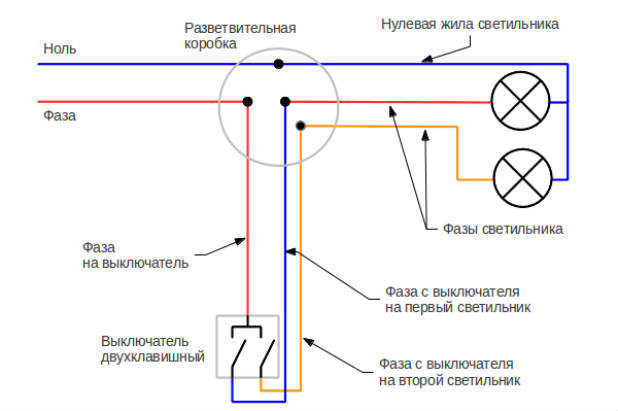
Installing a Two-Key Block

A socket with a two-gang switch in one common housing is mounted as follows:
- The phase of the outlet must be connected to the input contact of the switch with a jumper.
- Connect the phase cables to the terminal pins of the switch.
- Take the conductors into the distribution box and connect them to the phase conductors of the bulb holders.
- To throw a zero of a power supply network on the zero veins directed to the socket and lamps from a distribution box.
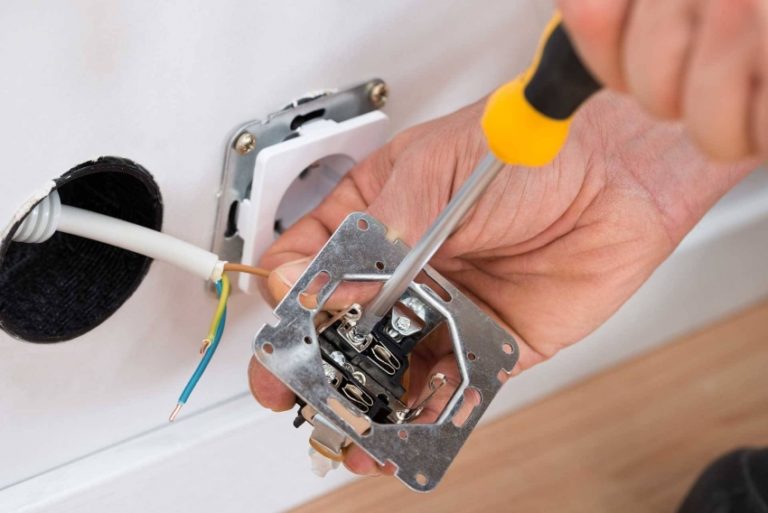
Correct installation is possible only with the following recommendations:
- prepare tools - a drill with a drill column, screwdrivers, pliers and wire cutters;
- use tools with insulated handles;
- invoice type of paired devices eliminates wall chipping;
- waterproof blocks are suitable for installation in the bathroom and toilet.
The rules of the PUE indicate the need to turn off the electricity in the entire apartment before installing electrical equipment.
Connection of a socket and a switch from a two-wire wire
The simplest scheme involves a clear sequence of wires leading from the distribution block to the device. Connection is carried out as follows:
- The choice of the area where the indoor or outdoor unit will be located.
- Surface marking.
- Search for a phase in the switchboard and turn off the electricity in the room.
- Throwing phase on the switch. It will be necessary to strip the ends of the corresponding cores, twist them and cover them with insulating material.
- Roll unused wires into a ring and cover with insulation.
The use of the circuit is justified only in cases of rare use of the network jack.The combined device works on the principle of supplying a phase to the power point to turn on the circuit breaker.
Connect a boiler without a shutdown button through such a system.
Connecting an outlet with a switch in one unit
Structural elements are operated together or separately. To install the device you will need:
- Route the phase and zero cable from the main panel to the distribution box.
- Place 2 cables from the fixtures and 3 wires from the unit in the distribution box.
- Throw the phase core from the shield to the socket.
- Connect the mains neutral to block zero.
- Twist together the phase conductors connecting the cartridge to the switch and insulate them.
- Connect the ground line from the input cable.
With this method, the outlet functions separately from the lighting, but the devices can be turned on simultaneously.
Use a jumper to create a connection between the terminal and the outlet.
How to connect a double switch and a power outlet
A two-gang switch, combined with a socket, is usually installed in a wall partition between the doors of the bathroom and the bathroom. So users can control lighting devices and turn on household appliances.
Connect the device using 5 cables connecting the unit to the distribution box:
- A couple of free cores to connect to the switching contacts.
- Apply phase to the switch using a jumper.
- Apply a phase to the light of the bathroom and toilet through the switching contacts.
- Twist loose lead wires with phase feed cables through the switch box in the junction box.
- Form the hitch of the neutral wire and ground with a twist (bare ends), bring them to a power outlet.
Choose an outdoor unit or system for the bathroom with a moisture-resistant housing and curtain covers.
Scheme of connecting a socket and a switch with three keys
The configuration of the unit allows you to save energy used, since it will be the control element for several lighting fixtures in the same room:
- main lamps;
- decorative lighting;
- minor light sources.
-

- 1. Installation of the switch mechanism
-

- 2. Attaching the outlet mechanism
-
- 3. Installing the holding frames
-

- 4. Fastening the front parts
Due to this, with insufficient lighting, you can not turn on the devices in the network, but activate them by pressing a button. Lighting brightness is also adjustable.
The installation diagram is almost identical to connecting single-key or two-key models. In this case, zero is the blue wire, and the phase is black or red. The neutral cable pops into a power outlet.
Features of connecting a double outlet in a living room
In the presence of several household appliances, it is worth mounting the unit for 2 or more electric points with parallel connection. Before starting the installation, jumpers from 3 cables are created and brought to the connection point. Work is carried out according to the following algorithm:
- Disassembling each outlet.
- Stripping jumper boxes, conductors, power cable.
- Connect the first outlet to the input cable.
- Installation of the element in the mounting box.
- Parallel connection of cables in colors and installation of subsequent power points.
Leave the cable removed from the distribution box with a margin.
Custom application
Some masters advise using a single-key with a socket instead of a standard socket - let the phase through the switch. This method is convenient for equipment without a power button or a quick blackout.
The minus of the scheme is compatibility only with low-power consumers, which in practice almost never happens.None of the contacts are designed for high current, so the wiring heats up, melts and causes a fire.
The idea of combining a switch and an outlet appeared recently, but devices quickly became popular for reasons of convenience and functionality. With proper observance of the schemes, combined devices will become an excellent interior solution, zoning the space, increasing the number of power points.