Vintage wiring is a decorative element that emphasizes the retro style of the interior in a wooden house. The wiring that is being done now is only an imitation of the wiring that was installed at the beginning of the 20th century. It is much safer due to technological installation techniques and the use of high-quality insulating and refractory materials.
What is retro wiring
In the last century, wiring was mounted from two single-core wires twisted together in a spiral. The lines were fixed externally to the roller insulators.
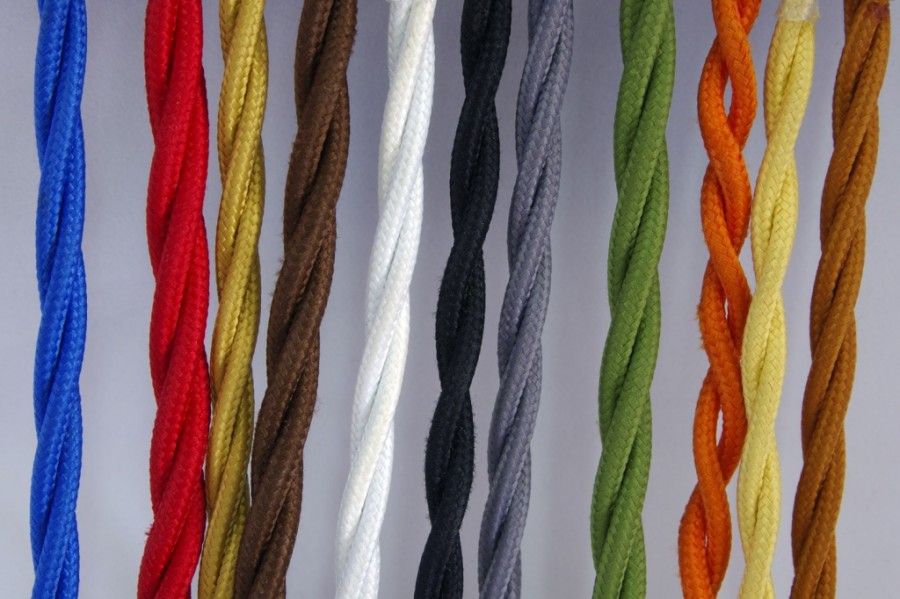
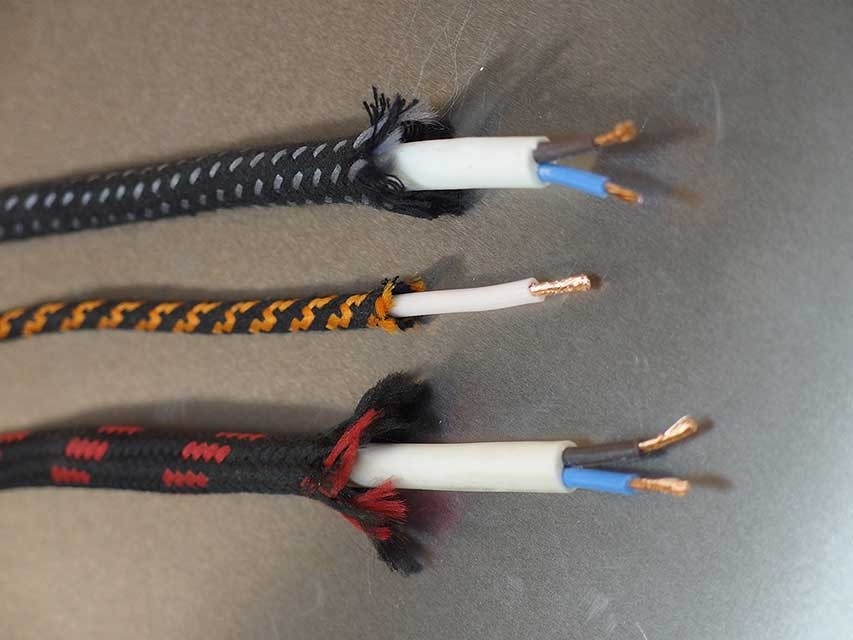
A modern wire is covered with a self-extinguishing braid made of synthetic materials, they are required to use junction boxes, porcelain accessories during installation. Wires are quite expensive, and in some cases they get a regular cable and then weave it on their own. However, it is recommended to buy special 2 or 3-core copper wires, already woven in the right way. They are covered with PVC braid, and the outer layer is made of technical silk or cotton, soaked in flame retardants. The material can be a stylish bright color. In addition to retro wires, you need to buy accessories:
- sockets - with or without grounding;
- retro switches - one-, two-position;
- heat shrink tubes - for insulation of compounds;
- rollers - from non-combustible materials for fixing the wire;
- junction boxes - usually round and small: with a diameter of 70 to 90 mm, a height of 35-55 mm.
No junction boxes were provided in the last century, the connected wires were simply tucked in such a way that no joints were visible. But this installation method is not safe.
Retro wiring will look great in interiors in the style of Provence, country, modern, loft, vintage.
Features of designing decorative open wiring
An open wiring project is necessary to accurately calculate the required amount of materials: wires, insulators, switches and sockets, and determine the optimal location of electric lines. It must be done without fail, since any flaws on a wooden surface are immediately evident. For example, a trace from a shurpa that was screwed in the wrong place is difficult to hide. It is recommended that you first fix the wiring temporarily, for example, with tape or small nails.
When choosing retro wiring in a wooden house as the main electrical wiring, you should be aware that retro cables are not produced with a cross section of more than 2.5 mm2. It can withstand a maximum current of 27 A (copper), not more, which means that it is impossible to connect especially powerful devices. The wiring is recommended to be done in the form of a beam scheme. There are three options for wire cross-section:
- 0.5-0.75 mm2 - up to 2.9 kW;
- 1.5 mm2 - 4.4 kW;
- 2.5 mm2 - 5.9 kW.
For lighting use a 2-core cable, for wiring - 3-core. From 2 to 4 outlets can be installed on each wiring line with a cross section of 2.5 squares.
 It is important to comply with all technical requirements for installing retro electrics, namely:
- When installing a retro outlet and a switch for open wiring, at least 10 cm from the window or door.
- Avoid mounting wiring closer than 50 cm to the water and gas lines.
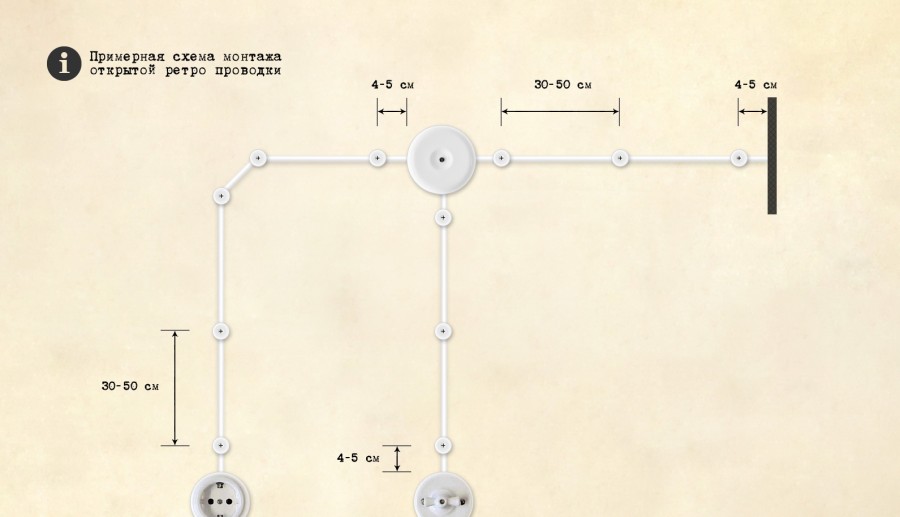
- A gap of 30-60 cm is left between adjacent rollers, and the insulator closest to the outlet or switch should be located no further than 5 cm from them. If the house is log, an insulator is installed in every second crown.
In the process of creating a project, you need to choose the type of wiring - top or bottom. The first option is less susceptible to mechanical damage, but the second allows you to save on materials.
How to install vintage wiring

First of all, they mark the installation sites for junction boxes, switches and sockets, so that they are located symmetrically, at the same height. It is recommended that this work be done using the laser level. Then mount the switches and sockets, and from them lay wicker wiring to the junction boxes. Elements are set on frames or linings.
Any branch must be executed in a junction box. In the distribution boxes, the wires are connected by soldering or terminals, twisting is excluded. From it, the line is let down vertically. Insulators are fixed to the wall with screws or screws.
Sagging wires during the final installation of retro wiring using insulators is not allowed. But at the same time it is necessary to consider whether the house continues to “sit down” or whether it has already defended. In the latter case, it is not necessary to pull the wires too much, the main thing is that they do not touch the wall.
Passing the cable through the walls, install ceramic or copper pipes. For the installation of insulators, long and thin fasteners are selected - screws or self-tapping screws. They must pass through the entire insulator and plunge into the wall at 2/3 of the length. Fasteners can be supplied by the manufacturer complete with rollers.
Insulator Specifications
The function of insulators is performed by rollers made of metal, ceramics, and plastic. A wire is fixed on them, due to which the main fire safety requirement is observed: the distance from the wiring to the combustible surface is at least 12-18 mm.
-

- Insulators for outdoor wiring
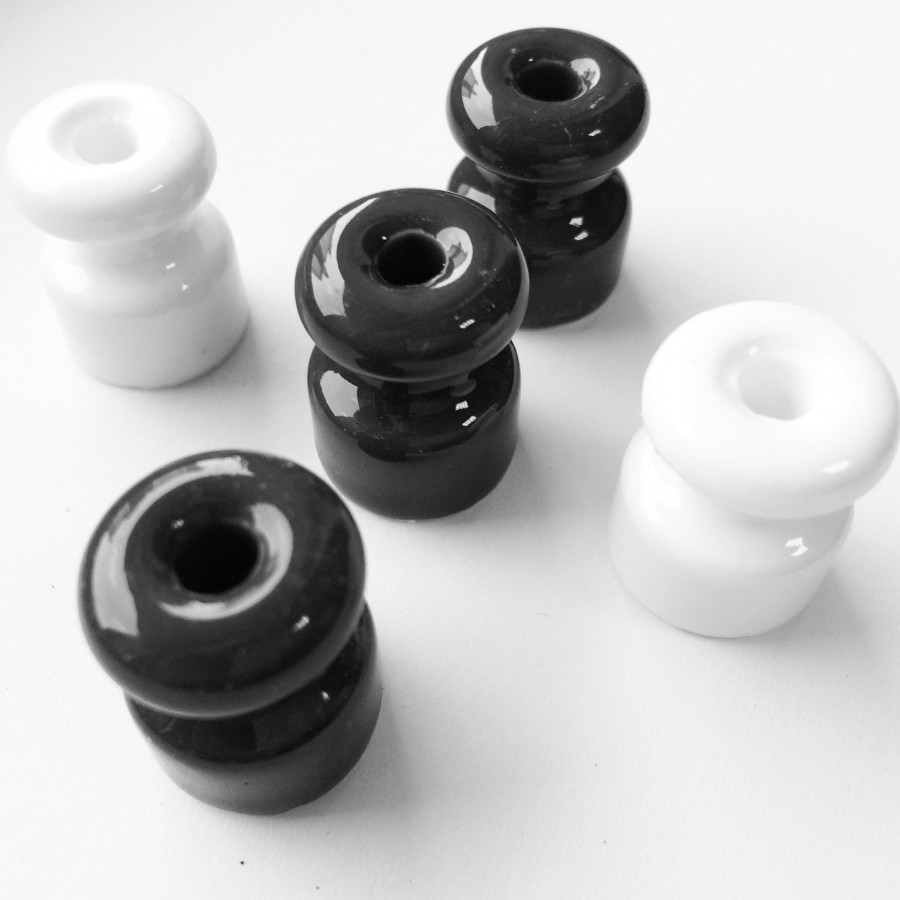
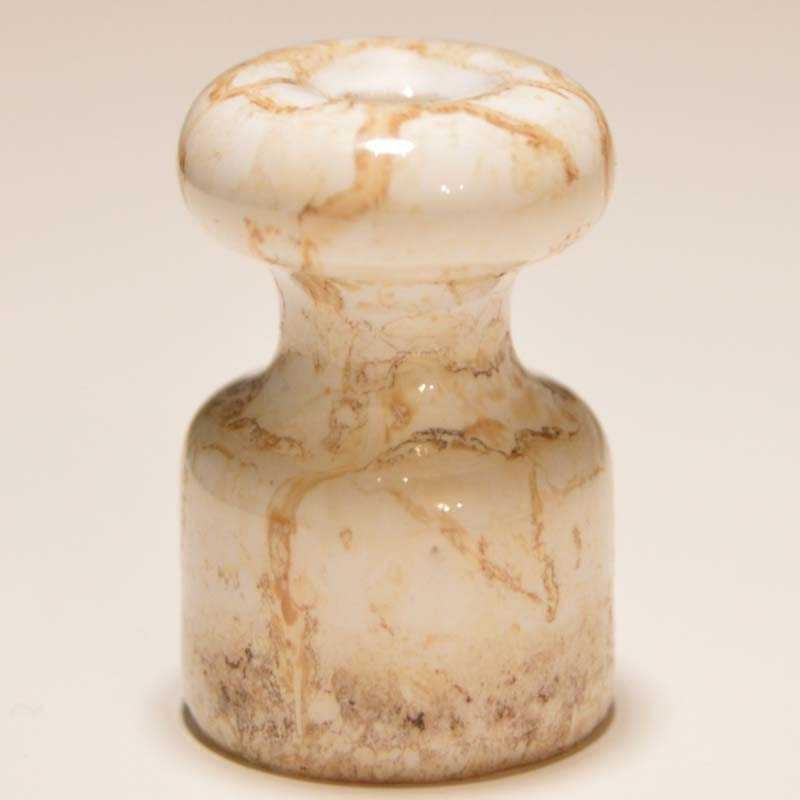
The rollers have a diameter of 18-22 mm. If the upper part is narrow, the roller is designed for fastening two-wire wires, if wide - three-wire. The height of the insulators is 18-24 mm.
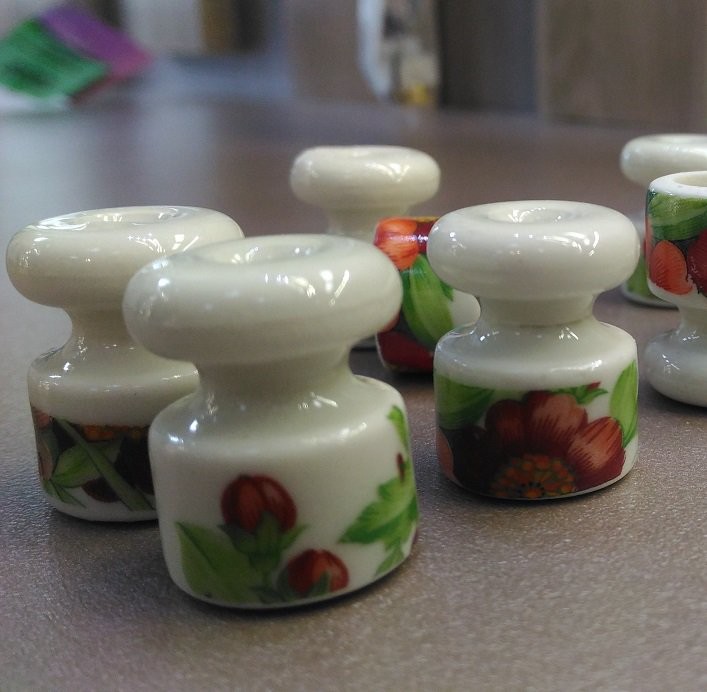
If the rollers are made of ceramic, their design can be supplemented by painting.
The number of insulators will depend on the method of mounting the twisted wiring. In straight sections, about 20 insulators will be required to fix a 10 m cable. In some cases, to decorate the interior, they lay a cable with a snake between the insulators, then much more rollers are required.
Benefits of Retro Open Type Electrical Wiring
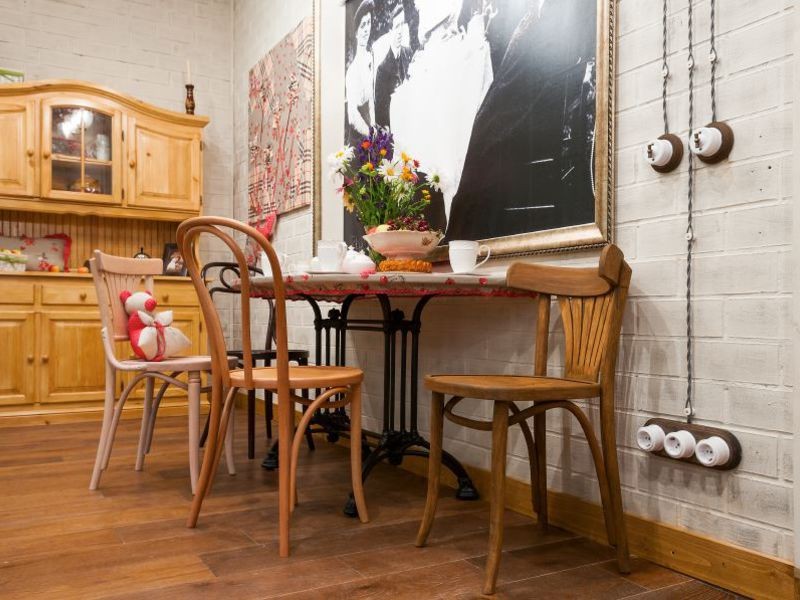
The dignity of retro-style wiring, primarily in its original appearance. If we are talking about a wooden house, only this option will look as harmonious as possible, since plastic cable channels violate the interior styling. But there are other advantages:
- Since the braid is presented in a variety of color variations, you can make the wiring noticeable and complementary to the interior detail.
- The wires are laid quickly, because you do not need to make the strobes in the walls and close them, as in the case of internal installation.
- Unlike hidden wiring, open wiring is easier to complete, while respecting all fire safety requirements.
- Since the wires are not hidden by anything, vintage wiring requires easy maintenance.
Thanks to its easy installation and decorativeness, vintage wiring is popular among owners of wooden houses.
How to save
The necessary components for vintage electrical wiring are quite expensive, especially if you want to purchase imported goods.Even when using an inexpensive retro cable for outdoor wiring, the amount runs up a lot, due to the fact that each line of sockets is pulled from the shield. But there are options to save.
Mixed gasket type
The combined laying method involves the installation of a conventional cable along with the use of retro wires. Moreover, the main goal is often not saving, but the desire to lay a wire of large cross section. In this case, to maintain the style, the cable is placed in a metal pipe of small diameter. It goes well with twisted lines of retro wiring, does not violate the overall style. Or it is laid between the draft and finish ceilings.
DIY twisted wire
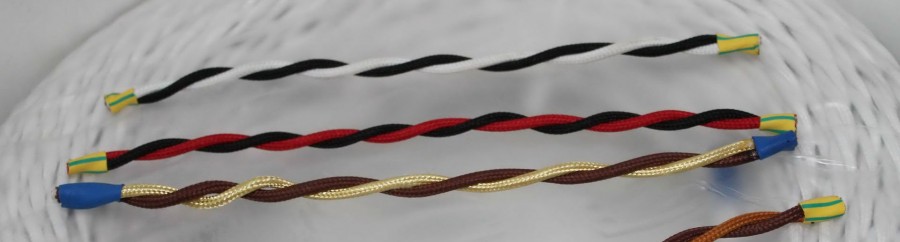
Self-made twisted wire significantly reduces the cost of materials. In this case, a cable with a cross section of more than 2.5 mm2 can be used. Filament-braided wires are best suited for this purpose:
- BPVL - stranded copper wire with tinned cores. A PVC braid is made on the top of the cores, and a braid of cotton threads is made on the outside. To prepare one cable, you need to use 3 wires, and due to the fact that it will twist, the length will decrease by about 30%.
- RKGM is a multicore copper wire, the braid of which is made of silicone rubber and fiberglass, impregnated with an organosilicon composition, with a varnish coating. This wire is more expensive, and the cost of the finished cable will correspond to the purchased analogues, but it is much stronger, and sections of 4 and 6 mm2 are on sale.
The wires can be connected in the form of a spiral or braided by a pigtail.
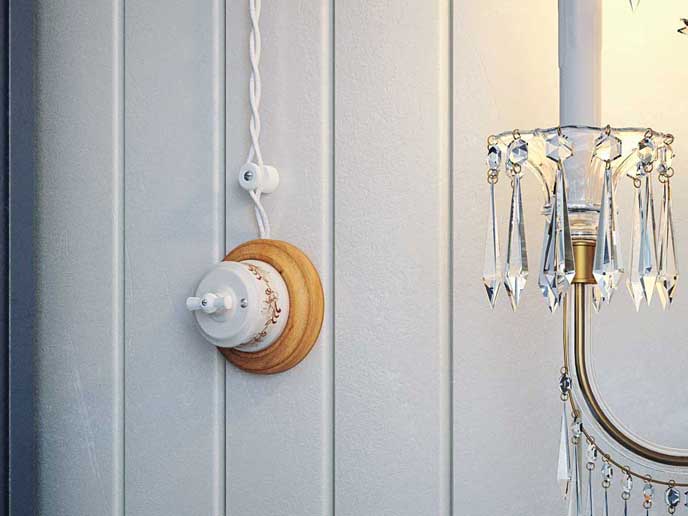
Antique Sockets and Switches

Sockets, switches and junction boxes can be installed and ordinary - plastic. The main thing is that the rear walls were made of non-combustible materials. But they do not fit the style, so they often get retro switches and sockets made of metal or porcelain. The products of domestic, European and Chinese production are presented on the market. European products are better, but expensive. Domestic sockets and switches have a more reasonable price and quality of a decent level, Chinese electrical products may be unreliable, their quality is unstable, although there are some good options.
Decorative vintage wiring in a wooden house is one of the most winning solutions. With its help, you can create a cozy atmosphere with a touch of antiquity. But in order to properly perform the installation, you need to know about the technical requirements and fulfill them.