A shower without a pallet is a small corner in the bathroom or a separate room in which there is a water outlet and a drain hole located directly in the floor. When installing this type of shower, special attention must be paid to waterproofing.
What is waterproofing
 Waterproofing in this case is the protection of the room or its elements from moisture penetration into other rooms. It contributes to the safety of the shower and durability. In addition, it prevents the rotting of materials, the occurrence of mold, fungus, negatively affecting the human body. Water seeping through the flooring can easily enter other rooms. Those parts of the shower cabin that are constantly in contact with water must be especially carefully protected with waterproofing. They are considered wet areas.
These include:
- A floor through which water can freely seep through.
- Joints of wall and floor joints.
- The sections of walls on which water gets the most.
- Places of input communications.
- Zones around the washbasin and bathtub, if any.
Shower waterproofing is a complex process consisting of several stages and requiring mandatory adherence to technology. Everything should be done carefully, without errors. Otherwise, the water resistance of the cabin will be of poor quality. It is important to pay attention to the drain structure, which must be built into the floor screed, and pour the rest of the base space with concrete mortar.
Waterproofing Materials
 Now on sale a large assortment of water-repellent coatings that qualitatively perform their functions is on sale. The most effective way to make waterproofing is to use a combination of several materials, each of which is unique in its own way:
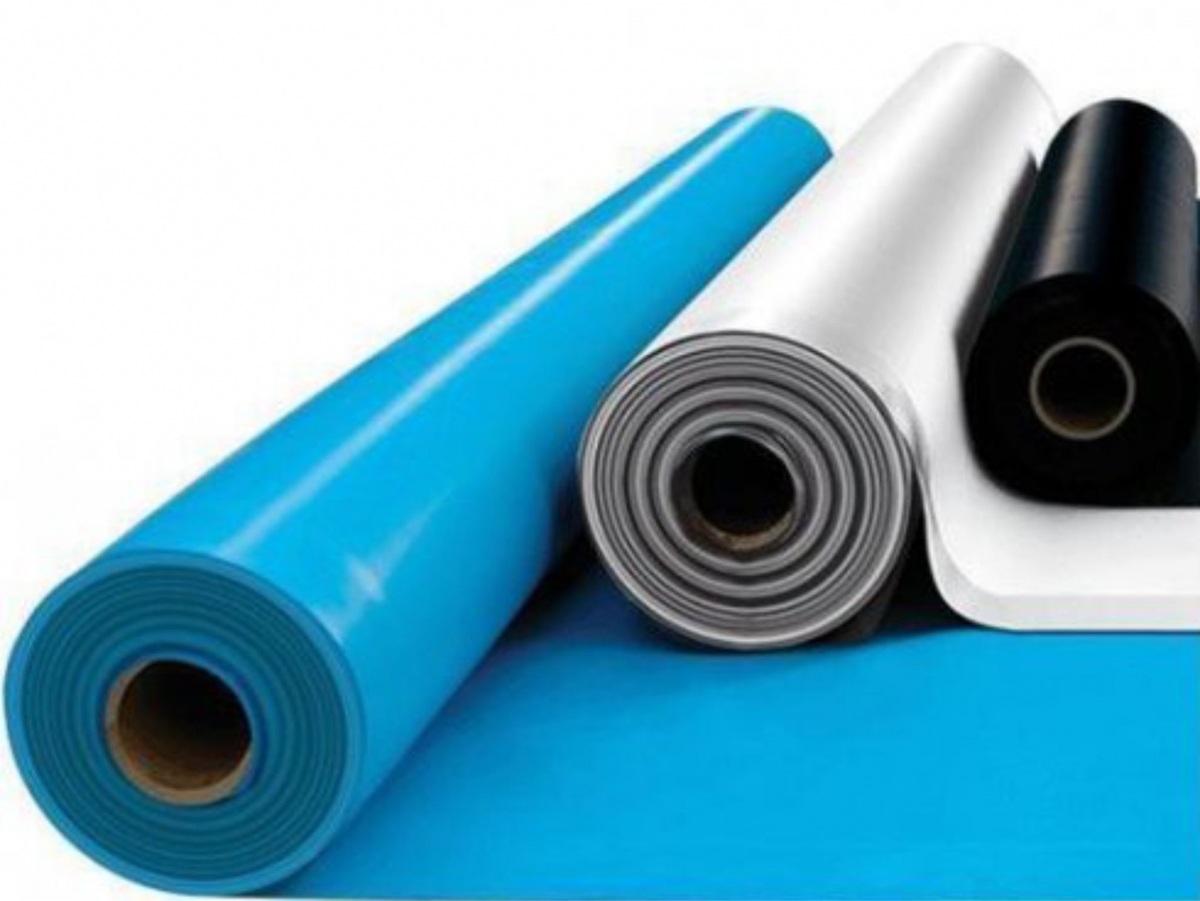
- Roll insulator is a proven and reliable water-repellent material, which is produced in the form of rolls. It is produced on the basis of polarized concrete and fiberglass, which have proven themselves in practice. Two insulators are used: self-adhesive and fused, which is applied with a certain heating.
- Coating sealant. This type of insulation involves the use of bitumen mastic with the addition of polymer or rubber. Both materials have excellent performance. Noteworthy is the polymer type of mastic that can penetrate deeply into the surface of the shower floor.
- Cement-polymer material also copes well with the protection of cab floors. The cost of such waterproofing is relatively low, and the method of application does not cause difficulties. Popularity is justified by an affordable price. Thanks to polymer additives, it has a high level of adhesion to the surface, characterized by elasticity and moisture resistance.
- Penetrating insulator is considered the most advanced and effective material. It consists of white (quartz) sand, Portland cement and various chemicals. Its active components, reacting with concrete, form insoluble crystalline structures that serve as a high-quality sealant. The chemical reaction is very slow and lasts for several years. As a result, small cracks that form over time are effectively tightened in the base structure.
In order for the sealing to be of the highest quality, several materials are used at once, some of which are glued to the surface, others are smeared with layers. For example, ceramic tiles are laid on top of a waterproofing coating.And bitumen insulators, since they are unstable to mechanical damage, are protected with a concrete screed.
The order of work
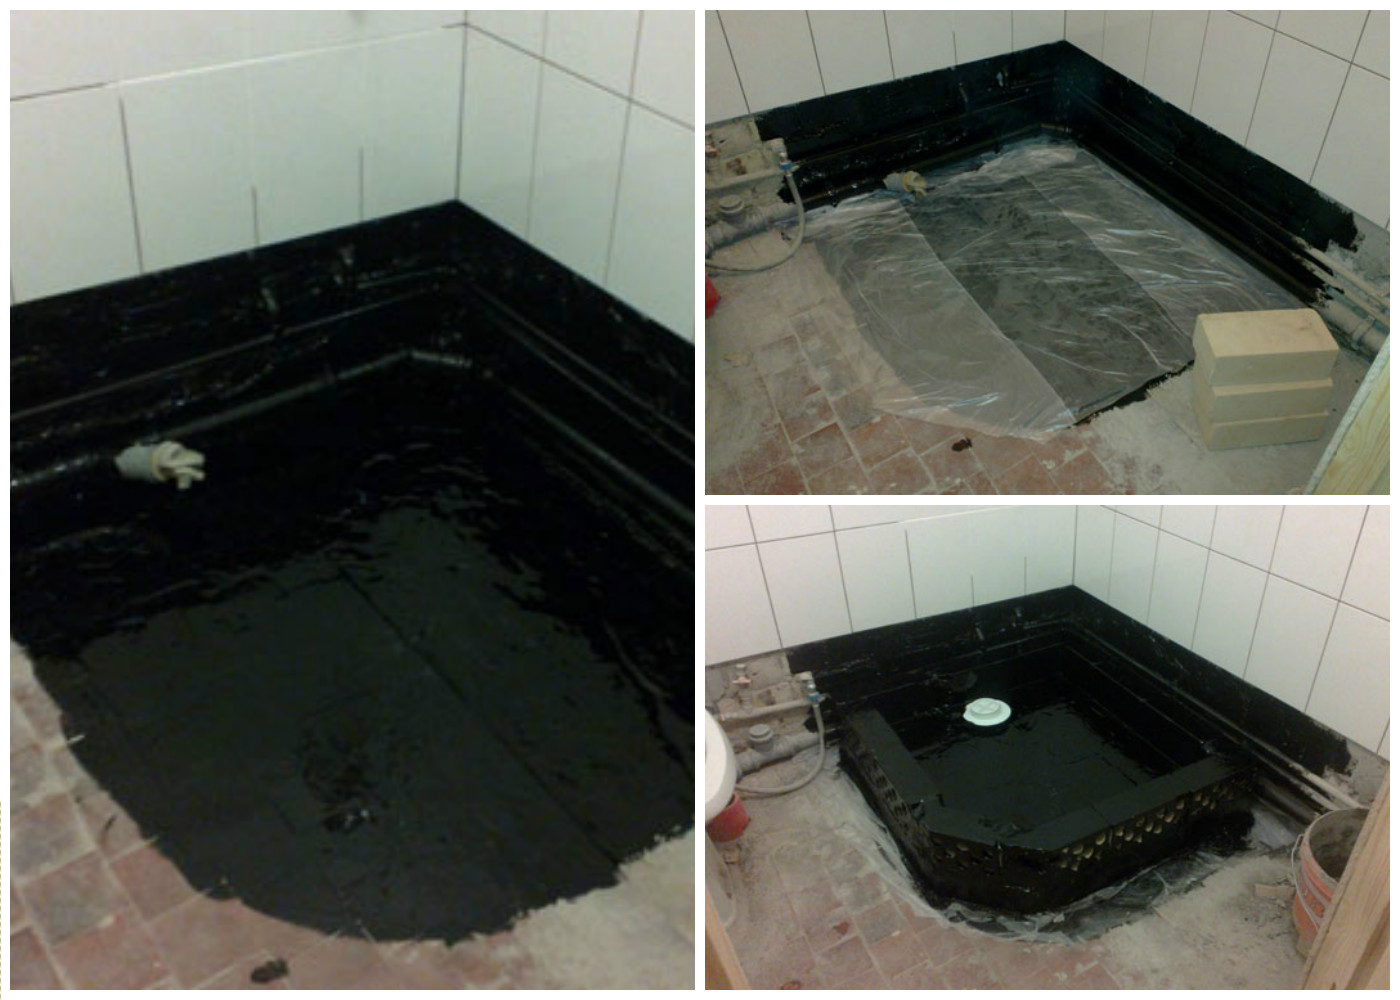
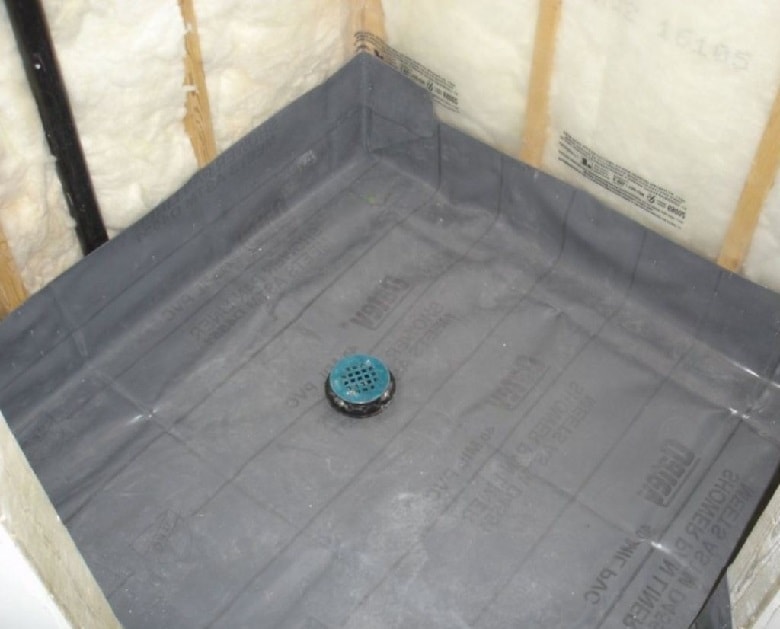 Roll insulation of the floor in a shower cabin without a pallet can be made using rolled self-adhesive or surfaced insulating materials. In this case, it is necessary to prepare the base - to level the surface with a cement screed. Next, continue in this sequence:
- Once the solution has hardened, treat with bituminous mastic.
- Roll insulating material from above, previously cut into pieces of the required size.
- Lay overlapping stripes at 100 mm and approaching the walls at about 150 mm.
- When using surfaced waterproofing, dissolve all joints with a building hair dryer.
- When laying self-adhesive material, the edges must first be greased with special glue and pressed firmly.
- For better sealing on top, lay the second layer perpendicular to the strips of the previous level.
- Check the quality of work performed. If air bubbles form under the coating, carefully cut them, coat with mastic and blow dry.
- A screed of cement mortar is made on top for leveling and only after that is the tile laid out.
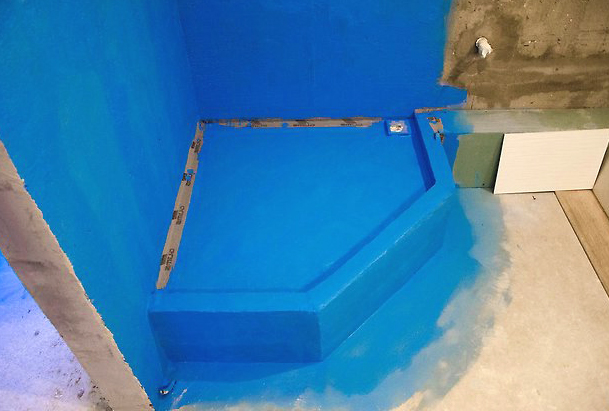 Coating insulation is carried out using both bitumen-rubber and bitumen-polymer mastics. Materials are easily applied to the surface, so everyone can do this work:
- First of all, level the floor with a cement screed.
- After the solution has dried, clean the surface and primer.
- Then apply a layer of mastic 4 mm thick.
- To increase the degree of waterproofing of the cab, pipes and walls should also be treated with material.
- After the mastic has completely dried, a moisture-resistant layer is formed.
- A cement screed is made on the shower floor, and then finishing work is carried out.
Polymer-cement compositions are often used for shower waterproofing. They are characterized by high adhesion and excellent elasticity. The process technology is the same as with the coating material.
The penetrating waterproofing agent made of cement and quartz sand with an admixture of active substances can be used for showers instead of plaster mortars. Only with the difference that a protective property is formed not only on the floor surface, but also inside the layer. Penetrating sealant is applied to the cement base.
Hydroprotection provides effective insulation, penetrating deep into the material by about 10 cm and thereby ensuring its stability. Manufacturing process:
- Clean the base of debris and dust. Along the perimeter of the shower, make a strobes measuring 20 by 25 mm, which should pass along the joints of the base and walls.
- Clean the surface again and moisten well.
- It is necessary to prepare the mixture in accordance with the manufacturer's instructions, otherwise the active components will lose their property.
- Then lay it in the shtrob (approximate consumption of 1.5 kg per 1 p. M).
- When the material hardens, moisten the bottom of the walls and floor, and then apply the mixture with a brush.
- Wait for the first coat to dry, then apply another one, after wetting the surface with water.
- As dry, periodically moisten the base for 2-3 days.
- After 3 weeks, remove the remains of the cement mixture.
- At the end of all work, you can begin to finish. Typically, ceramic tiles are laid.
The installation of a shower cabin sometimes causes certain difficulties due to the small space of the room. Therefore, the option of making a shower without a pallet will be much more profitable than a standard installation. Having shown diligence and a bit of creativity, you can get an aesthetic and comfortable shower.