A home-made shower is a zone for carrying out water procedures, the structural elements of which are lined with ceramic tiles.
Finished products are not always suitable for installation in small bathrooms; they can be equipped with electronic devices (radio, backlight), which leads to a significant increase in the cost of cabins.
 The installation of a do-it-yourself bathing area has several advantages:
- ceramics has a long service life and is more durable than plastic;
- environmental friendliness and fire safety: the tile is made from components safe for human health, it is not subject to fire, does not emit toxic substances when heated;
- simplicity in leaving;
- the ability to perform various design decisions in the interior of the bathroom.
The disadvantages of a home-made shower room (in the form of an unpleasant odor in the room, accumulation of water in the pan) can occur if there is a violation of the installation technology of the siphon, gangway, tile laying.
What is needed from materials and tools
To make a shower cabin, you will need the following materials and tools:
- cement-sand mortar, construction mixer or drill with a special nozzle;
- bricks (if silicate blocks are used, treat them with a hydrophobic agent);
- waterproofing materials in roll, sheet (polymer film, ruberoid) and liquid form (bitumen, water-based mastic);
- drain system;
- self-leveling mixture;
- construction level, tape measure, pencil;
- spatula, trowel, brush;
- facing material, moisture-proof tile adhesive, dividing crosses, grout mixture;
- angle grinder for cutting tiles.
Important points on the floor and pallet
 In case of significant differences in the height of the base of the floor, pre-align with a thin layer of screed and apply a primer mixture.
The manufacture of a shower tray is performed by the methods:
- by pouring screed;
- brick tank;
- frame construction.
The bottom of the bowl must be raised to the installation height of the drain ladder.
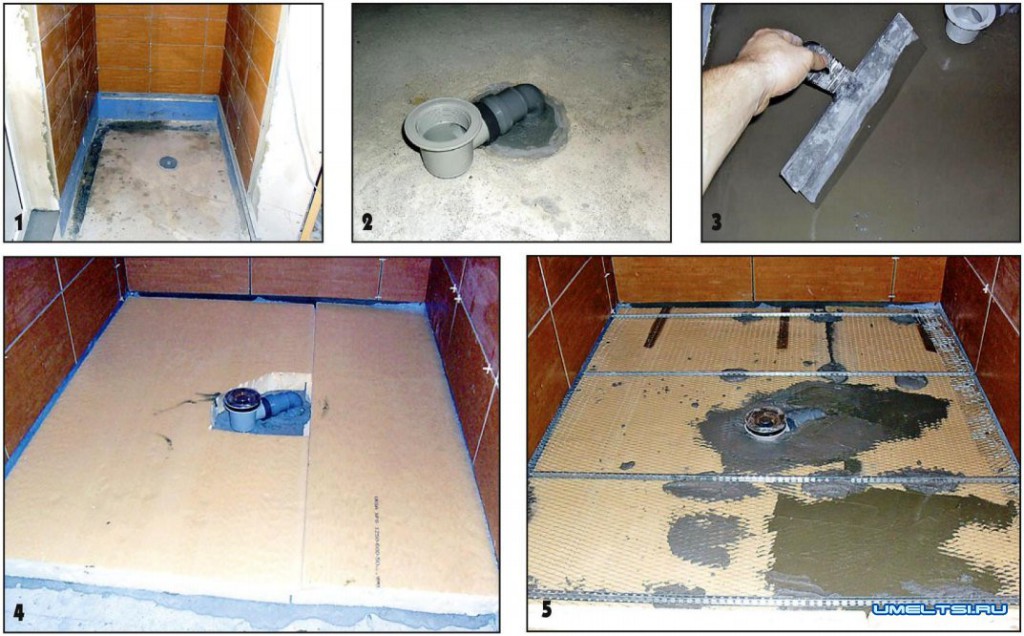
An important point in the arrangement of the zone for the adoption of water procedures is the double waterproofing of the bottom and adjacent walls to the height of future sides:
- Apply the first coat before pouring screeds or laying bricks. If using solid materials, cover the perimeter with hydrophobic tape and seal the joints with sealant;
- Make a second coat after applying and drying the self-leveling mixture. Waterproof with a thin layer of mastic or bitumen, as the next stage of work will be laying the tiles.
 The bottom should provide unimpeded flow of water into the drainage system, so do the final screed with a slope of 10-20 mm towards the drain.
- Monolithic pallet. The manufacture consists in the creation of formwork from wooden boards, oriented particle boards, followed by the installation of the ladder and pouring the rough screed. This method is suitable for creating pallets of non-standard shapes, but differs in complexity and time-consuming due to the long drying of the screed.
- Brick pallet. When installing the blocks, lay them on their side, with their displacement in each subsequent row. For the erection of masonry, use a highly elastic tile adhesive or cement-sand mortar. Fill the internal voids with the same mixture in case of using hollow blocks. In this case, you can raise the floor level by filling the screed on a rough foundation or laying two layers of bricks.
- Frame construction. The use of this type of shower is advisable in wooden or frame houses. Installation consists in the manufacture and fixing of a wooden or metal profile frame on the basis of the floor, the installation of the ladder and the laying of the flooring from moisture-resistant oriented particle boards. All wooden elements must be pre-treated with fungicidal agents, all seams in front of the lining are plastered with a moisture-proof mixture.
Installation of a factory product is carried out on a metal frame, a foundation of bricks, foam concrete blocks or a flat base. When installing flat products, the siphon is installed in the screed.
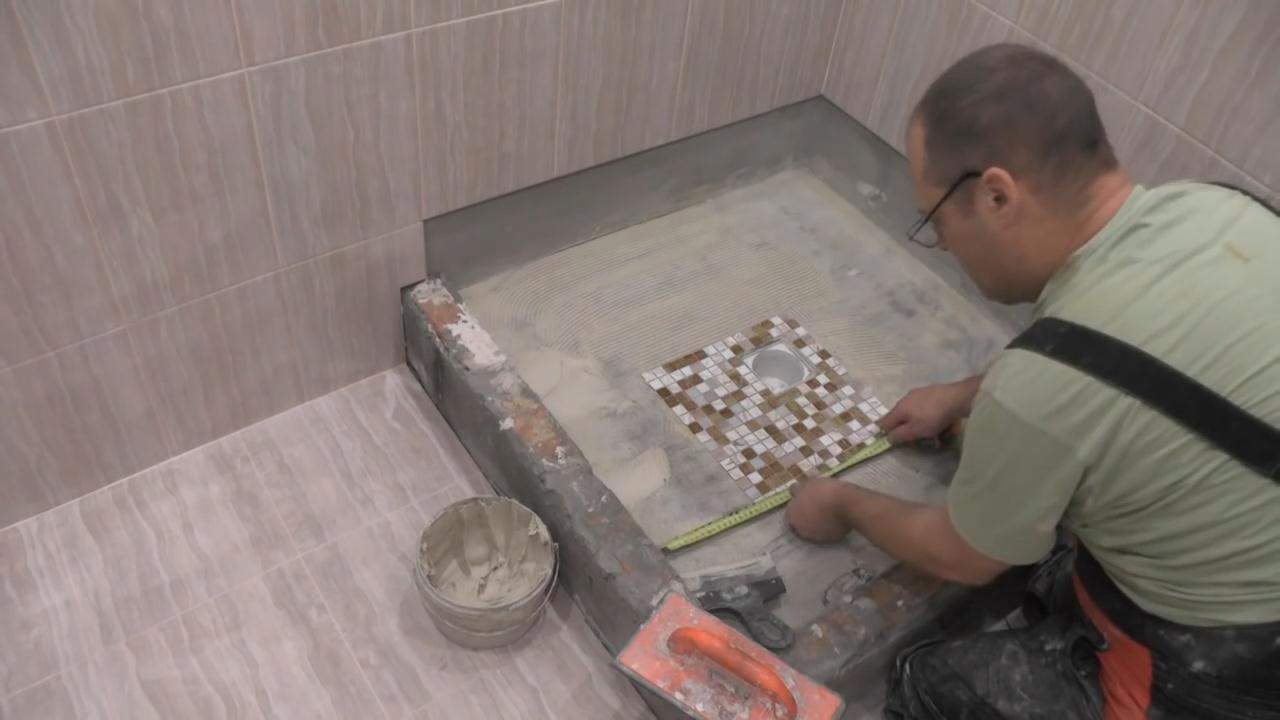
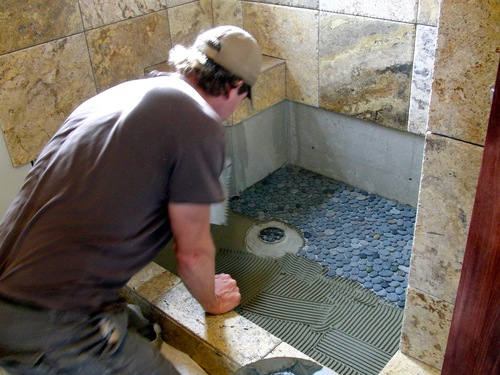
Laying tiles
 Prepare the glue for work immediately before the start of installation, since prolonged contact with air can adversely affect the adhesive properties of the mixture.
Features of laying tiles:
- apply the composition using a notched trowel - this will provide better adhesion to the glued surfaces;
- control the level of inclination of the surface to the drain, keep in mind that the glue can shrink;
- when facing the sides, lay the tiles first on the sides, then decorate the upper part;
- after 5-6 hours, remove the remnants of the solution on the decorative elements with a soft sponge;
- proceed to mashing the seams in a day. In the case of using a quick-drying mixture, application of the fugue is possible after 8 hours.
24 hours after the completion of work, you can proceed with the installation of the cabin doors and use the shower.
Installation methods and connection details
 To ensure the flow of water from the surface of a makeshift pallet, a metal, metal-plastic or plastic gangway is used.
The device consists of an oval, square or rectangular removable grate that performs a decorative function and prevents the passage of debris into the drain, a water inlet funnel with a flange and a siphon with a hydro or dry shutter.
Depending on the design features of the ladder there are:
- point (mounted in the center, in the corner of the pallet or near the wall);
- linear (a long gutter is located in the wall zone. This type has a high throughput and is suitable for installation in large shower rooms;
- wall-mounted - point or linear ladders additionally equipped with a sink receiver.
Mounting Features:
- when installing the drainage system in the center of the pallet, the slope of the facing coating to the grate should be on four sides;
- when mounting the ladder in the near-wall zone, make the bottom in the form of a surface inclined towards the drain;
- in the corner - the water drain is provided by two inclined planes;
- install the device grid instead of the facing element or at the junction of tiles.
When connecting to a sewer drain, it is imperative that the slope of the drain pipe in the drain side is at least 30 mm per meter length.
General advice and recommendations on design and operation
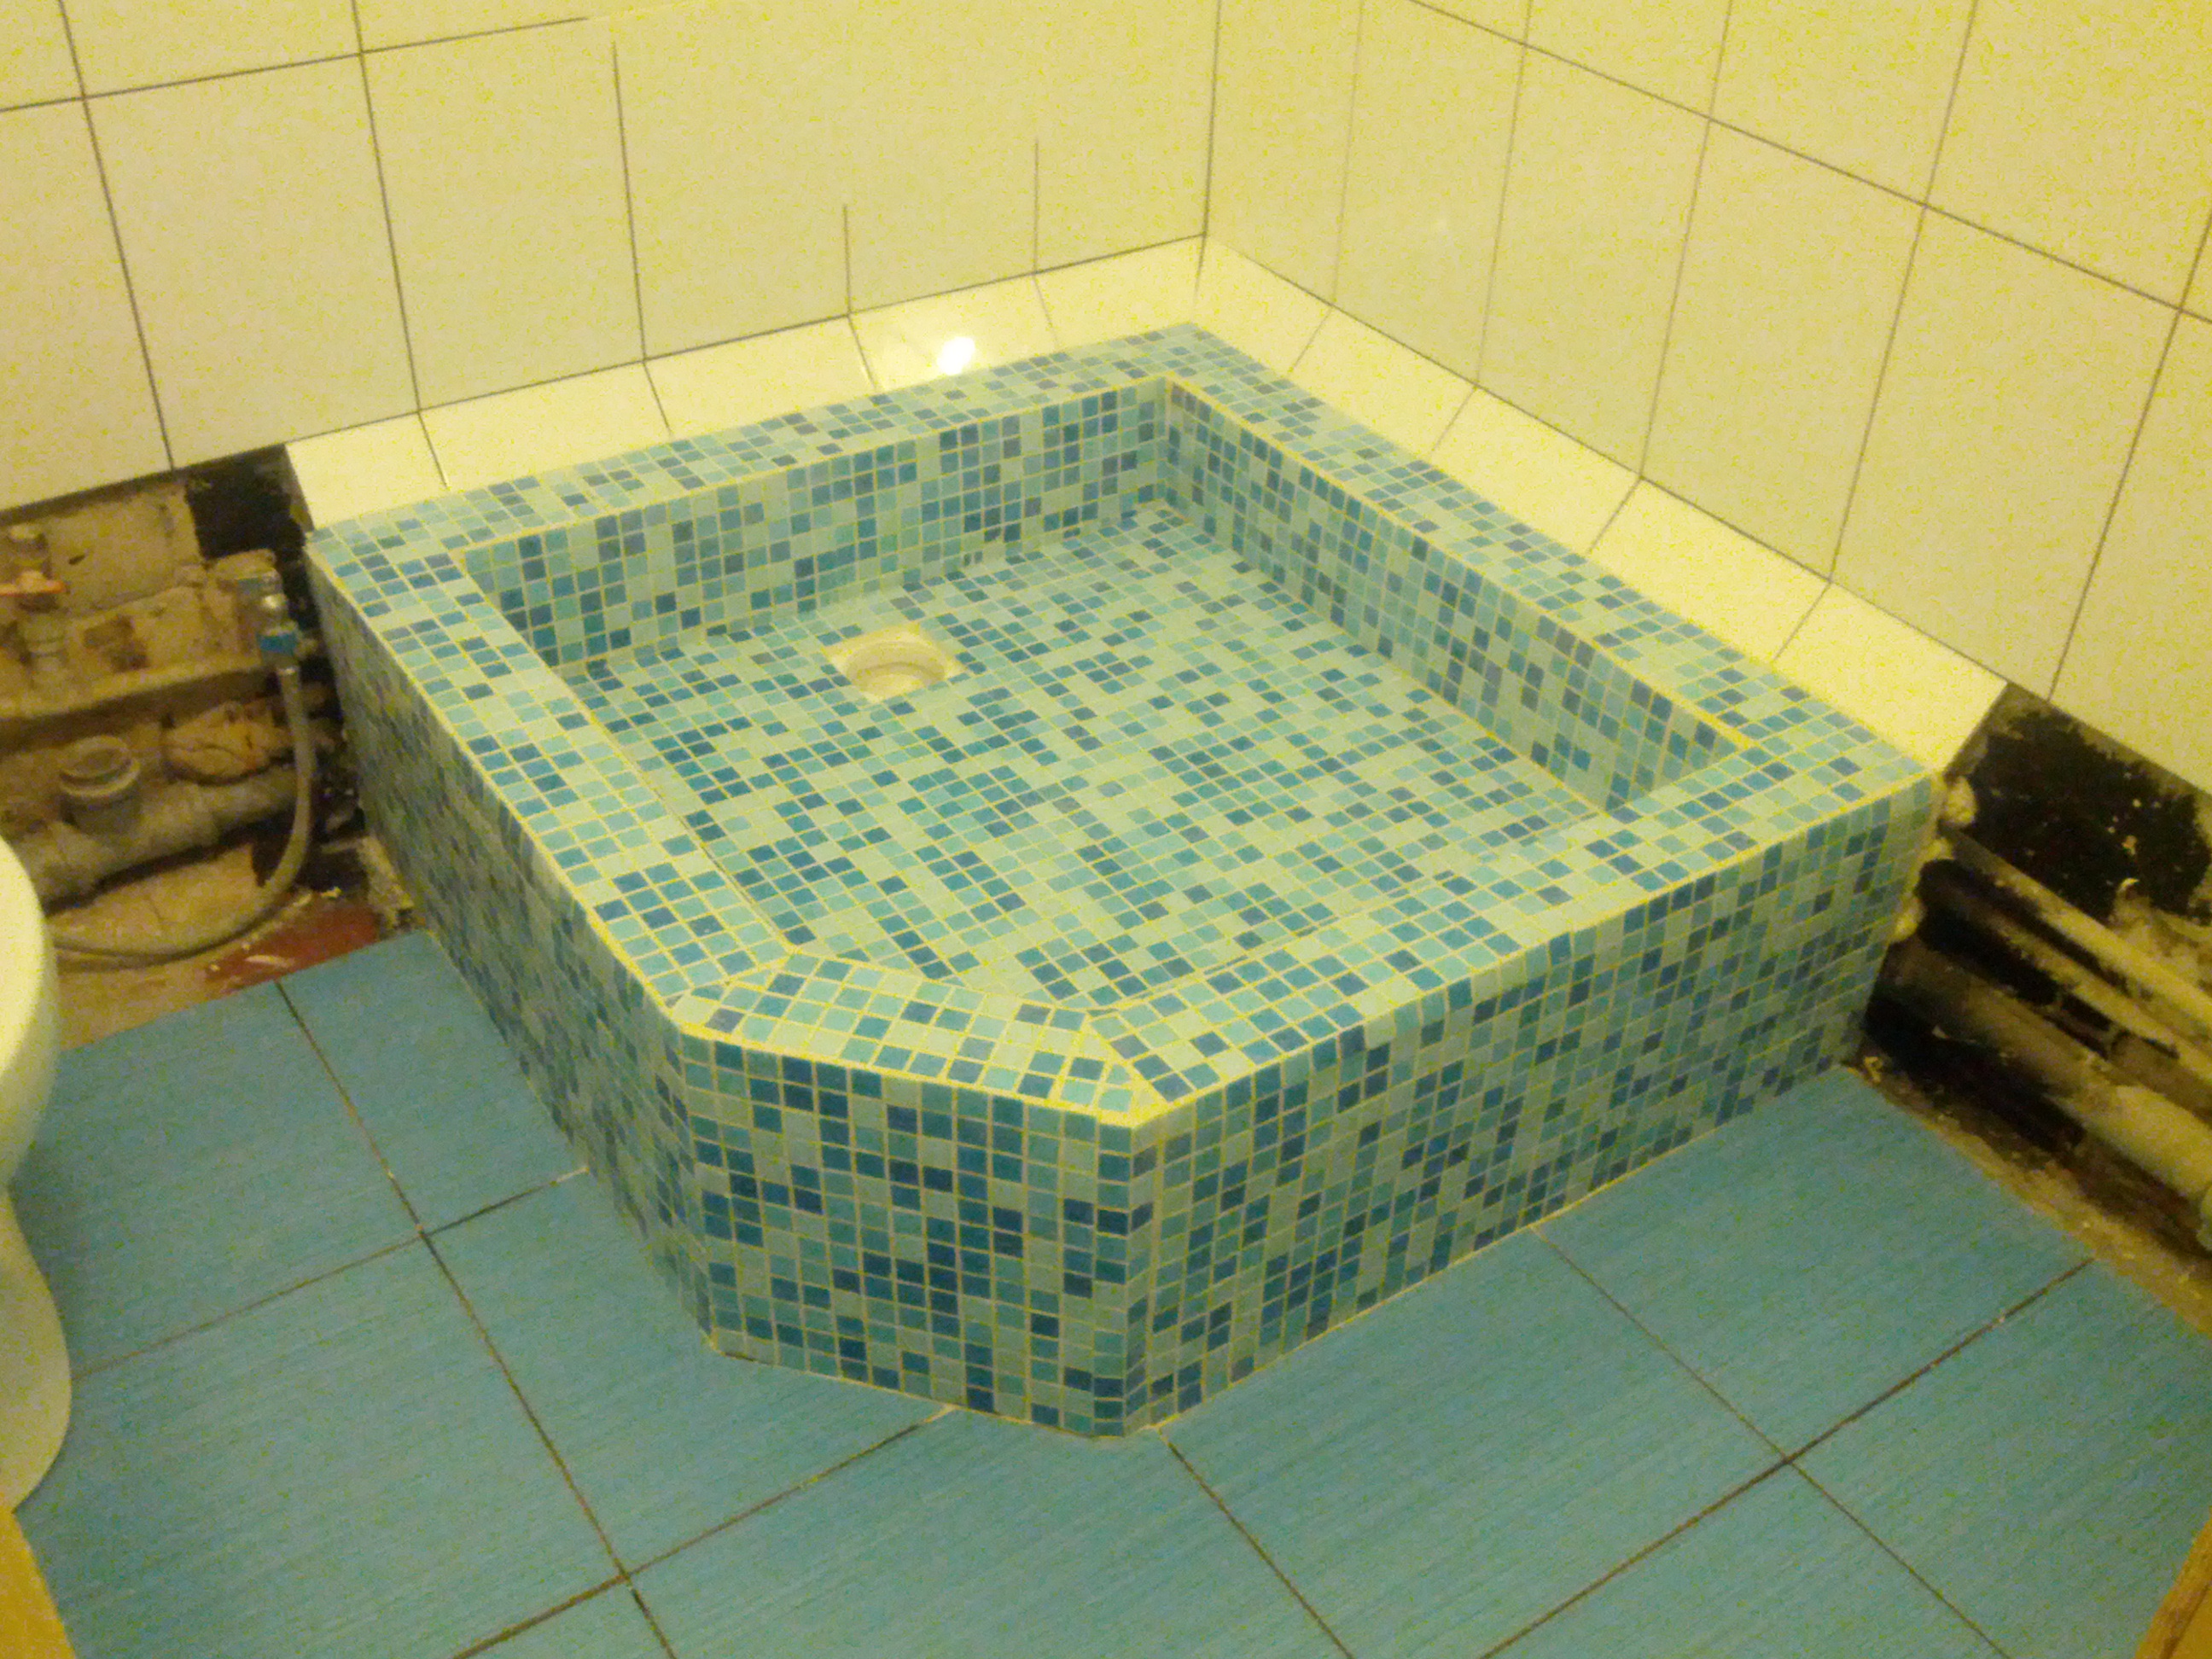
- small tiles are most suitable for lining a shower with a non-standard shape - separate mosaic chips or blocks on a plastic mesh;
- for finishing the floor of the pallet it is desirable to use products with a rough, embossed surface - such a coating will not slip during bathing;
- Before starting work, consider the possibility of equipping the cabin with shelves for placing hygiene products, steps or creating a place for sitting, decorated with tiles;
- in the process of caring for the facing coating, the use of acid-based detergents or with abrasive components is unacceptable.