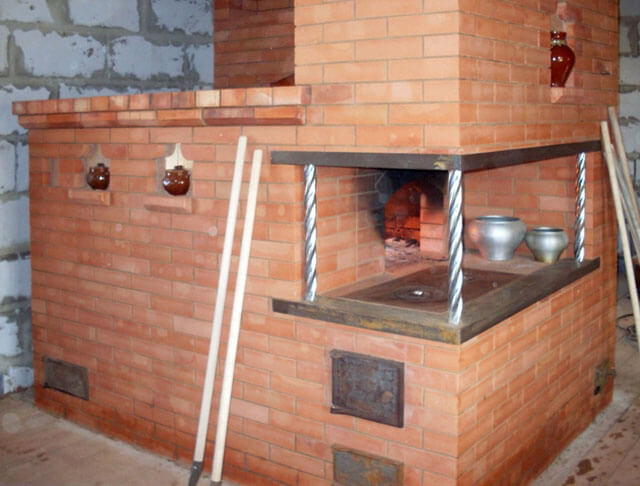
A Russian stove with a stove bench is an actual attribute of private houses and country cottages. This is not only a useful, functional building, but also a traditional element of home comfort and color, interior design. An open fire in the hearth, like in a fireplace, will not hurt in the event of an unexpected outage or supply of gas, and the lounger is used as an extra bed.
The design of the Russian stove with a stove bench
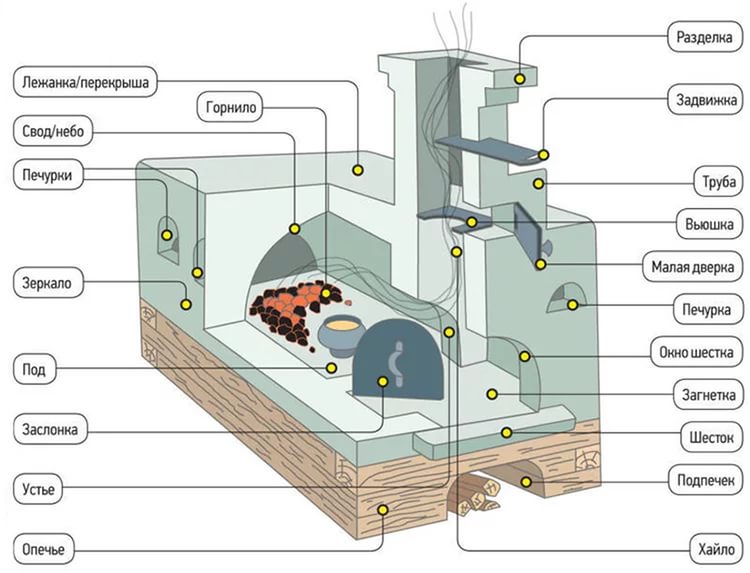
The rustic Russian stove with a stove bench in its case has a deep furnace (furnace chamber) with a blind hearth. In the old villages it was with a vaulted ceiling. After burning wood for a long time, it kept a high temperature in it, which made it possible to cook bread and pies, baked milk among coals and other food.
Modern models differ from the old furnace designs, but all the functionality and architecture are repeated. Similar structures are relevant for Russian, Ukrainian, Belarusian, Moldavian and Romanian rural houses. The diagram and description of the furnace design are represented by the following elements:
- guardianship is the foundation;
- under-fire - the space below the oven for drying firewood and keeping animals (for example, chickens);
- crucible (firebox) - furnace (cooking) chamber;
- cheek - front wall of the furnace;
- mouth (forehead) - the entrance to the crucible;
- vault - the upper arched part of the furnace;
- under - the bottom of the firebox (crucible) with a slight slope for the convenience of laying firewood and dishes with food;
- six - a platform in front of the mouth for utensils with food, instead of it there may be a cast-iron stove with an additional firebox - underflood;
- podshestok - cold stove for storing dishes;
- stoves (hot pots) - small niches in the case for increasing the heat-transfer surface and drying herbs, mushrooms, dishes, clothes, shoes, etc .;
- hailo - a tapering upward opening above the sixth to remove smoke.
An important part of the project is a chimney consisting of a hog (inclined or horizontal part, starting from 1 m in size, located in the attic in front of the chimney) and a chimney.
Advantages and disadvantages
The main fuel of the Russian stove is firewood, but it can also be heated with peat, dung, husk, straw, reeds and other organic materials. There are products in which it is permissible to use coke coal. Heat transfer from it is greater, but a problem is created in the form of dust.
The dimensions of the furnace can reach 150-200 cm by 150-200 cm and a height of 120-150 cm. Products have many advantages, for example:
- High level of efficiency. Bricks accumulate heat and retain it for a long time, therefore, the room is maintained at a normal temperature when the stove has already melted.
- Long operational period. A properly laid out structure is safe in terms of fires.
- Heated several rooms. If you correctly position the stove with a stove bench, with minimal fuel consumption, you can heat the living quarters associated with it.
- Functionality. The product serves as a source of heat, a place of rest, cooking food and bread, drying food and clothes, storing firewood and utensils.
Like other solid fuel structures, there are also disadvantages to the pros, in addition to:
- large dimensions and weight;
- a stand-alone foundation is required;
- high consumption of firewood;
- after summer inactivity, a lot of time is required for heating.
Since the design of the chimney does not provide for complicated strokes, it is very rare to clean the stove - about 1 time per decade.
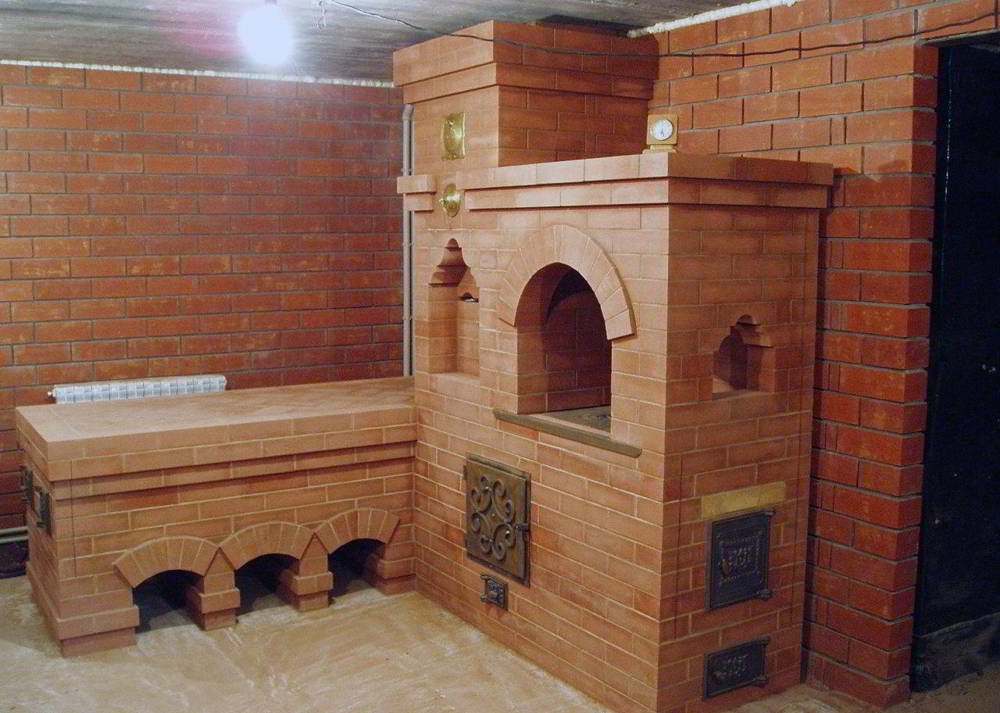
Do-it-yourself Russian stove with stove bench
It is quite difficult to lay down a real oven with your own hands, but according to drawings and photographs it is still possible.
Self-made foundation
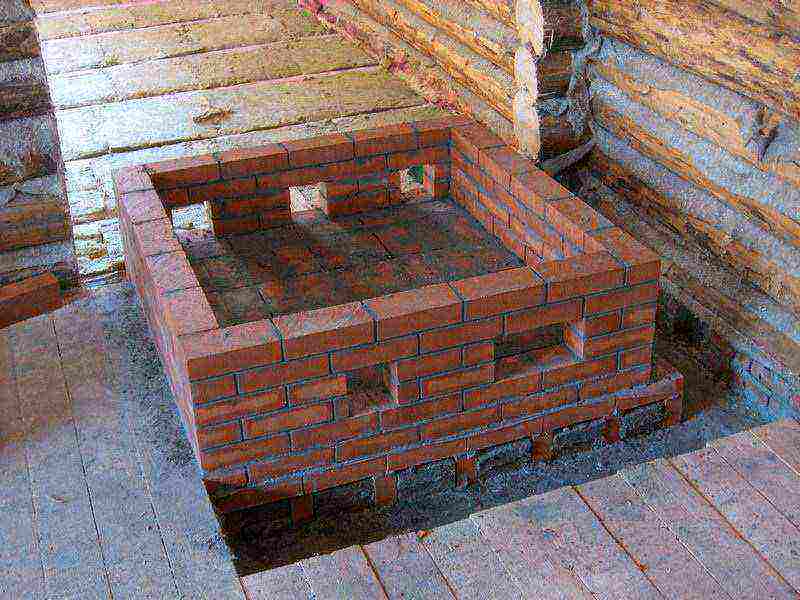
Since the unit is very heavy, a foundation for it needs to be thorough. It should go beyond the size of the bottom of the Russian stove with a stove bench not less than 10 cm.
- Dig a hole below the depth of freezing.
- Make a 20 cm sand and gravel pillow and tamp.
- Build the formwork and lower it into the pit, align the upper edge horizontally.
- Place the reinforcing bars (0.8-1.0 cm) in the form of a grid.
- Prepare a solution of crushed stone, sand and cement in a ratio of 4/3/1.
- Fill the base with overflow over the edge of the formwork.
- Level with the rule horizontally, often pierce with a reinforcing bar to let out air.
- Iron the concrete by sprinkling dry cement with a thin layer and slightly grinding it. It will take a month to fully harden the concrete.
Moisten the base of the oven with water for the first few days to dry evenly. It should not adjoin the foundation of the house - if the base of the house begins to move on heaving soils, the stove will “dance” with it, which will lead to its cracking. Otherwise, it will move independently along with its foundation, which will exclude destruction.
If the bases of the stove and the house are located close to each other (15 cm), provide a gap between them, cover with sand and compact.
Tools and materials
To work, prepare the following tools:
- a shovel;
- plumb line;
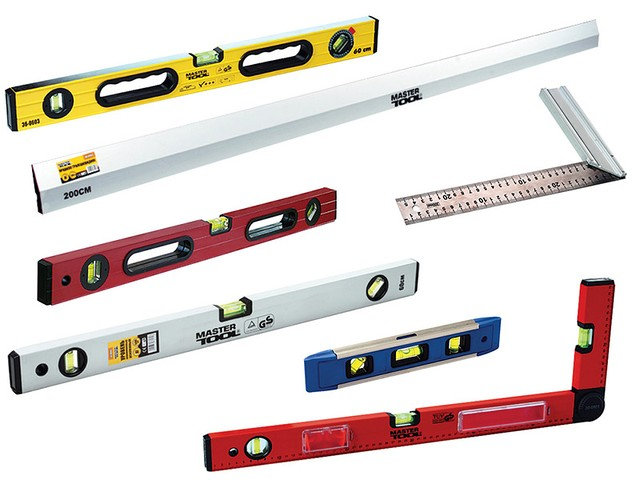
- levels - building and water, square, tape measure;
- rule
- Master OK;
- electric tile cutter for fitting bricks or a pickaxe;
- a mallet;
- jointing for facade seams
- container for mixing mortar for masonry.
On the finished base, put roofing material in 2 layers as a waterproofing.

From materials for the furnace, get:
- 1500 pcs. red brick;
- 75 buckets of sand;
- 65 buckets of clay;
- samovar (13 x 13 cm);
- shutter (43 x 34 cm);
- gate valve (30 x 15 cm).
For self-laying, use one of the simplest.
Ordering according to the scheme of the stove with a stove bench

A step-by-step instruction consists in the following sequence of rows:
- 1 - put a continuous layer of bricks on the mortar, which was used to fill the foundation.
- 2, 3, 4 - being guided by the scheme, lay out a well with dressing of sutures, not forgetting about the space for the underwear.
- 5,6 - at this level the arch begins, for which make a formwork and prepare supporting heels for bricks.
- 7, 8 - form a vault with dressing of sutures, close it on row 8.
- 9, 10 - put in 1 brick.
- 11 - final for the stove, fill the well so that a slight bias is obtained.
- 12 - form under the hearth brick, fill the seams with sand and sand the entire surface.
- 13-16 - crucible. Put the walls in ¾ bricks with ligation of the seams, without tying the material, lock the bricks for locks at an angle of 45 degrees.
- 17 - the back wall and the mouth are completed. Proceed with the construction of the frame for the arch of the cooking chamber - stitch the heels, put the brick on its side.
- 18 - line the wall, fill the voids between the cooking chamber and the side surfaces with beaten brick, sand, clay.
- 19 - overlap the hemisphere opening over the six.
- 20 - align the walls, reduce the hole above the pole. The weights should be without steps, so stitch corners. Block the channel for the samovar.
- 21 - repeat the 19th row.
- 22 - finish laying above the vault, make a chamber for collecting soot.
- 23-32 - lay out the pipe, not forgetting about the valve.
The pipe should end with 2 bricks (26 x26 cm).
Other oven options
In addition to the classic version, there are other modifications.
Russian stove with stove bench and stove
This model is the most popular because it allows you to heat the room and cook food in the usual way. According to the scheme of a Russian stove with a stove bench and a stove, the well is first laid, then the door and the blower are mounted (3, 4 rows), the stove is installed on the 9 row.Everything else is according to the pattern.
Mini Russian stove
Due to the fact that the crucible and the stove are adjacent, the dimensions of the furnace are significantly smaller - no more than 100 x 130 cm. The structure is the same height as the classical model, the end pipe ends with a pipe that goes into the ceiling.
Russian stove with fireplace and stove bench
This model is very complex, for its laying it will require not only knowledge, but also experience. The formation of the fireplace channels begins already with 2 rows. (they will need 14 doors and a blower door), and ends on the 38th row.