Before the flooring of the wooden coating and pouring with a concrete screed, the warm floor is pressed. Hydraulic testing allows you to determine the readiness of the system for work, to detect possible defects. Checking is done if there is a distribution manifold, ball valves, drain and fill valves.
The concept and purpose of crimping
Installation of underfloor heating implies the presence of a high-quality system - pipes without defects and leaks. Pressure testing is the creation of excess pressure, which allows you to detect broken joints and hidden pipe problems. At the end of the work, you can fix existing problems and fill the screed.
Pipeline pressure testing is necessary to verify:
- hidden factory pipe defects;
- strength and integrity of radiator housings, heat exchangers, reinforcing elements;
- quality of fasteners;
- endurance of valves, latches, manometers and cranes.
Through comprehensive measures, you can check the quality of the hot water supply, sewer, well.
Pressure testing is allowed to be performed in the unconnected boiler mode or as soon as one room is ready.
Crimping Technology
In order not to dismantle the warm water floor, it is possible to create conditions of increased pressure before starting. Testing is also performed after assembly to determine leaks, ruptures, and areas with corrosion. The procedure consists of crimping and flushing the line, checking and replacing components, restoring the insulation coating. Depending on the state of communications, you can choose the right technology.
Using water
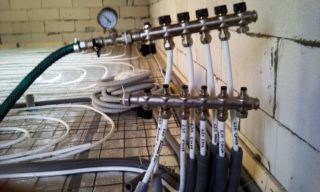
Before crimping the warm floor, install the collector box and connect the water circuits for heating. The system is filled with water from the feed tap - caps are screwed on the return manifold; in feed mode, the tap is brought to the open position. The fluid enters the line, displacing the air through the vent, as indicated by hissing.
To bleed the air mass opens the return valve of one or more circuits. The actions must be repeated until air is pumped out of the pipes. At the end of the bleed, the collector input valve is closed.
The hydraulic method is also divided into several types.
Verification check produced with a gradual increase in operating temperature. Initially, +20 degrees water is supplied to the circuit, after a few hours the temperature indicator rises by 5 degrees. After that, joints, external sections of the pipeline, and attachment points are checked.
In the presence of leaks, water is drained from the system and the malfunctions are eliminated. After re-supplying the coolant and reaching the desired temperature, the system does not operate for 2 days. Failures are determined visually, lower the temperature to a cool state, then fill in the screed.
Overpressure created by filling the line with cold water. Pressure parameters should exceed the norm by 1.5-2 times. The valves are closed, the circuit does not operate for 24 hours.
During this time, water flows from pipe breaks or joints. Damaged areas are determined visually. Repair is started after removal of the coolant. At the end of the work, a second control is performed and the system is filled.
The optimal pressure indicator is from 2.3 to 2.8 atm.
Air pressure testing
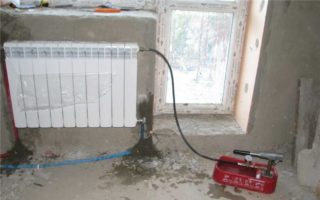
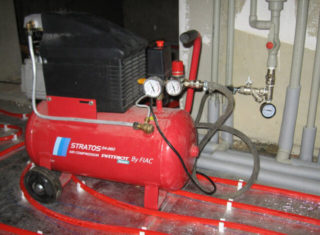
The procedure for crimping the underfloor heating system with air is performed when it is not possible to test them with water. To create excess pressure, a floor compressor, a car pump or a sprayer with a pressure gauge are used. The technology of crimping with air is implemented as follows:
- Checking the status of the taps. They close tightly.
- Removing the automatic air vent, installing a temporary plug in its place.
- Connecting a pressure boosting device. A hose is attached through the fitting, and then a tap.
- The creation of high blood pressure. They work only with pipes, they do not test the area from the collector to the boiler, so as not to damage the heating devices.
- Overlap of the valve after the appearance of the desired pressure. The trunk remains in the received condition for 24 hours. Pressure indicator is constantly monitored.
- Check and clarify damage. Leaky joints are treated with soapy water. Soap bubbles indicate the need for repair.
- Upon successful completion of the crimping, the air remains in the communications until the screed is filled.
If the system operates under pressure from 1.5 to 2 atm., It is necessary to test at a pressure of from 4 to 5 atm.
The nuances of choosing technology
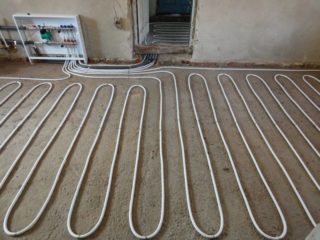
To test the warm floors correctly, you should consider the features of the pipeline. In the presence of metal-plastic reinforcement, the test is performed with cold water at a pressure of up to 6 bar and leave them for a day. In the absence of pressure changes, a screed is produced.
The polyethylene pipe is tested with a pressure 2 times greater than the working one, but not less than 6 bar. 30 minutes after the decrease in the indicator, the working value is restored.
Before starting the filling of the coolant, the check is done twice. At its end, the pressure indicator is brought to its initial state, the pipes can withstand at least 48 hours. A value of less than 1.5 bar indicates the success of the test, the health of the heating.
After water crimping, repeated work is necessary. Hot coolant is pumped into the communication, which is heated gradually. The circuit thus functions for several days. With the formation of leaks, the joints are tightened. If the system is operational, the water in the pipes is cooled and pumped again without decreasing the pressure indicator.
Air pressure testing is the best option for the cold season, because With the onset of cooling, water may freeze and break pipes.
Water crimping process
The use of the hydraulic method involves pressurizing up to 6 bar, but in fact, the indicator in the system is 3 bar. To obtain the optimal level, several devices are used.
Crimper - professional equipment
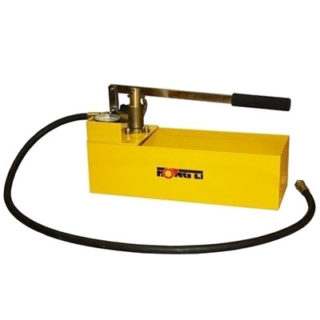
Manufacturers produce manual and electric models, the main difference between which is the cost. It is advisable for a home master to use a manual crimping tool:
- The device hose is connected to the system, water is poured into a special container.
- Pumping is performed in manual mode with periodic opening and closing of the valve.
When working with an electric pressure tester, you will need to connect it to the water supply system or water tank. Further actions are carried out according to the manufacturer's instructions.
Garden sprayer
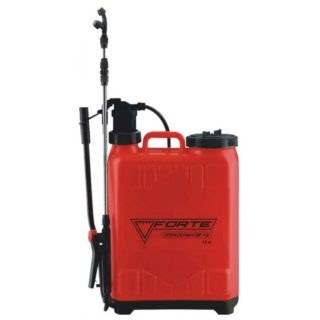
The device is selected according to the operating pressure parameters indicated on the housing or in the passport. In the process of applying the sprayer you need:
- Pour water into the tank.
- Connect the device hose to the supply valve.
- To create a pressure of 4 to 6 bar - one filled tank is enough for this.
- Pump manually until the desired pressure appears.
One filled tank is enough for one circuit.
Deep vibration pump
Devices create pressure up to 6 atm., Therefore, are excellent for crimping. The work is carried out with an assistant - one person opens the cranes, and the second monitors the pump. The hose of the vibrating device is connected to the manifold.
The pump is activated after opening the valve. The return hose is connected to the complete tank. After complete descent of air from the circuit, the return valve is shut off. Next, you need to monitor the gauge indicator until a pressure of up to 6 atm appears. After that, the feed valve is closed and the pump is turned on at the same time.
The maximum level of pressure drop during pressure testing for metal-plastic pipes is 0.2 atm., For polyethylene pipes - 0.5 atm.
Verification and test run
After assembling the system, you need to know its performance and eliminate installation flaws. The check is carried out after washing and filling with coolant. If it is successful, the system is operated in control mode.
Testing Methods
To detect defects in the installation of underfloor heating and check the communications as follows:
- Run at operating temperature. The indicator rises gradually to 20 degrees, and after 2-3 hours it rises another 5 degrees. If there is a leak, the system stops, breakdowns are eliminated. The coolant is brought to the design temperature, the line is maintained for 2-3 days.
- Overpressure testing. Water works at standard temperature, but the pressure rises by 1.5-2 times. If it drops no more than 1.5 bar, there is no leak.
- Dry crimping. Air is pumped into the line under pressure 2-3 times more than normal. Work is performed before pouring screeds with the design water temperature.
Air pressure testing is not suitable for underfloor heating with antifreeze due to its increased fluidity.
Test run sequence
Before hiding the contours under the screed, a test run of the system is performed:
- Prior to the distributor, the valves are closed and the circulation of the "boiler - collector" zone is organized. A heating boiler is connected, but not at maximum power, and a circulation pump. The fastener points are examined.
- Loop valves open. After heating the boiler, the temperature difference in the feed and return zones should be 5-10 degrees.
- The second circuit opens, as evidenced by the hiss.
- The temperature regime of warm floors is brought to a maximum of 60 degrees, if it is the only source of heat.
- In the presence of a combined heating system, the operating temperature is set on thermostats.
- The system is at a temperature maximum of 6 hours.
To pour the screed begin only after crimping and control start.
Features of crimping do-it-yourself
To test a water-heated floor made by yourself, you can hydraulically or pneumatically.
- Preparation according to the type of coating. For concrete screed crimping is performed before pouring. If there is a polystyrene or wooden surface - but the heating main is closed with plywood or gypsum board.
- Testing communications. All heating circuits are connected to the distribution manifold and checked individually. The areas are filled with water until the air is completely expelled. For adjustment, return and feed valves are used.
- Cold test of metal-plastic communications. It can be made cold coolant with a pressure of 6 bar and withstand the system for 24 hours. If the pressure has not increased, the line is working.
- Checking polyethylene pipes.The system is loaded with pressure, 2 times the standard, but not less than 6 bar. After 30 minutes, the indicator is restored. The operation is carried out three times, then the pressure is brought to the crimping mode and left for 24 hours. If the indicator has fallen by less than 1.5 bar, the system is operational.
Additional testing is performed by pressurizing the coolant under a temperature of 81-86 degrees for 30 minutes. At this time, the fittings are inspected, if they are weakened, they are tightened.
Before operating an underfloor heating water, it is necessary to refuel it with coolant. The line is brought to the operating temperature mode gradually, with preliminary crimping. Work allows you to identify breakdowns, leaks, installation flaws.
