During the installation of the components of the heating system in your home, you need to pay attention to such moments as mounting the heating batteries to the wall. Equally important is the reliability of the fastening of the heating pipes and the expansion tank.
In this article you can find useful recommendations for self-installation and fixture of heating appliances.
Why the mount must be secure
The severity and well-being of not only the inhabitants of a given dwelling, but often its neighbors will depend on how correctly the fastening technology for heating radiators is applied and the installation is made.
Causes of problems with insufficiently secure mounting:
- distortions of radiators when filling the system with water;
- accidental mechanical damage during operation;
- natural shrinkage of house structures (especially wooden);
- impact of natural factors (earthquakes, landslides).
As a result, if heating radiators, pipes, and other elements of the heating system are not properly secured, their deformation, depressurization of the joints can occur, and leaks will follow.
Let us consider in more detail how to make wall and floor fastening of heating radiators, as well as fastening heating pipes to the wall.
How to mount radiators
The most suitable mounting method for heating batteries (radiators) is chosen according to their size and weight, as well as the place where they are supposed to be installed. Most often, the radiator is attached to the wall under the window, but sometimes it becomes necessary to fix it to the floor. Depending on this, the necessary type of fastener is used - for wall or floor installation.
Immediately before installing the radiator, it is advisable to fully prepare it: if necessary, paint, install the Majewski tap, thermostat and plug.
Mounting the radiator to the wall
Fixing heating radiators to the wall directly below the window is considered more practical. This ensures the creation of a thermal curtain, which prevents the direct passage of cold air into the room.
To perform the installation of the battery you will need:
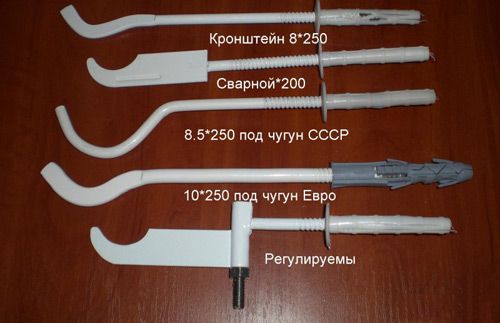
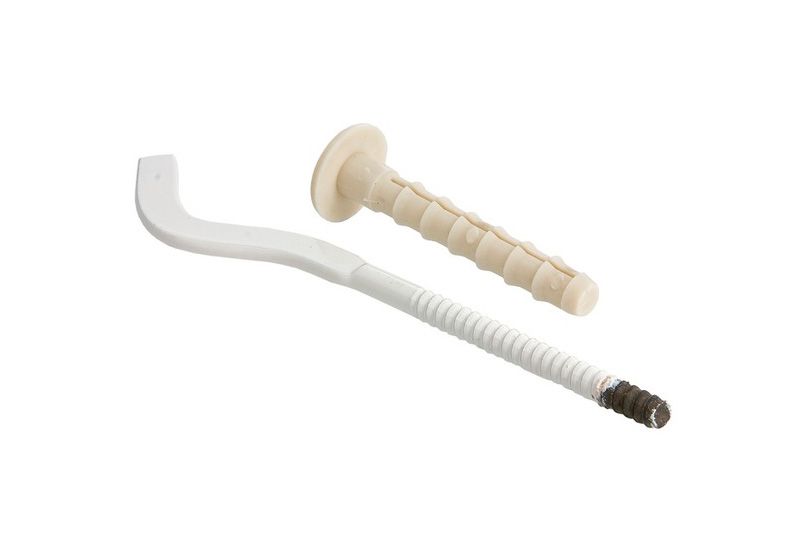
- several brackets (their number depends on the length of the battery), and the same number of dowels for them;
- a punch with a drill corresponding to the wall material;
- spirit level, tape measure, meter line.
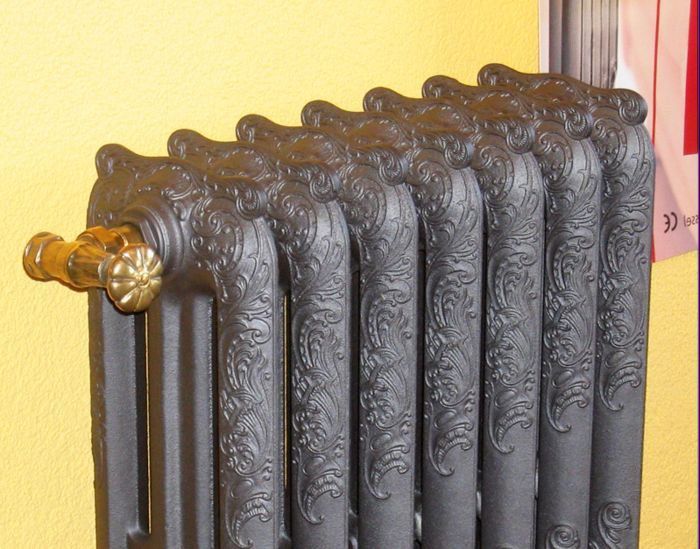
Brackets for heating radiators must correspond to the type of metal from which the heating equipment is made - cast iron, steel or aluminum.
Cast iron batteries are the heaviest among all types of radiators. Therefore, when installing them, fasteners for cast-iron heating radiators are used that are strong enough to withstand such a large weight. In addition, brackets for cast iron radiators allow you to adjust the distance to the wall.
Fasteners for bimetallic radiators should be no less durable than for cast iron. Although batteries of this type themselves are not too heavy, with a large number of sections they can create a serious load on the wall.
Mounting aluminum batteries is much easier because they are lighter.For their installation, brackets are used to mount aluminum heating radiators, which have a fixed length.
Recommended parameters for installing the radiator and its mounting:
- height above the floor - 100-120 mm;
- height under the edge of the window sill —80-100 mm;
- the distance from the wall is 20-50 mm.
In addition, if the pipe wiring diagram involves the flow of coolant from above, then a small slope of the radiator must be provided so that air bubbles do not accumulate in it.
The number of support points is determined depending on the type of battery and its size. For example, for a cast iron radiator, the number of sections of which does not exceed six, it is enough to install two fasteners for cast-iron heating radiators in the wall above and another bracket from below. For larger batteries, you will have to increase the number of brackets - per one for every three sections.
The number of brackets for mounting aluminum heating radiators should also correspond to the number of sections: 3 brackets, if the number of sections is less than eight and 4-5 brackets with a larger number of sections.
When attaching heating radiators to a wall, it is also necessary to take into account the properties of the material from which the walls are made.
Procedure for installing and fixing the radiator battery:
- The wall is pre-plastered and, if necessary, papered;
- Mark places on the wall for the brackets so that their hooks correspond to the gaps between the sections of the radiator;
- In the marked places, holes are drilled, dowels are inserted into them, and then the brackets are screwed;
- Check that all bracket hooks are in line;
- Hang the radiator on the brackets and lightly press on it to check whether it is properly seated and whether there is any play;
- Check the horizontal level, and in the event of a skew, raise one side of the radiator by laying gaskets of the appropriate thickness at the points of contact with the brackets;
- After final alignment of the radiator, pipes are connected to it and the connections are sealed.
Floor mount radiators
The fastening of the heating radiator to the floor can be due to the structural features of the room: too large window sizes make it necessary to put heating batteries on legs or on a special floor pedestal. In the floor-mounted version, the installation of radiators give preference to aluminum products, as the most light and aesthetically attractive.
The process of attaching heating radiators to the floor is not much different from the wall version. To do this, you must:
- purchase the appropriate brackets for attaching aluminum heating radiators to the floor surface;
- mark on the floor a place for each bracket;
- drill holes and mount mounts for the heating battery;
- install the radiator and connect pipes to it.
During the construction of a new house, it is advisable to install embedded elements for fastening radiator radiators during the process of screeding. This is especially true when bulk floors are installed in the premises.
How to fasten pipelines
The methods for attaching heating pipes to the wall may vary, if you take into account what material they are made of. For example, fastening a metal heating pipe requires less special fixing devices, since such a pipe itself has sufficient rigidity.
Compared to metal, plastic pipes are more flexible. This is especially evident under the influence of hot coolant, and in horizontal sections the plastic heating pipe may sag.Minor changes in the geometry of the pipelines do not greatly affect the stability of the coolant circulation, however, they can cause air congestion in the system.
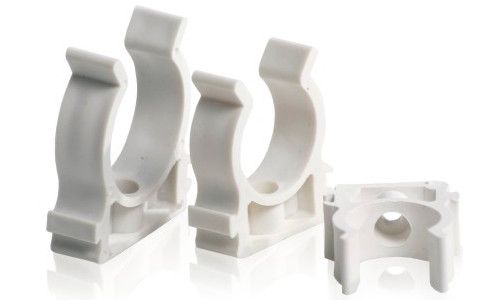
To fix plastic heating pipes to the wall, special clamps (clips) are used. Such a clamp is first fixed to the wall, and then a pipe is inserted into it. Supports for fasteners should be evenly located at all pipe joints and on long bends, while the length of the gaps between the supports should not exceed 10 pipe diameters. If it is necessary to indent from the wall according to the installation scheme, then the same fastenings are used as for heating radiators - brackets of appropriate length.
When the fasteners are mounted on the wall, you can proceed to fasten the pipes on their base. Depending on the design of the clamps, the pipe in them is either latched or screwed with studs. It is useful if the clamps are equipped with rubber gaskets to compensate for thermal expansion and reduce vibration.
Sometimes the design project involves laying heating pipes in the gates - hollowed indentations in the wall. With a hidden installation, you need to wrap the pipe with a soft insulating material, or put on a plastic corrugation on it. This is necessary in order to reduce heat loss, as well as to leave free space for thermal expansion. Subsequently, the wall can be plastered, covering the gaps with insulating materials.
In places where the heating pipe passes through walls and ceilings, it is necessary to install passage elements in them in the form of a sleeve with a diameter several millimeters larger than the pipe section.
How to mount the expansion tank
The installation location and method of mounting the expansion tank depends on the type of heating system that can be open or closed. Although nowadays, open-type heating systems have almost completely ceased to be used, they still remain in old buildings in some places.
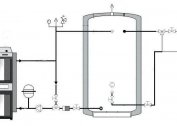
In outdated systems, an open expansion heating tank was mounted in the attic. From the highest point of the pipeline system, a pipe was taken out through the ceiling and connected to the tank bottom. The expansion tank was mounted vertically and attached to the ceiling in any way possible.
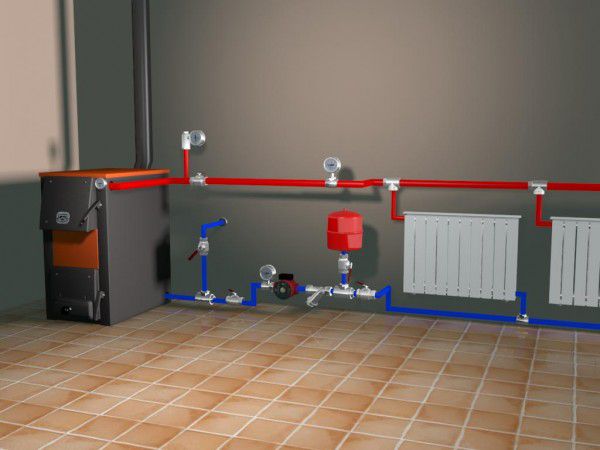
In a closed heating system, the fastening of the membrane expansion tank is done differently. Here the main rule is that during installation it is necessary to orient the tank so that the coolant enters it from above. But in practice, depending on the volume of the tank and its design features, the mounting methods can be different: vertically or horizontally, directly on the heating pipe, on the wall or on the floor.
It is most advisable to install an expansion tank in front of the circulation pump, in a straight section of the pipeline from the return of the coolant to the boiler.
Features of fixing heating in a wooden house
If the house is built of wood, it must be borne in mind that all of its structures in the first years of operation will inevitably shrink. Therefore, the fastening of heating pipes to a wooden wall should be more free than in other houses. It is unacceptable that dynamic stresses arise on any of the pipeline sections. When piping, leave 15–20 mm gaps in the wooden walls and ceilings to compensate for shrinkage. To fix the pipes on the wall, clamps are installed. Similarly, they also attach the expansion tanks of heating.
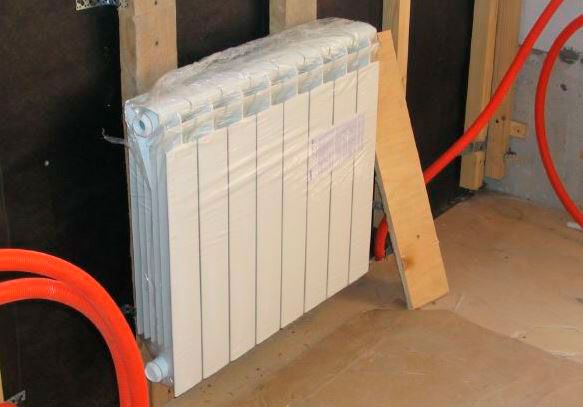
In a wooden house, the aluminum heaters are mounted to the wall using technology that does not differ too much from the usual.The aluminum radiator is light enough, and a wooden wall can easily support its weight. Unlike aluminum, a cast-iron radiator needs to be mounted on a wooden wall more carefully, and for reliability it is worth increasing the number of mounting brackets.
When a massive cast-iron radiator is attached to a wooden wall, it should be installed on floor stands, which will take on the bulk of the device.
If it is planned to attach heating radiators to a wooden floor according to the construction project, the process of their installation will be even simpler than in the case of a concrete floor. But when there is a suspicion that a heavy radiator installed on the floor will put an excessively large load on the logs, you need to try to partially redistribute its weight on the wall brackets.
Video instruction will help to understand how to fix heating radiators:
In order to ensure that the heating system does not cause problems during its operation, you should pay due attention to the issue of fastening pipes and radiators. Then it will be possible to gain full confidence that the heating equipment will not let you down at a crucial moment.