Despite the autonomous heat supply, stove heating can help out the owners during the off-season. Using a stone stove, you can maintain a comfortable temperature, normalize the indoor climate or cook food. Self-laying of the furnace is carried out according to several schemes, requires strict adherence to the sequence of work.
The main varieties of stoves
The brick type of stove is intended for heating a house, cooking dishes or for everything at once. To select the appropriate option, you need to familiarize yourself with each variety.
Heating device
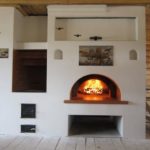
You can add a heating stove with a fireplace or a single firebox in order to heat the rooms. Structures are built into interior partitions or perform the function of zoning if installed in the center of the room.
The heating type of stoves is used as the main or additional source of heat. Buildings are most often operated in the off-season or in the cold season. They are put in the presence of a kitchen with a modern electric or gas stove, as well as in summer cottages.
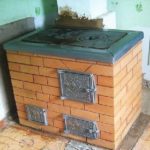
Cooking modifications
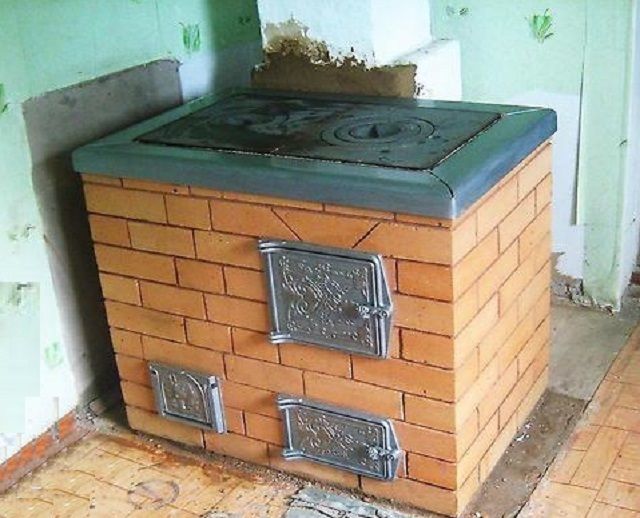
With the knowledge and skills, it’s easy to fold the cooking stove, which is designed for quick cooking or baking. The hob and the back of cast iron quickly heats up and accumulates heat for a long time, which allows the design to be used for heating.
A feature of the stove is its compact size, which is suitable for giving, a small kitchen in a private house. The device is also operated at the moment of turning off the electricity or gas supply.
Heating and cooking facilities
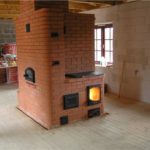
The advantage of this option is high-quality heating of several rooms, the possibility of cooking, boiling water. Modifications with the oven are also used for baking, drying fruits, vegetables and herbs.
-
- Cooking
-
- Heating and cooking
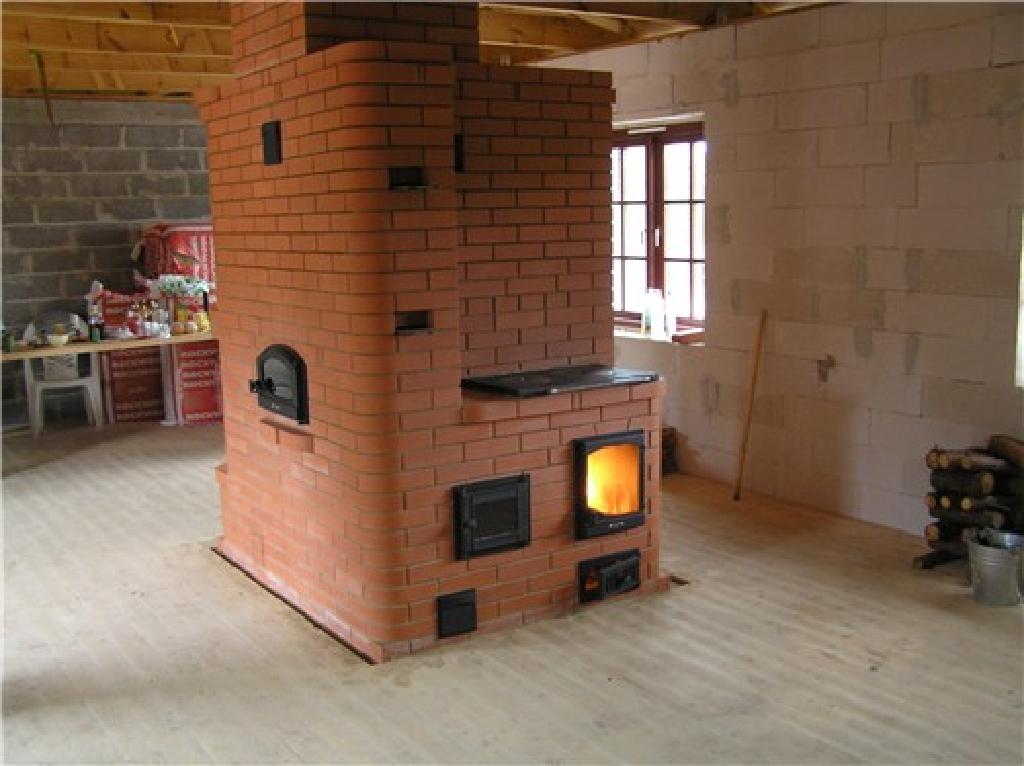
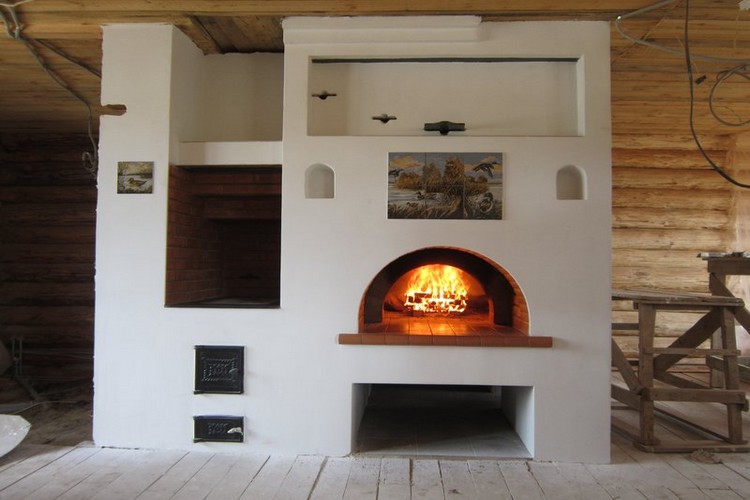
Laying the heating and cooking stove in the case of do-it-yourself work involves its installation in the wall. The design can be used as an independent supporting element - the tiles and the firebox are directed to the kitchen, and the back to the living area. For an aesthetic look and decor of the room, the heating-cooking stove is equipped with a fireplace.
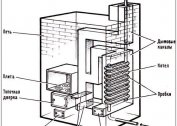
Brick stove design
According to the design, there are several types of structures:
- Dutch. Channel Dutch is compact and simple self-construction. Due to its low efficiency (40%), it is installed in a garage, in a summer cottage, in a workshop and is operated in the mode of smoldering or slow burning.
- Swedish Chamber-and-channel Swede has an efficiency of about 60%, is compact and practical. The product requires careful selection of building materials.
- Russians. With an efficiency of 75% are the most difficult to work. These structures must be folded up only by specialists.
-

- Dutch woman

-
- Russian
-

- Swede
A Russian stove is often equipped with a bathhouse, a residential building or a two-story cottage.
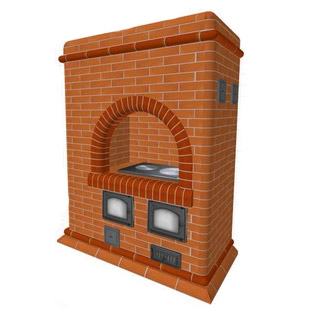
Universal cooking units are the most popular option in homes and cottages. They consist of an array with a firebox and duct, chimney and foundation.
Foundation
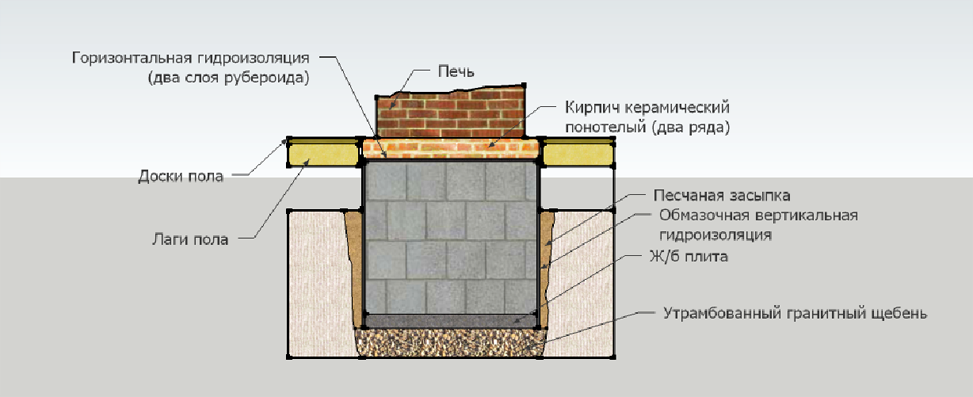
Folding the base for the furnace must be separate from the general house foundation:
- due to the large weight of the structure, the soil sags more than under the walls of the building;
- the furnace unit has unstable linear dimensions due to heating;
- there must be an indent between the heating structure and the bearing walls that protects against fire;
- a separate foundation is easier to rebuild, modify and repair.
For the manufacture of the foundation, a boot or brick is used, the binder is lime or cement.
It is impossible to fasten parts of the foundation with clay - it crumbles in a humid environment and cracks when heated.
Stove array
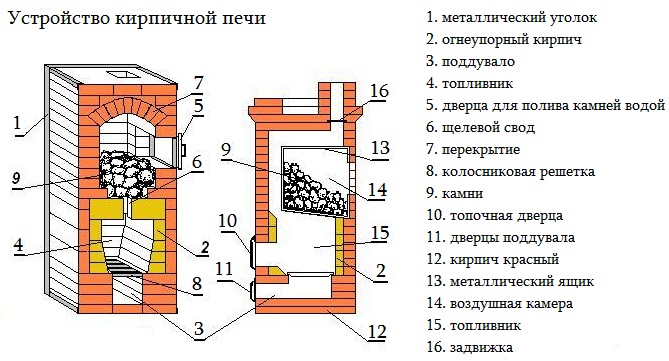 The kiln array consists of a firebox, a housing and chimney rotors. The optimal material for it is red solid brick. Refractory brick is suitable for lining. The case with the lining is not tied up due to the difference in the thermal expansion of the elements. When constructing the furnace array, it is necessary:
- to tie the stitches;
- soak red bricks for 10-15 minutes in water so that they do not take water from the solution;
- control the horizontal and diagonal of the row;
- fill the joints with surplus without excess;
- Wipe the inside of the chimney with a sponge brush.
The construction of the furnace array is carried out with a preliminary set dry. Trying allows you to mark the structure relative to other elements of the room.
Trumpet
Chimneys are vertical, characterized by clear parameters of height and section. Depending on the location of the furnace chimney, there are:
- mounted - continues the design in the upright position, is located above the smoke flues and the casing;
- indigenous - for the pipe you need a separate foundation, bring it to the stove using the sleeve at the corners;
- wall - the channel is located in the main wall of the house.
In the case of a protrusion of the pipe above the roof, an otter is created - an expansion structure, preventing the access of condensate. In the attic area the chimney must be plastered and covered with whitewash - it is easier to find areas with leaks. A metal deflector (cap with legs) blocks the access of rain and snow to the channel, acts as a spark trap.
A country house is best equipped with a small stove with a chimney.
The specifics of using the solution
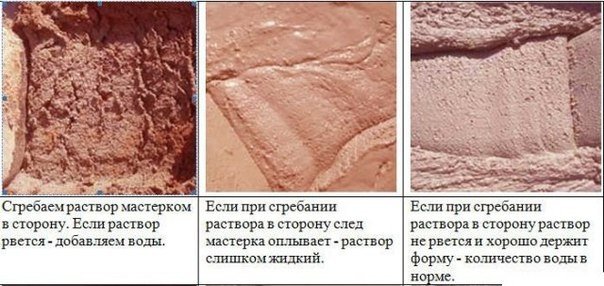
Before you put the stove on your own, you need to determine the type of solution. In the construction of heating products are used:
- Lime or cement paste - the viscosity of the composition depends on the specifics of the soil. For soil with a low level of moisture, lime or lime-cement mixture is suitable. On wet soils, cement is used.
- Clay sand mortar - for housing and chimney sweeps.
- Fireclay sand mixed with refractory clay - for lining. The seam thickness should be minimal.
- Ready mixes - stones are laid on chamotte or clay-sand compositions.
- Lime or cement-lime mortar - for a bunch of components of the stove in the attic.
- Cement dough - for the outer surface of the pipe.
When making chamotte mixture yourself, take into account the fat content of clay and select proportions from 1: 0 to 1: 3.
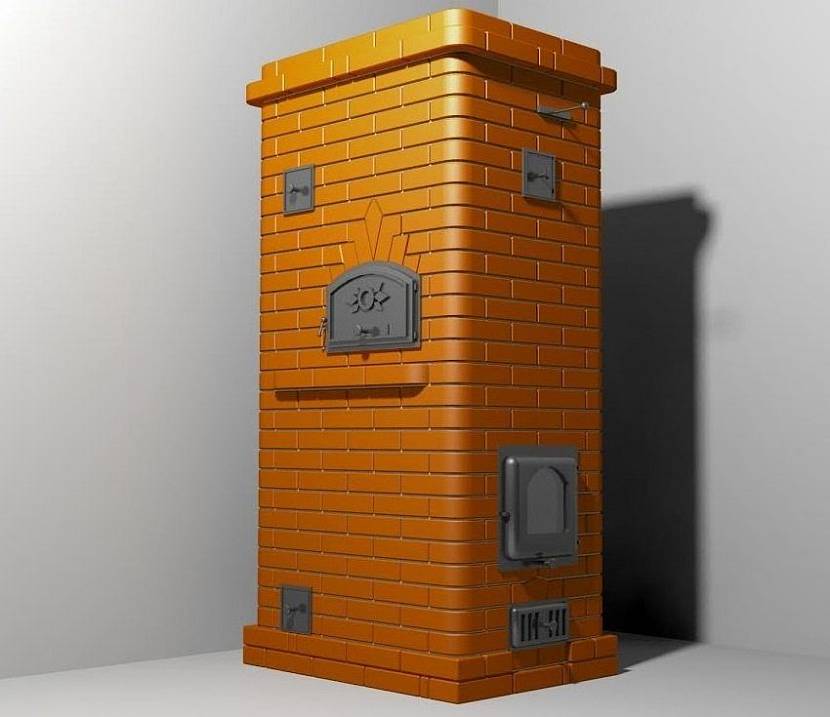
Features of self-finishing
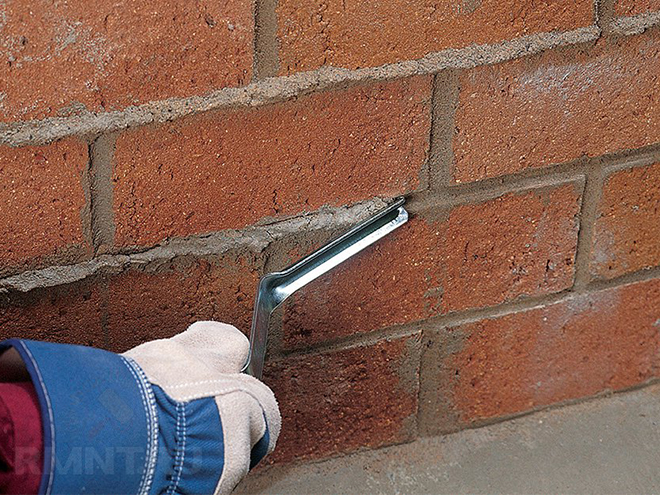
It is not difficult for a novice to fold an oven for a beginner, provided that the algorithm of work is observed. The main issues arise when performing the decoration. The easiest option is to plaster and whitewash the building well. If the brick is good, enough grouting and jointing.
Sloppy stove walls can be masked. Before finishing, the surface must be swabbed, rubbed with a brick and wait for drying. After plastering with a clay-sand mixture with asbestos chips, they proceed to the finish. Heating and heating facilities are tiled.
Possible difficulties
It is not easy to start laying an oven without experience and practice. In some cases, it is necessary to change the location of the floor beams, disassemble the structure, destroy the foundation. To avoid errors, you must:
- Make a test laying on a brick without mortar. It’s easier to understand the arrangement of elements.
- Use wooden slats 5-7 mm thick to even out the thickness of the inter-brick seam.
- Carry out a thickness calibration if laying is underway.
- Fit the bricks to size, number them with a marker and put them in a separate pile.
- Apply the solution with a layer of 10 to 12 mm.
- Tap the brick laid on top with a rubber mallet until it stops against the rail.
- Remove excess mixture.
- Remove the strips after installing 3-4 rows, fill the seams with mortar and immediately embroider.
The horizontal and vertical evenness of the structure is checked by the level.
Laying a simple furnace option
Self-masonry of the simplest type of stove provides for the manufacture of a base and an array.
Foundation building
The practical concrete monolith with reinforcement by a corner made of metal along the ribs is simple in construction. In finished form, the foundation should protrude 5-7 cm from the furnace. The depth is not more than 75 cm, for a one-story house it is allowed 50 cm, for a two-story house - 1 m.
The reinforced structure gains strength 1-3 weeks - only after that a moisture-proof coating is organized.
Ordinary masonry method
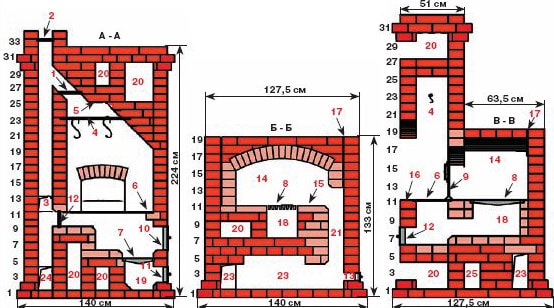
To fold the stove with your own hands, a step-by-step instruction for beginners should not be complicated.
Ordinal mounting method:
- Marking of the future product on a waterproofing coating.
- Continuous layout of the first row with an evenness test. The formation of the blower chamber.
- Installation of the blower door. A steel wire is threaded into the ears and launched into the seams. To eliminate displacement, the sash is temporarily held by bricks.
- Installation of calibration rails and laying of the second or third row.
- Forming channels to remove soot in the fourth row. Each hole will need a separate sash.
- In the fifth row, the simplest scheme involves the installation of a grate. It is fixed in special recesses of the lower row. The door through which the structure will be heated is temporarily fixed with bricks or a wooden plank.
- From the sixth row, they switch to refractory bricks.
- From the seventh row they make gas outlets and lay out vertical walls with fireclay bricks. The material is placed on the edge.
- Knocking out ¼ brick under the furnace door in the eighth row.
- Laying the wire under the cast-iron part in the 9th row.
- In the 11th row, a furnace plate with a sealant made of basalt cardboard or asbestos cord is placed in the chamber opening. The end part of the cooking place is made out of a metal corner.
- From 12 to 16 rows make the camera.
- Making a support for bricks of the 17th row by laying steel strips on the side walls.
- From the 18th to the 19th row, continuous masonry is carried out, two heat exchangers are installed vertically.
- Arranging a horizontal channel to remove soot and forming an oven in the 20th row.
- Overlapping the door in the 22nd row.
- Creating a horizontal overlap in the 23rd row. Installation of steel strips over the oven.
- Installation of the treatment leaf and overlapping of the niche in the 25-28 row.
- Fastening the valves of the vertical duct (first the frames, then the partitions) in the 30th row.
- The calculation of the transitional section of the chimney in 31-35 rows.
- The construction of the cannon from the 36th to the 38th row.
The chimney riser is laid out from 1st to 26th row, the central damper is placed in the 27th row, and in the 31st cross-section of the masonry should be less to bring the pipe through the roof.
In order to lay the stove in the best quality in the country or in a private house, you need to determine the type of design. Work begins after arranging an individual foundation and selecting a solution for each element of the structure.
https: //