A high-quality heating system is a prerequisite for ensuring a comfortable life for people in an apartment building. In order for energy efficiency to be at a high level, it is necessary to comply with the requirements for the installation and placement of radiators. There are established standards for the location of heating devices, following which the house can provide the optimum temperature and reduce heating costs. Before starting the installation, you need to know how much the window sill should protrude above the battery, at what distance from the battery to the wall and floor should the heating circuit be installed and which circuit is better to choose.
Recommendations for the placement of radiators
Specialists pay great attention to the correct location of heating devices. In this case, the room will be heated with the greatest efficiency.
Key recommendations for choosing where to install batteries:
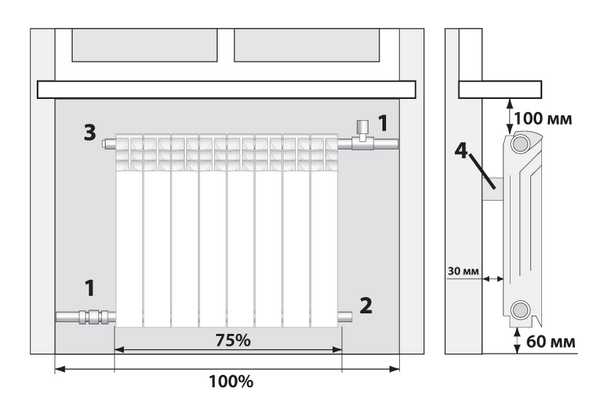
- For high-quality air circulation around the battery, it is necessary to observe a distance of 3-4 cm between the insulating layer and the heating device. By reducing this gap, air exchange is hindered and the efficiency of the system decreases.
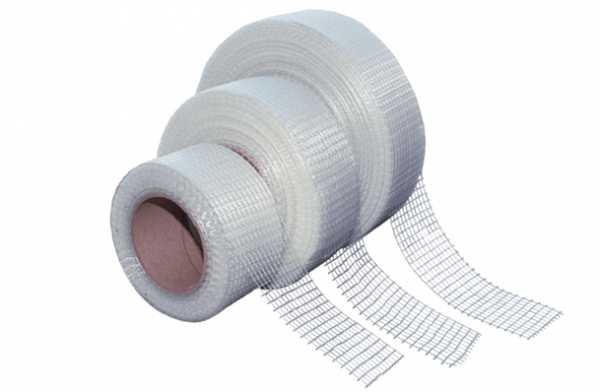
- If it is impossible to create insulation, the inner surface of the wall is covered with a layer of foil. It serves as a heat reflector that directs flows into the room.
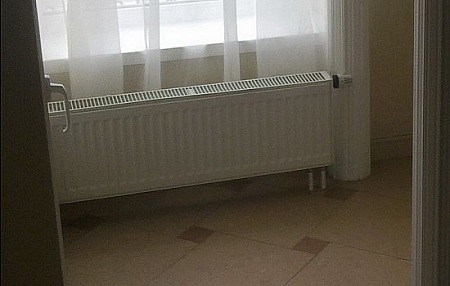
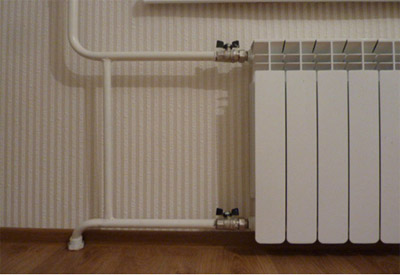
- When installing batteries under the windowsill, a gap between the radiator and the floor should be up to 10 cm. The distance from the radiator to the windowsill must be at least 8 cm. This is because the board is an obstacle when raising warm air up.
- If the house has large windows, 30 cm high batteries are used. Then no condensation will form on the glass.
- The radiator is installed at an angle of 90 °. In the event of a deviation from the norm, air will accumulate and corrosion will form.
- The battery should be installed exactly in the middle of the window. Then it will cut off the streams of cold air and will not allow them to penetrate into the room.
For decorative purposes, radiators can be fenced with special screens. They must block the radiator, therefore, reduce the efficiency of the system, as they prevent the flow of thermal energy into the room. For this reason, it is important to pay special attention to the choice of decorative grilles for batteries.
GOST and SNiP requirements
Depending on the type of window, the distance from the windowsill to the floor may vary. But GOST sets the coefficient at which heat is best stored in the room. It is 0.55 W / ° С sq.m. For the best effect, plates with low thermal conductivity are used. Also, during installation, you need to figure out whether the window sill should cover the battery.
The provisions of SNiP regulate the following values of the distance of the battery to the windowsill:
- The window sill should be at least 1 ° tilt.
- Between the battery and the wall should be a layer of thermal insulation. It will protect the house from heat loss and extend the life of the heating system.
- The battery should have a protrusion compared to the windowsill.
- All window sills should be on the same level. The distance from the floor to the radiator depends on the shape and size of the device.
- The maximum length of the windowsill is 3 meters.
- There should be at least 8 cm of clearance between the battery and the windowsill.
The norms for installing heating radiators must be observed for good heat preservation in the house.In case of insufficient distance between the window and the floor, a low radiator with an increased number of sections should be installed. Then the heat loss will be reduced.
The importance of the gap between the wall and the battery
When installing radiators, it is important to create a distance between the heating device and the wall. The outer wall is constantly in contact with the surrounding air, which causes significant cooling. When fixing the battery on the inner surface without a gap, most of the heat will be spent on heating the wall material, not the room. Low heat-insulating properties of concrete walls do not allow to create an optimal microclimate, about 70% of thermal energy will be wasted. When the heating system is moved a short distance, air insulation will be created to increase the heating efficiency.
There are other reasons why it is necessary to create a gap according to the given standards:
- Creating a sufficient level of circulation of air masses. If this condition is violated, part of the energy will be lost.
- When close to the wall, the appliance begins to heat up faster. As a result, the radiator may fail.
- Between the wall and the battery, dust and debris will accumulate, which also impede heat transfer.
- In the absence of a heat-reflecting plate, the radiator will in vain heat the exterior walls.
- If an electric battery is installed, there is a risk of short circuit. Water heating systems may be susceptible to corrosion in the absence of clearance.
When installing heating devices, you must adhere to the following recommendations - the greater the power of the radiator, the wider the gap should be. Its specific dimensions are made up of two important parameters:
- The width of the windowsill, the size of the niche. The ability to create distance depends on these individual characteristics.
- The power of the battery itself.
You can reduce the distance from the wall to the radiator by gluing foil heat-reflecting material to the wall. Then the gap can be 2.5-3 cm. In other cases, this value is approximately equal to 6-8 cm.
Recommendations for the installation and operation of radiators
The efficiency of heating and the service life of the heating system depend on the correct installation of the battery. There are a number of recommendations that you need to use during installation:
- It is recommended to lubricate the gaskets with silicone sealant before installation. This is an optional step, but it will help protect the junction.
- Do not sharply open the valves when filling the heating battery with liquid. Otherwise, a water hammer may occur that will damage the system.
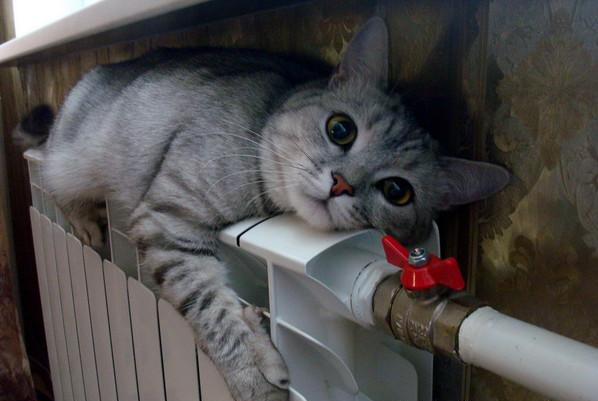
- If thermostatic valves are installed in a single pipe system, a bypass must be installed. Without it, regulation of the entire riser will be carried out, for which the owner may be fined. In front of the valves, ball valves are installed that allow shutting off the flow and return.
- If the radiator has more than 12 sections with one-sided side connection, set the flow guide to a length equal to two-thirds of the battery (it is better to do until the last section). This will completely heat the radiator.
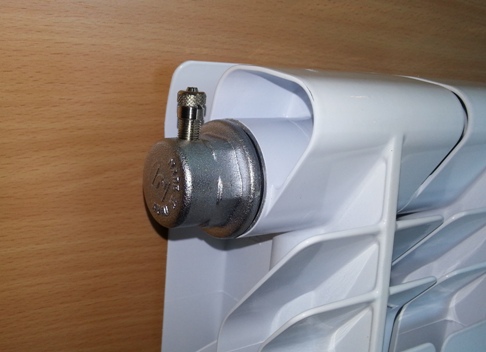
- If the radiator is filled with water, let air out of it. If this is not done, the device will not warm up. Air is removed every year at the beginning of the heating season.
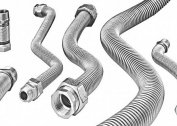
After installing the radiator, pipes are brought to it. They are pre-selected by material, cross-section and length.
Wiring diagrams
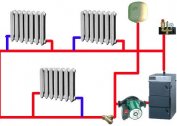
There are several radiator connection schemes that meet the requirements and standards of GOST and SNiP. They are represented by the following varieties:
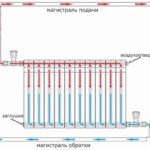
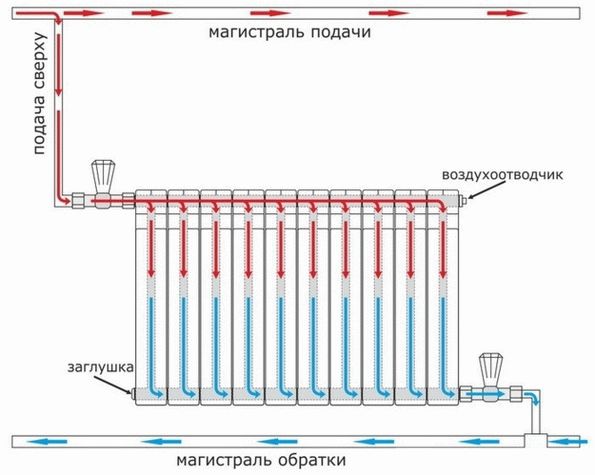
- Lateral connection. It is characterized by maximum heat transfer. With this connection, input is made from the top of the battery, and output is from the bottom on the same side.It is the most popular wiring diagram.
- Diagonal connection. It is produced with significant system dimensions. Water enters the radiator through the upper part, and is discharged from below from the opposite side.
- Bottom connection or “Leningradka”. It is produced in small one- and two-story houses, as well as during installation of pipes hidden under the floor. The effectiveness of such a system is 5-15% lower than with a side connection.
-
- Diagonal
-
- Lower
-
- Side
When the pipes are in the rough screed, heat loss increases due to contact with concrete and the ceiling of the lower floor.
Step-by-step installation algorithm
After calculating all the necessary values and choosing the connection method, you can proceed to the installation of radiators. All work must be carried out in accordance with the requirements of SNiP. You must also follow the manufacturer's instructions. If you violate the instructions there is a risk of loss of warranty service. By standards, you can not remove the protective film from the devices during installation. Thus, the device will be protected from dust and scratches during installation.
Elements required for connection:
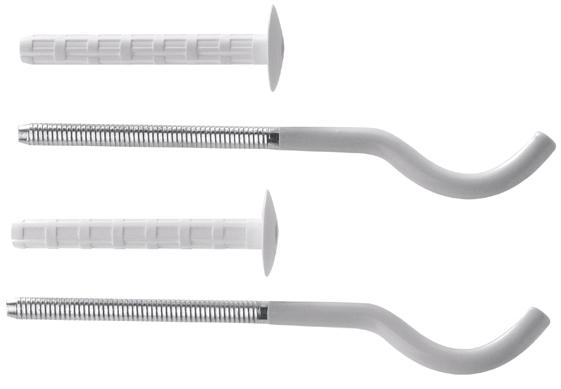
- Hooks with plastic dowels - at least 3 pieces. Needed for mounting to a wall or floor.
- 2 side plugs with right-hand thread. They are designated D.
- 2 left-hand plugs with letter S.
- Stub.
- Silicone sealing thread or flax.
- Elements required by the scheme - crane, valves, valves.
- Pipes. Selected metal or polypropylene. Metal products are of high quality, durability and durability. Polypropylene pipes are cheaper.
Of the tools required:
- Electric drill and drill. Selected according to the hardness of the wall.
- Screwdriver.
- Building level.
- Key.
- Roulette and a simple pencil.

The general installation procedure for different parts of the heating system is also regulated by SNiP.
- Marking for brackets. This is done with dowels or cement mortar. Total brackets should be at least three.
- Installation of plugs, adapters, Maevsky cranes and other details.
- Installation of the radiator itself. It is necessary to connect its pipes to the heating system.
- Installing an air vent. It must be automatic.
- Removing the protective film.
Subject to these requirements, the installation of the system will be of high quality and durable.
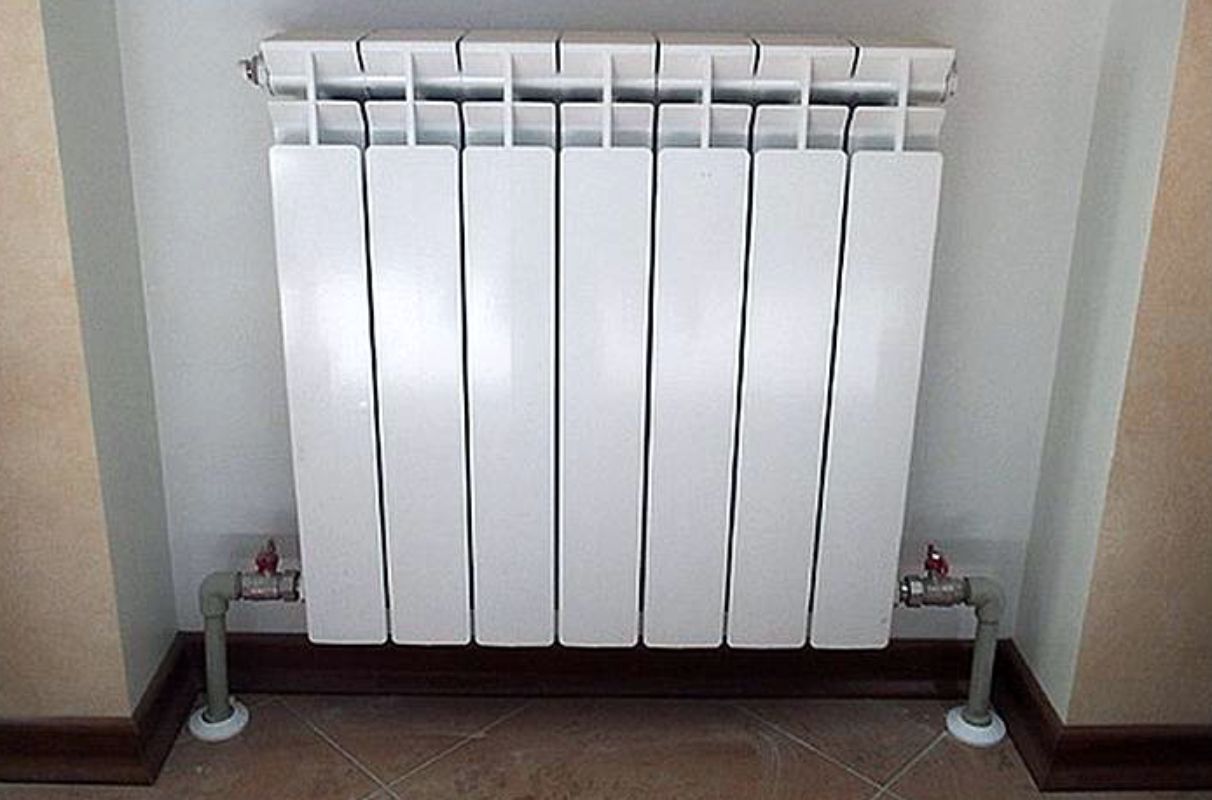
For efficient operation of the heating circuit, it is important to make the connection correctly, which varies depending on the type of mounting. It happens wall and floor.
Wall mount
Wall mounting is easier than floor mounting.
Installation is as follows:
- Preparing the mounting location. First, the heating circuit pipe is brought in. The wall behind the radiator must be covered with foil material.
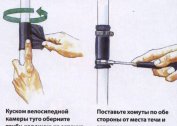
- Preliminary marking of the place of attachment of the clamps.
- Installation of fasteners using dowels. The recess in the wall should be at least 6 cm for reliable battery fixation.
- Mounting the radiator on the brackets. Fixation and alignment of the device.
- Connection to pipes. Check the tightness of all connections.
- Test run of the system.
During installation it is important to make horizontal alignment of the battery. Otherwise, air will accumulate in the device, which reduces the heating intensity and leads to corrosion.
It is also important to comply with the battery location condition. It should be installed strictly in the center of the window.
Fasteners are different. They can be made in the form of suspensions, brackets and other designs. Regardless of the type, they have one task - reliable fixation of the radiator on the wall.Instructions for fixing the clips are included with the elements themselves.
Floor mount
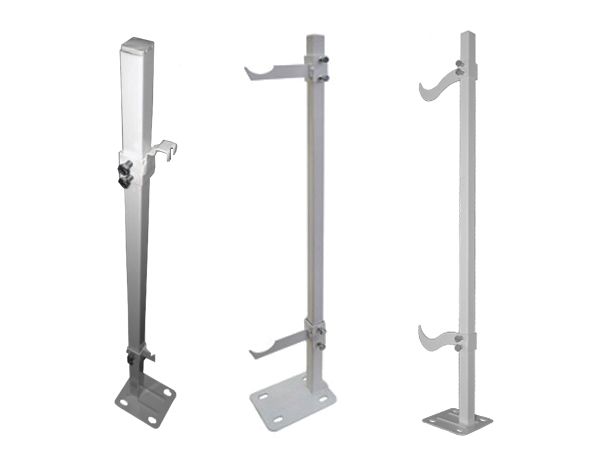
Heavy and massive radiators can not always be hung on the wall. Not every latch can withstand such a load, so they use an outdoor installation method. For this, special brackets are used. They cost more, but their mounting reliability is higher than that of wall-mounted models.
Stages of the radiator floor installation:
- Selection of brackets that are designed for battery weight.
- Installation in a designated place for the radiator base. Fixing is carried out on anchor bolts at a distance of at least 6 cm from the wall. The height of the radiator from the floor must be observed.
- Concrete work. Filling with a screed of the base of the brackets and bonnet.
- Putting on hook racks. They are adjusted to the desired height and fixed with bolts. If provided with a complete set, protective metal gaskets are installed.
- Hooked to a pre-calculated battery height from the floor. The radiator, as in the case of wall mounting, needs to be aligned horizontally.
The floor system has an important advantage. All the burden of the battery falls on the floor, and is not distributed on the wall. Due to the distance from the floor, a gap will be created allowing air to circulate. Typically, this scheme is used for heavy cast-iron heating radiators, but aluminum or bimetallic devices can also be mounted on the floor.
Regardless of the type of construction, type of batteries and the chosen circuit, it is important to observe the distance between the wall, window sill and floor. In any case, space is needed for heat transfer. If you do not adhere to the established requirements, the efficiency of the system will decrease, radiators will last less than the declared time. As a result, the cost of energy, repairs and replacement of components of the heating circuit will increase.